Workshop Design - well it's a build really.

UKworkshop.co.uk

Help Support UKworkshop.co.uk:

This site may earn a commission from merchant affiliate links, including eBay, Amazon, and others.
Update: Borrowed some aluminium ladders and fitted the roof hooks and then got going. Rolled out the ridge roll that comes with the Marley dry ridge kit, with a nail every 1m or so into the pieces of timber that were fitted onto the ridge.

With only one roof ladder - it was a right faff. Start at one end - roll it out, come down, move ladder, go back up, roll it some more, come down... you get the picture. Then the same shenanigans for nailing it, and sticking it down. Then onto getting the ridges up the. All I can say is thank God for Snickers work pants with knee pads!!

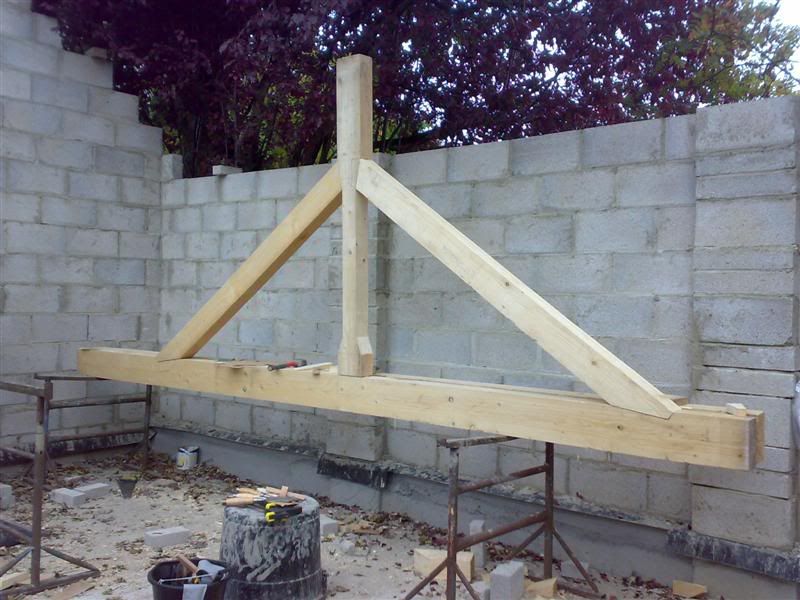
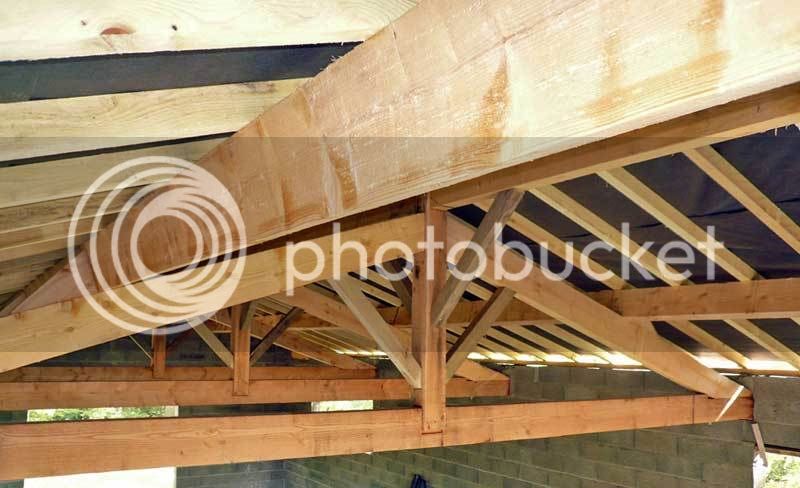
As you can appreciate WIP piccies are a bit hard work up a roof ladder. Sorry. Anyway here's one with all the ridges fitted,

roof_finished_1.jpg


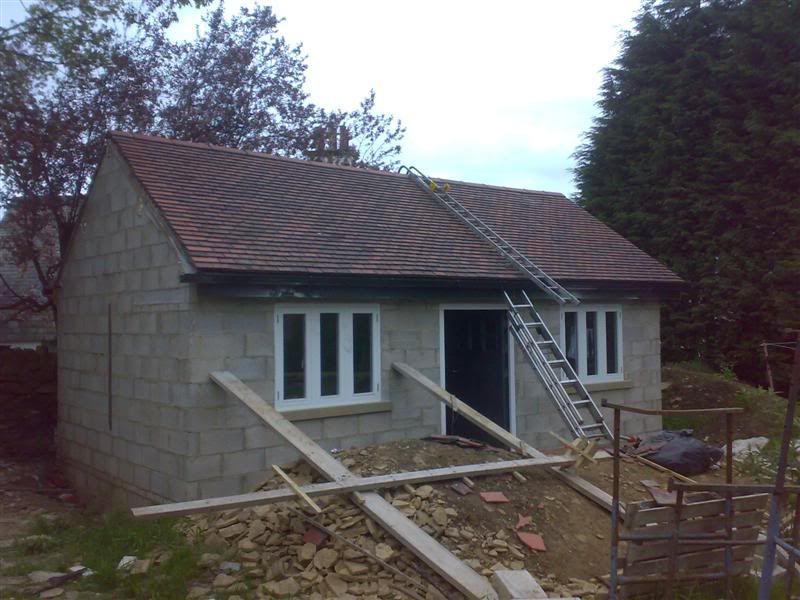
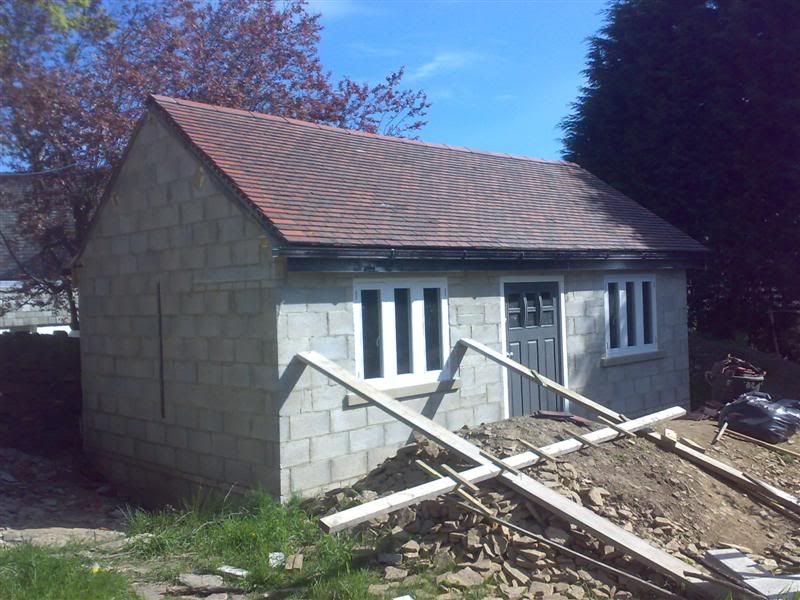
And here's a gratuitous shot in better light,

roof_finished_2.jpg


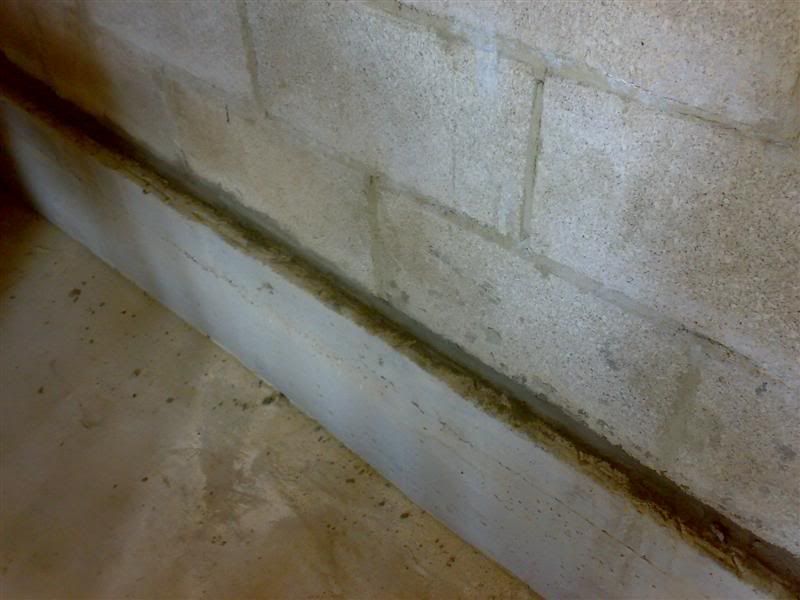
That took a fair part of Sat. On Sunday my attention turned to the rear wall and where water had penetrated from the other side horizontally on and under the DPC. Cut the overhanging DPC back and then cut the mortar out (and the DPC) to a depth of around 20mm and more or less the full height of the mortar bed.

I'd got some Feb Waterstop

http://www.feb.uk.com/products/waterproofing/waterplug

and as per instructions, filled this cutout leaving.

water_plug.jpg


I'd also got some of their FebTank Super,

http://www.feb.uk.com/products/waterpro ... tank-super

(a cementious slurry type product for negative and positive water pressure). In all honesty, since the guttering has been on the back - there has been no more seepage. But before fitting the DPM - I'd just like that extra bit of peace of mind.

Unfortunately on Sunday the temp dropped to around 5, and the datasheet for this product stated that it should only be applied in temps exceeding 5 degrees. So just had a day off! So hopefully will be giving it 2 coats of this stuff this week, some Synthaprufe and then down with the DPM, bearers and then the flooring and stud walls.

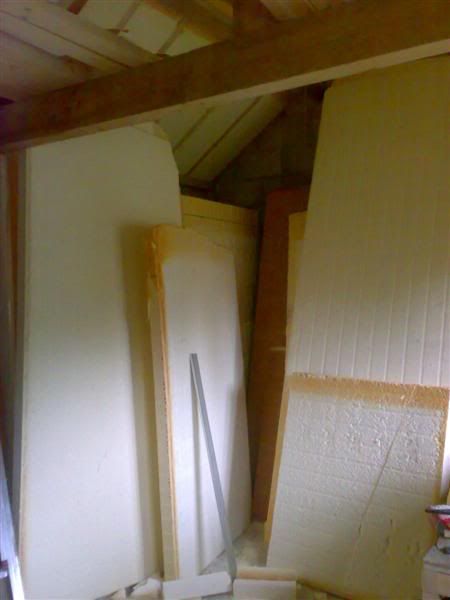
Found a supplier of 4" kingspan type stuff for a ridiculously low price, so will be grabbing a mate with a very large van and getting as many as we can can get into it. Will report back on that if anyone else is interested.

I was going to lay 2" Kingspan down - 3"x2" bearers down sideways, infill with 2" Kingspan and then 1" ply flooring. Now I'm just thinking that's a faff - and I'm inclined to use 4"x2" joists sat directly on the DPM and infill with 4" kingspan, with the 1" ply screwed on top. Any suggestions?
 
Dibs-h":3v1922tc said:
I was going to lay 2" Kingspan down - 3"x2" bearers down sideways, infill with 2" Kingspan and then 1" ply flooring. Now I'm just thinking that's a faff - and I'm inclined to use 4"x2" joists sat directly on the DPM and infill with 4" kingspan, with the 1" ply screwed on top. Any suggestions?

Hi Dibs,

You are an inspiration to us all - can't fault your attention to detail and determination to succeed! You probably know this but surely just infilling the joists with Kingspan will create a cold bridge through the joist? An easier solution may be to float a T&G floor directly over the 4" kingspan although you will probably have to install skirting to stop the sides lifting. If you do consider this then I'd suggest checking the compressive strength of Kingspan especially if you intend to support heavy machinery.

HTH,
C
 
Very informative topic and some great pictures. The roof looks great.
Truss1.jpg


I built a workshop a couple of years ago and made the same type of roof as yours but was strongly advised by a good friend and roofer that the king post must not sit/touch onto the tie bar, but must work like a pendulum to prevent any possible problems with movement that may result in the center of the tie bar bearing the weight of the king post and causing the tie bar to dip/sag....

It's not a very clear photo and it looks as though my king post is fixed to the tie bar but it's actually floating, I had to hollow-out the bottom of the post to fit round the bar leaving a 15-20mm clearance , had some slight movement, but only by a few mm.
roof2.jpg


Please correct me if I'm wrong, but I'm sure the floating method is to ensure that if a ceiling were to be fitted at some stage it would prevent any problems with movement...

Good to see a project like this, it's going to be a mighty nice workshop.

Russ
 
chris_d":1sitza0i said:
Hi Dibs,

You are an inspiration to us all - can't fault your attention to detail and determination to succeed! You probably know this but surely just infilling the joists with Kingspan will create a cold bridge through the joist? An easier solution may be to float a T&G floor directly over the 4" kingspan although you will probably have to install skirting to stop the sides lifting. If you do consider this then I'd suggest checking the compressive strength of Kingspan especially if you intend to support heavy machinery.

HTH,
C

Chris - thanks for the kind words! Yes the original reason for having Kingspan under the joists and between was to prevent cold bridging. However I'm not all that convinced that the compressive strength of the stuff is up to heavy machinery. I spoke to their Tech Dept and the were mentioning things like 10% compression etc.

I might do a U-Value calc and see how much the cold bridging affects it. I suppose the fact that there will be around 10" of raft (concrete) underneath the DPM - I'd expect the thermal bridging to not be huge, as the temperature below the slab shouldn't vary hugely over the year. Probably speak to my tame SE as well.


Russ":1sitza0i said:
Very informative topic and some great pictures. The roof looks great.

I built a workshop a couple of years ago and made the same type of roof as yours but was strongly advised by a good friend and roofer that the king post must not sit/touch onto the tie bar, but must work like a pendulum to prevent any possible problems with movement that may result in the center of the tie bar bearing the weight of the king post and causing the tie bar to dip/sag....

It's not a very clear photo and it looks as though my king post is fixed to the tie bar but it's actually floating, I had to hollow-out the bottom of the post to fit round the bar leaving a 15-20mm clearance , had some slight movement, but only by a few mm.

Please correct me if I'm wrong, but I'm sure the floating method is to ensure that if a ceiling were to be fitted at some stage it would prevent any problems with movement...

Good to see a project like this, it's going to be a mighty nice workshop.

Russ

Russ - before I did the trusses I read so much on them my head hurt. IIRC the connection between the tie beam and the Kingpost is supposed to be fixed. As the tie beam deflects downwards due to the loads - it puts the kingpost in tension, which is the aim. There are so many variations on the theme - but the one consistent thing is that the bottom of the kingpost is always fixed into the tie beam. So have a stopped mortice, whereas some have a thru one with the tenon poking out the bottom. I never saw any where it just floated on top. In your case - whilst it may look like a Kingpost truss, if the bottom of the kingpost isn't fixed to the tie - your truss isn't a true kingpost truss. But it doesn't really matter as long as it structurally works. In my case as Building Regs wanted the calcs for the roof - plus all the works by Tredgold and guidelines assumed fixed connections and as I ended up designing the trusses myself - went with the traditional approach.

In terms of initial assembly - some will prop up the centre of the tie beam (causing a small upwards deflection) before pinning it together, so that when it settles - the tie beam isn't deflecting downwards. If that makes sense.


p.s. Applied the 1st coat of the waterproof render thingy last night, so should be applying the second coat this evening. Sorry no piccies.
 
Thought it was fine but just thought I'd mention it....

I was buzzing when I built my shop, loved every second of it and saved a fortune..... :D

Are you going to render the blocks? Cedar clad would look the bizz...

Russ
 
Russ":2jkiu3um said:
Thought it was fine but just thought I'd mention it....

I was buzzing when I built my shop, loved every second of it and saved a fortune..... :D

Are you going to render the blocks? Cedar clad would look the bizz...

Russ

Buzzing - we'll sometimes. Most of the time I'm knackered! The only outside help I have had is the chaps who pumped the concrete for the ground beams and raft. Not forgetting my mate who had a go on the digger, but after wacking the drystone wall too many times (he got demoted to watching) - I operated the digger.

We're in a conservation area - hence the reclaimed rosemary tiles. The block walls will be rendered (with limestone chippings) to match the main house - planning conditions. Planning want sample panels etc. That's going to be interesting.

Fortune - certainly saved that, not to mention lost a few inches off the waistline and the moobs have gone!

Now that you mention costs\savings - strange no-one has asked what the costs have been so far.
 
Dibs-h":12zpi38h said:
I'm not all that convinced that the compressive strength of the stuff is up to heavy machinery. I spoke to their Tech Dept and the were mentioning things like 10% compression etc.

10% is just a standard measurement point as defined in the applicable BS to allow easy comparison between materials but the important bit is what pressure is required to give 10% compression. This table should help and I doubt that any of your machinery is greater than 12 tonnes and with a bearing area less than 1m2:

Kingspan.bmp


HTH,
C
 
Hi dibs. I'd strongly suggest you use a t&g floor of some description of if you do go the sheet route double it up staggering the joints and glue the 2 layers together. I've fitted ply floors before on joists at 400mm centres and the edges still have a knack of lipping up.

Personally i'd be fitting a Joist floor with Kingspan between and T&G ply or a double layer of chipboard t&g.

The build is looking really good mate. The roof looks especially superb. I find it amazing that you have done all this single handedly!
 
Mattty":3s7d2e5q said:
Hi dibs. I'd strongly suggest you use a t&g floor of some description of if you do go the sheet route double it up staggering the joints and glue the 2 layers together. I've fitted ply floors before on joists at 400mm centres and the edges still have a knack of lipping up.

Personally i'd be fitting a Joist floor with Kingspan between and T&G ply or a double layer of chipboard t&g.

The build is looking really good mate. The roof looks especially superb. I find it amazing that you have done all this single handedly!

Chris - cheers for the link, will check it out.

Matty - the ply I have is the far eastern WBP hardwood one - 22mm thick. Selco were doing it for about £15\sheet - so I just bought a load. The cheaper (normally) shuttering ply would have the edges lipping up - but eastern hardwood WBP?
 
Dibs-h":217136ym said:
Now that you mention costs\savings - strange no-one has asked what the costs have been so far.

What have the costs been so far? Aside from the human cost of muscular / skeletal damage ;)
 
PaulO":1ud4z2jn said:
Dibs-h":1ud4z2jn said:
Now that you mention costs\savings - strange no-one has asked what the costs have been so far.

What have the costs been so far? Aside from the human cost of muscular / skeletal damage ;)

Well I've lost (and kept off more importantly) just over a stone in weight, but obviously you're not asking about that sort of poundage. :wink:

I've already paid for the Rosemary tiles for the new garage as well as the Tyvek for it - so some things have been bought forward. Including these Phase 2 items (i.e. for the additional garage\basement) the total costs so far are £4,700 - that's everything.

Done absolutely sod all lately - at the moment dealing with a Compaq Server\SBS 2003 that's misbehaving - favours?? I'm sure some of you know what I mean - favours getting out of hand.

I expect it to finish at around £5,500 - the build that is.
 
Thats not bad at all considering the space you now have.

I know all too well about those favours, I've managed to knock the phonecall everynight asking how to do this and that on the head.

IT is more time consuming than any other trades favours and the favours also tend to not earn you much back.
 
Update: no piccies. Sod all has happened - got the SBS 2003\Compaq server sorted.

I'm at the stage where I need to get the floor down, build up the stud walls and put the insulation in the roof, but 4" Kingspan ain't cheap and these 2nds boys ain't all that cheap.

Got a load sorted for tomorrow - might have the roof insulated over the weekend if all goes well. Assuming I can get the DPM down and BR don't have any issues. Can't imagine so, haven't had any probs so far.
 
Update: Haven't got any piccies unfortunately. I got some Kingspan type insulation.

Absolute stonking price - each board was 4' x 8' (min). Some went to 12'.

40 boards all in - if not a few extra, basically 2 LWB Sprinter loads - £200 in all. PM me if you want the chaps details - and it's kosher. I collected from a factory - Liverpool way.

Admittedly no foil on them - but as it's full fill insulation - who cares & I don't believe it makes an ounce of difference, and BR don't care.

Spent the last week or so - measuring, measuring again, cutting and fitting it. Got almost 1/2 way doing the rafters. At the moment, the workshop is rammed to almost bursting point with this stuff and the other insulation. Going to be so glad when it's all fitted.
 
Dibs,
You've done fantastically well to get the building you have for under £200/sq.m. I'm self-building mine at the moment (a combined workshop/garden store/greenhouse). Size is 5x13m and I'm aiming for the £300/sq.m mark - construction is slightly different from yours though in that it's cavity wall/insulated slab etc.
Before I embarked on the self-build I had a quote from an oak framer for a basic shell on top of a provided (by me) base - Over £800/sq.m for an unfinished shell not including any groundworks!!!
Inspirational stuff Dibs - keep at it.
Mark
 
Dibs-h":yh0rmlhj said:
40 boards all in - if not a few extra, basically 2 LWB Sprinter loads - £200 in all. PM me if you want the chaps details
That's a great deal Dibs, well done.

Admittedly no foil on them - but as it's full fill insulation - who cares & I don't believe it makes an ounce of difference
No, I don't think it does. You need a little gap for the foil to do anything.

Now that you mention costs\savings - strange no-one has asked what the costs have been so far
I did think about asking 6 months ago, but thought you'd either want to keep it to yourself, or you'd volunteer it at some point. You must be very proud of your job, it's amazing you've done it so cheaply.
 
Update: Got all the insulation fitted in the rafter spaces. All except for the 3 rafters above the trusses which require it fitting in smaller pieces (one's done). Took some piccies - but left the cable to connect phone to PC at home! I'll post some piccies up this evening, otherwise as we all know - no piccies means it never happened!
 
Piccies: Her's a couple of shots of most of the rafter spaces having been insulated,

rafters2.jpg


This one shows just the spaces above the trusses remaining to be done. As of yesterday evening only 1 remains - so should have that one done this evening.

rafters1.jpg


One of the insulation boards as they came - still loads left over.

boards_left.jpg
 
Hi Dibs

It is looking very neat.

What is the insulation you are fitting? I know you said it is like Kingspan without the foil - in the pictures it looks like polystyrene. I am looking for something to add some insulation to my loft and do not want to fit foil as it will shield the tv and radio signals, so this stuff may be just what I want.

I would be wary of using polystyrene due to fire considerations but I am guessing yours is not actually polystyrene.

cheers
 
scholar":l0g20glh said:
Hi Dibs

It is looking very neat.

What is the insulation you are fitting? I know you said it is like Kingspan without the foil - in the pictures it looks like polystyrene. I am looking for something to add some insulation to my loft and do not want to fit foil as it will shield the tv and radio signals, so this stuff may be just what I want.

I would be wary of using polystyrene due to fire considerations but I am guessing yours is not actually polystyrene.

cheers

It's definitely not polystyrene and is identical to Kingspan\Celotex - when you cut it with a handsaw, there's no mistaking that smell!

I'm off to finish the last bit and will hopefully take a better picture - the last ones looked totally rubbish.

Dibs
 
Back
Top