Workbench build (WIP)

UKworkshop.co.uk

Help Support UKworkshop.co.uk:

This site may earn a commission from merchant affiliate links, including eBay, Amazon, and others.
trousers":3iama5u0 said:
Why condition the beech in the (presumably heated) house if the bench is in the (presumably un-heated) workshop?

My workshop is about the same relative humidity as my house, all be it a bit cooler. Conditioning is about balancing the moisture content of the wood with the relative humidity, and the higher temperature in the house should mean that happens a bit faster than in the workshop.

That's my theory, and I'm sticking to it.
 
The tenons are also going to be dowelled, partially for strength but mostly for decorative reasons. The dimensions of the tenons means that they won't be draw bored as I don't think you could get sufficient deformation, especially as I am using ebony for the dowels.

First I prepared a face side and edge on an ebony turning blank.
Bench15.jpg


I am going to be using 10mm dowels, so I set my bandsaw fence to make about a 10.6mm cut (to allow some margin for error, but not too much for the dowel plate to remove).
Bench16.jpg


I cut two pieces 10.6mm thick, then laid these on their side and cut each into three 10.6mm squares.
Bench17.jpg


I didn't want to be removing too much on the dowel plate, particularly given the hardness of ebony, so I made a little sledge with a stop to hold the squares on edge, a few cuts later and I had six foot long octagons. I only needed eight six inch dowels, so I had a bit of allowance for it going wrong.
Bench18.jpg


I got the octagons a bit closer to round with a block plane, but a trial of putting the octagon through the dowel plate showed this wasn't necessary.
Bench19.jpg


Cut the dowels down to six inches, then whack them through the dowel plate with a soft faced mallet.
Bench20.jpg


I couldn't resist a little test to see how they looked.
Bench21.jpg


When I fit them each one will be cut into a short stub and a long one, with them being inserted from each side of the joint, as whacking a long all the way through might break out the grain on the back side.
 
The through tenons on the front face are going to be wedged with ebony wedges. When I told my wife that my workbench was going to have ebony accents she almost fell off her perch. She said something along the lines of "It's only an f'ing workbench". That one is filed away for the divorce hearing :wink:

Given the thickness of the tenons I was concerned that the wedges wouldn't be able to deform the tenon enough as I had drawn them
bench23a.gif


The wedge needed to be nearer the edge so it was acting on a thinner section of tenon, but I preferred the aesthetic of them being closer to the middle. So I angled the wedge slots. These were cut on the bandsaw with a little wedge jig.

For the wedges I cut a piece of ebony slightly over width for the mortice, then hand planed it to a good fit. Then I cut them on the bandsaw. In this picture the wedges have the same included angle as the wedge slots.
Bench23.jpg


You'll also notice that I drilled stress relieving holes at the end of the wedge slots. I'm not sure this is strictly necessary, but I saw it in Joyce and it looked like a neat idea.

Light pressure on the wedges splays the tenon nicely, but I spotted a problem. As the wedge is driven in the wedge slot included angle increases, which means that it opens up on the show side. So it was back to the bandsaw to trim the wedges to a steeper angle to make sure they maintained contact at the show face.

I also drilled holes through the mortices for the dowels. I would drill the tenons later as the position would move when I cleaned up the inside faces with a hand plane. Drilling for the dowels was a bit of a polava as my Fobco drill has a stroke less than the four inches of the stock and I wanted to drill from both sides to avoid tear out.

The process was to insert a scrap tenon, then drill through one side. I used a lip and spur bit as they give a nice clean entry hole. Then remove the scrap tenon and prop the work up with a packer. The depth stop was set so that the point of the drill just touched the packer. Continue drilling to the stop. Turn the work over then drill from the other side using the through point as a reference. That way you avoid any break out on the back side.
Bench23b.jpg
 
I can't wait to hear how you attach the bench top to the legs. I'm at that stage now and I've spent 3 days scratching my head figuring the best way to do it.
 
10mm coach screws, the top is in two parts. The larger front part is attached with two screws per frame. The rear screw is in a slot to allow the top to expand and contract.

The smaller rear top is fitted with one screw per frame.
 
ok thanks. sounds about right to me.

thanks

oh and good job on the bench!
 
Lee J":3v46j5ah said:
I can't wait to hear how you attach the bench top to the legs. I'm at that stage now and I've spent 3 days scratching my head figuring the best way to do it.

The weight of the solid top will be more than enough. Here is how I did mine.

Every is thing upside down, with bench base sitting on the tenons on the legs.
269981496_6fed3d9735_m.jpg


I marked around the tenons, then the base was removed. Next cut the motices. Then using a block plane the tenons were slightly tapered to make it a loose fit for easy future removal of the top from the base.
269981498_d80cb44a2b_m.jpg


Tenons cut and everything back the right way up.
271404804_82b85114b8_m.jpg
 
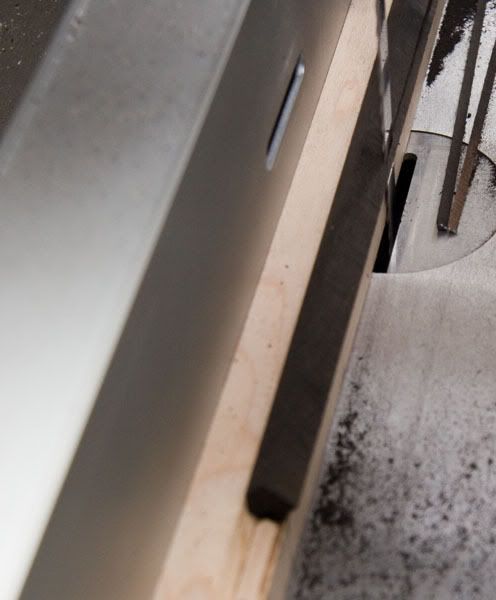
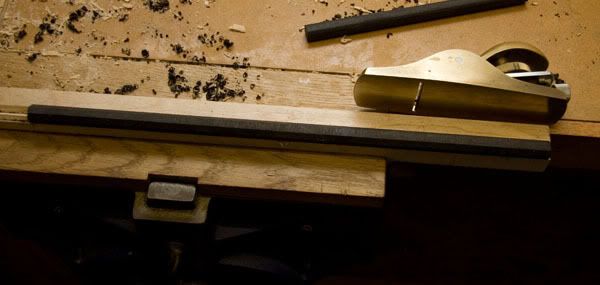
I applied a chamfer to most edges, to make them a bit more robust. This was done on the router table, and finished of with a block plane to remove any undulations or burning from the router. The end grain was done first, followed by the long grain, so any tear out was lost in the long grain passes.

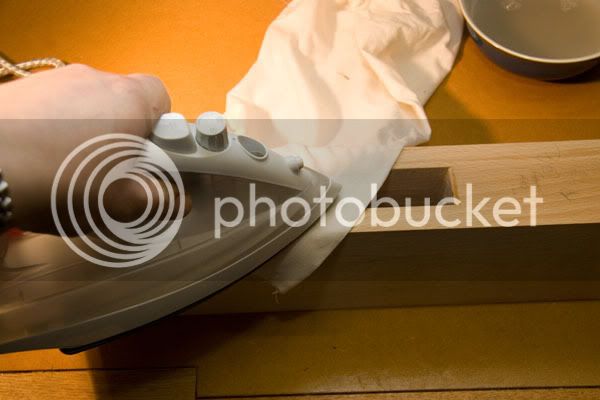
Before gluing up I needed to plane and finish all internal surfaces. Prior to planing I like to steam out any dents. If you plane and then steam, what was a dent becomes a bump. I don't borrow my wifes iron any more. Lie Nielsen don't sell irons yet so I splashed out on this charming model from Argos, which cost 2.99.
Bench24.jpg

The iron is applied over the dent with a damp rag in between.

Then I planed all of the interior surfaces (that can't be planed after glue up). What was satisfying was that this only took two sets of 1 thou shavings per surface to remove all the planer and pencil marks. So the planer obviously got them pretty flat, and they stayed flat.

The planed surfaces were hand sanded with 400 grit, vacuumed, then tack clothed.

I applied two coats of Osmo Poly-X matt, after which the surfaces where as smooth as a baby's bottom, in fact they made a baby's bottom seem like a badgers a**e.

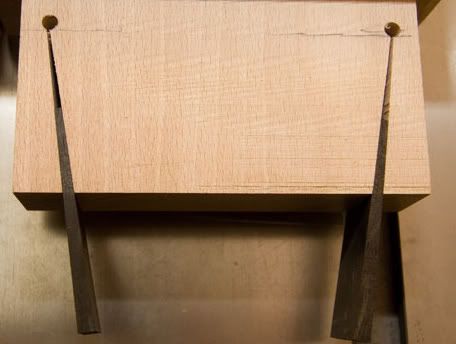
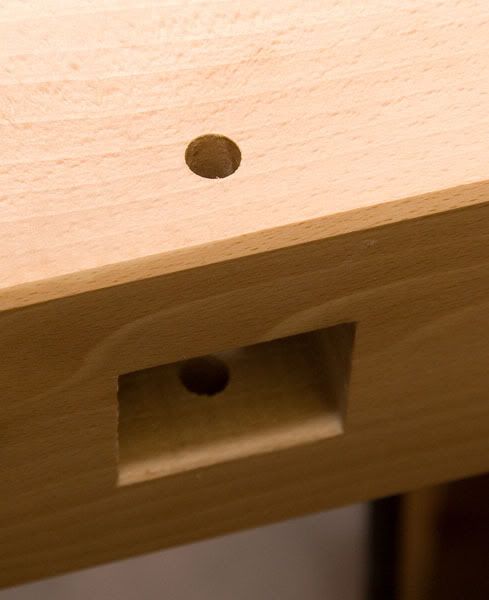
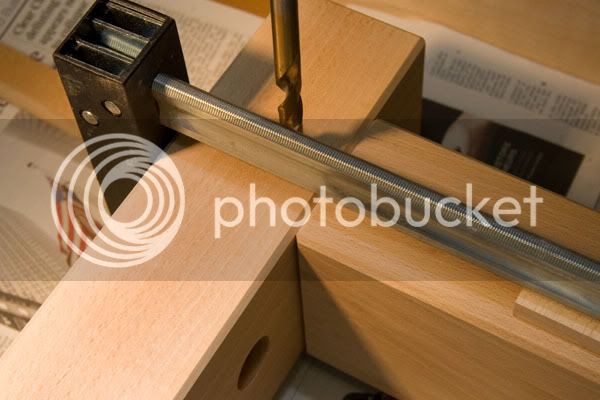
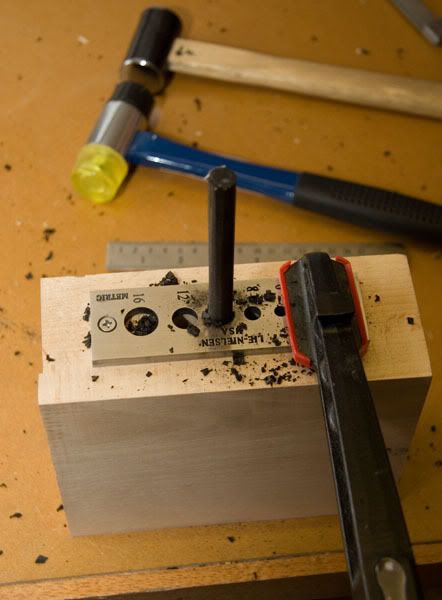
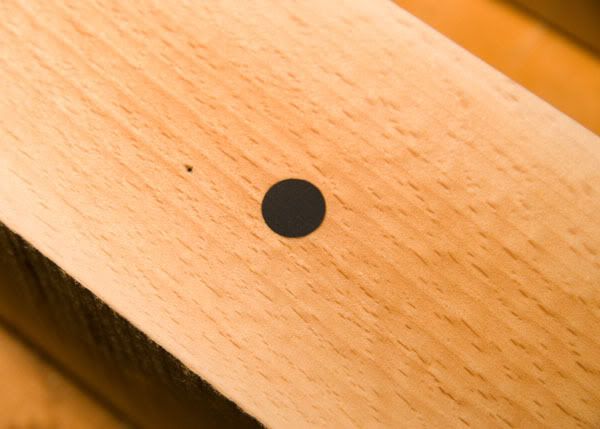
I then dry fitted the joints again to mark the dowel locations on the tenon. If I was draw boring I would drill the holes slightly closer to the shoulder on the tenon, but I think these tenons are too large to warrant that. I marked the location using a lip and spur bit, but a transfer punch would be better.
Bench27.jpg

Bench26.jpg


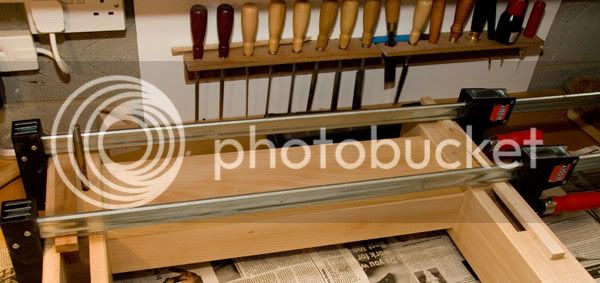
I'm going to be attempting the first part of the glue up tonight.

I'll be using Aerolite 306, which is a urea-formaldehyde adhesive with a long open time that was invented in 1934 and used in deHavilland Mosquitos, so should be good enough for my bench.
 
The bench seems to be coming on very well...nice to see someone using my method of marking joints with Roman numerals, just remember that 9 is IX not VIIII :oops: - Rob
 
I'm pleased to see this build is back up and running again, Paul. Look foward to seeing more progress - keep those photo's coming! :D
 
awsome, nice build, nice car to, belive it or not ive been in one of them, there crazy cars very rapid the wheels were spining in most gears :lol: .
 
woodbloke":1olvono7 said:
nice to see someone using my method of marking joints with Roman numerals, just remember that 9 is IX not VIIII

Doesn't really matter as long as you are consistent, and no one can see it after glue up.

The double line was to signify the bottom, as IX could be confused with XI, except they were different joints so wouldn't fit together anyway.

Just finished the first part of the glue up, with the legs to the bottom rails. All went to plan. I made sure I laid all the clamps, blocks, wedges, dowels and glue spreaders out in advance. Even though I had about 25 minutes of open time to play with.

Well I say it all went to plan, I won't really know until I take the clamps off, but it is pretty unlikely to go wrong then.
 

Latest posts

Back
Top