Walnut Box

UKworkshop.co.uk

Help Support UKworkshop.co.uk:

This site may earn a commission from merchant affiliate links, including eBay, Amazon, and others.

TheTiddles

Established Member
Joined
14 Oct 2007
Messages
3,027
Reaction score
843
Location
Wiltshire
Right, this piece is finished but I may post this in installments as there's a lot of pictures to explain.

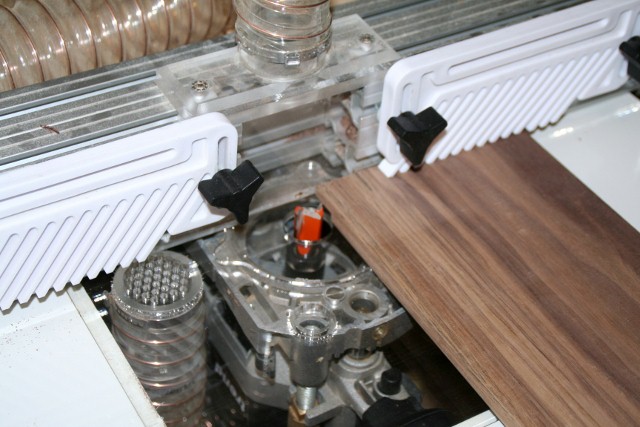
I'm using my new router table for the first time, with a curtain fence as it's simple to make.
Walnut & Walnut Burr (1) (640x427).jpg

The walnut boards have been sat waiting for an application for years, so here it is, I took a little off either side then left them for another couple of weeks before cross cutting and shooting.

This design is rather much inspired by Ian's work, I wouldn't normally go for this kind of construction but it works for him. So here goes...
Walnut & Walnut Burr (2) (640x427).jpg


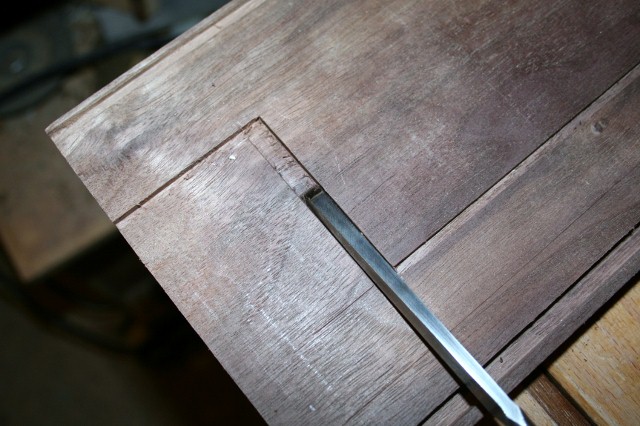
The fence works perfectly, the workpiece is totally supported right through the cut, the final cleanup is done with a shoulder plane

Walnut & Walnut Burr (3) (640x417).jpg


The top is going to be walnut burr, first time I've used it and seeing as I've got about a dozen bundles I hope I like it. This has been flattened in a press for months having first been sprayed with 10:1 water and glycerin. I hate shooting veneers, I always make amess of it, so I'm using an oversize marking knife from Pheil, it has one bevel only and it works great. It needs a handle but for the moment I'm using in the buff.

Walnut & Walnut Burr (4) (640x427).jpg


Here it is just prior to going in the vacuum press, hinged with tape to stop it skidding.

Walnut & Walnut Burr (5) (427x640).jpg


I'm using a bit of leftover 6mm WBP as it's going to be veneered both sides, on the right is some gorgeous rippled ash I now have lots of too now! :D

Walnut & Walnut Burr (6) (640x427).jpg


The rebate for the top is cut with the table saw, because of the design of TS-200 the riving knife has to come off to do this, I need to make one that's sub the top of the blade.

Walnut & Walnut Burr (7) (640x346).jpg


However, to keep things safe I'm using a semi-circular feather board which keeps the piece down, pulled into the fence and covers the blade, not bad for £5.
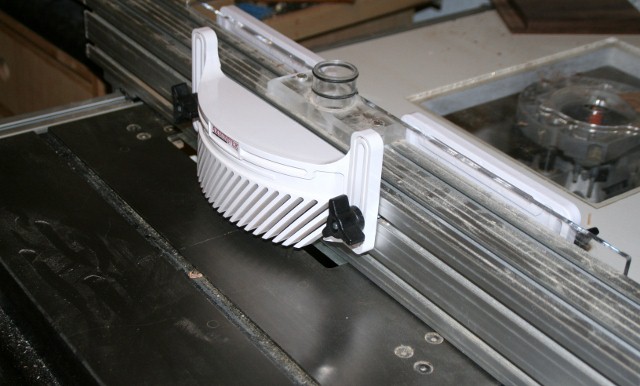
Walnut & Walnut Burr (8) (640x386).jpg


First trial fit and I like it. this sort of construction doesn't hold itself together like dovetails would but it's quick, clean and allows you to focus on details and simplicity instead of complex joint making

Walnut & Walnut Burr (9) (640x427).jpg
 

Attachments

  • Walnut & Walnut Burr (1) (640x427).jpg
    Walnut & Walnut Burr (1) (640x427).jpg
    89.6 KB
  • Walnut & Walnut Burr (2) (640x427).jpg
    Walnut & Walnut Burr (2) (640x427).jpg
    97.5 KB
  • Walnut & Walnut Burr (3) (640x417).jpg
    Walnut & Walnut Burr (3) (640x417).jpg
    68.8 KB
  • Walnut & Walnut Burr (4) (640x427).jpg
    Walnut & Walnut Burr (4) (640x427).jpg
    80 KB
  • Walnut & Walnut Burr (5) (427x640).jpg
    Walnut & Walnut Burr (5) (427x640).jpg
    72.9 KB
  • Walnut & Walnut Burr (6) (640x427).jpg
    Walnut & Walnut Burr (6) (640x427).jpg
    107 KB
  • Walnut & Walnut Burr (7) (640x346).jpg
    Walnut & Walnut Burr (7) (640x346).jpg
    79.4 KB
  • Walnut & Walnut Burr (8) (640x386).jpg
    Walnut & Walnut Burr (8) (640x386).jpg
    83.4 KB
  • Walnut & Walnut Burr (9) (640x427).jpg
    Walnut & Walnut Burr (9) (640x427).jpg
    77.9 KB
  • Walnut & Walnut Burr (9) (640x427).jpg
    Walnut & Walnut Burr (9) (640x427).jpg
    77.9 KB
The top has been coated with sanding sealer, it'll probably be finished 4 or 5 times before its done, I just wanted to protect it a bit.

Walnut & Walnut Burr (10) (640x427).jpg


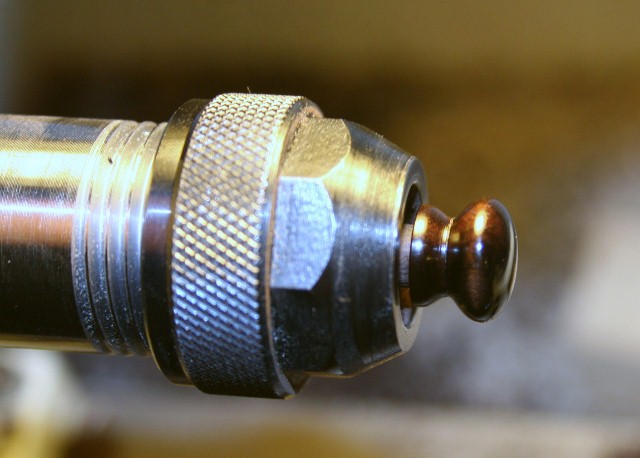
For the drawers I'm making knobs from ebony, a single pen blank provides plenty. They're roughed out as a spindle with 6mm diameter tennons.

Walnut & Walnut Burr (11) (640x427).jpg


which fit into the collet of a pen turning headstock so each one is held securely so I can finish them off with sanding pads and friction polish

Walnut & Walnut Burr (12) (640x458).jpg


Finished result is as follows

Walnut & Walnut Burr (13) (640x458).jpg


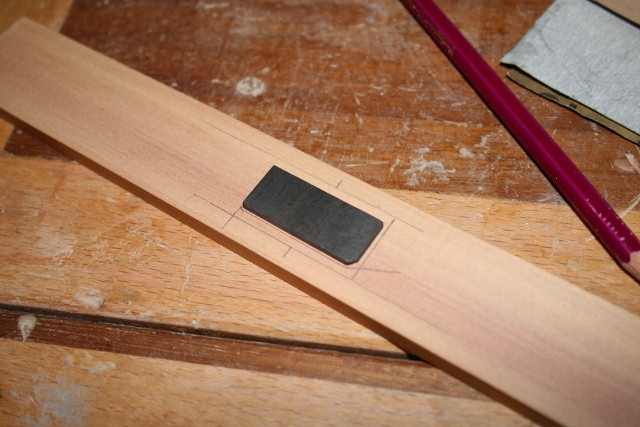
Making a start on the drawers and to holdthe secret drawer in till the correct drawer is mated to it, I need to make some magnetic wood. A pocket is cut in some cedar and a magnet sat into it

Walnut & Walnut Burr (14) (640x427).jpg


A piece of veneer over the top will conceal it totally, I'm not vacuum pressing this little piece, just lots of clamps and blocks

Walnut & Walnut Burr (15) (640x427).jpg


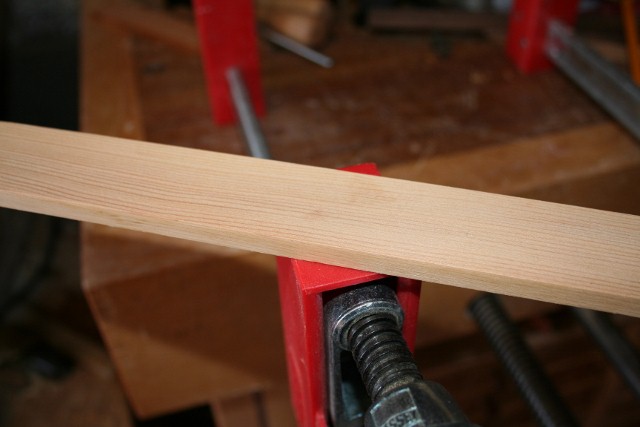
The finished result being pretty hard to distinguish from a solid piece, a slight chamfer and the glueline is gone too.

Walnut & Walnut Burr (16) (640x427).jpg


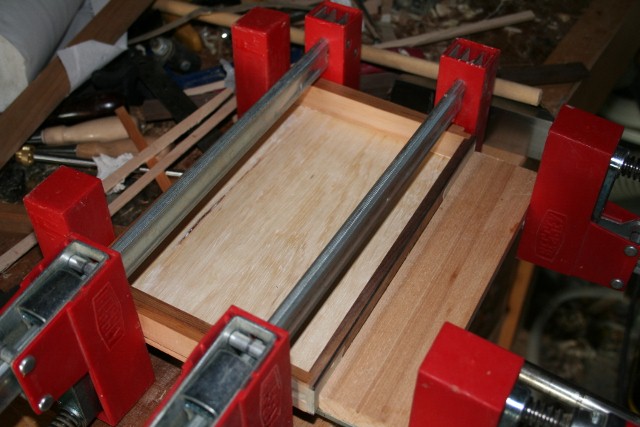
Gluing up the drawers is always a faff...

Walnut & Walnut Burr (17) (640x427).jpg


The fronts are solid walnut and again, no fancy joints, just a simple lap. They have been veneered in the same leaves as the top and sitting them on a flat top with some weight makes them come out nice and flat

Walnut & Walnut Burr (18) (640x427).jpg
 

Attachments

  • Walnut & Walnut Burr (10) (640x427).jpg
    Walnut & Walnut Burr (10) (640x427).jpg
    85.6 KB
  • Walnut & Walnut Burr (11) (640x427).jpg
    Walnut & Walnut Burr (11) (640x427).jpg
    63.2 KB
  • Walnut & Walnut Burr (12) (640x458).jpg
    Walnut & Walnut Burr (12) (640x458).jpg
    79.5 KB
  • Walnut & Walnut Burr (13) (640x458).jpg
    Walnut & Walnut Burr (13) (640x458).jpg
    106.1 KB
  • Walnut & Walnut Burr (14) (640x427).jpg
    Walnut & Walnut Burr (14) (640x427).jpg
    83.3 KB
  • Walnut & Walnut Burr (15) (640x427).jpg
    Walnut & Walnut Burr (15) (640x427).jpg
    77.4 KB
  • Walnut & Walnut Burr (15) (640x427).jpg
    Walnut & Walnut Burr (15) (640x427).jpg
    77.4 KB
  • Walnut & Walnut Burr (16) (640x427).jpg
    Walnut & Walnut Burr (16) (640x427).jpg
    55 KB
  • Walnut & Walnut Burr (17) (640x427).jpg
    Walnut & Walnut Burr (17) (640x427).jpg
    83.6 KB
  • Walnut & Walnut Burr (18) (640x427).jpg
    Walnut & Walnut Burr (18) (640x427).jpg
    77.7 KB
Nice WIP mate, looks like a good design too, will be watching this one with interest. Where did you get those featherboards from? They look the business. :)

Cheers _Dan.
 
The rebate for the bottom isn't continuous and the drop front isn't cut at all so this has to be done with a router, bit of a nerve-wracking bit but it went ok

Walnut & Walnut Burr (19) (640x364).jpg


To maximise the space for drawers I'm making the base thin and the front edge is a solid piece with a tenon each end.

Walnut & Walnut Burr (20) (640x425).jpg


With a bit of shaving it fits nicely. The outside is veneered in black walnut and the inside is Lebanese cedar on scrappy ply.

Walnut & Walnut Burr (21) (415x640).jpg


The top has voids in the burr, I bought 1kg of powdered brass from a glass fibre suppliers which is enough to last a lifetime, by filling the void then dripping on cyano I filled them in then sanded back, normally taking a few hits to get a complete fill.

Walnut & Walnut Burr (22) (640x425).jpg


To make the secret compartments there's a stepped divider, I've routed a housing in both sides making sure they're a mirror image, cleaning up the old fashioned way

Walnut & Walnut Burr (23) (640x426).jpg


With that fitted I did a sneaky dry fit, pretty pleased so far...

Walnut & Walnut Burr (24) (640x427).jpg


and when you squeeze it everything's square too!

Walnut & Walnut Burr (25) (640x384).jpg
 

Attachments

  • Walnut & Walnut Burr (19) (640x364).jpg
    Walnut & Walnut Burr (19) (640x364).jpg
    63.2 KB
  • Walnut & Walnut Burr (20) (640x425).jpg
    Walnut & Walnut Burr (20) (640x425).jpg
    65.1 KB
  • Walnut & Walnut Burr (21) (415x640).jpg
    Walnut & Walnut Burr (21) (415x640).jpg
    81.9 KB
  • Walnut & Walnut Burr (22) (640x425).jpg
    Walnut & Walnut Burr (22) (640x425).jpg
    78.4 KB
  • Walnut & Walnut Burr (23) (640x426).jpg
    Walnut & Walnut Burr (23) (640x426).jpg
    101.7 KB
  • Walnut & Walnut Burr (24) (640x427).jpg
    Walnut & Walnut Burr (24) (640x427).jpg
    97.7 KB
  • Walnut & Walnut Burr (25) (640x384).jpg
    Walnut & Walnut Burr (25) (640x384).jpg
    90 KB
last off, drawer runners, these are strips of walnut glued and pinned to the sides. To get them at just the right height I've planed them down in place.
Walnut & Walnut Burr (26) (640x399).jpg

Glued up, now it's time to part it off...
Walnut & Walnut Burr (27) (640x408).jpg


At this point I realised I had made a bit of a boo-boo. Given how well the entire build had gone I suppose it should have been obvious that when something did go wrong, it was going to be pretty special. The only reason it escaped being smashed to bits was that I just didn't have the materials to start again.

so, no more WIP, too annoyed. :evil:
 

Attachments

  • Walnut & Walnut Burr (26) (640x399).jpg
    Walnut & Walnut Burr (26) (640x399).jpg
    89.8 KB
  • Walnut & Walnut Burr (27) (640x408).jpg
    Walnut & Walnut Burr (27) (640x408).jpg
    66.1 KB
So, here's the finished piece...
Walnut & Walnut Burr (28) (640x452).jpg

The finish is two coats of colron "French Polish", very expensive and very dark, from now on I'm mixing my own.

The seriously expensive Brusso hinges I had saved especially for a piece this nice just didn't look right and given previous form I wasn't tempting fate, a call to Ian and I had some nice brass Neat Hinges, totally sold on them, well worth the cost.
Walnut & Walnut Burr (29) (453x640).jpg

The fall front is on brass pins, I was going to plug the ends with walnut but decided to use brass instead, seemed to balance well with the brass of the hinge knuckles on the back. Two Brusso ball latches hold it in place but again, I won't use them again, they sort of have two latching places and I would prefer to use magnets in future. Bullet nose dowels on the lid slip into sockets lined with sections of pen barrel on the fall front to stop it opening when the lid is closed.
Walnut & Walnut Burr (30) (451x640).jpg

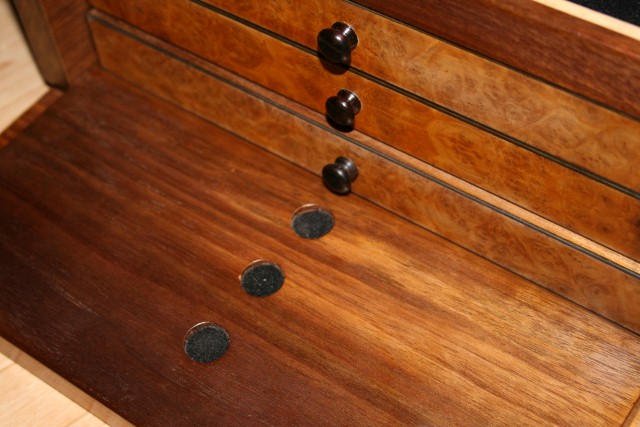
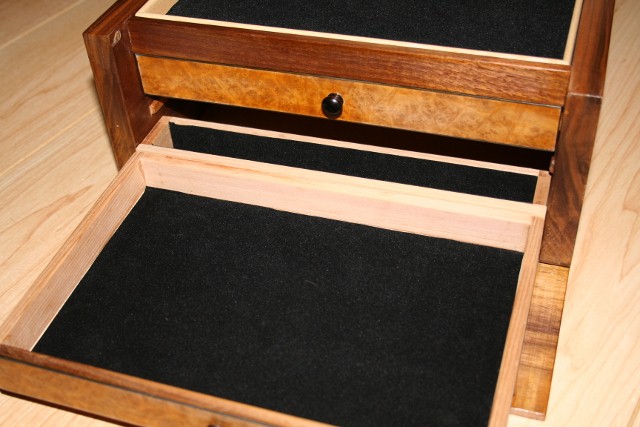
A simple ash tray sits in the top with a pen carrier behind it. The fall front has recesses lined with baize to stop the drawers rattling and protect the ends of the knobs. The top two drawers open as follows...
Walnut & Walnut Burr (31) (640x452).jpg

However, the bottom drawer has a special design feature, it doesn't open.
Walnut & Walnut Burr (32) (640x427).jpg

Yes, that's right, it's a special secret opening drawer where you have to take the drawer above it out to open it.
Walnut & Walnut Burr (36) (640x427).jpg

However, if you swap the middle drawer for the bottom drawer then re-open it, the secret drawer pulls forward with it.
Walnut & Walnut Burr (38) (640x427).jpg

In it's home the drawer is hidden as it's the same grain pattern as the vertical piece above it
Walnut & Walnut Burr (40) (640x427).jpg

The final trick is the pen holder, take the ash tray out it pulls forwards on two brass rods to reveal the final hidden section under it
Walnut & Walnut Burr (33) (640x423).jpg

Walnut & Walnut Burr (34) (640x427).jpg


So that's that, final wedding present of the year, now for a damned good tidy up before the Christmas rush.
 

Attachments

  • Walnut & Walnut Burr (28) (640x452).jpg
    Walnut & Walnut Burr (28) (640x452).jpg
    82.5 KB
  • Walnut & Walnut Burr (29) (453x640).jpg
    Walnut & Walnut Burr (29) (453x640).jpg
    79.8 KB
  • Walnut & Walnut Burr (30) (451x640).jpg
    Walnut & Walnut Burr (30) (451x640).jpg
    83 KB
  • Walnut & Walnut Burr (31) (640x452).jpg
    Walnut & Walnut Burr (31) (640x452).jpg
    93.7 KB
  • Walnut & Walnut Burr (32) (640x427).jpg
    Walnut & Walnut Burr (32) (640x427).jpg
    86.1 KB
  • Walnut & Walnut Burr (36) (640x427).jpg
    Walnut & Walnut Burr (36) (640x427).jpg
    80.2 KB
  • Walnut & Walnut Burr (38) (640x427).jpg
    Walnut & Walnut Burr (38) (640x427).jpg
    83.1 KB
  • Walnut & Walnut Burr (40) (640x427).jpg
    Walnut & Walnut Burr (40) (640x427).jpg
    62.1 KB
  • Walnut & Walnut Burr (33) (640x423).jpg
    Walnut & Walnut Burr (33) (640x423).jpg
    81.2 KB
  • Walnut & Walnut Burr (34) (640x427).jpg
    Walnut & Walnut Burr (34) (640x427).jpg
    65.7 KB
goldeneyedmonkey":avpz6xx0 said:
Nice WIP mate, looks like a good design too, will be watching this one with interest. Where did you get those featherboards from? They look the business. :)

Cheers _Dan.

Axminster own brand, US sizes...
 
andersonec":1rbph8vj said:
TheTiddles":1rbph8vj said:
The top is going to be walnut burr

Could you tell me how you fill those holes in the veneer???

Thanks in advance.
Andy

Conventional wisdom is you mix some metal powder into an epoxy and fill with that. I've never much liked it and you can only fill say 50% with metal. I guess it is more structural that way however.

I used the powder direct into the void with a 0.5l squeezy bottle (like chefs use) as the powder is practically a fluid. Filling it completely and then scraping over the top with a straight edge to level it off. Some runny cyano on top of that then wicks down into the powder in just a few seconds, add till it's all wetted out, the glue dries in seconds, sanding with fine paper to cut it back flush to the wood afterwards. If it's not totally filled, you can always add more. This way the void is filled 90%+ with metal and just bound together with glue.

It's not as good an effect with brass as it is with aluminium powder which stays shinier. I've always wondered about using solder...

Time to complete, I'd guess somewhere between 60 and 100 hours over a 4 week period. Sadly, I started 2 weeks before the wedding even though I'd known about it for 18 months and had suspected it was incomming for a further year or two!

Aidan
 
Looks great Aiden. A lovely gift.

Can I ask what a curtain fence is and did you make it or buy it?
It sounds good.
 
Fantastic, Aidan! A beautiful piece of work. Didn't know those featherboards existed, either.
 
Jensmith":2aizy96p said:
Looks great Aiden. A lovely gift.

Can I ask what a curtain fence is and did you make it or buy it?
It sounds good.

A curtain fence goes up and down, instead of the split fences that are common. The advantage being that it the workpiece doesn't have to pass a gap in the support which can catch and only the part of the cutter you ae using is exposed. However, it's not as versatile and can't be used so well with big cutters.

You could make one from anything, like a normal split fence. Mine's made from laser cut acrylic but that's just because I can, ply would be fine. If I want to use split fences I can just swap them out.

Aidan
 
Lovely work - nice to see justice done to such a beautiful piece of timber. I particularly like the ingenious recesses in the front fall for the drawer knobs.
 
Back
Top