Tone's Garage Projects - WIP

UKworkshop.co.uk

Help Support UKworkshop.co.uk:

This site may earn a commission from merchant affiliate links, including eBay, Amazon, and others.

chingerspy

Established Member
Joined
27 Jan 2010
Messages
242
Reaction score
0
Location
Borehamwood, Herts
Hi all,

Well it's about time I started sharing and the upcoming garage project is as good a place as any.

Basically we have a load of old wood in the garage which I've gathered up and hope to use in these garage projects. There are bits of old beds, furniture, contiboard, etc...

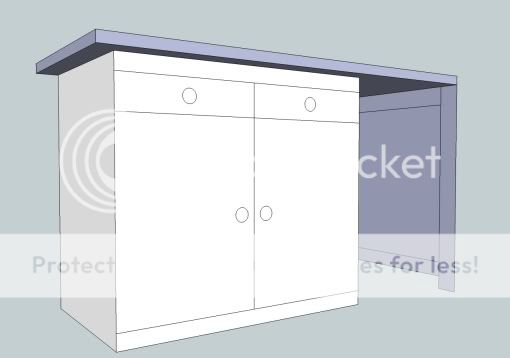
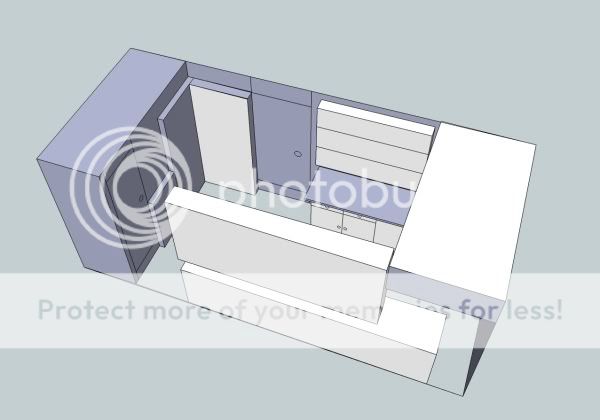
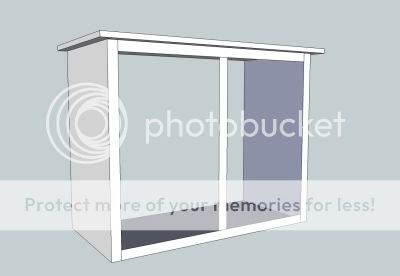
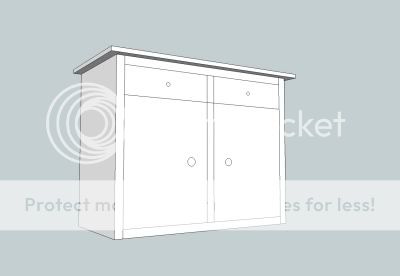
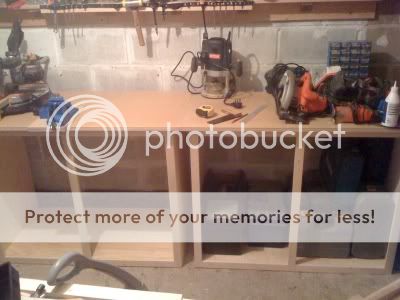
I've been thinking hard how to go about making the bits. I think I'm settled on using pocket hole joints after deliberating about traditional M/T or biscuits or dados. After watching Kreg stuff on Youtube I'm going to pick up a Kreg 3 or 4 from Axi High Wycome on Friday. I like faceframes and I think I will be able to make a good job of the furniture with the Kreg. Does anyone else use them here? I don't read a lot about them on this forum. So pine faceframes and plywood sides. Plan is to make two cabinets that the worktop will go on. Then some shelving above to take some more storage that's got to stay in the garage for the time being. Should end up with a 2'x5' worksurface with storage under and over it.

Anyway... here goes!

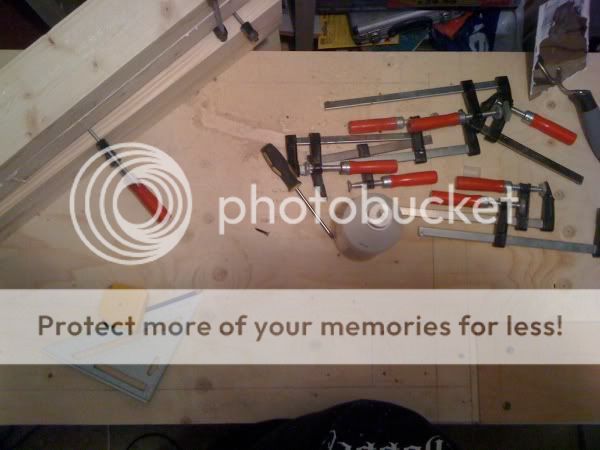
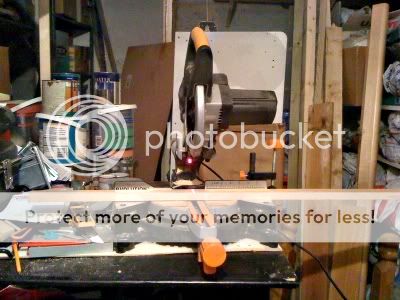
First I found all the suitable framing bits from the old pine. There was a lot of 45x20mm lengths so I chopped all the dodgy ends off and came up with some nice useable bits for free :) The Evolution Rage3 for £100 is earning it's money!

reclaimedpine1small.jpg


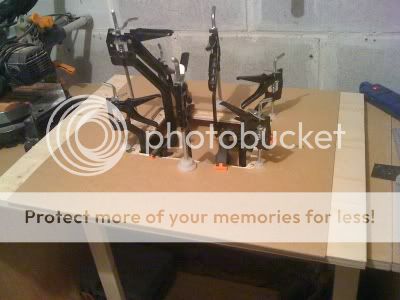
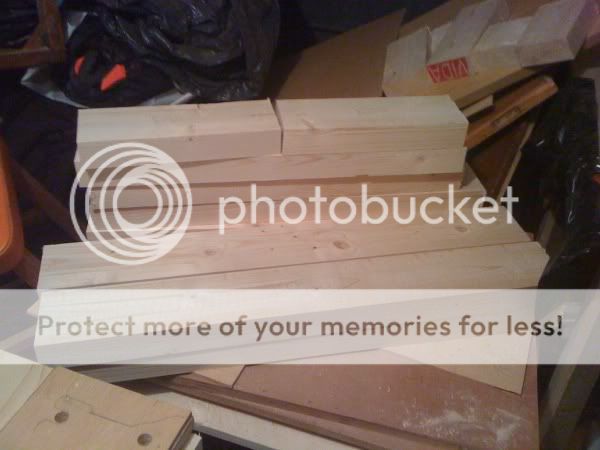
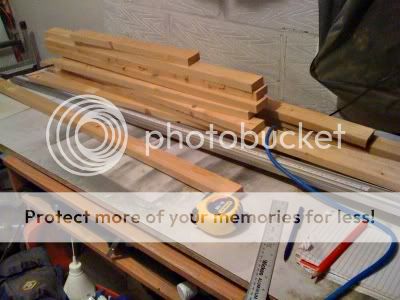
Here's the small pile I ended up with looks like I might have to buy some planks if I can't find any more hiding in the woodbin. I made a note of all the sizes in pencil on each length after chopping them. I've now written it all down on a pad and will hopefully be able to create some sort of cutting list to make my frames or at least some of them:

reclaimedpine2small.jpg


I'm also getting into the habit of cleaning up shop afterwards, here's the current shop vac:

shopvacsmall.jpg


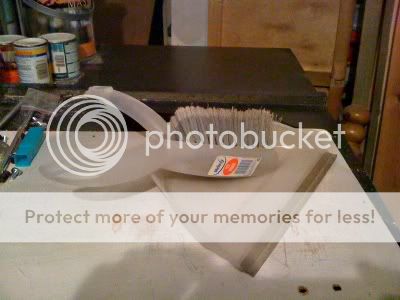
And I'm also reclaiming sawdust from the reclaimed timber! It's going to come in handy for all the filling I will probably end up doing knowing me :oops: This old Jelly Belly jar is filling up quickly:

sawdustcollectionsmall.jpg


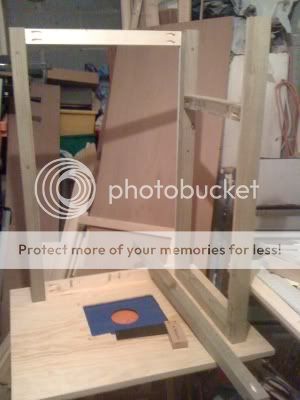
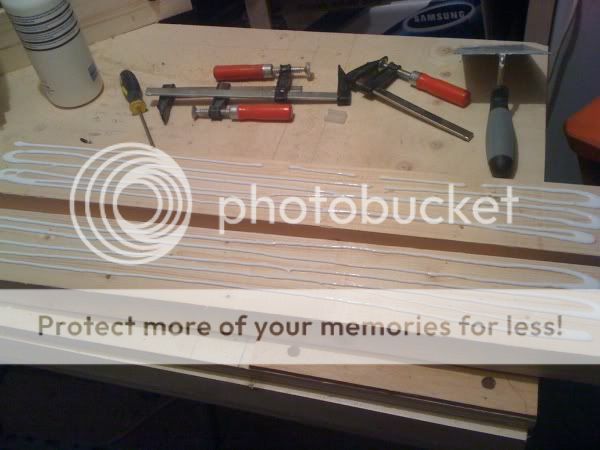
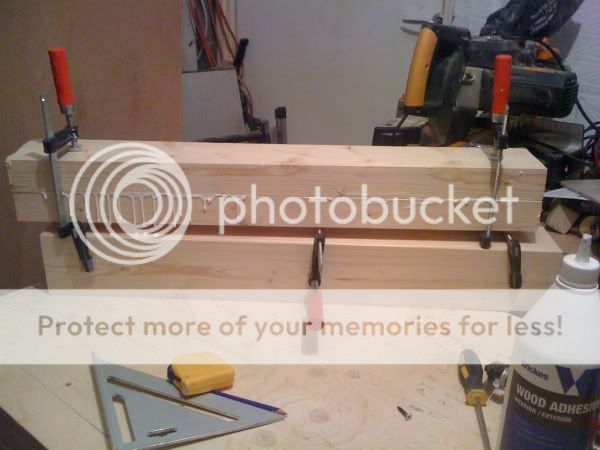
Well this is the start of the WIP. I have Friday through Monday off work so hopefully will get the jig and get used to it quickly to progress on the build.
 
Thinking it through...

I've just spent an hour in the garage looking at what I've got in terms of framing material. Was looking like I was short a few pieces until I realised I'd have to make the under cabinet shorter due to my bait freezer! Not sure how I missed a big white appliance when I measured up last night :)

Anyway, this means my base unit will ideally be L1000mm x H900mm x D60mm. I may have to adjust the depth down slightly as I want to get as much out of 4'x8' plywood sheets as possible. This should give me a decent sized unit with two drawers at the top and two cupboards at the bottom. I'll use the two 57x18mm wide rails top and bottom and the rest of the frame will be 47x18mm wide rails/styles. The box behind that will be 18mm ply with 3 or 6mm ply back.

The workbench top will be a torsion box. Constructed using some 45x45mm lengths I have left over from putting the joists across the garage to create storage above the garage door. This is tanalised c16 and I have 4 2.4m lengths of it. Once joined together (pocket screws again) and wrapped in ply it should serve well as a benchtop. This will measure longer than the cabinet as I am aiming to get 1500mm x 600m for the worktop. This means a good 500mm overhang over the freezer and a 50-80mm overhang around the sides and front. I will probably end up putting support on the far end with a legs and rails to keep it from shearing. I have some 45x45mm lengths that could be used there making it pretty sturdy.

If I could use sketchup here I would. May work on that during quiet time at work shhh ;)

The drawers will be full extension and probably 12mm ply pocket screwed together. I may see if I have any decent bits of 120mm wide pine. I've seen some in the woodpile but I think they've already suffered some cuts. There might be a couple of useable pieces though. Otherwise I'm not worried about using straight ply for the fronts.

I might even stain the whole thing. I like the Ronseal Diamond hard range, even if it is a little pricey. It gives a really nice colour and a very durable finish. Don't worry I'm not for the life of me believing that it will survive a slipped chisel :D

Anyway, I best be off to get ready for work...
 
I've had a little play with Sketchup at lunchtime and came up with this which shows what I'm looking to accomplish:

garagecabinet1small.jpg


The gap to the right will be home to my bait freezer. Unsure yet whether to fill inbetween the rail and styles on the end piece. No matter what I tried Sketchup filled it in anyway :) I've been thinking about the overhangs and may have to change them to suit our old Eclipse vice. It's not very big but will do. I may need to adjust cabinet dimesions again though to allow for the vice screws. I can have a tinker with that tonight when I get home.

At this rate I might have to think of a better storage solution for the 4 bikes (3pushbikes and a Monkey Bike) which live at the far end of the cabinet. Otherwise I'm just constantly losing dimensions for under bench storage.
 
Hi Tone, great to see you are using up your old wood. I actively seek it out, even occasionally "skip-diving".

The sketchup issue is because the end panel is "flat". If you highlight the infill and press "delete" it will disappear. Even if you are making a sketch, get used to making each item (equal to a piece of wood in the real world) into a component. Makes life easier and you can hide components so you can work on other areas ie. the inside of the cabinet, without obstruction.
 
Thanks Shultzy, I'm gonna try to use up as much of this pile as possible :) maybe not much more on this project. I have some good planks though that I've not started to look at yet.

Project update:
I'm currently thinking about chaning everything. I'm a little fed up with losing storage space just because I need a bench in there. This is unfortunately a dual purpose garage and not just my workshop. I don't necessarily need a proper bench but at least a good assembly table with the small woodworkers vice would suffice.

I'm thinking about putting this bench on the other side of the garage. There is already a storage unit along that wall and who knows whats in it! But I think I would be happier being able to convert this into a long stretch of cabinets and drawers with a good sized and good height benchtop running the length of this wall.

This is an attempt at showing my garage in it's current-ish physical state:

garage1.jpg


As you can see moving the bench area to the opposite wall will give me probably 3 feet extra length. Better for assembly, chop saw, and preparation. Cabinet/drawer space underneath still and a good overhang for clamping on 3 sides. Shelving above but this could then become more of a proper tool cupboard. The original bench location would become a pure storage system. So I am essentially dividing the garage into general storage and workshop without (hopefully) mixing the two.
 
That looks good Tone. Don't forget if you need space when you are not woodworking you could hinge the worktop and fold it away until needed. I had one in my single garage which allowed me to store the car away but hinged up made a good assembly table.
 
I had considered a folddown bench but I think I can get more out of the space by putting the bench ontop of cabinets. I don't need to get a car in here fortunately :)

I've been playing again and if it all goes to plan I should be able to get a 3'x8' or near to that benchtop to work on at bench height (for me this is around 1m high). There will be cupboards underneath at say 500mm depth with extension drawers and trays.
 
Well after thinking about it and rethinking and then just saying sod it, take advantage of 20% at B&Q and building here is what I came up with so far :)

cab1small.jpg


I'm going for two cabinets, each with a 4' x 2' top. The carcass is 18mm ply with a whitewood faceframe. The top is 18mm ply with 3mm hardboard pinned to it. It overhangs for clamping and this has already come in really handy. Everything is pocket hole screwed together and only the faceframe is glued up.

I've got most of the second cabinet made up now (you can just see it to the left). I've just got to put the top on it. I've got the frame clamped at the moment though as the crappy whitewood decided to split when I screwed it :( ah well I'll leave it to glue up overnight as I've done enough for today.

I'm toying with just adding doors to the front or putting a couple of drawers at the top with cupboard space underneath.

The backs are open at the mo and I'll probably just add a brace to the back for rigidity for now. I'd like to cover it with more ply when I'm a little more flush though. This will add weight and make it very rigid.

I'll also add adjustable feet when I get some to raise it off the deck a little and help with levelling.

On top of it are most of the power tools I used to build it :) the most important isn't there though, the Kreg jig!

I'll try and get some sketchup's done in a mo.
 
Sketchups of what I'm after:

I might wait and have a go at panelled doors next month for this. This would mean investing in a router bit kit and was the main reason for buying Wizer's Ryobi 1/2" off him (thanks again for the arrangement man). Once I've got the kit I can produce them for lots of things :)

Current:
cabcarcass1small.jpg


Aim:
cabcarcass2small.jpg
 
Tone I might have a set of raised panel router bits if your interested? Brand new, never used, still sealed. :D
 
Spent more time in the garage on Sunday. Fighting a weird bug that I've picked up I soldiered on...

Sorry if the pics are slow to load or whatever, I've put them on Imageshack as I can't get to my own ftp at the mo.

Finished off the second carcass:
bothgaragecabs1.jpg


Had a good old cleanup! Here is the shopvac upgrade! A crappy little upright from my sister, it clogs all the time and has a tiny hose but it's a step up from the dustpan and brush :)
shopvacupgrade1.jpg


Then after dinner I decided to attempt a router table to save some money. Yes Tom I really would like that door making set ;) I had already bought the Kreg insert plate but had screwed up the first attempt at installing it :oops: Anyway after a little battle with the router and messing things up again I found a way to win the war... Onward!

I had a nightmare trying to get the rebate just deep enough to make the insert flush, also lacking a rebating bit I used a straight cutter and the fit was loose to say the least so I devised a cunning plan...

This is the top and you might be able to see the original hole and rebate. I covered my mistakes with a piece of left over 3mm hardboard from the counter tops. I spent time to get the hole in the h/b just right (ok so it was still a little off but much better!) I pinned this to the ply around the outside edge and glued just around the edges of the hole to hold it rather than use pins there, hence the clamps in the pic.

clampuproutertabletop.jpg


Now of course the insert would be too low but I thought it would be easier to raise it than keep whittling away at the ply. So a little more ingenuity was called for and I came up with a levelling system. I thought about stopping and just buying the easy levelling system that Kreg make. Well, I don't really have £12 to spend on a few grub screws and plastic triangles, so... I used two 1/4" self tapping screws at each corner, one either side of the radius. I can now adjust the plate to become flush with the top. Bargain! I might add a screw to the centrepoint of each side too if I feel the need but it's pretty sturdy with no wobble at all right now.

So with the top finished to where I was happy I knocked up a stand for it. I already had a face frame made up for another cabinet so used that, just to tie all the cabinet fronts together. Behind that I used some left over 2"x2" tanalised beams from the above door storage area to construct the legs and stretchers. I held it all together with pocket screws again (I love my Kreg) I decided on just a leg/stretcher arrangment mainly because I had the lengths of 2x2 sitting there getting in the way. Also if it's good enough for Colin at the YOKB, it's good enough for me :) I don't have any dust extraction at the moment so that wasn't a concern either. I see this table as an ever evolving project right now.

Here's a construction shot about half way through:

routertableconstruction.jpg


After a bit of rearragement of rubbish and furniture I managed to sit the router table at the left end of the other units. Once I use a little more scrap hardboard to cover the ply the top should flush up with the other cabs. This will also as a bonus give me a roughly 10' x 2' surface area to work on.

routertable.jpg


And I'm spent! Well actually I'm at work taking a break ;)

Edit:

I put up an in focus pic of the table above. The pic shows my impromptu fence too as I really wanted to put some wood through it :)

It works, my first OGee!

itworks.jpg
 
Oooo something big just arrived :)
vice1sm.jpg


Not that much could damage it, I appreciated all the packing that kept it safe Norman :) There was a load of that air pocket stuff in the box too!
vice2sm.jpg


Now that's what I call a vice!
vice3sm.jpg


I didn't think it would be so long :oops:
vice4sm.jpg


Happy Tone :) Let the cleansing commence!
vice6sm.jpg


I've already started taking the Dremmel to it but it wasn't charged so that didn't last long. It has already done a good job with the handle though so good things to come.

Does anyone have any advice on how to clean it up. I think Schultzy performed heavy maintenance on his one? I want to avoid taking it apart in case I don't get it back together again. I guess just go at it with Dremmel, steel wool, then give it a paint job. Does Hammerite do a fairly accurate "Record" blue?
 
when I got mine I had big plans to strip it down, clean it up and paint it. In the end I couldn't be pineappled with that and surprisingly it still works perfectly. ;)
 
Phew thanks for that. I was kinda hoping that will be the general consensus :) I REALLY don't want to have to do it.

I am content on just cleaning it up a bit really. It works great as is but has a fair amount of rust on it that I will get cleaned up as best I can and then give it a good oiling. Oh and paint just to prevent rust again.
 
lol, thanks for that, and nice birthday present :)

That didn't help much with this unfortunately. However, this one about fixing vices which you contributed to will I am sure! Now is that coach screws or coach bolts I should use? ;)
 
chingerspy":1ojd330r said:
Phew thanks for that. I was kinda hoping that will be the general consensus :) I REALLY don't want to have to do it.

I am content on just cleaning it up a bit really. It works great as is but has a fair amount of rust on it that I will get cleaned up as best I can and then give it a good oiling. Oh and paint just to prevent rust again.

I guess if you suffer from rust in your workshop then it's worth taking the time to clean it all off and protecting it. I'm lucky so far in that I've never had a problem with it.
 
I'm not sure I suffer from rust in the shop. I am cleaning it up mainly because I can't handle it without getting orange hands at the moment :)

Anyway, that's mostly changed tonight after a session on the power drill with a couple of different wire brushes attached:

Yesterday:
vice6sm.jpg


Today:
vice7sm.jpg


Quite an improvement I think after a couple of hours. I'm tempted to just get the surface rust off as much as I can now just to knock it back.
 
Bench Time!

OK so after getting the Record vice it became immediately apparent that I would need a more substantial bench.

I had to wait till this month before I could buy some 2x4's and have a crack at something.

Well April is here and I have a few extra days booked off work either side of Easter so thought it about time to crack on.

After endlessly looking at pictures and reading about builds I decided that a workbench should a) be able to help you do woodworking, b) be built from readily avaliable material that you can afford, c) be heavy d) be a representation of the builders ability.

Therefore I've decided on the following for my bench:

A torsion box top made from 2x 18mm ply and 2x4's kiln dried timbers this will be near enough 90mm (just under 4") thick. I already had the ply and 2x4's are cheap as chips, well 3 helpings of chips :)

This is the underneath of the as yet unassembeled torsion box. I have marked in pencil where all the bits are going. The piece of ply on the right is the spacer for the Record 52E. I've already cut the holes for the bolts.

birdseyesmall.jpg


2x4's doubled up to make 4x4's for the legs standing at around about 750mm.

Here's some a pics of the glueup. I used a trowel to spread it on, the drips have now been ragged off :):

mmmglue1small.jpg


mmmglue2small.jpg


dripsmall.jpg


2x4's for the feet cut to about 650mm to stand just proud of the top. The legs will be screwed into the feet from underneath. I'm thinking 4x 60mm screws each leg should be ample pre-drilled holes of course.There will also be pads (toes?) front and rear on the bottom of the foot to help it sit on the garage floor.

Picture of the little stock pile including some leg parts, rails, stretchers and feet:


bitssmall.jpg


Other than that tomorrow I will find out if the legs are glued together properly, I only had 3 clamps for each leg to hand. I'll then have to square up the ends with the SCMS and plane the sides flush. That could be a job and a half as I still only have my Stanley Sweetheart No.4 smoother to do that with. I have just won a Record 5 1/2 off the 'bay though so cannot wait to play with that :)

All being well there should be a few assembly pics and a finished bench either tomorrow or Tuesday :)

Oh yea and this scared the rubbish out of me when I looked up one time!
scarysmall.jpg
 
Back
Top