Thicknessing small pieces of wood

UKworkshop.co.uk

Help Support UKworkshop.co.uk:

This site may earn a commission from merchant affiliate links, including eBay, Amazon, and others.
I have used the sled successfully on my P/T but double sided tape is a pain to remove so I used a trick I found from Ben Crowe on Crimson guitars YT video. This uses masking tape as the adhesive coupled with super glue to aid removal. This is for hand planing but still works on a P/T with care. Watch the attached for details:-

 
If they are over length, screw them to a larger board and push through.

generally you would push through a piece 100mm wide x 7mm and say 600mm long, then cut to length after.

most planer thicknessers would manage 7mm okay

double sided tape is an option, but you need to be careful removing as you might split it.
Would you not be at all worried pushing screws through your P/T? 😲
 
I have used the sled successfully on my P/T but double sided tape is a pain to remove so I used a trick I found from Ben Crowe on Crimson guitars YT video. This uses masking tape as the adhesive coupled with super glue to aid removal. This is for hand planing but still works on a P/T with care. Watch the attached for details:-


alternatively you can just use double sided tape, superglue is expensive!
 
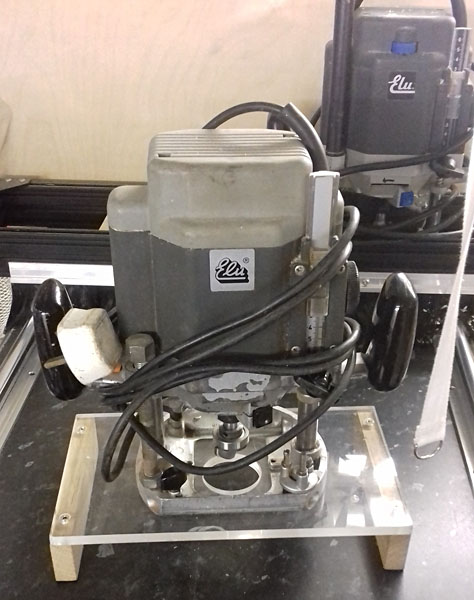
I did something similar sized using a small router sled and a trim router came out better than I expected. The pieced of ash were stuck to a mdf board with masking tape and CA glue for a temporary fix.
 

Attachments

  • 01.jpeg
    01.jpeg
    462.8 KB · Views: 0
  • 02.jpeg
    02.jpeg
    628.1 KB · Views: 0
  • 03.jpeg
    03.jpeg
    794.9 KB · Views: 0
I have access to a cnc router. could that be any use in getting small pieces of wood down to a uniform thickness.
Certainly - it's how I would do it. The biggest problem is how to secure the blanks. Double sided tape can be useful but does demand that one side is already flat.

I use an eccentric clamp which has about a 2mm travel but that is 10mm high so needs a sacrificial timber spacer. You could also use 'wedges' - which I do on occasion - certainly when I need to get down to 3 or 4mm.

One of the first tools I made when I got my Denford CNC unit was 'Fly Cutter' - - -
Fly Cutter A.png

They are available commercially but since I have a surfeit of broken micro carbide drills it seemed sensible to utilise them.

This one is set to cut about a 45mm wide swathe but I have others at 20 and 30 (ish).

For best results you do need to be able to traverse beyond the width/length of the blank by the dia. of the cutter though.
 
I did something similar sized using a small router sled and a trim router came out better than I expected. The pieced of ash were stuck to a mdf board with masking tape and CA glue for a temporary fix.
Yes - this is the solution, I will make something up next week
 
Double sided tape to stick your piece of wood down to the benchtop, pair of equal thickness wooden battens each side and then use the router with the fence rods installed riding between the two battens. I have a "tri wing" cutter that works well for this, but any large straight cutter would do, or a "baseboard" cutter even better. These are intended for flattening the spoil boards used with a CNC router.
This will get you flat enough for most purposes and you can sand or scape for a good final finish.

The tape resists sideways shear forces very well but the work prises up off the bench easily enough afterwards.
 
I've used a sled or baseboard to put small pieces through p/t or drum sander, also a mini self-contained router sled: make a base, add side rails screwed to the outer ends under the base. Pic below with luck..
D/s tape or hot glue the pieces to a flat surface and skim them with the router. I've made 2mm veneers with that. With a couple of different-height side rail sets it covers thicknessing a range of things. With pieces that size you could do several at once.

One surface I use the mini sled on is laminate-covered kitchen worktop, hot glue holds things find and pops off wood & surface no problems. If any bits do get left they come off easily with painters panel wipe (also called pre-paint and similar - excellent general cleaner & degreaser and remover of tape leftovers).

With a bowl cutter the surface is good, free of plough lines.

30-sled.jpg
 
I have thought about attaching to a larger piece, which may work well. However would double sided be strong enough? the stuff I have wouldn't be.

Hot melt glue would be strong enough, but the problem would be ungluing afterwards. I have thought of hot melt gluing them onto a piece of steel plate then it would be just a case of heating the steel up until the glue gave way. But that just sounds like a mad idea, would not want the steel to touch the spiral cutters.
Hot melt glue is easily sorted with a wetting of meths or alcohol, leave a few minutes then prise off or peel away.
Use that method when removing mounted blanks on a glue block with hot glue for turning, check out this video
 
Hot melt glue is easily sorted with a wetting of meths or alcohol, leave a few minutes then prise off or peel away.
Use that method when removing mounted blanks on a glue block with hot glue for turning, check out this video

Interesting, did not know that rubbing alchol dissolves the hot melt glue. But would the alcohol mark or stain the wood?
 
I use meths or isopropyl alcohol at 99%, unlike rubbing alcohol it doesn't stain.
 
I have had success with small pieces down to 4mm by using masking tape/ superglue onto a melamine P/T sled, placed in the centre of the sled with long sacrificial batons either side that start off just slightly proud of the rough stock, the batons engage the rollers throughout the pass.
 
I agree with @sams93 about the suitability of using a thicknesser on such small pieces. A 100mm long piece would not go through my thicknesser, even if I put it on a sled, because there is not enough wood to adequately engage the infeed and outfeed rollers as it passes under the cutter block.

With a 7mm target thickness, I think a drum sander is ideal if you want to use machines. For small quantities, I would use a bench plane and have at it.
You can add pallet wood edges to a sled, so that the edges are slightly higher than the stock and are always in contact with the rollers. They get planed away along with the stock. This also reduces the risk of snipe.

But I agree, a sander would be preferable.
 
If you end up using hot glue gun, just use the glue around the perimeter, not the flat faces and you can easily remove it by blowing a hot air gun (meant for paint removal) over it to soften it. I use that technique to hold pieces onto a friction chuck on a lathe and they are very secure but easily removed. If you find that it leaves a residue where you don't want it, prepare the wood by sealing it with sanding sealer or similar where the glue will go.
 
A couple of things in this thread concern me.In the first post our enquirer mentions having no idea how short a piece can be fed through the machine.I would suggest he reflects for a moment on quite how the piece will be propelled through the machine when it is beyond the point of contact with the infeed roller and not yet at the outfeed roller.It will also,quite obviously be beyond the reach of the pressure bars at the same point in it's journey...

The CNC router option makes it simpler to produce a toolpath that will be located the correct distance above the lower surface of the blank.Keeping the workpiece firmly located on that surface will need to be achieved.

For a handfull of parts I would cut a piece of 6mm ply to about a couple of inches longer than the width of the blank and fasten it to the bench with a couple of panel pins and then use my (well fettled,of course!) hand plane.
 
A couple of things in this thread concern me.In the first post our enquirer mentions having no idea how short a piece can be fed through the machine.I would suggest he reflects for a moment on quite how the piece will be propelled through the machine when it is beyond the point of contact with the infeed roller and not yet at the outfeed roller.It will also,quite obviously be beyond the reach of the pressure bars at the same point in it's journey...
On my machine (Minimax Lab 300) the rollers are 4.5" apart, which means I can feed through anything longer than 5" or so. The trick with short pieces is to feed them one after the other, butted up, without a break. This means the rollers are always engaged.
A small piece on its own gets nudged as it butts up to the outfeed roller and gets nudged again as it leaves the infeed roller, as it drops down behind it. This can be what sets it off line and makes it difficult.
The OP's 6 to 9" pieces shouldn't be a problem at 7mm, unless the rollers are much further apart than say 5". The ends need to be fairly squared off so that each piece butts up to the next one as you feed them through.
So check the rollers - I doubt they'd be anything like the guessed 18" apart.
 
Last edited:
If double sided tape isn’t strong enough, masking tape applied to both sides then mitre bond on the masking tape to glue the tops of the tape together, if this makes sense ? Also a great trick for holding for example a router template or jig in an awkward to clamp space.
You might also try putting a stop behind it for it to rest against, either sacraficial and the same thickness as your piece, or thinner ..

Infeed and out feed rollers really don’t matter that much if you are glueing to a long bit of mdf for example, because you can gently hand feed it, and the fact it’s fixed to a long board will stop it being pulled up into the machine.

If you are brave you can also make a push stick, a bit like a pizza slice with which you can push through bits that are too small, or feed through the piece in a diamond orientation which will make it a bit longer if you see my meaning. But they certainly wouldn’t be my first choice !
 

Latest posts

Back
Top