Just checking... is this still the practice run? It's looking good enough to keep - which is no surprise to anyone who has seen your work - if I could achieve that I'd be tempted to just stick with it. (But I'm not retired so don't have as much time on my hands...)
You are using an out of date browser. It may not display this or other websites correctly.
You should upgrade or use an alternative browser.
You should upgrade or use an alternative browser.
The UKW Infill Project
- Thread starter jimi43
- Start date


Help Support UKworkshop.co.uk:
This site may earn a commission from merchant affiliate
links, including eBay, Amazon, and others.
jimi43
Established Member
AndyT":2c21o371 said:Just checking... is this still the practice run? It's looking good enough to keep - which is no surprise to anyone who has seen your work - if I could achieve that I'd be tempted to just stick with it. (But I'm not retired so don't have as much time on my hands...)
Yes Andy...it is indeed just a dry run...always assuming I can get the darn infill out again! :mrgreen:
My view is that the metalwork that Richard has achieved is so perfect that anything other than that would not do it justice...and since I have never filled a plane of this type before...I thought I had better practice! :wink:
The back infill will be done in two sections...and bookmatched so that should prove easier.
I think I might give the milling machine with chuck an airing this afternoon for the mortice...should keep things straighter than the drill press!
More later.
Jim
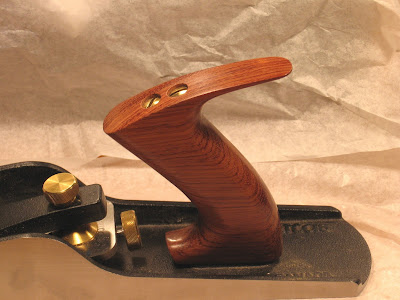
Not an expert in this field at all, but why the rather elegant but extravagant tail (headpiece? ponytail?) at the top-rear of the handle? Maybe my hands are a funny shape, but I'd expect that extended piece to wear holes in the skin on the back of the hand between thumb and forefinger if used for any length of time.
(Possibly it is my hands, as I've once or twice had to modify saw handles with this sort of shape to prevent discomfort)
(Possibly it is my hands, as I've once or twice had to modify saw handles with this sort of shape to prevent discomfort)
jimi43
Established Member
dickm":2xmsuzwg said:Not an expert in this field at all, but why the rather elegant but extravagant tail (headpiece? ponytail?) at the top-rear of the handle? Maybe my hands are a funny shape, but I'd expect that extended piece to wear holes in the skin on the back of the hand between thumb and forefinger if used for any length of time.
(Possibly it is my hands, as I've once or twice had to modify saw handles with this sort of shape to prevent discomfort)
Oh..it's not going to be like that when it's finished....that is just over-cut so I have enough to trim back to "what looks right" when i've finished.
This temporary infill is intended as something to be experimented with.
Jim
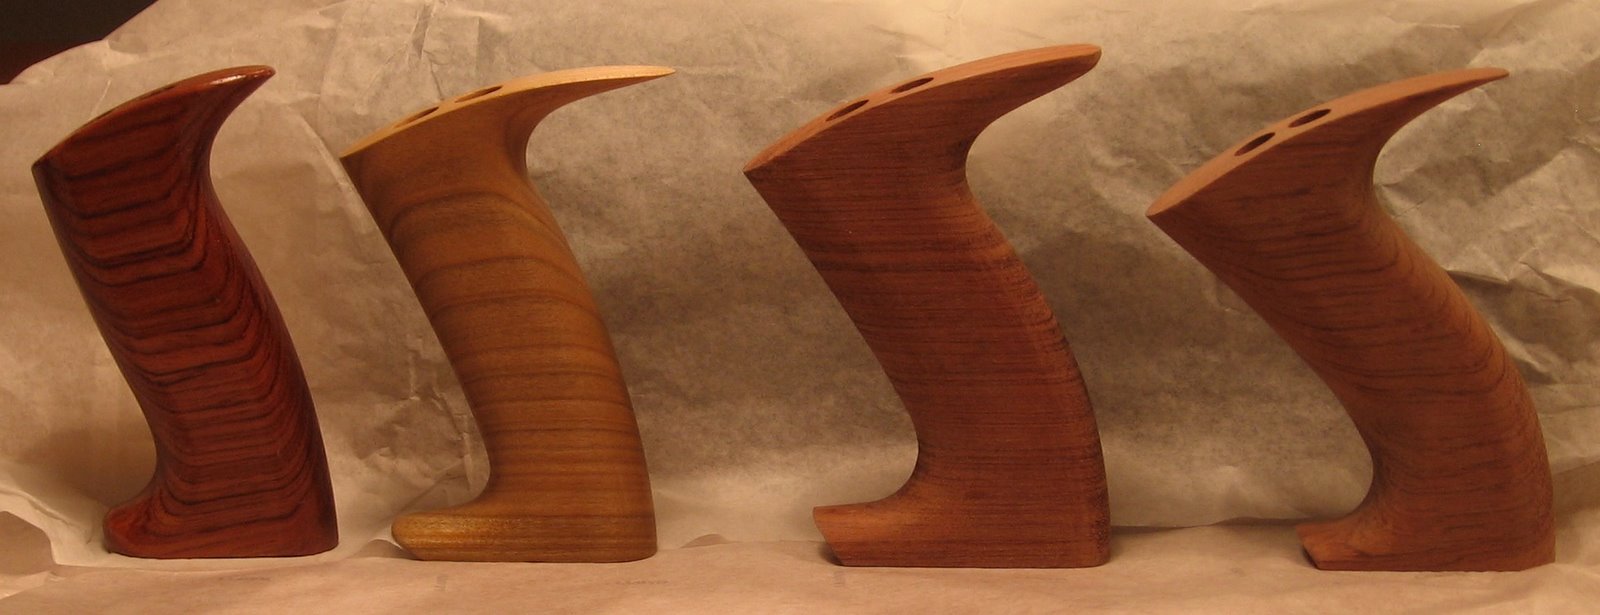
reminds me of Klaus made a new handle/tote for my LV BUJ a few years ago:jimi43":3kamovwb said:dickm":3kamovwb said:Not an expert in this field at all, but why the rather elegant but extravagant tail (headpiece? ponytail?) at the top-rear of the handle? Maybe my hands are a funny shape, but I'd expect that extended piece to wear holes in the skin on the back of the hand between thumb and forefinger if used for any length of time.
(Possibly it is my hands, as I've once or twice had to modify saw handles with this sort of shape to prevent discomfort)
Oh..it's not going to be like that when it's finished....that is just over-cut so I have enough to trim back to "what looks right" when i've finished.
This temporary infill is intended as something to be experimented with.
Jim
The evolution:
Cheers
Pedder
jimi43
Established Member
It looks great Pedder but do you not think that the Flying Angel is a bit of an accident waiting to happen?
In actual fact...even with this extended tail...the tip does not cut into the hand...it just flies over it!
I will probably cut this one back about 3/4 of the existing length...it's over by about 2cm at the moment.
So..how did the test with the milling machine go?
First...let me say that I will probably be doing the real mortice by hand in keeping with most of the build but I wanted to play...and see how it performed.....
To be honest...it was so good and fast and effortless that I might even do the real one this way...but since it's joined down the middle...it hardly seems worth the setup. It's true what they say....using a milling machine..the setup is 95% of the work!
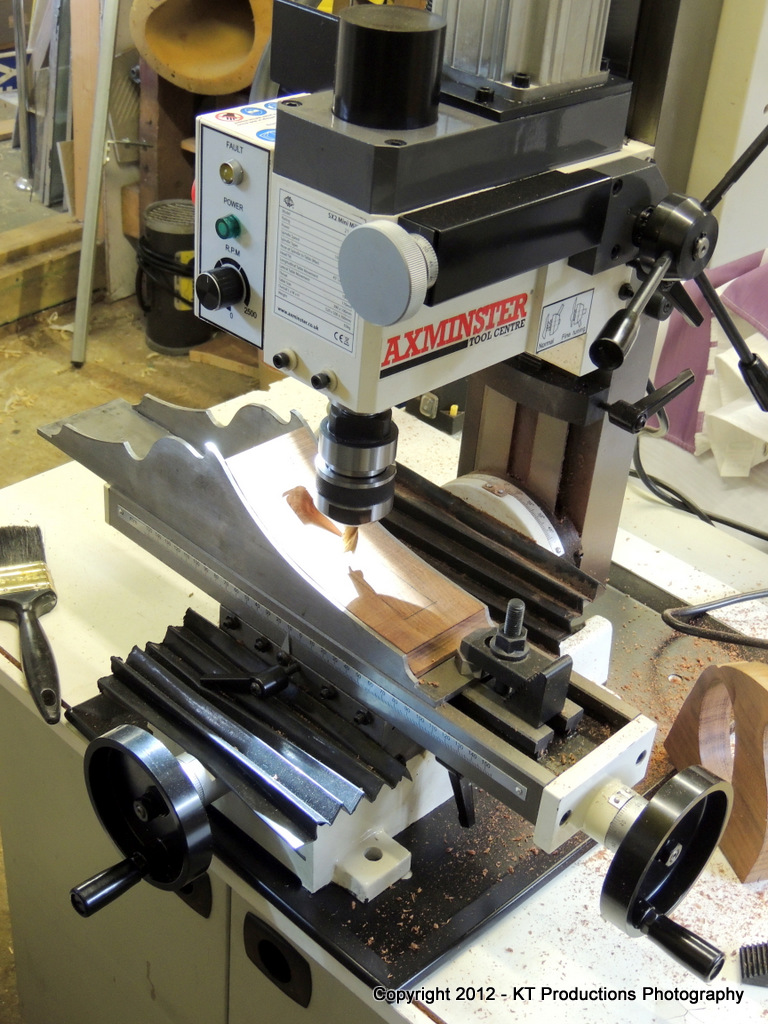
I was going to use a larger mill...but I wanted to control the width and creep up on it....
....so I stuck with the smaller one...12mm I think.
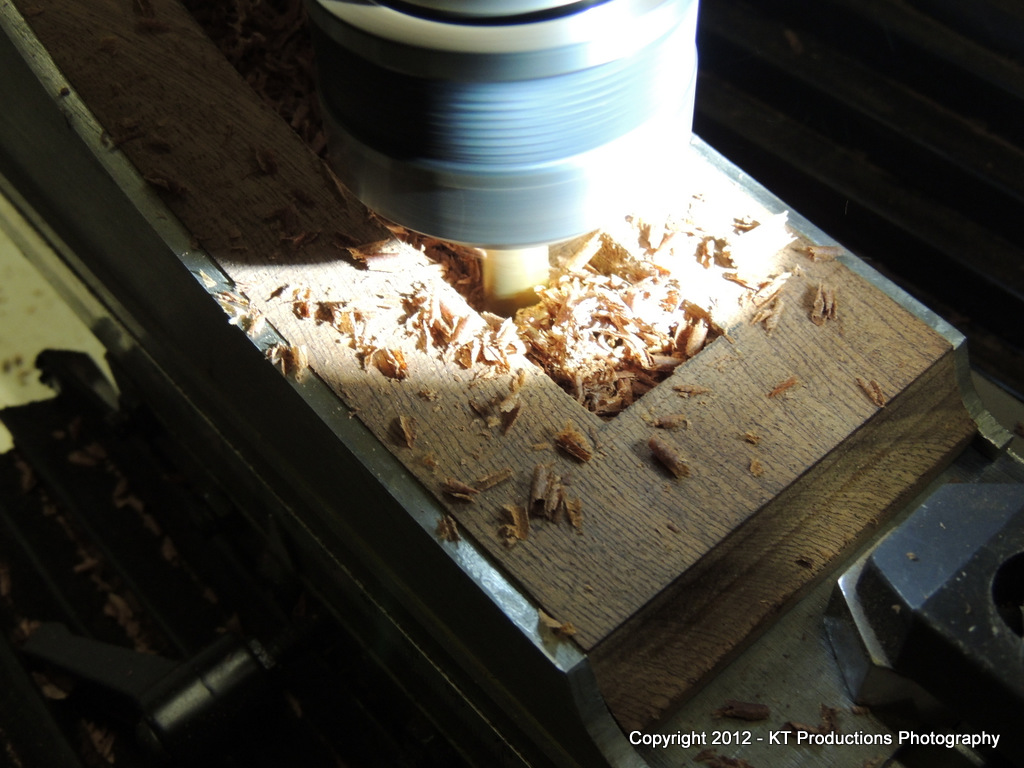
It fair rips though the mahogany and I think when I get to the burr oak..it may come in handy in some areas.
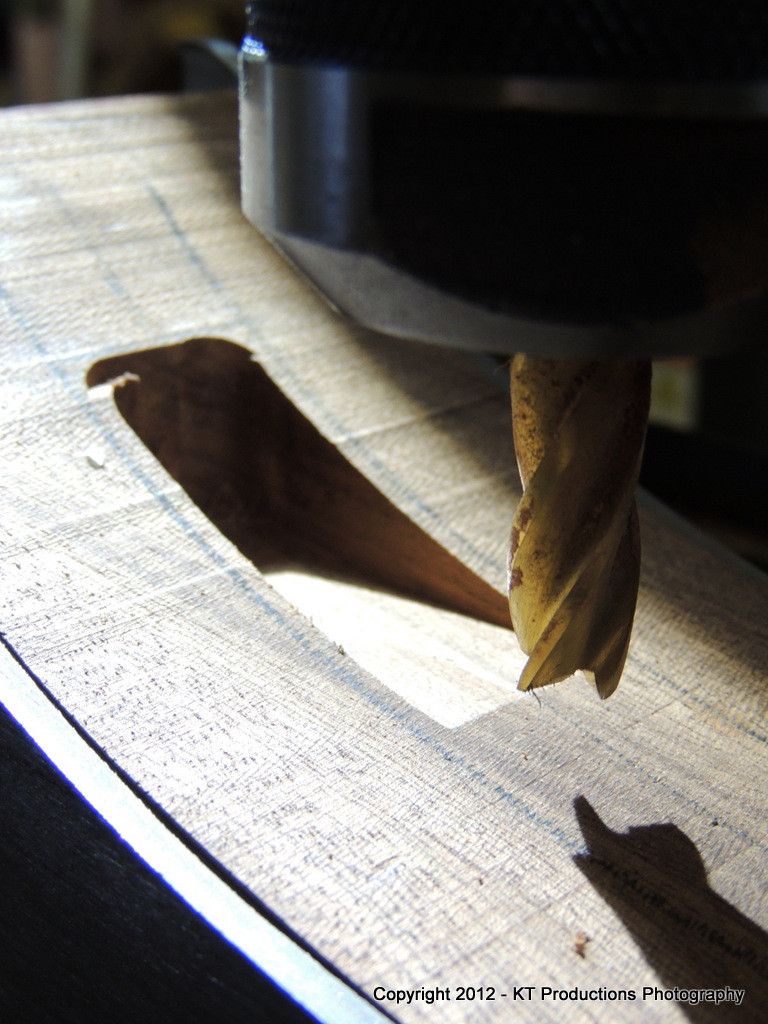
Anyway...it worked like a dream....
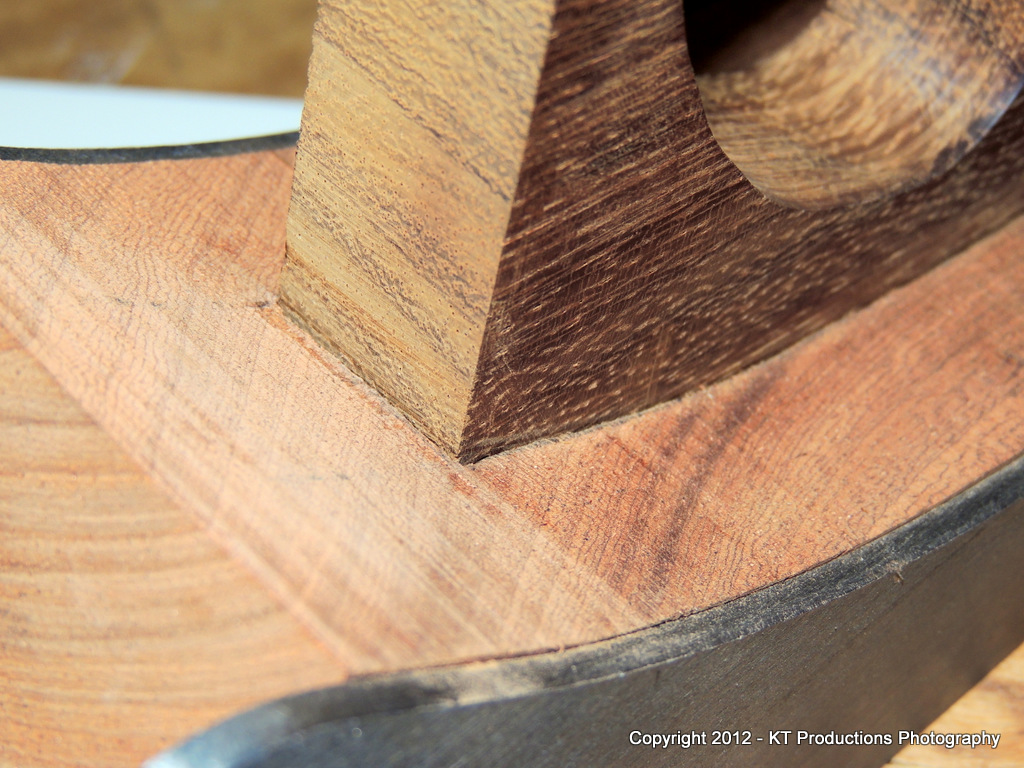
....tight as a duck's..... :mrgreen:
When I do the actual one I think I will undersize the mortice and do a step tenon on the handle...it adds another problem...following the contour...but it will take up any errors in the joint...not that there are any this time (never is with a "test"!!!) :mrgreen:
Ok that's it for today...I need to make the mortice deeper..I think the handle is too high and the hole needs to be closer if not flush with the tail infill....again..I intend to creep up on this until I think it looks right.
This week I shall make an unhardened iron...test this and then try to get some brass/gunmetal for making the lever cap....
I'm having a bit of a problem sourcing a suitable piece of stock...thick enough and wider than 2".....anyone know a stockist who is likely to have such a size. I only want a small piece (lengthwise)....
Cheers
Jim
In actual fact...even with this extended tail...the tip does not cut into the hand...it just flies over it!
I will probably cut this one back about 3/4 of the existing length...it's over by about 2cm at the moment.
So..how did the test with the milling machine go?
First...let me say that I will probably be doing the real mortice by hand in keeping with most of the build but I wanted to play...and see how it performed.....
To be honest...it was so good and fast and effortless that I might even do the real one this way...but since it's joined down the middle...it hardly seems worth the setup. It's true what they say....using a milling machine..the setup is 95% of the work!
I was going to use a larger mill...but I wanted to control the width and creep up on it....
....so I stuck with the smaller one...12mm I think.
It fair rips though the mahogany and I think when I get to the burr oak..it may come in handy in some areas.
Anyway...it worked like a dream....
....tight as a duck's..... :mrgreen:
When I do the actual one I think I will undersize the mortice and do a step tenon on the handle...it adds another problem...following the contour...but it will take up any errors in the joint...not that there are any this time (never is with a "test"!!!) :mrgreen:
Ok that's it for today...I need to make the mortice deeper..I think the handle is too high and the hole needs to be closer if not flush with the tail infill....again..I intend to creep up on this until I think it looks right.
This week I shall make an unhardened iron...test this and then try to get some brass/gunmetal for making the lever cap....
I'm having a bit of a problem sourcing a suitable piece of stock...thick enough and wider than 2".....anyone know a stockist who is likely to have such a size. I only want a small piece (lengthwise)....
Cheers
Jim
jimi43":1cblg5cl said:This week I shall make an unhardened iron...test this and then try to get some brass/gunmetal for making the lever cap....
I'm having a bit of a problem sourcing a suitable piece of stock...thick enough and wider than 2".....anyone know a stockist who is likely to have such a size. I only want a small piece (lengthwise)....
Cheers
Jim
One place that I would try if it was me is Avery Knight and Bowler. They don't get mentioned on here so you may not have tried them. They are a real survivor - Bowler's Engineering was a Victorian brassfoundry and general engineers who branched out into making fizzy pop. When their building was demolished for a road scheme, the contents were moved into a fantastic little museum.
The current company describe their stock here http://www.averyknight.co.uk/itemclas.php/clashist/-1,363,364/findclas/364 but you'd have to call and ask. I could easily pop over and get it if there was a problem with having them post it.
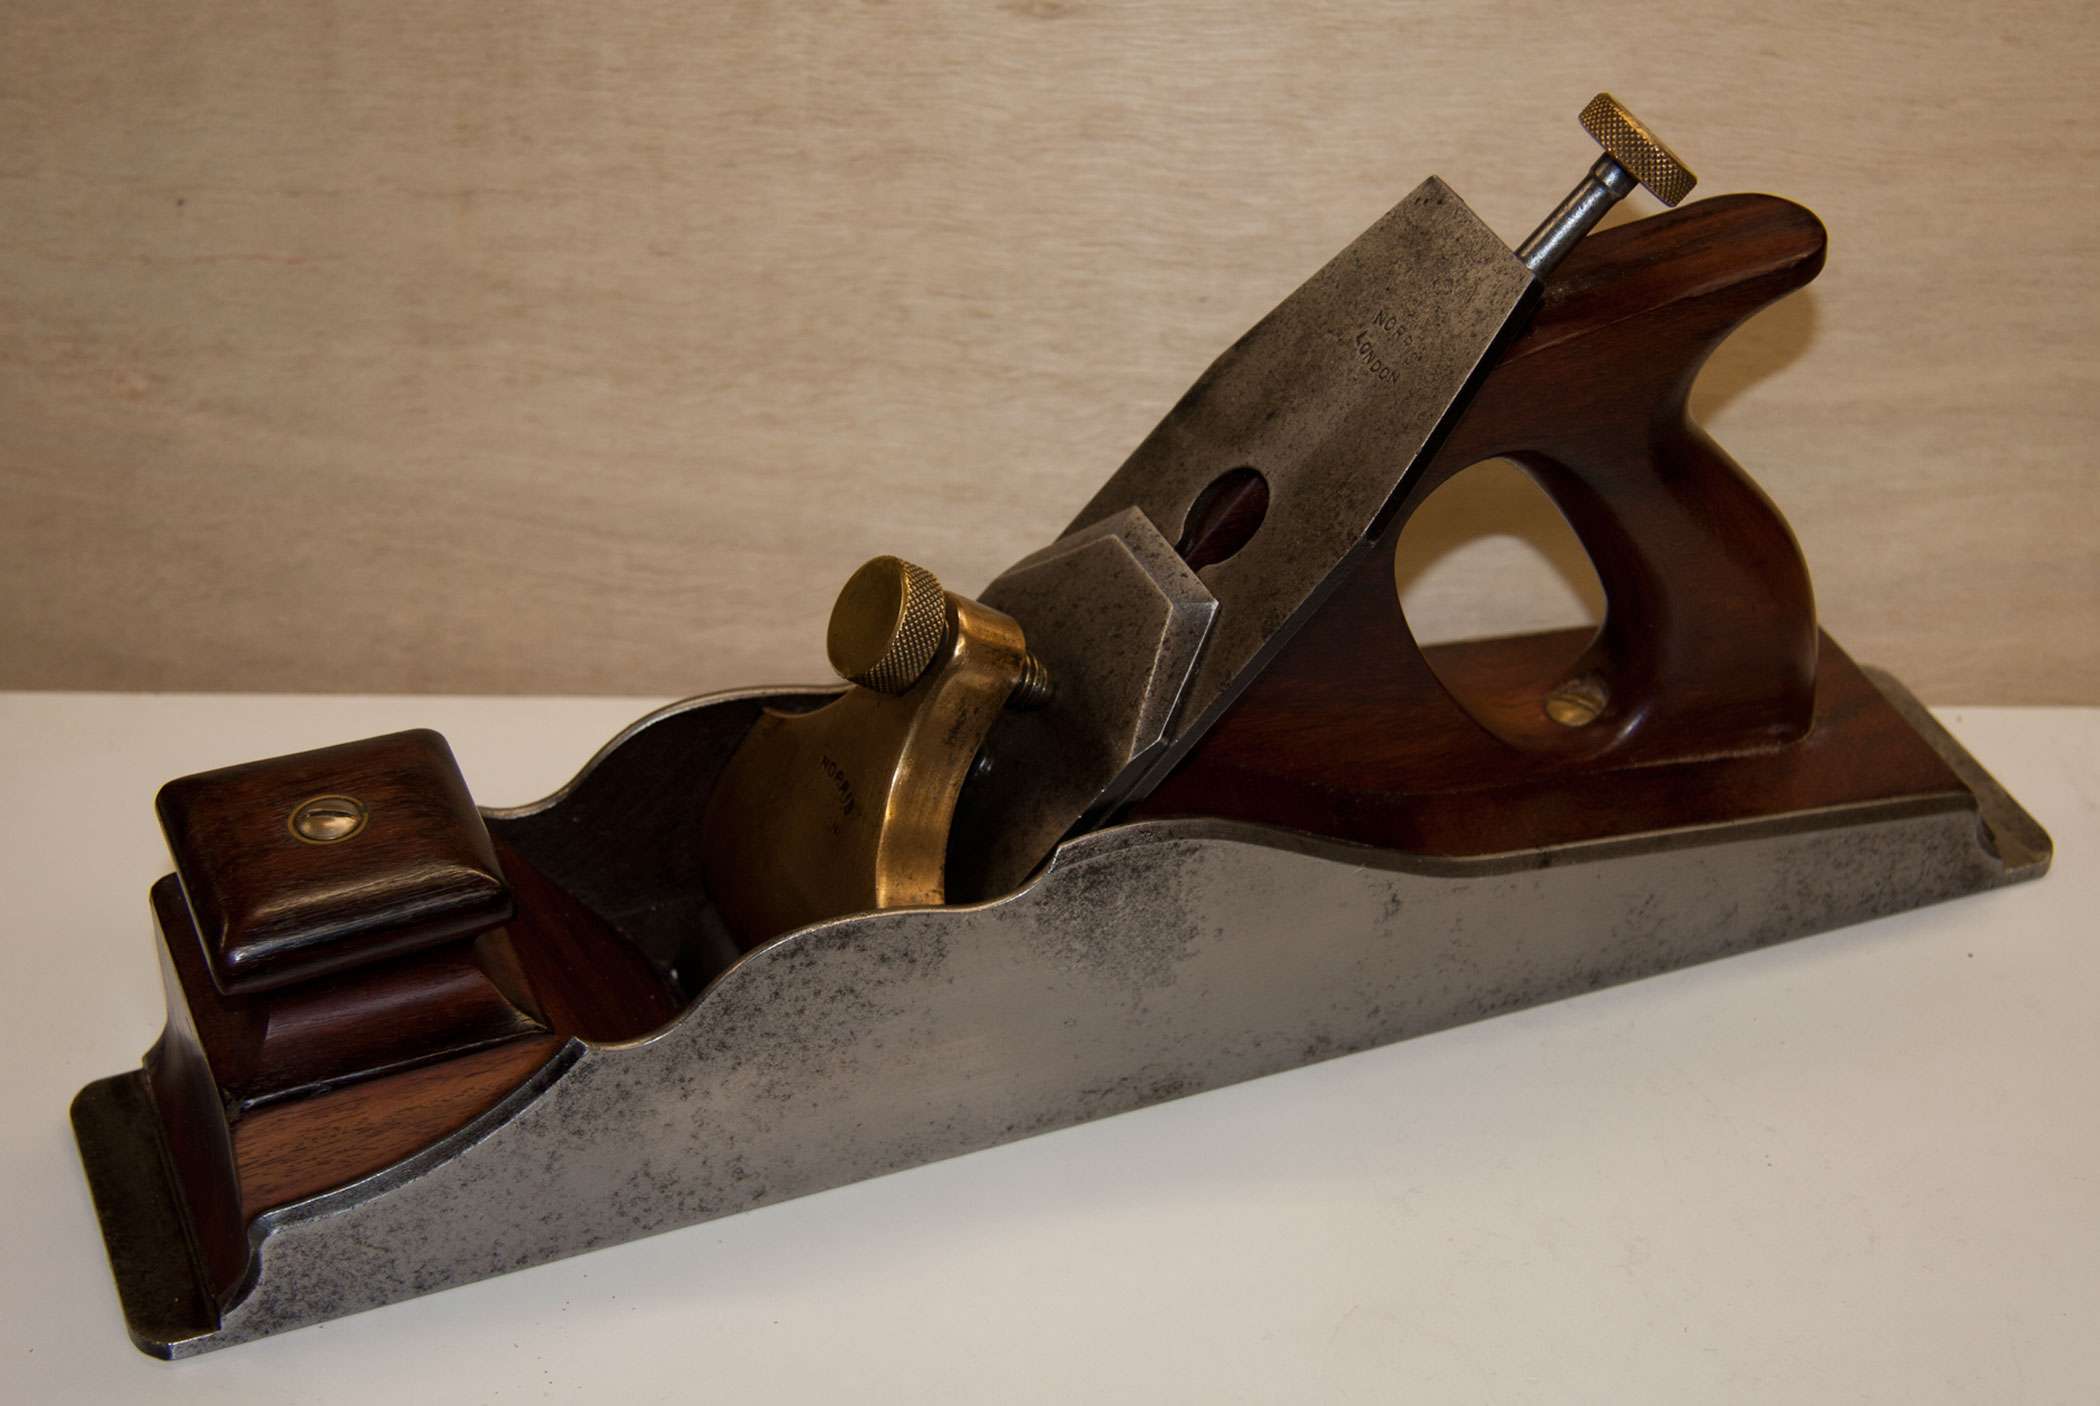
Just out of interest here' a pic of a Norris - sorry not in full profile?
Nice handles Pedder, but wasn't there some talk about Veritas making their handles more up-right to suit their design/handling?
Your final one is very rakish?")
Rod
Nice handles Pedder, but wasn't there some talk about Veritas making their handles more up-right to suit their design/handling?
Your final one is very rakish?
Rod
jimi43
Established Member
Really helpful Andy! Thanks mate.
I will ring them tomorrow and see. Will let you know.
The only other idea that I had was to get a casting from Bristol Designs....again..I would prefer to make my own to fit precisely but if they were to cast one that fit by just milling to the right size that might be an option.
Jim
I will ring them tomorrow and see. Will let you know.
The only other idea that I had was to get a casting from Bristol Designs....again..I would prefer to make my own to fit precisely but if they were to cast one that fit by just milling to the right size that might be an option.
Jim
Hi Rod, thanks,Harbo":v5nu465d said:Nice handles Pedder, but wasn't there some talk about Veritas making their handles more up-right to suit their design/handling?
Your final one is very rakish?
Rod
I'll foward the compliments to Klaus, who made these (before we made saws together)
Don't believe everything Rob tells you. Most of it but not everything! The planes feel and work better with the raked handles.
At least on low benches as mine.
Cheers Pedder
jimi43
Established Member
Rod...somehow I missed your picture and post on the original Norris...and you can see that the O in the handle is lower...not by much...these things have a tendency to fool the eye and you dig out more than you need but will play with this tomorrow probably.
I am waiting on the rasp as I don't want to do this with a router bit really...I don't mind joints being made by machine but the handle is a different matter.
Might play with the bun design tomorrow...I have an idea about thumbs which might or might not work...we shall see.
I suppose I could now also get on with the iron and cap iron as the gauge plate is here....
I didn't get a chance to call the company about the brass Andy...will be doing that tomorrow afternoon as well.....
Cheers
Jim
Cheshirechappie
Established Member
Jimi - if Bowlers don't come up with the goods, try The College Engineering Supply in the Wet Midlands ( www.collegeengineering.co.uk ) for ground flat stock. They do 3" x 3/16" and 3" x 1/4" in 9" lengths. They also do blocks of bronze sawn to your sizes if that helps with lever cap material.
jimi43
Established Member
Cheshirechappie":1ttgwf08 said:Jimi - if Bowlers don't come up with the goods, try The College Engineering Supply in the Wet Midlands ( http://www.collegeengineering.co.uk ) for ground flat stock. They do 3" x 3/16" and 3" x 1/4" in 9" lengths. They also do blocks of bronze sawn to your sizes if that helps with lever cap material.
Hi CC
I have the gauge plate stock for the iron and the cap iron already....it's the brass I'm having problems with. I need to get about 3" wide... a couple of inches high and about 4" in length to make a proper job.
Thanks for all the links...will ring around tomorrow and order.
I would have liked gunmetal but that is not easy to come by in any size let alone large dimension blocks.
Jim
Cheshirechappie
Established Member
Sorry Jimi - I misread!
However, all is not lost. College Engineering's standard grade of sawn block bronze is SAE660, which is, to all intents and purposes, leaded gunmetal. From experience, I can tell you that it machines very nicely, and can be brought to a nice finish. I think they can provide in far bigger blocks than you'll need; the problem will be VAT and postage charges, but t'was ever thus on smallish quantities!
However, all is not lost. College Engineering's standard grade of sawn block bronze is SAE660, which is, to all intents and purposes, leaded gunmetal. From experience, I can tell you that it machines very nicely, and can be brought to a nice finish. I think they can provide in far bigger blocks than you'll need; the problem will be VAT and postage charges, but t'was ever thus on smallish quantities!
jimi43
Established Member
Cheshirechappie":267sreu5 said:Sorry Jimi - I misread!
However, all is not lost. College Engineering's standard grade of sawn block bronze is SAE660, which is, to all intents and purposes, leaded gunmetal. From experience, I can tell you that it machines very nicely, and can be brought to a nice finish. I think they can provide in far bigger blocks than you'll need; the problem will be VAT and postage charges, but t'was ever thus on smallish quantities!
Excellent information as usual CC...I didn't know that was what is gunmetal...I just like the look of it. I had visions of popping over to Greenwich and sawing a few feet of a cannon! :mrgreen:
I will let you know how I get on.
Cheers again
Jim
jimi43
Established Member
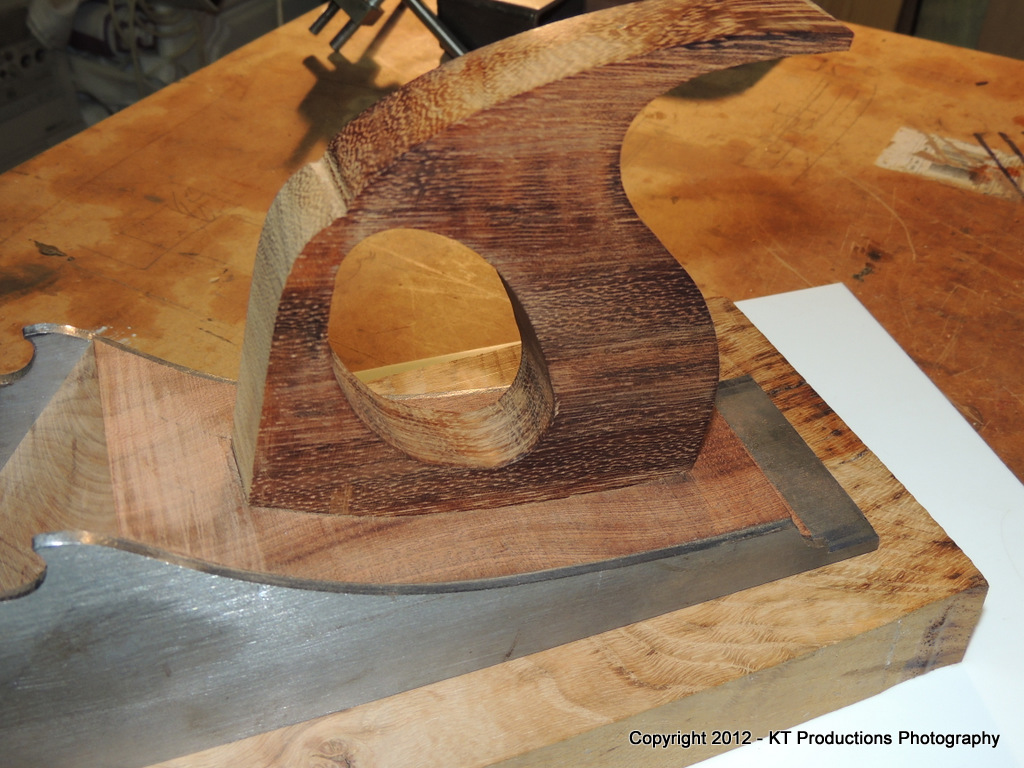
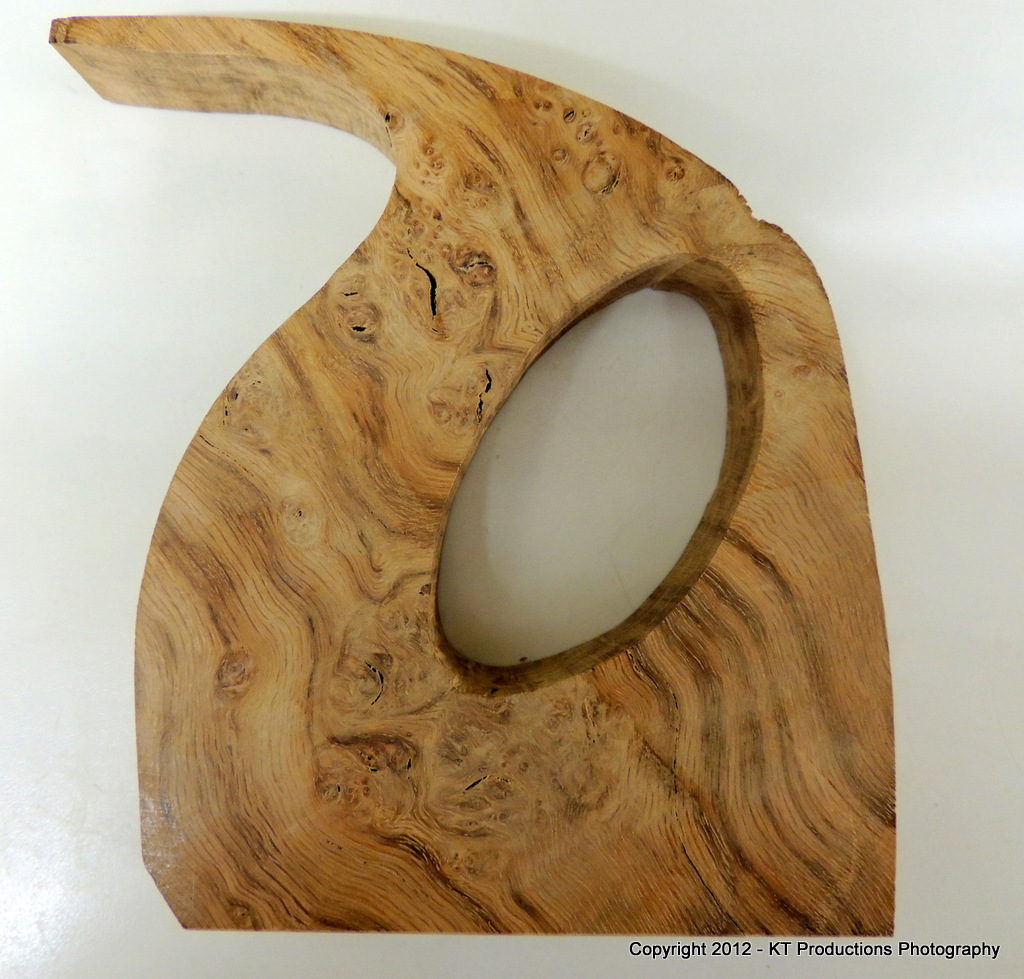
As I wait for the rasp..I thought that I was quite satisfied with the handle shape and so bit the bullet and decided to make the real one.
After choosing the right area of the burr oak board to avoid major through pockets....I thought I would put the Burgess 3 -wheeler through her paces and push her to the limits....
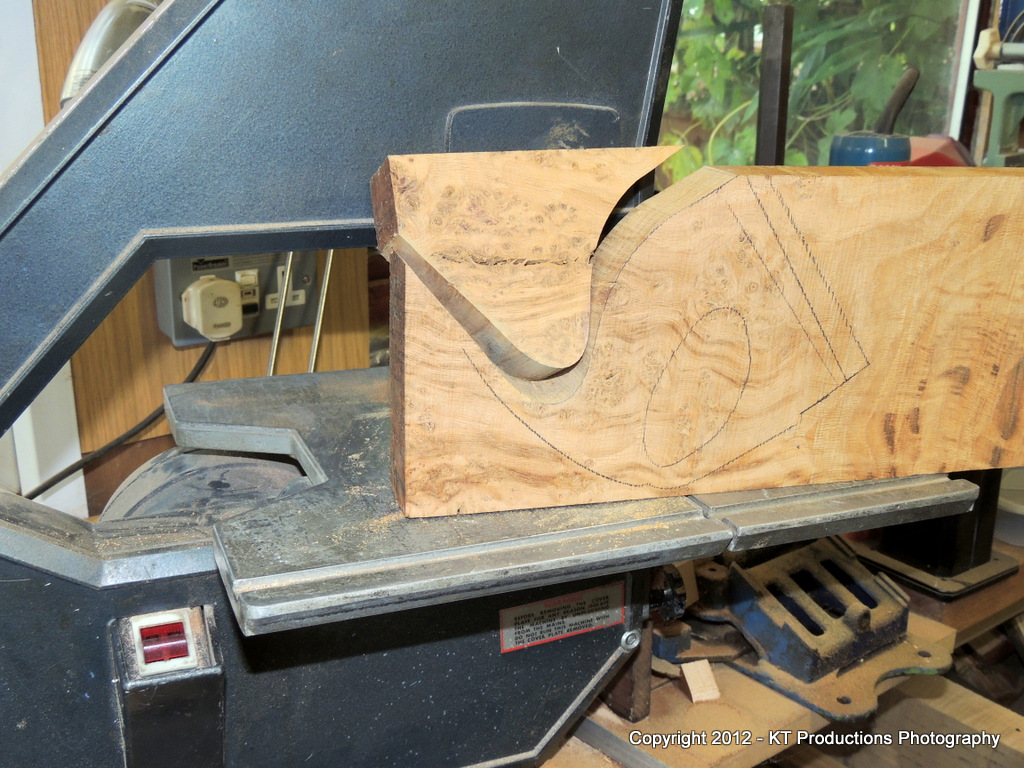
I have pushed this machine and blade to what I thought were the limit before but I wondered if I could just turn really acute corners....and it did!
Notice too how close to the line I could go with no wander...no hesitation and crisp lines.
This bandsaw is phenomenal...carrying the Tuffsaw blade...on curves and straight lines...it just goes where you point it!
Remember...this is oak and pretty thick oak too!
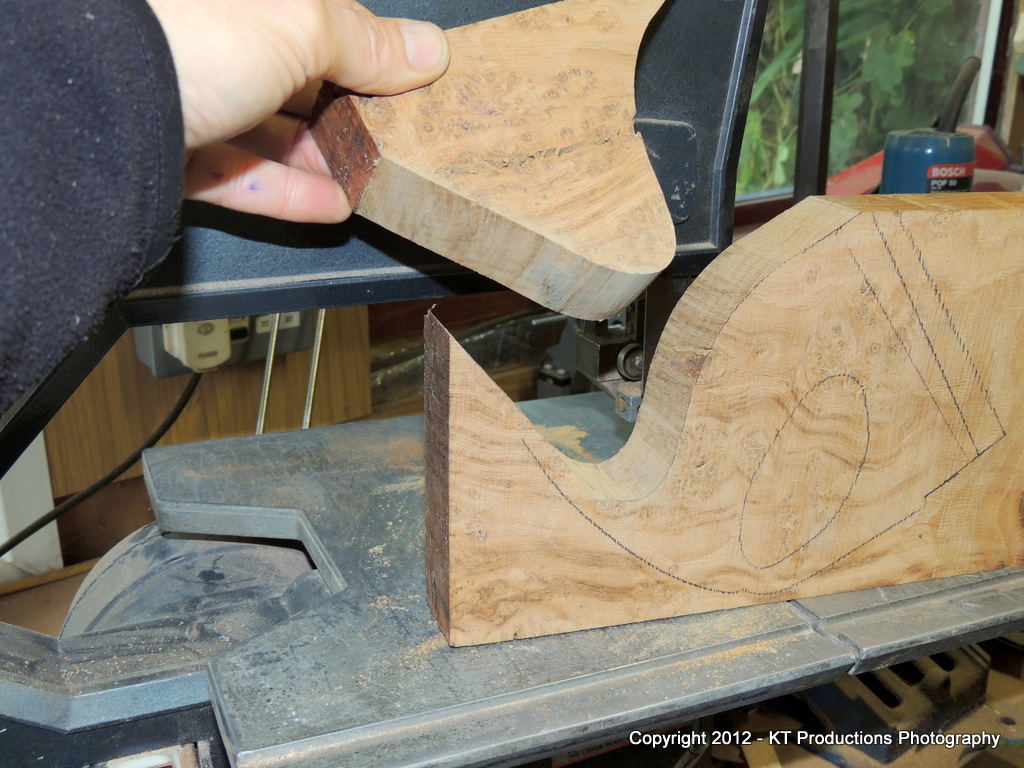
Next I flattened both sides and made them smooth and parallel using the Barron smoother...
I kept on smiling all the way through this...
You know it IS all about the tools...for me anyway. There is something about a highly tuned piece of art which makes me want to work to the best of my ability...and be able to!
So...now the hole is marked out...
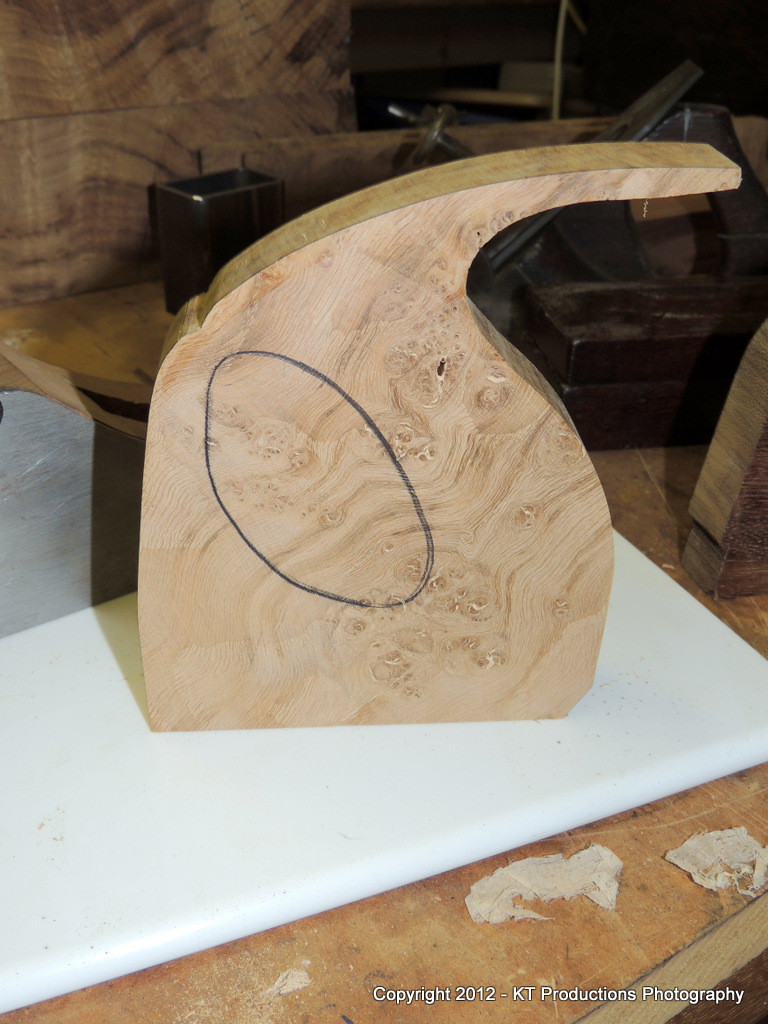
...it's on to the next stage.
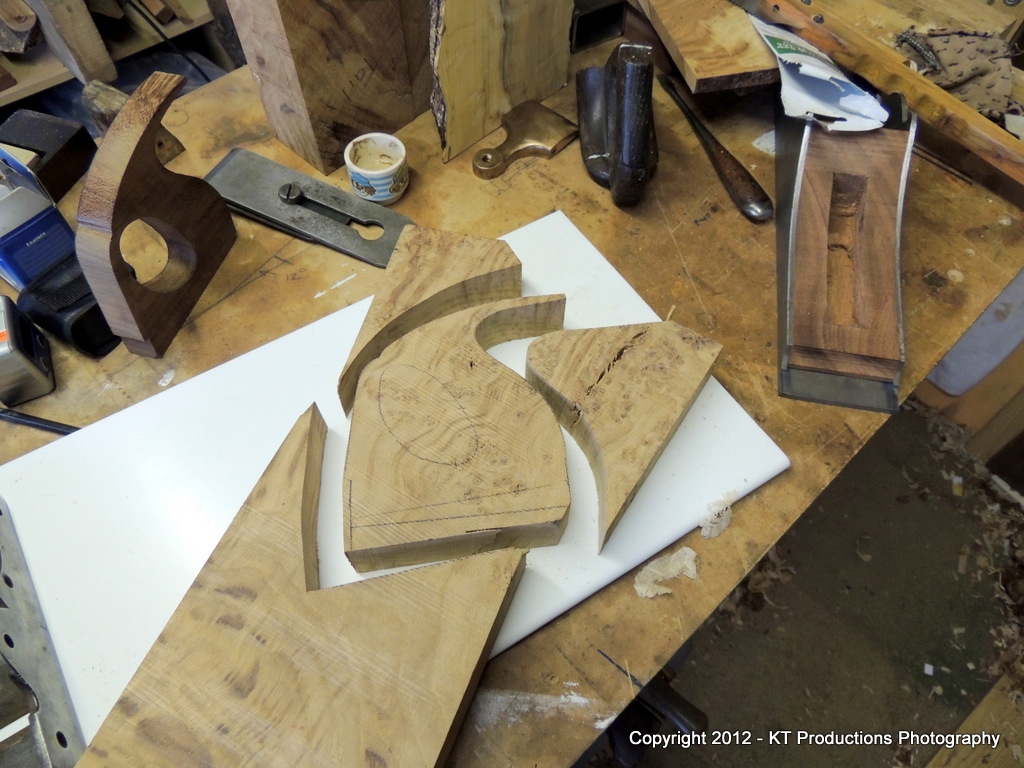
For the hole this time around I thought I would use a fretsaw...as promised...and how much more tranquil this job was...
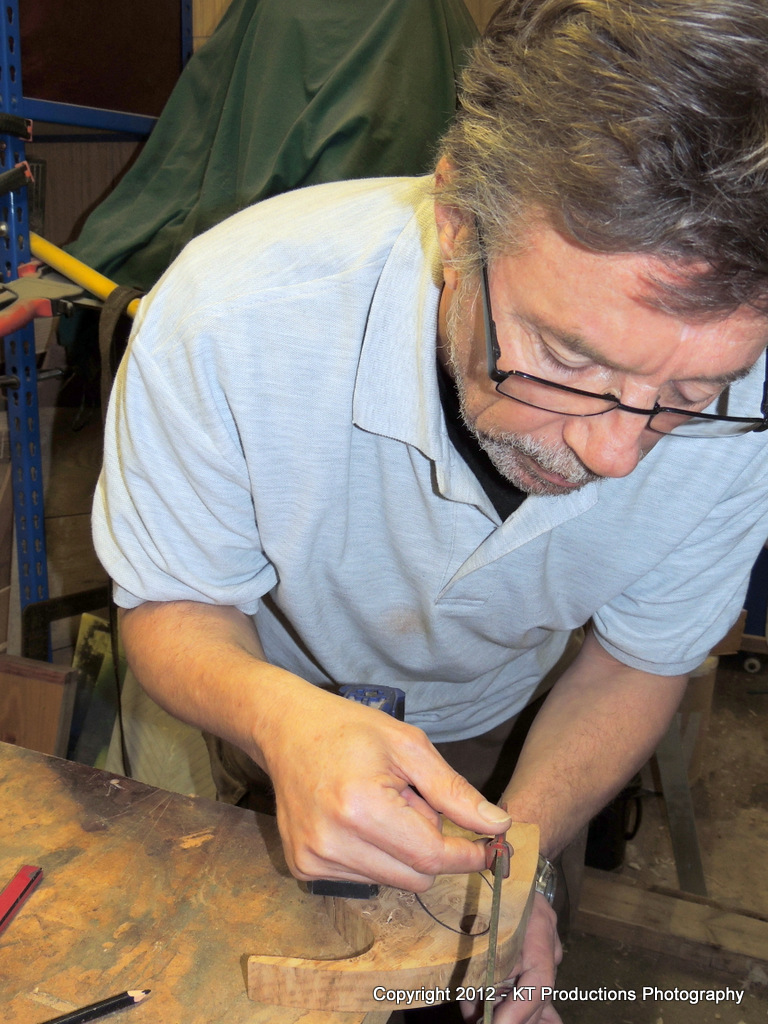
This was remarkably quick...even through thick oak....
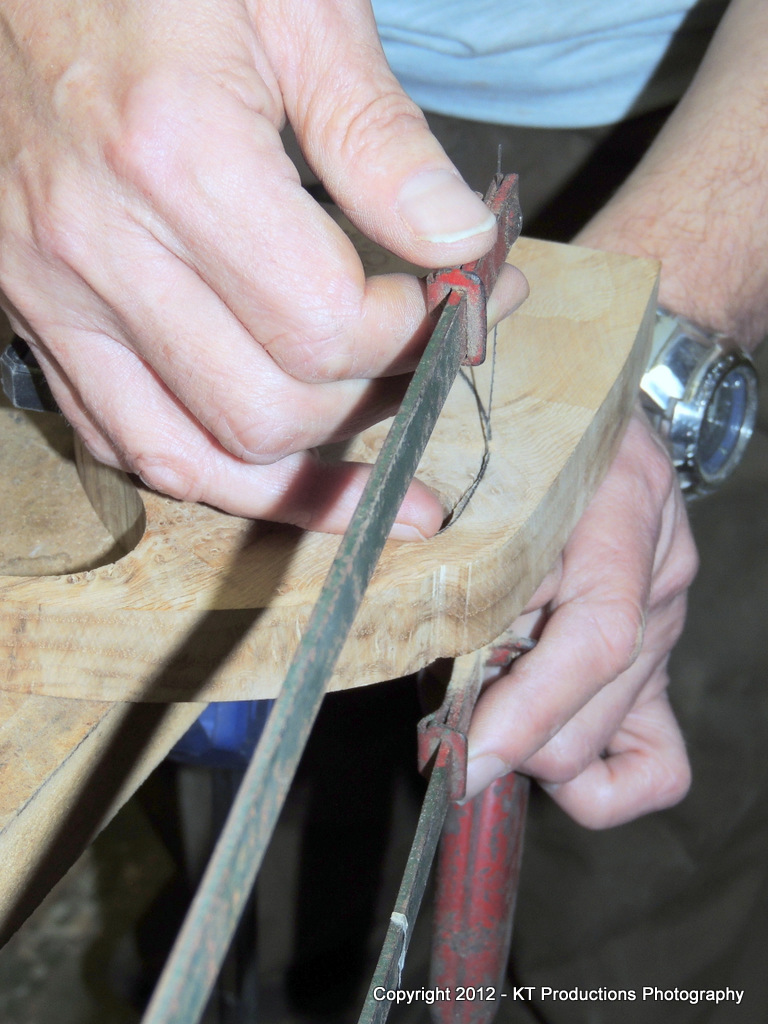
...but the control you can exercise is much greater than the jigsaw...and a LOT quieter! :mrgreen:
Start and finish are a bit ropey but apart from that there is little I need to clean up...
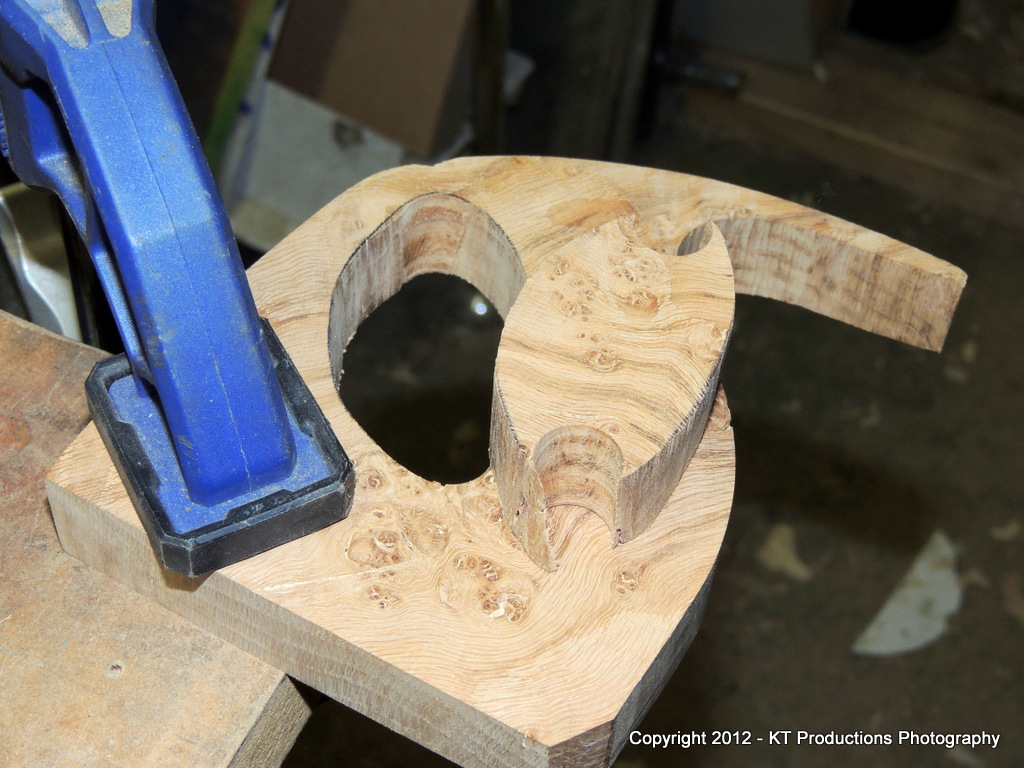
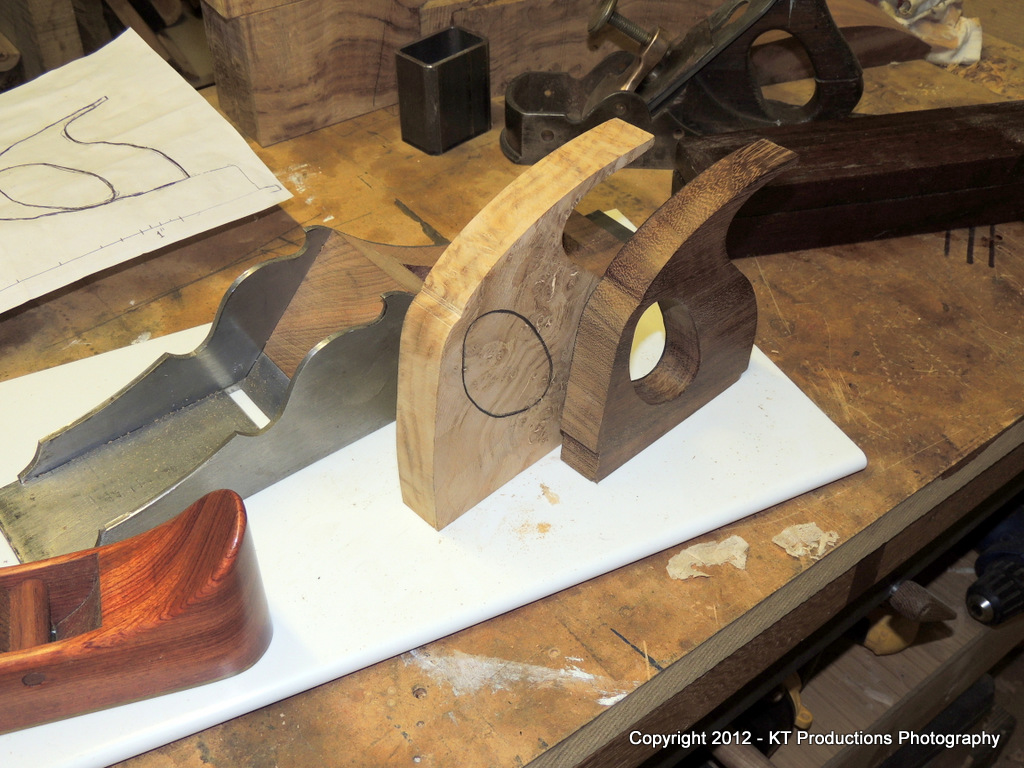
So...next to the prototype...
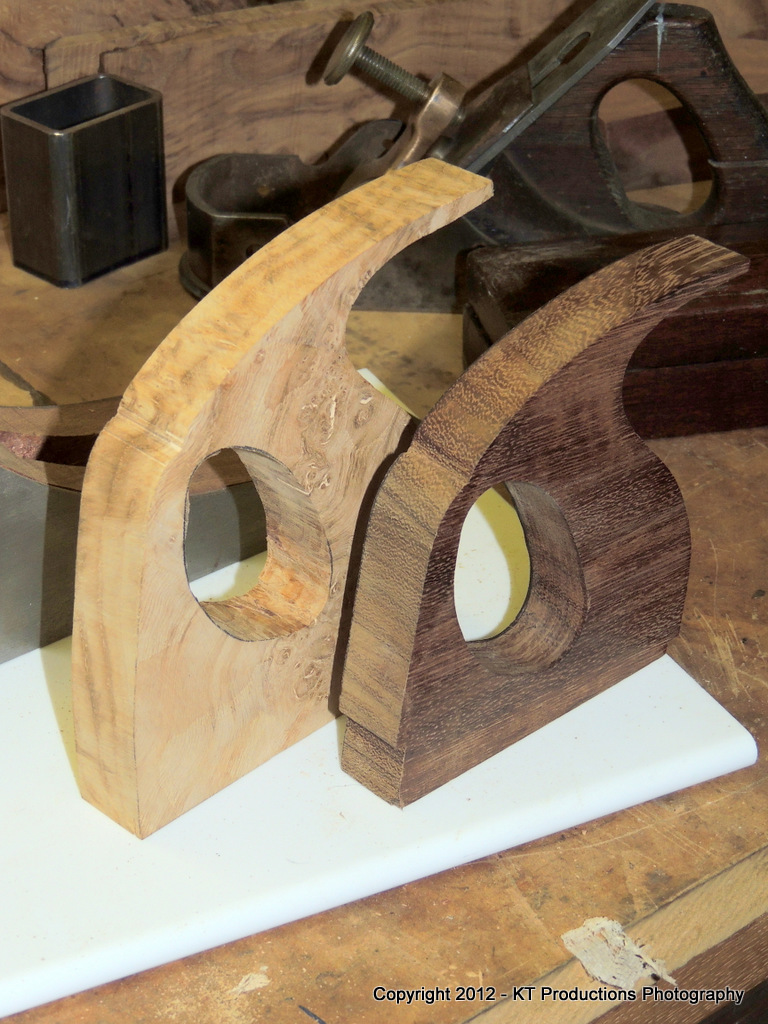
I am so glad that I picked up this burr oak from MAC Timbers...it was the largest piece there but it allowed me to pick the best areas for the parts of this plane...
This is going to be drop dead gorgeous when it's finished!
Next job...sort out the same for the base and get on and order that brass!!
Cheers
Jimi
After choosing the right area of the burr oak board to avoid major through pockets....I thought I would put the Burgess 3 -wheeler through her paces and push her to the limits....
I have pushed this machine and blade to what I thought were the limit before but I wondered if I could just turn really acute corners....and it did!
Notice too how close to the line I could go with no wander...no hesitation and crisp lines.
This bandsaw is phenomenal...carrying the Tuffsaw blade...on curves and straight lines...it just goes where you point it!
Remember...this is oak and pretty thick oak too!
Next I flattened both sides and made them smooth and parallel using the Barron smoother...
I kept on smiling all the way through this...
You know it IS all about the tools...for me anyway. There is something about a highly tuned piece of art which makes me want to work to the best of my ability...and be able to!
So...now the hole is marked out...
...it's on to the next stage.
For the hole this time around I thought I would use a fretsaw...as promised...and how much more tranquil this job was...
This was remarkably quick...even through thick oak....
...but the control you can exercise is much greater than the jigsaw...and a LOT quieter! :mrgreen:
Start and finish are a bit ropey but apart from that there is little I need to clean up...
So...next to the prototype...
I am so glad that I picked up this burr oak from MAC Timbers...it was the largest piece there but it allowed me to pick the best areas for the parts of this plane...
This is going to be drop dead gorgeous when it's finished!
Next job...sort out the same for the base and get on and order that brass!!
Cheers
Jimi
Richard T
Established Member
... and strong. =D> Good stuff Jim.
condeesteso
Established Member
looking brilliant, a nice piece of burr, and generally that must be a good choice for this component, with short grain every-which-way. But the long tail (whatever it's called) looks a little risky to me. Academic as you won't be dropping it of course.
Similar threads
- Replies
- 12
- Views
- 594
- Replies
- 8
- Views
- 984
- Replies
- 8
- Views
- 1K