jimi43
Established Member
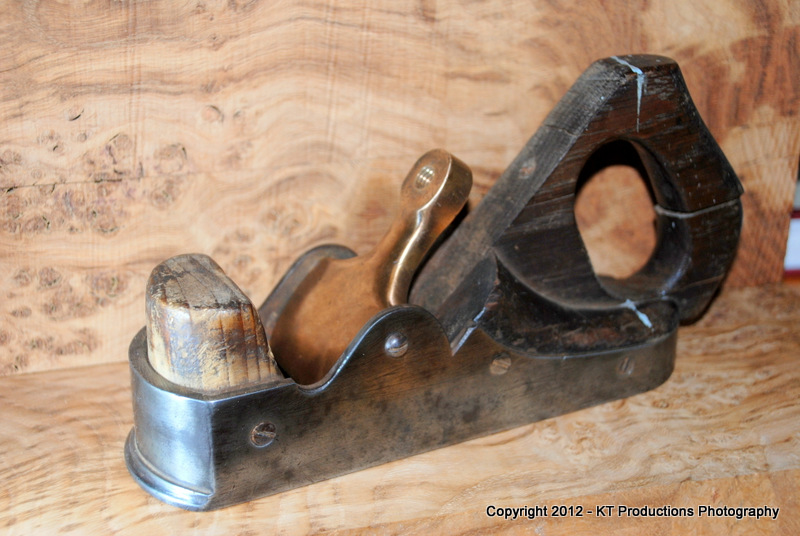
Richard...thanks for the confirmation...and that beautiful photograph of an equally beautiful plane!!!
That is more stunning that I remember if that is possible and you have made my mind up without question as to what infill stock to use...that is true eye-candy!
Ok...the reason your one doesn't go black from the steel is that is isn't steel!! :roll:
If I were to coat the steel plane of Richard's with a barrier of some kind...say varnish or epoxy...do you think that would prevent the staining which Peter quite rightly mentions might happen? Any ideas on this?
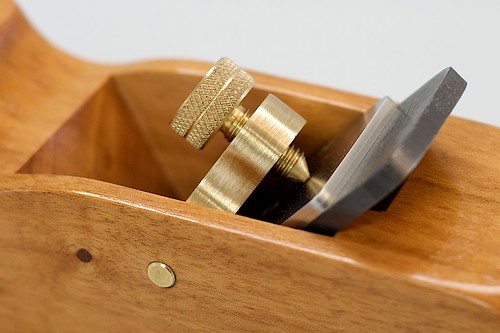
I have a solution for the screws....stainless or bronze (yes!)....and I am really wondering if a WARD iron would also be the cutter of choice too...I do so love WARD irons!
Douglas and I had a play with his various irons from Lie Nielsen and we reckon that a 5mm iron would be just about spot on...even 4mm would work...so if I make one from 01 tool steel then that would be the other option....with a 3mm cap iron.
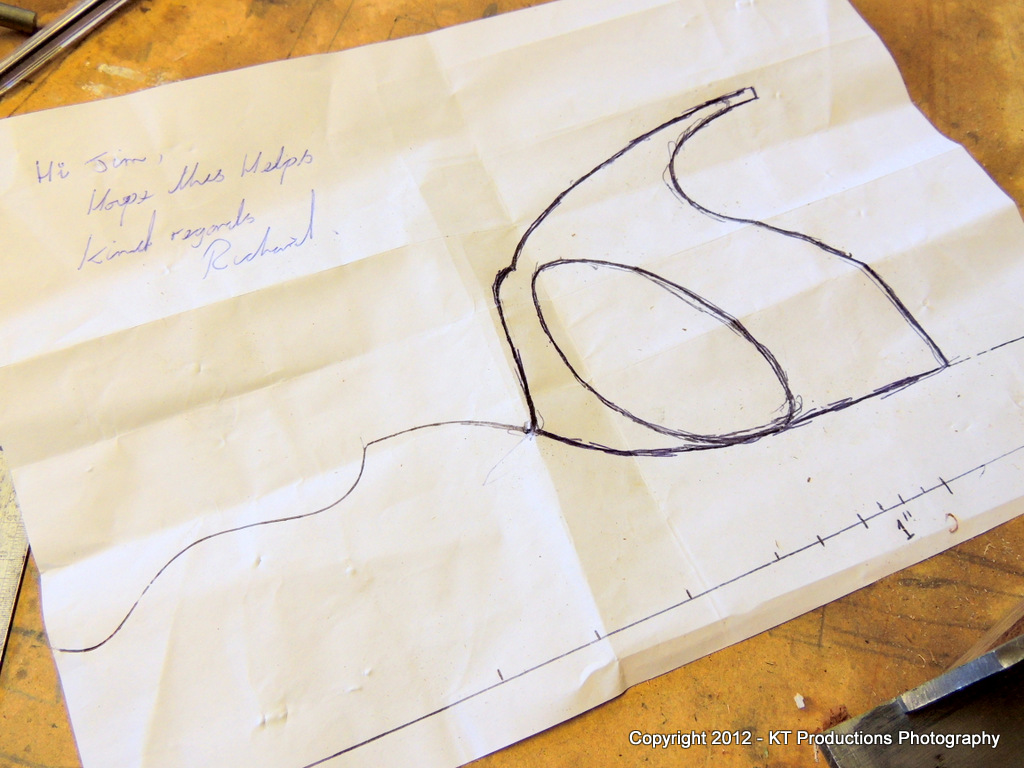
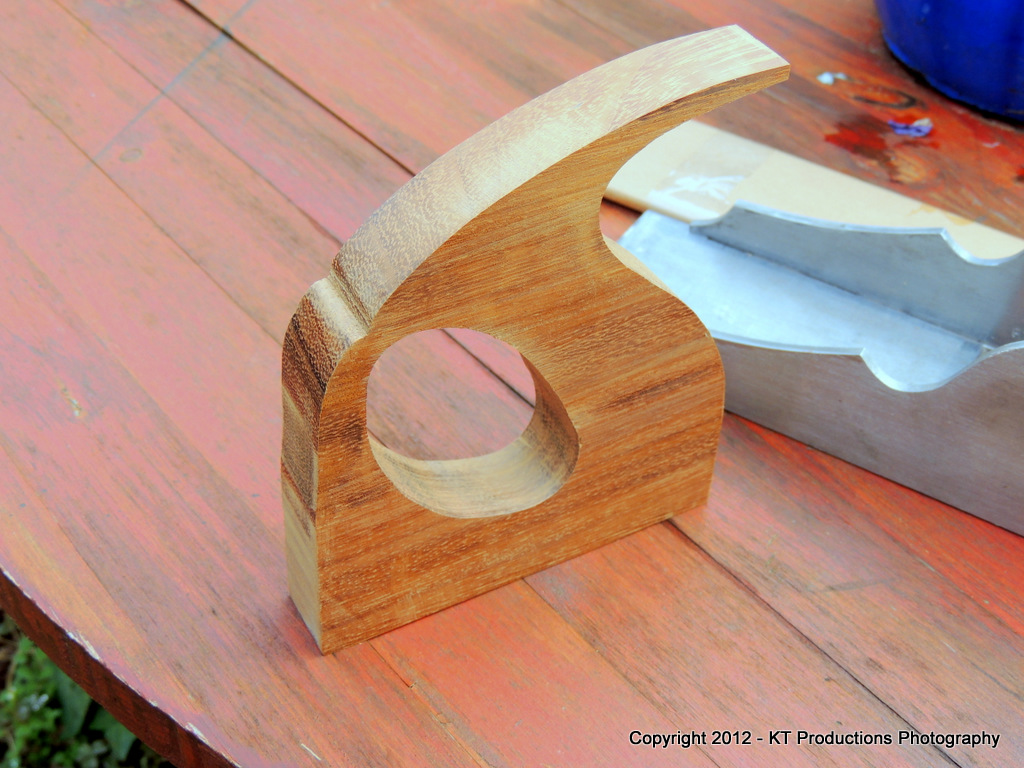
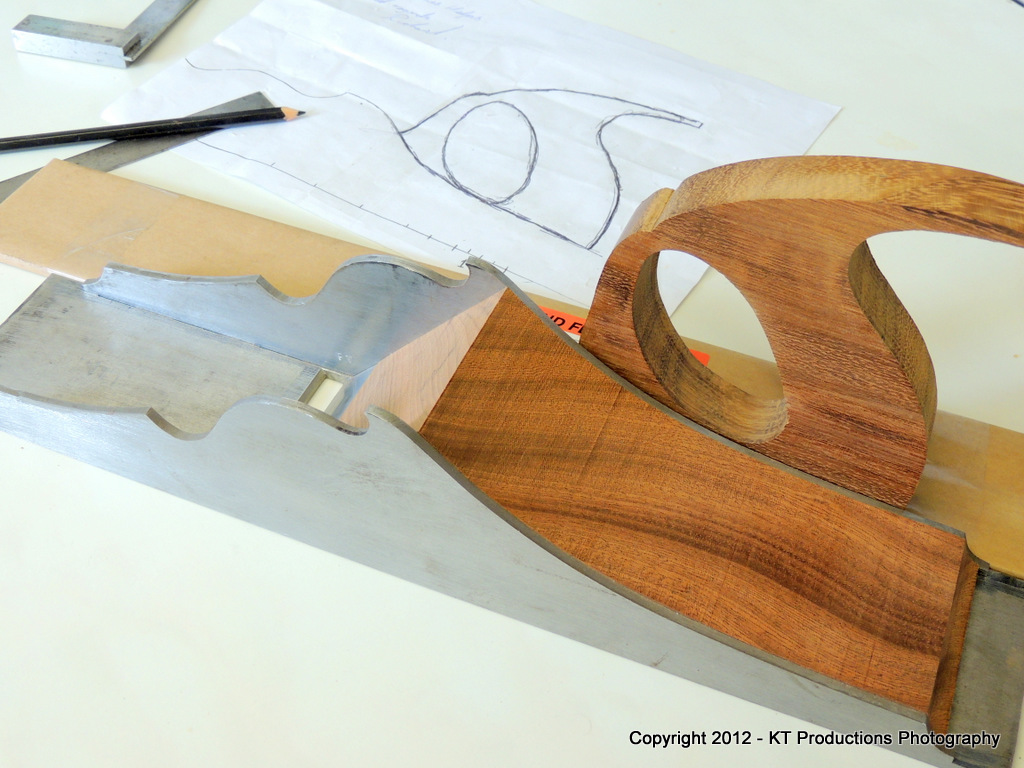
I love the shape of that handle on your Norris mate...would there be any chance of you tracing the profile...that is just perfect!
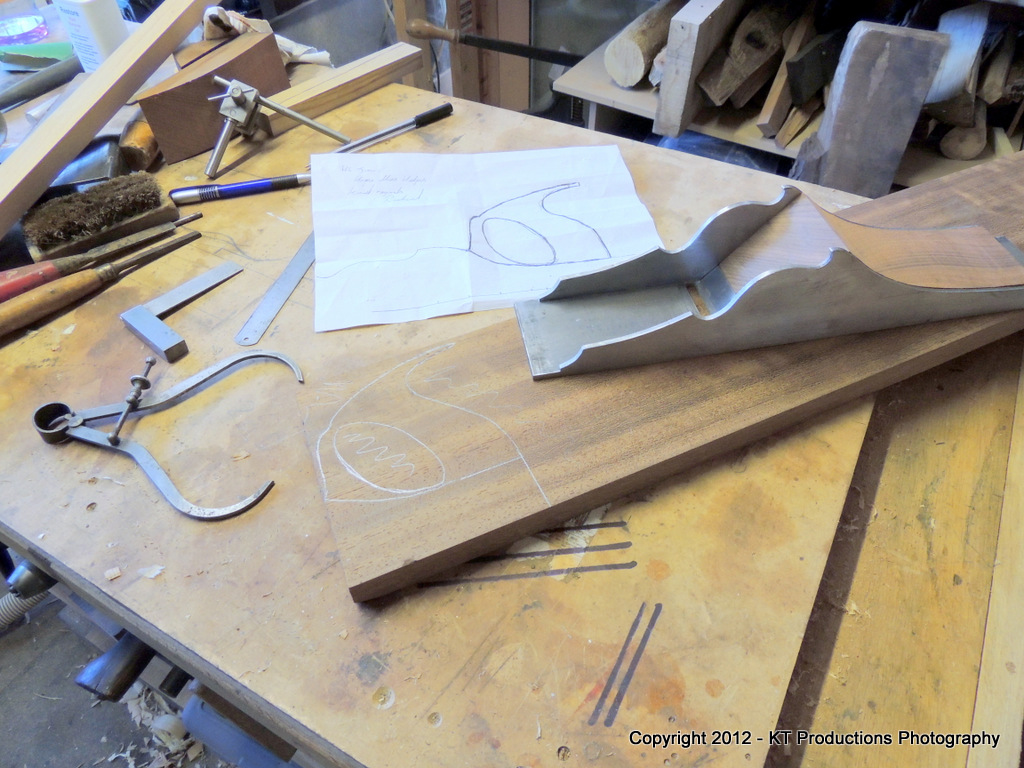
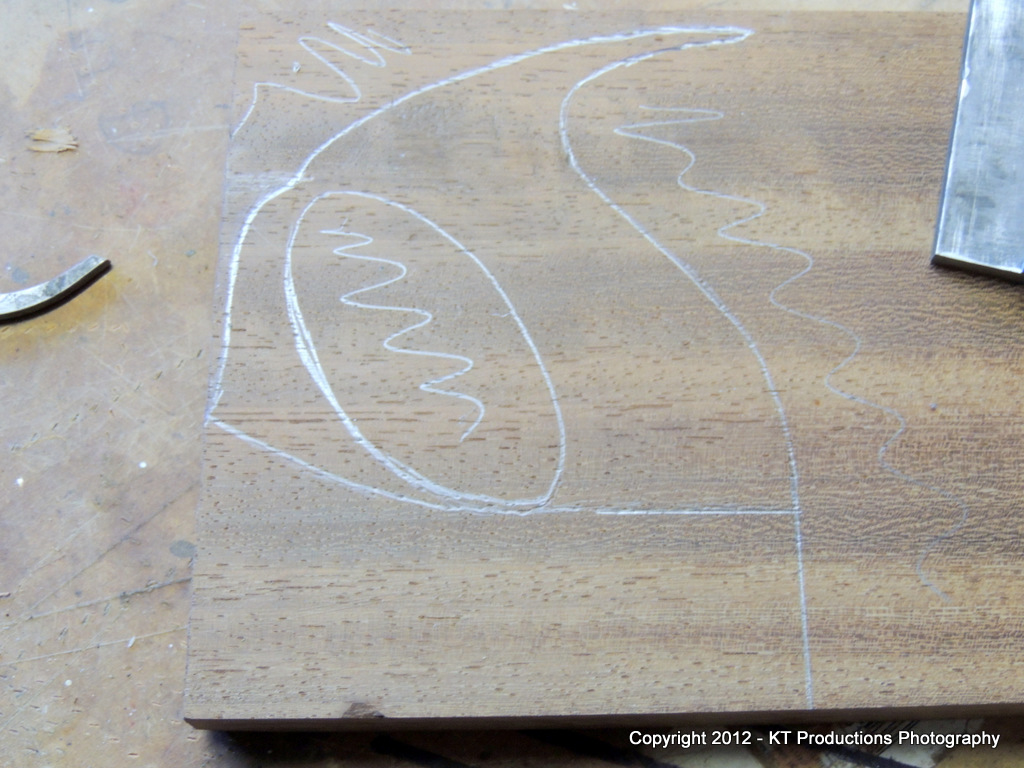
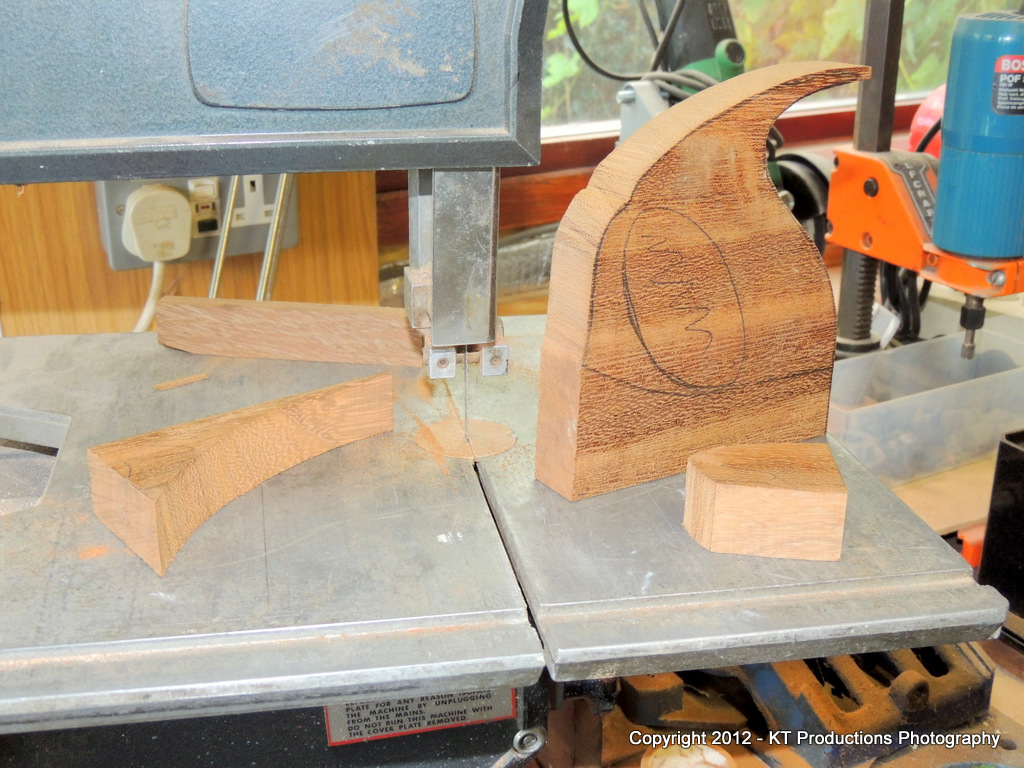
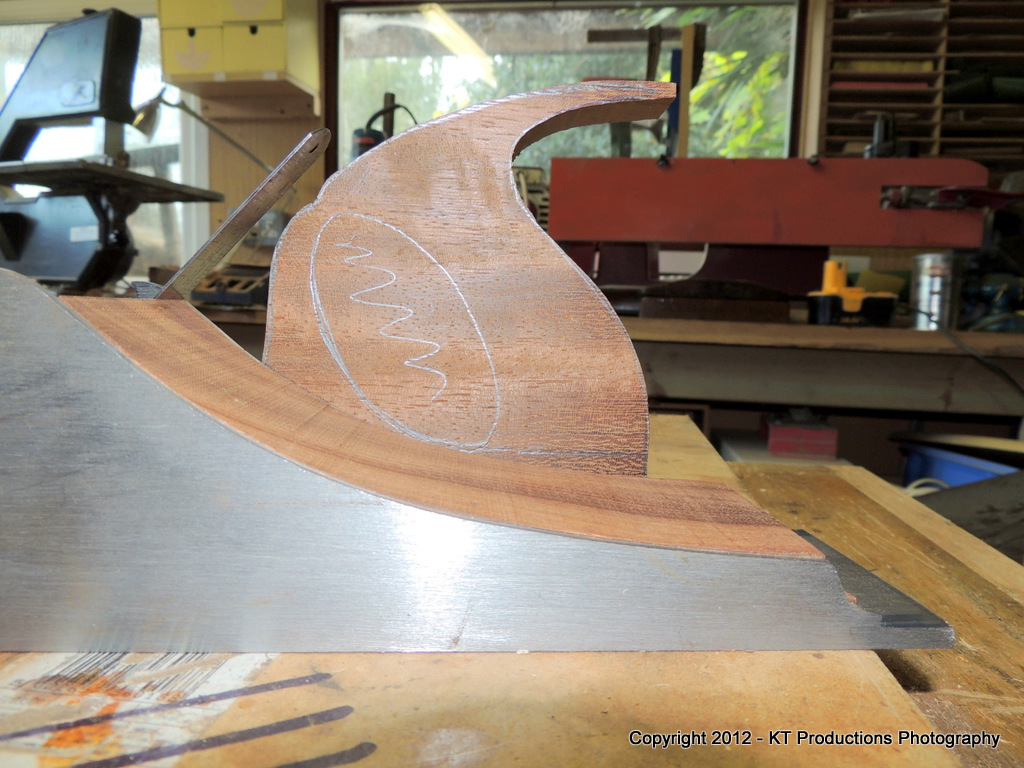
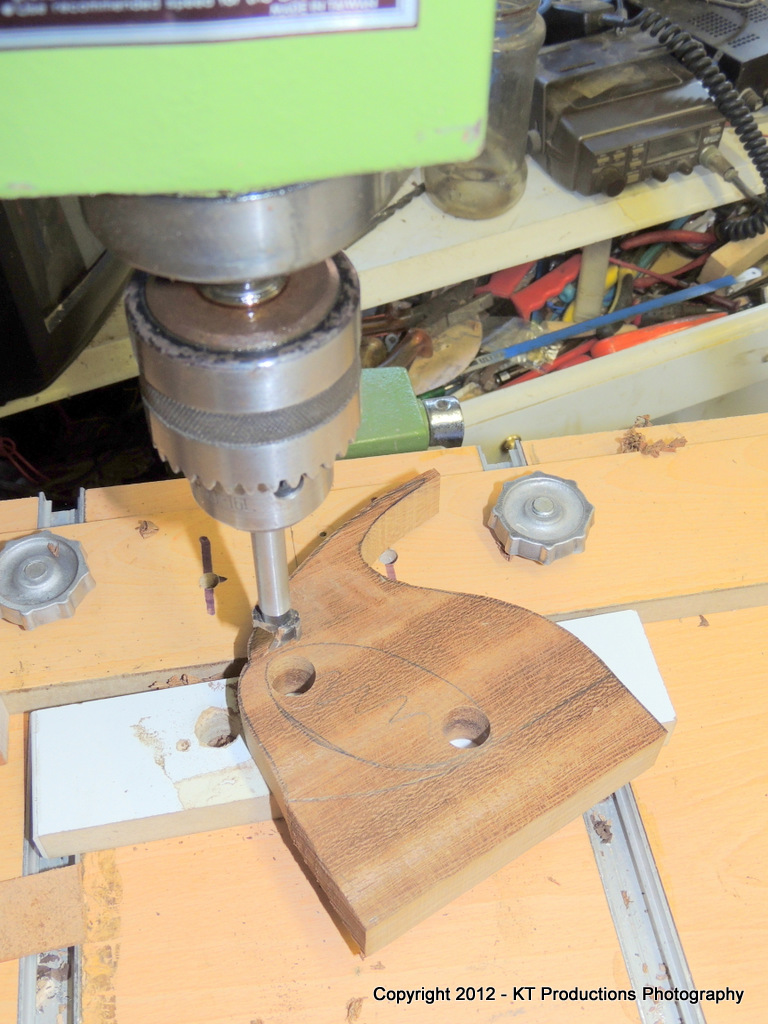
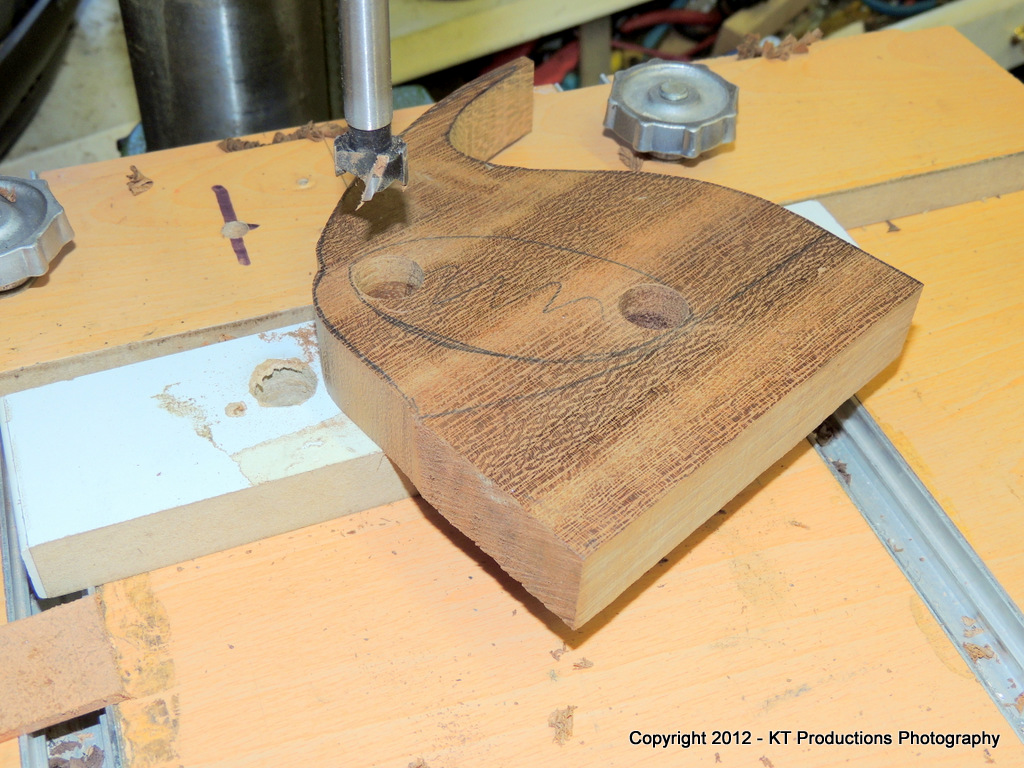
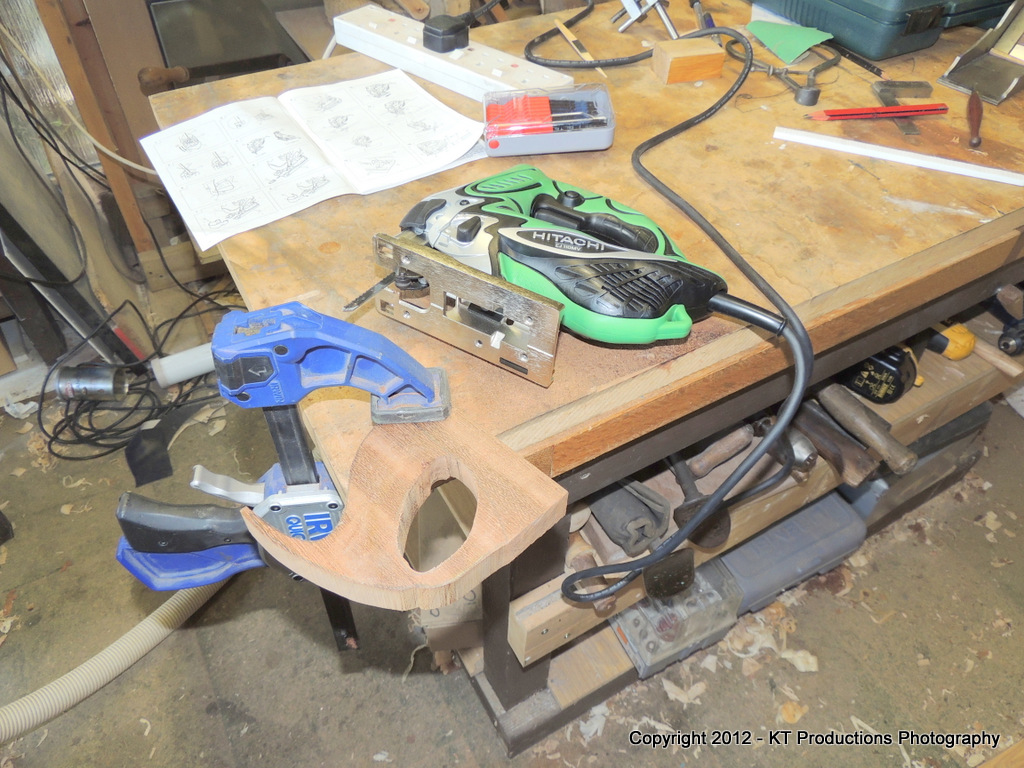
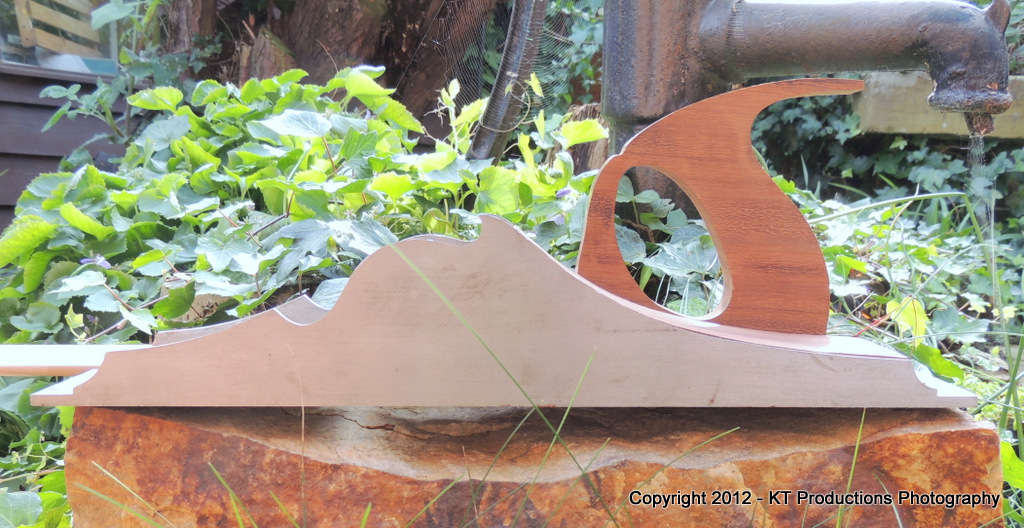
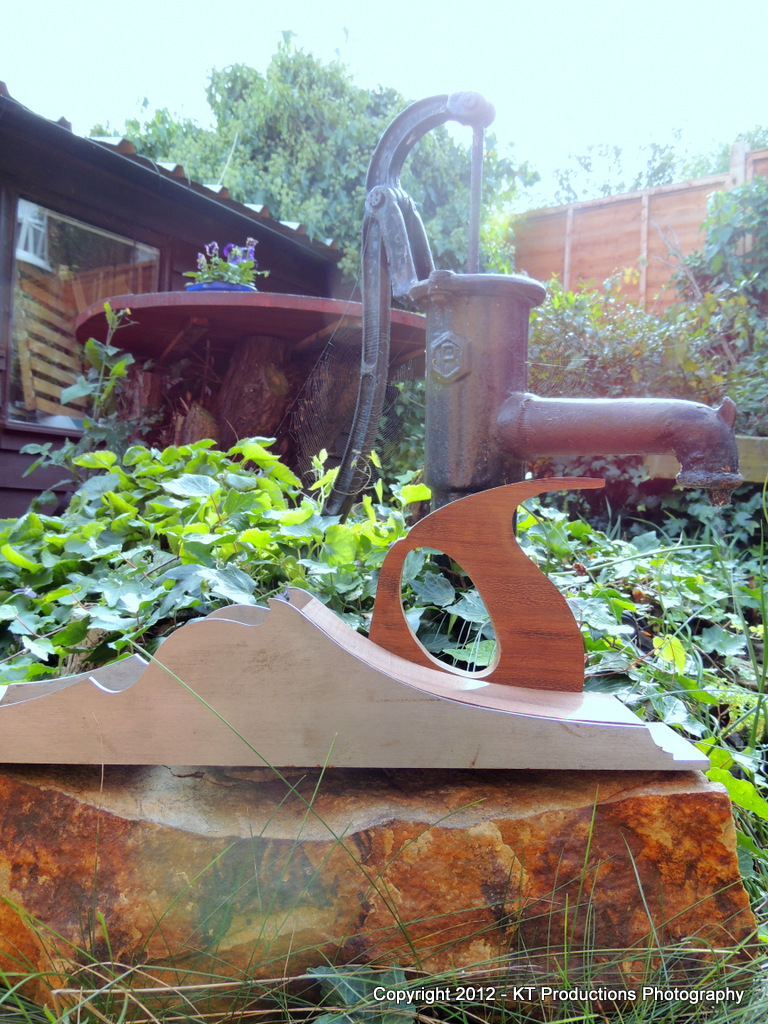
Owing to staff holidays...I have to stand in at the hotel for more shifts than I would ideally like this week but I should have time to rough out the handle with some mahogany and get an infill sorted for the front by the end of the week. I may have a design for a lever cap by then and there will be no adjuster on this plane...you have tipped the balance of my mind and I am firm on this.
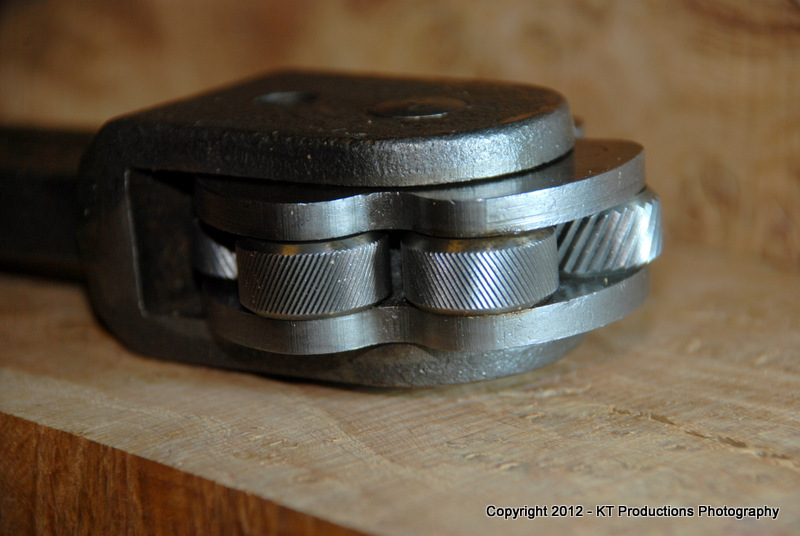
I probably will cut a square threaded knob and also an ACME one...I can do the square on the lathe...that will be fun! AND...I found a most beautiful knurling tool on FleaBay this week.....
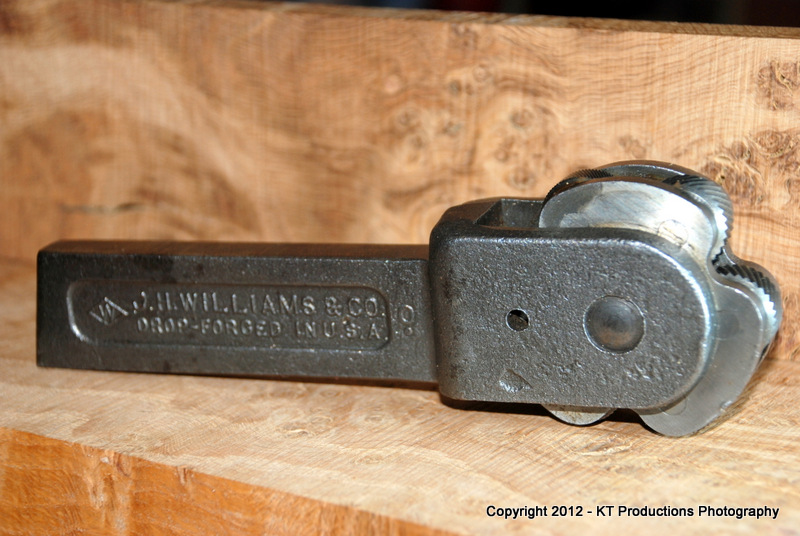
I don't know if I am going to cut my own knurl of sorts by hand (read lathe) or whether I'm going to use a knurling tool straight....but this has a beautiful set of gnashers...typical American engineering...over engineered and stunningly made....
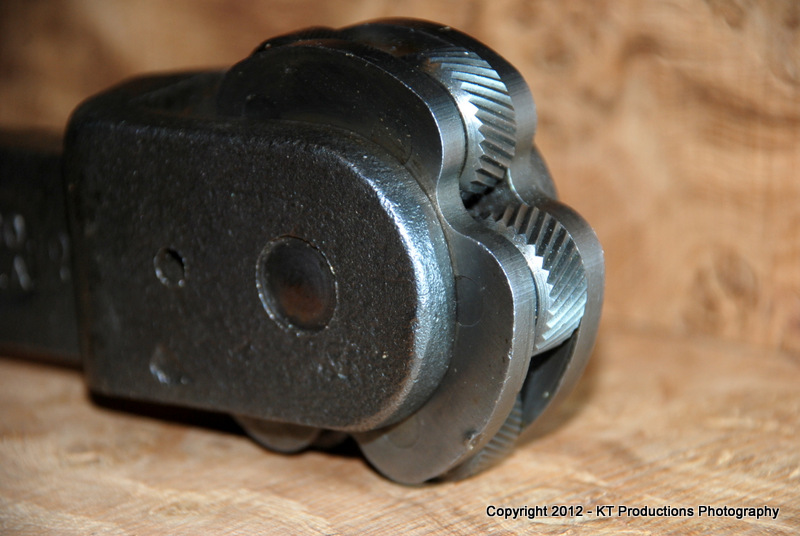
This is the Cadillac of knurling tools for sure!
Anyway...more on that aspect of the build as we progress. The 1" brass round is currently being whittled into a knob blank...so I will photograph that progression this week...along with my attempt at square type threads!
I will leave you all tonight...particularly those amongst you from Health and Safety with this picture of Douglas cutting up a little log of box....

Now...far be it from me to suggest that he has lost his marbles...let alone nearly his fingers but even I...the crazy loon of the cave would not have attempted this cut...but I have to say...all the normal precautions were taken...flattened bottom...slow cut...keen thin kerf blade....half a million in insurance....first aid trained accomplice standing by with a DSLR and a box of plasters.... :mrgreen: :mrgreen:
Yup...I think it was safe enough! :shock:
More on the "cutting day"...as I get them.
Jim
That is more stunning that I remember if that is possible and you have made my mind up without question as to what infill stock to use...that is true eye-candy!
Ok...the reason your one doesn't go black from the steel is that is isn't steel!! :roll:
If I were to coat the steel plane of Richard's with a barrier of some kind...say varnish or epoxy...do you think that would prevent the staining which Peter quite rightly mentions might happen? Any ideas on this?
I have a solution for the screws....stainless or bronze (yes!)....and I am really wondering if a WARD iron would also be the cutter of choice too...I do so love WARD irons!
Douglas and I had a play with his various irons from Lie Nielsen and we reckon that a 5mm iron would be just about spot on...even 4mm would work...so if I make one from 01 tool steel then that would be the other option....with a 3mm cap iron.
I love the shape of that handle on your Norris mate...would there be any chance of you tracing the profile...that is just perfect!
Owing to staff holidays...I have to stand in at the hotel for more shifts than I would ideally like this week but I should have time to rough out the handle with some mahogany and get an infill sorted for the front by the end of the week. I may have a design for a lever cap by then and there will be no adjuster on this plane...you have tipped the balance of my mind and I am firm on this.
I probably will cut a square threaded knob and also an ACME one...I can do the square on the lathe...that will be fun! AND...I found a most beautiful knurling tool on FleaBay this week.....
I don't know if I am going to cut my own knurl of sorts by hand (read lathe) or whether I'm going to use a knurling tool straight....but this has a beautiful set of gnashers...typical American engineering...over engineered and stunningly made....
This is the Cadillac of knurling tools for sure!
Anyway...more on that aspect of the build as we progress. The 1" brass round is currently being whittled into a knob blank...so I will photograph that progression this week...along with my attempt at square type threads!
I will leave you all tonight...particularly those amongst you from Health and Safety with this picture of Douglas cutting up a little log of box....
Now...far be it from me to suggest that he has lost his marbles...let alone nearly his fingers but even I...the crazy loon of the cave would not have attempted this cut...but I have to say...all the normal precautions were taken...flattened bottom...slow cut...keen thin kerf blade....half a million in insurance....first aid trained accomplice standing by with a DSLR and a box of plasters.... :mrgreen: :mrgreen:
Yup...I think it was safe enough! :shock:
More on the "cutting day"...as I get them.
Jim
") There is, of course, one way to guarantee nothing unusual happens - have a camera with you!
There is, of course, one way to guarantee nothing unusual happens - have a camera with you!