Table Saw Tenon Jig

UKworkshop.co.uk

Help Support UKworkshop.co.uk:

This site may earn a commission from merchant affiliate links, including eBay, Amazon, and others.

Stuartgb100

Established Member
Joined
11 Jul 2022
Messages
34
Reaction score
5
Location
East Anglia
Fairly new to woodworking and so would be grateful for some advice please.
I have several large and heavy oak external doors to make. They will be fl&b and vertically boarded.

I have a morticer, so no problems there, i hope.

Would like to form the tenons with my Wadkin AGS10 using a 'safe' jig.
The sections needing tenons are likely to be up to 63 x 200mm in section, and up to 1500mm long.

Can this be done safely and, with a home-made jig, please ?
 
If you mean the issue of standing a 1500mm oak beam on it's end whilst running it through a table saw, I wouldn't.
I'd use a band saw to cut close to the line and then a small plane
 
You haven't mentioned the reach of the tenons, which is more pertinent to the operation than the width of the rail.

But the best bet is a tenoner. The next best bet is a spindle moulder ....

Given that tenons need to be (1) a good fit and (2) out of wind.
 
There are end-on tenoning jigs available, though I'm not sure how well any of them perform. I would always feel a bit dubious about passing metal assemblies of this kind over the blade of a circular saw. Any slight lapse in concentration, then there will be a metal-on-metal graunch, or worse. I have in the past, used a home-made wooden ones, when my other machinery was out of action, though I am not really a fan of this approach.

The usual method for machining tenons on a circular saw, was to take out an equal rebate from each side, by passing the stock multiple times ,over the revolving saw blade using a sliding, mitre-fence. A really bad habit, was then to slide the stock sideways ,over the blade to clean the ragged steps off. It was bad for two reasons: 1 - It wasn't particularly safe, and 2 - It wrecks the bearings in the spindle assembly, on the saw.

I now have two choices for cutting tenons: I can either cut them in a spindle moulder, or on my Radial Arm Saw, using the multiple pass, method, the latter, of which, is my preferred option for deeper tenons.
 
Have you a sliding table on your saw ?. You can make your tenon cuts that way.
I wouldn't bother cleaning them up. Personally I like the rough surface thats left, I feel it makes for better gluing.
 
Many thanks all for the suggestions.
I'll have to give it some thought as to what's best for me going forward.
You've confirmed my thought that putting large timber sections vertically past a table saw is not good.
Best Regards.
 
I've done door sized tenons quite safely using this method but it's a bit slow and inaccurate as well as blooming dusty. the reason joiners still use through tenons is because of tenoners. on a 4 inch tenon the multi cross cut way is really tiresome.
I consider shorter tenons. shoulders on the cross cut(table saw) then bandsaw and tickle in using a router plane.
 
@Stuartgb100 You might have already seen this video on building Oak fl&b doors but if not it's worth a watch. He uses a not so safe jig to cut his tenons on his Wadkin.

 
HE would certainly not approve as I tend to remove the riving knife and crown guard to cross-cut the waste away. I use the cross-cut slider which I extend the width of by fixing a strip of about 1x1 to the slider to give the wood being cut a more secure and steady hold. The blade is set at the required height to remove the waste and when finished I run the blade randomly to clean any little bits missed by the first cuts. Once set up and trial cuts done you have the means of doing repetative tenons. By the way,I still have all of my fingers even at 80!
 
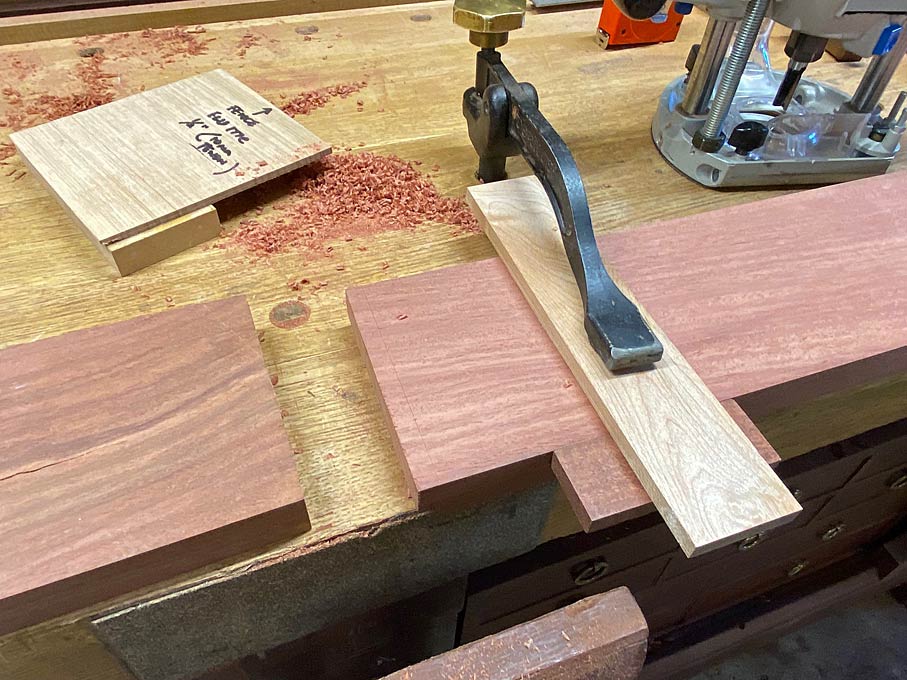
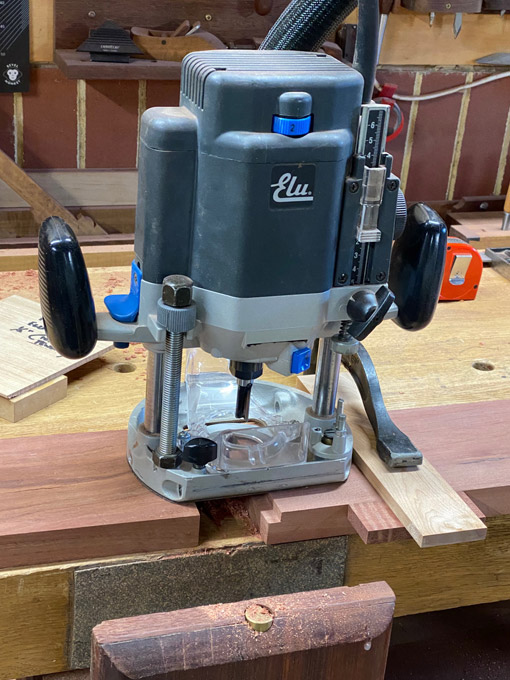
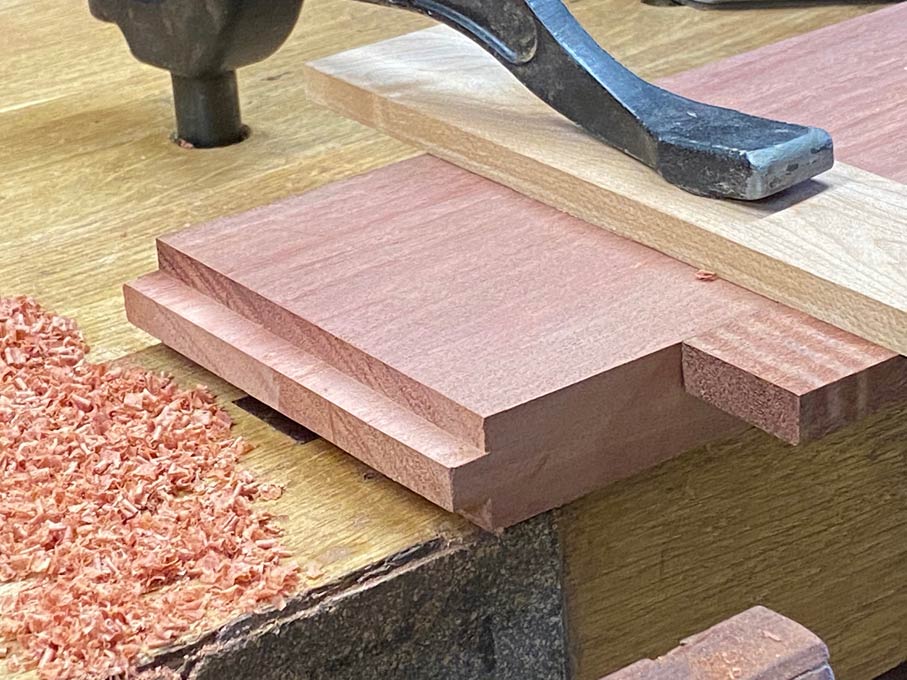
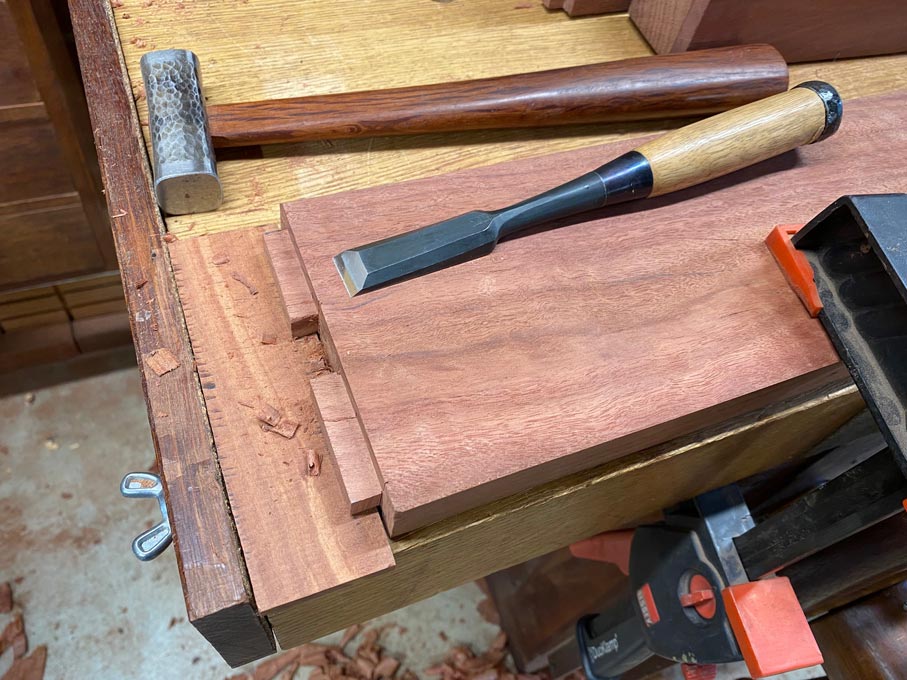
You could use a router for the tenons. Below is a method I used recently to create stub tenons for the side rails of a couple of beds I am building. Usually I would use a bandsaw or backsaw to shape tenons, but these rails were too long.

The essential components are a fence to guide the router, and a depth stop to position the fence on each side of the board. These are in the first photo. Article extract below.

Regards from Perth

Derek


The tenons were planned to be 10mm x 10 mm. These were made with a router and a simple fence ...


29.jpg


The fence is positioned by a depth stop (top left).


30.jpg


... flipped, set up, and routed again ...


31.jpg


Saw and chisel to a matching fit ...


33.jpg
 
Back
Top