


mailee
Established Member
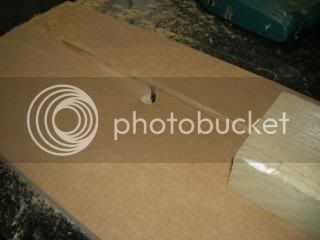
Ok here is how I make finger joints on the router table. I find this method quick and easy once set up. Here is the basic setup of a flat base plate with a hole for the cutter and a rail of the width of the fingers required.

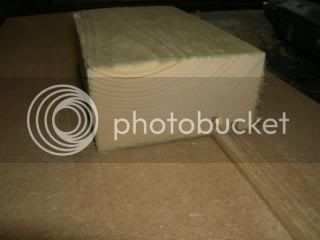
Any pushblock can be used as long as it is square. Just run the block through the cutter to produce a channel for it to ride on the rail.
Here is the view of the block in place and the cutter protruding through the table the same height as the rail.
In use the wood is held firmly against the block and fed through the cutter. After the first pass with the edge of the timber against the rail step it over and continue cutting.
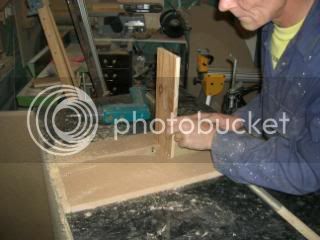
For the next piece of timber to be cut run a scrap piece through and reverse it so it will give the required offset. As you can see the fingers turn out very well.

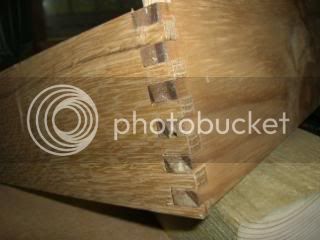
After cutting all of the fingers the fit is very neat and rady for glue and sanding.
It does mean that you must make one jig for each size of fingers you need but they are quickly made as you can see. :wink:
Any pushblock can be used as long as it is square. Just run the block through the cutter to produce a channel for it to ride on the rail.
Here is the view of the block in place and the cutter protruding through the table the same height as the rail.
In use the wood is held firmly against the block and fed through the cutter. After the first pass with the edge of the timber against the rail step it over and continue cutting.
For the next piece of timber to be cut run a scrap piece through and reverse it so it will give the required offset. As you can see the fingers turn out very well.
After cutting all of the fingers the fit is very neat and rady for glue and sanding.
It does mean that you must make one jig for each size of fingers you need but they are quickly made as you can see. :wink: