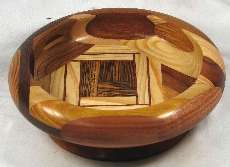
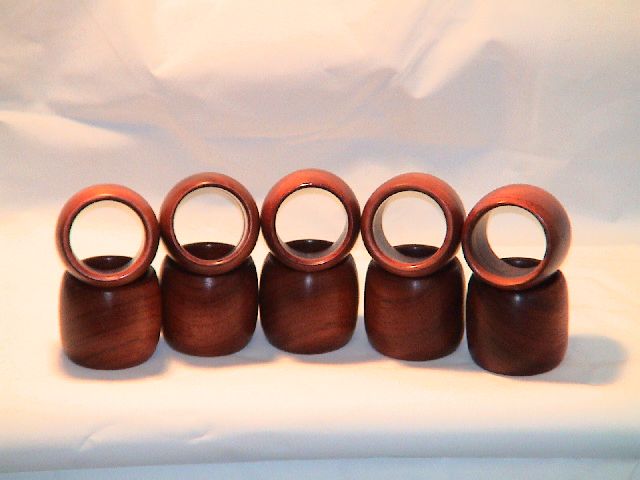
One Small Step for....

UKworkshop.co.uk

Help Support UKworkshop.co.uk:

This site may earn a commission from merchant affiliate links, including eBay, Amazon, and others.
Status
Not open for further replies.
I just thought I would share this with the group too :lol: A mate of mine was "tidying" the garden and cut a huge lump off his wifes beloved syringe bush (spelling?). I took the lump home and made her this so my mate didnt end up with lumps chopped off of him :lol: :oops:

Duiker-seringe1.jpg
 
Duiker":2ebrurek said:
I wanted to show you my "utility mushroom" too. Two bowls for the price of one? It is turned from an elm burr and finished in wax. See the next picture for the full effect.

Don't mind at all Mick, always got room for a timely piece in beech, and I like the funky Fungi cluster, as I've said somewhere before though, there's not Mushroom inside that box.
 
Hi Chas,

You know I remember that gag now you mention it! I've posted that pic before me thinks? Oh pipper! Never mind, it's the age you know!

I'm just finishing a couple of bits this week which I'll post next week so I don't get too boring ;-))

Mick
 
Duiker":388osncn said:
Hi Chas,

You know I remember that gag now you mention it! I've posted that pic before me thinks? Oh pipper! Never mind, it's the age you know!

:lol: (link)

Duiker":388osncn said:
I'm just finishing a couple of bits this week which I'll post next week so I don't get too boring ;-))

Mick

May have to wait a couple of days for a response from me Mick, driving south next weekend for a few weeks, unfortunately passing through the high country a few miles south of you so can't get to see what makes all these mushrooms propagate. I presume it has something to do with the moisture content of your area.
 
Hi Mick, how about trying some of these
click on picture for more

I would love to know how he gets such a good mating surface on the pieces, when I have tried I always seem to have a visible glue line showing somewhere when turned.
 
Might know the guy was never at his lathe to explain how the oddball traditional tools were used.

DSC01537%20(Small).JPG


Bowl potential:
DSC01527%20(Small).JPG
 
Back in the swing again after catching up on some of the chores:

One Chestnut Fruit/Salad bowl finished in 'Chestnut' oil.
Don't know why I picked this bit of wood for a restart, dry as a bone, (read hard) full of rogue grain, cracks etc.
Still with a bit of CA and sanding dust filler it rings like a bell.

_________ ___click on images for larger view

_____________Chestnut (235mm)

And another result following an extended battle with red dust:

_________

_____________Padauk (290mm)
 
Hot off the machine today.

_________ ___click on images for larger view

_____________Exeter Elm(300mm)

_________

_____________Ash (280mm)
 
Now what do you do with those little triangular bits left over from bandsawing your turning blanks.

Well if the hot weather has got to you, you set about producing a few Serviette Rings for a member of the family just to prove you remembered how to organise Batch Production.

_________ ___click on images for larger view

_________Exeter Elm (30mm bore x 23mm)

_________

__________Padauk (30mm bore x 40mm)
 
Very impressive Chas!

I think I would have found the first one challenging, the second one fun, the third one a bit boring, and teh fourth one would have been the last!

I take my hat off to your perseverance and patience!

Regards

Gary
 
Funnily enough Gary done as a batch process it is no more boring(sorry) than a bowl etc. because a finished item does not appear until near the end

1. Prepare a batch of rough cylinders approx. 50mm dia on bandsaw.
2. Turn up cylinders (long enough for two rings) all to same nominal external dimension. *
3. Bore all central holes to same size and sand bore.
4. Part off into two rings of nominal length.
5. Size all rings to same length. ** and sand ends.
6. Turn up tapered jamb chuck spindle to mount rings on.
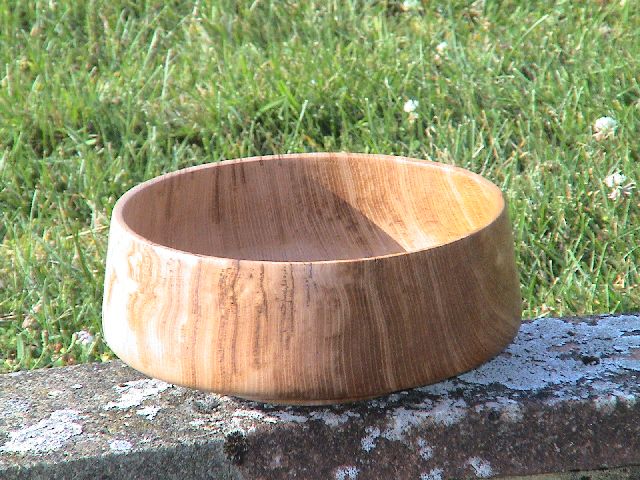
7. Mount each ring and turn outer shaping and sand finish. (not too tight or rings may split)
8. Immerse rings in diluted cellulose sanding sealer, remove and drain until dry. (fixes any stress cracks)
9. De-nib with webrax.
10. Reduce diameter of jamb chuck spindle by the thickness of a layer of soft cloth.
11. Attach soft cloth to spindle with spot of CA glue.
12. Apply wax to each ring in turn and lightly hold on start of jamb spindle to polish inside of each ring from both ends.
13. Push ring firmly onto jamb spindle and buff outer surface with soft cloth.

Notes:
* I did this by drilling an 8mm hole through and mounting them on a bit of 8mm studding, nut and washer held in chuck, quicker than mounting between centres and provides a start for boring process.
** reference off face of chuck.

Edit: see This Threadfor Pictures
 
Managed to grab a couple of days in the shed before the next lot of visitors arrive.

_________ ___click on images for larger view
__________Coloured Beech (17mm dia.

_________ ___

_____Exeter Elm & Pau Rosa (140-135-125mm)
 
Just a test run for a set of much larger items.

_________ ___click on image for larger view
_______________Elm (105mm)
 
Philly":61kle3o3 said:
ooh! Nice! Did you turn it square or do that after?
Cheers
Philly :D

Turned it square Philly, just bansaw'd it square against the fence then sanded the edges on disc sander (fitted to lathe),

Problem doing it that way is have to have tools really sharp else trailing edges chip out.

Just a confidence test of method as I want to do several about 300mm square and think polishing edges before turning stands a better chance of success than trying to trim and finish a round .
 
Here's a couple I did. First is our much used fruit bowl made from English Walnut, finish is oil and wax:

bowl001.jpg


This is a smaller bowl in Bulgarian Walnut (according to Yandles), again finished with oil and wax

bowl002.jpg


Rob
 
I particularly like the lines of the English Walnut one Rob: Simple and practical, 'well used' says it all as far as I'm concerned regardless of so called 'design parameters'.
I find that whatever the finish used, Walnut always has that rich 'I want more of the same' look to it.
 
One of Three Items from Phillys Big Bash.

_________ ___click on images for larger view
_______________Exeter Elm and Pau Rosa (130mm)

Sheela hollowed out most of the inside, including flattening the bottom.

The lid had to await the use of Cole Jaws to complete, for some reason we ran out of time and Philly did not seem to have any wood around for a quick Jamb Chuck.
_________
 
Chas,

Very nice. :D
Looks like a gloat there, you have something that philly doesn't? :shock: :wink:
 
Status
Not open for further replies.

Latest posts

Back
Top