


engineer one
Established Member
after a problem or two with my little ryobi station, i finally decided i had better get a space, and install the woodrat. which i have had for some time :roll:
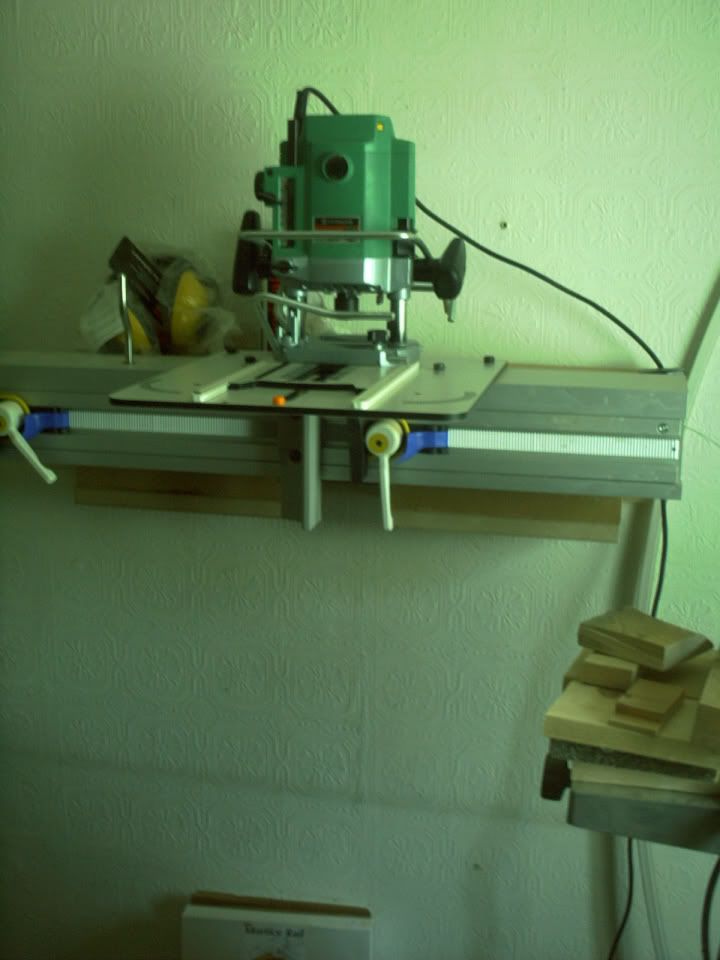
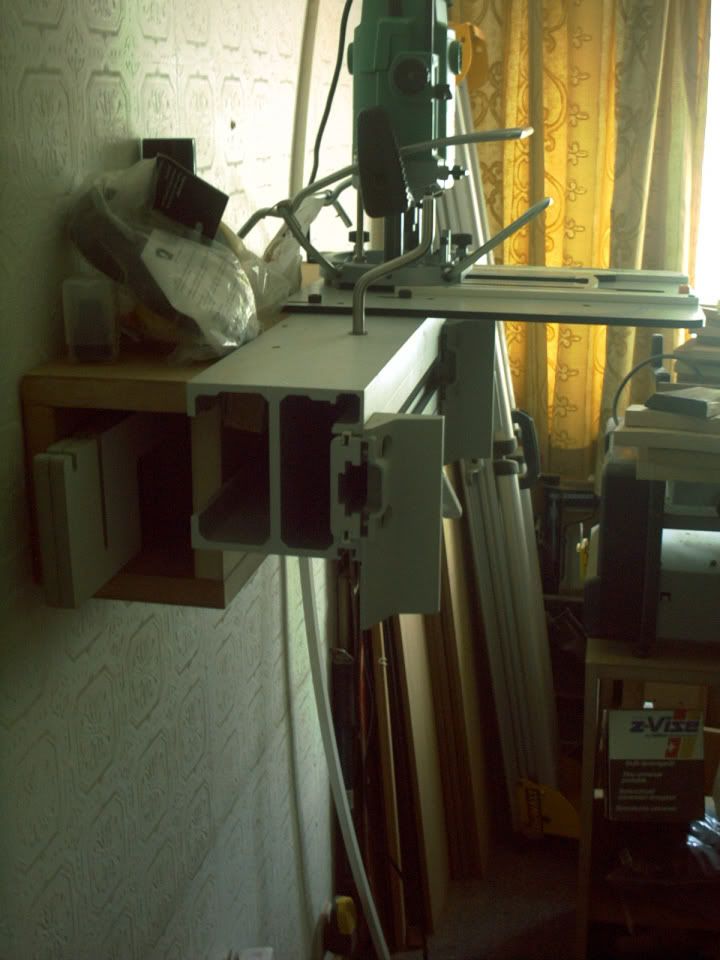
so i built an mdf box, solid top and back, plus open front and bottom.
screwed to the wall at just over 54 inches to the base plate. this will allow me to work with all the lengths i want, plus makes it easier to see when fitting the bits etc. the lower shelves are open at the outer ends to allow me to store certain parts there.
the photos show the basics, it is not painted, only covered with dilute pva.

[/img]
as you can see from the level, it is quite high, but i do find this a decent idea, except of course lifting the rail and mounted router on and off if need be. :?
am happy with the basic settings etc, but there are a couple of problems that are still not properly resolved. drilling for the M12v was a little problematic, since the guide bush screw holes in the base plate are not in the same position as those on the router. so a little bit of guesswork was needed. also the base of the m12 is almost as wide as the baseplate on the rat. bit scary. drilling that stuff is a real pain.
still got it all sorted last night, and tried it out today, fine everything works in the right axes etc, the winding works, and i was able to notch a couple of my shelves for the coffee table.
must figure out a way to avoid breakout on veneered mdf
so out with the glue, and then the 3m magic tape to hold the break out in place whilst it is glued back. it's alright saying use a backing board, but of course that means having lumps lying around to fit :roll:
anyway, the areas of problem i am now experiencing
1/ after only a few minutes, since i had not used it for a while, the router started to run very slowly. so i took the top off thinking it would maybe need bushes, but thought the first thing to do was blow out the whole top.
used an air duster bought for the computer, maplin sell it.
tested the router without the top on, and it worked, so put it back together and it worked also. lesson therefore if you router starts to run erratically, worth just blowing some air through it to ensure it is nothing serious.
2/ fitted the newer ally rails, and discovered that the base plate won't run up and down too easily, indeed at all there is no side movement on these rails unlike the plastic ones, so question should one shave the base plate to allow for movement? is so how?
3/ the centre finder is also too wide for my baseplate so i understand that one has to start by removing the little bumps, any sensible ideas about doing this to ensure that you get only equal amounts off??
anyway otherwise i am again happy with it, think it will make my next couple of tables easier to deal with.
just waiting for some help during the long rail glue up, and then more details of the final build up of the coffee table. :? mind you am still worried about the mortices in the table top. that will be fun laying them out and ensuring they are attractive and accurate :roll:
paul :wink:
so i built an mdf box, solid top and back, plus open front and bottom.
screwed to the wall at just over 54 inches to the base plate. this will allow me to work with all the lengths i want, plus makes it easier to see when fitting the bits etc. the lower shelves are open at the outer ends to allow me to store certain parts there.
the photos show the basics, it is not painted, only covered with dilute pva.
[/img]
as you can see from the level, it is quite high, but i do find this a decent idea, except of course lifting the rail and mounted router on and off if need be. :?
am happy with the basic settings etc, but there are a couple of problems that are still not properly resolved. drilling for the M12v was a little problematic, since the guide bush screw holes in the base plate are not in the same position as those on the router. so a little bit of guesswork was needed. also the base of the m12 is almost as wide as the baseplate on the rat. bit scary. drilling that stuff is a real pain.
still got it all sorted last night, and tried it out today, fine everything works in the right axes etc, the winding works, and i was able to notch a couple of my shelves for the coffee table.
must figure out a way to avoid breakout on veneered mdf
so out with the glue, and then the 3m magic tape to hold the break out in place whilst it is glued back. it's alright saying use a backing board, but of course that means having lumps lying around to fit :roll:
anyway, the areas of problem i am now experiencing
1/ after only a few minutes, since i had not used it for a while, the router started to run very slowly. so i took the top off thinking it would maybe need bushes, but thought the first thing to do was blow out the whole top.
used an air duster bought for the computer, maplin sell it.
tested the router without the top on, and it worked, so put it back together and it worked also. lesson therefore if you router starts to run erratically, worth just blowing some air through it to ensure it is nothing serious.
2/ fitted the newer ally rails, and discovered that the base plate won't run up and down too easily, indeed at all
there is no side movement on these rails unlike the plastic ones, so question should one shave the base plate to allow for movement? is so how?3/ the centre finder is also too wide for my baseplate so i understand that one has to start by removing the little bumps, any sensible ideas about doing this to ensure that you get only equal amounts off??
anyway otherwise i am again happy with it, think it will make my next couple of tables easier to deal with.
just waiting for some help during the long rail glue up, and then more details of the final build up of the coffee table. :? mind you am still worried about the mortices in the table top. that will be fun laying them out and ensuring they are attractive and accurate :roll:
paul :wink: