More wooden plane making

UKworkshop.co.uk

Help Support UKworkshop.co.uk:

This site may earn a commission from merchant affiliate links, including eBay, Amazon, and others.

richarnold

Established Member
Joined
10 Apr 2012
Messages
419
Reaction score
3
Location
market harborough
Plane making , by W J Armour.
Some of you may be familiar with an article that has been talked about and published from time to time by Victorian plane maker William J Armour. The piece was first published in the work magazine in 1898.
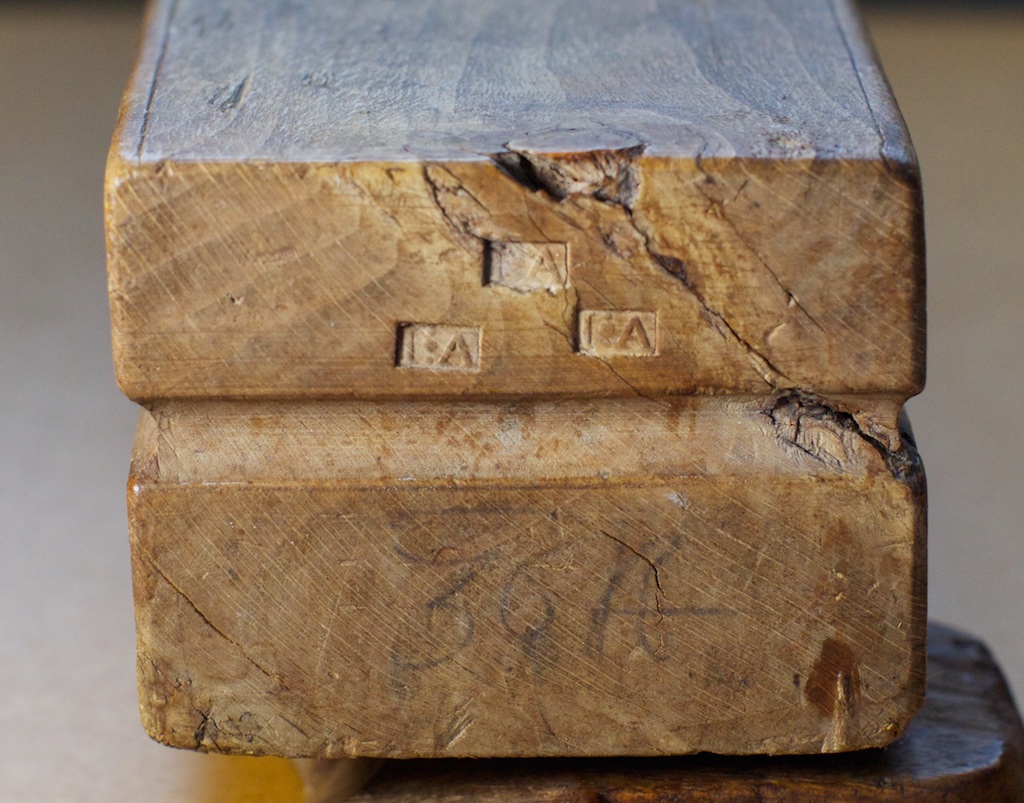
The first section of this important work details the making of a traditional jack plane. I thought it might be an interesting experiment to follow these instructions and make the plane in the manner described. Armour first describes the selection of a suitable timber suggesting the use of steamed beech. The blank is to be 17" long and 3" square. This is suitable for an iron of 2 1/4" wide. Well I have the beech, and a new- old stock Ward iron, and back iron, so we are good to go! To be continued. ......
 
The work magazine article isn't published anywhere, is it? (as in publicly available?)

I have some interest in planes of this type, but I never read anything anywhere about making them because it doesn't seem like the details of double iron planes are anywhere on the internet. I would've probably been too stubborn to read them, anyway.

Here is my finished plane - with a just a bit too tight mouth that was later relieved a touch:
https://www.youtube.com/watch?v=2yYnjUhVvzk&t=426s

Please excuse the diatribe at the end, someone had made some nonsense about not being able to mortise with japanese chisels and I was indulging myself in some pointless rant about doing the mortising with one of the makers of the lowest regard - Iyoroi - and relying on what you see and experience rather than what you read.

These planes are, of course, not that complicated and they were easy enough to figure out the making without referring to anything other than a few planes on hand to copy (I had built moulding planes before and had the tools on hand to do these). They are like a new plane should be when you're done, though - everything is tight and well fitting and they are a joy to use preparing wood. As custard would attest, having the cap iron comes in handy on some occasions when preparing figured timbers, too.
 
The original drawing that accompanied Armour's text was a little confusing to follow, so I have drawn up my own version, and anyone who fancies a go at replicating this build may find this useful.
 
richarnold":2itis3m8 said:
The original drawing that accompanied Armour's text was a little confusing to follow, so I have drawn up my own version, and anyone who fancies a go at replicating this build may find this useful.

Looks identical to the measurements I've used, more or less. Except I use common pitch out of preference - not that it is critical either way.

I've pretty much settled on bodies 3/4ths wider than irons, and I have ideas on open and closed handles based on hand width at the knuckles if the article doesn't provide a formula and someone is building along.
 
Looking forward to following Richards progress on the traditional wooden Jack Plane build.

I am still in the early stages of building a wooden jointer plane. The design for the closed rear tote is based on the more commonly found 3 finger entry of the 1700s. The bed angle will be 52*.(an allowance of +2* for the tapered iron). The DAR dimensions of the main stock are 2 3/8" x 2 3/8" x 28". The original double irons width of 2 1/8"was reduced down to 1 13/16".


In rift sawn lumber
the annual rings are typically
between 30-60 degrees, with
45 degrees being optimum.
Manufactured by milling perpendicular
to the log’s growth
rings producing a linear grain
pattern with no flecking. This
method produces the most
waste, increasing the cost of
this lumber. Rift sawn lumber is
the most dimensionally stable
cut of lumber available and has
a unique linear appearance.


http://www.edensaw.com/MainSite/Store1/ ... iagram.pdf

http://www.hardwooddistributors.org/blo ... wn-lumber/

As to why most plane makers historically preferred Quarter Sawn Beech over Rift Sawn Beech, is likely answered within the following quote; Quarter sawn wood has an amazing straight grain pattern that lends itself to design.
 
Regarding grain orientation, it seems that the 19th century planemakers were a lot more concerned about choosing truelly quarter sawn, straight wood then the earlier planemaker. In those older planes it is not uncommon to find all kinds of wood from rift to quartersawn and they sure wouldn't throw away a piece with a big knot. Maybe they would shift around a bit so the big knot wasn't right in the middle of the escapement, if you were lucky!

A plane from 1664:

p7c5790-version-2.jpg
 
Corneel":11pqo7my said:
Regarding grain orientation, it seems that the 19th century planemakers were a lot more concerned about choosing truelly quarter sawn, straight wood then the earlier planemaker. In those older planes it is not uncommon to find all kinds of wood from rift to quartersawn and they sure wouldn't throw away a piece with a big knot. Maybe they would shift around a bit so the big knot wasn't right in the middle of the escapement, if you were lucky!

A plane from 1664:

p7c5790-version-2.jpg

I have seen planes with knots, too (if they are old enough), but not English style. Japanese planes and continental european planes have come to me with knots, and they work fine. I noticed on wiley's panel raiser, Larry left something right in the top/middle of the plane on the front that I would've culled, but it is unlikely to be anything other than an aesthetic issue.

Regarding what makes a stable plane, rift sawn is fine. I see the comment that a dealer says rift is the most stable, but I think they're probably considering radial and tangential shrinkage, or perhaps resistance to cupping in wider boards. Something we really don't care about with planes.

The first good beech that I got was more rift than quartered. I made two long planes out of it, and both have remained dead straight. The important consideration is that the log is oriented with the pith centered horizontally and vertically when it's sawn. If it's not, the plane will twist.

I would assume that the later orientation of planes being closer to quartered is due to the fact that the non-quartered face of the wood wears the best. Few of us are likely to honestly wear out a rift sawn plane, though, unless it's sawn off center and we have to keep shaving wood off to adjust it as the wood moves around.
 
I don't quite understand what you mean with the pith centered. Does that mean straight grain in the length of the plane?

And yes that plane from Willey looks like a piece of firewood :mrgreen:
 
Pith centered just meaning that if you find a line of grain on a plane, It will be the same shape and same level vertically from front to back.

If you look at the jack plane I have in my video, you'll notice that the grain is at the same level front to back. That's not *too* critical that it be exact, it can go uphill or downhill a little bit as long as whatever it does, it does on both sides of the plane. If it stays straight on one side and does something else on the other, the plane will twist.

It's easier to confirm with rift sawn because there will be straight grain lines on all sides of the plane. With perfectly quartered, you just want to do the best you can to see that the grain runs as straight as possible down the plane on all sides.

I had a piece of nice wood that was well quartered but has the pith just off center. Sure enough, it doesn't stay flat with seasonal movement. It's not terrible, and it would be fine as a jack, but on a jointer for fine work, it's troublesome and will lead to a plane with a shorter life. Still can be a useful plane, just not quite as nice as one that is more stable.

(I do realize that most of the planes that I've given away or sold for the cost of materials - those planes are generally destined for a life of leisure. Prashun has one, Chris Griggs has two and Brian Holcombe has two. I sold another less well finished plane on ebay for the cost of materials and it went to someone on the creek - it wasn't quite as nicely finished because I intended it to be for me. At any rate, I don't think seasonal movement will affect most of them, and that's not a slight at the people who have them - you just don't have the need to use jack and try planes that much if you're not dimensioning by hand. Holcombe's planes get plenty of work, though. I'll bet the wedges are tight in some of the other ones, and nobody knows it yet, though).
 
I'll have a look at my planes too! My tryplane is sure not ideal, but it was the only piece of beech in the right dimensions I had. Untill now it works perfectly, even after one year without adjustments.
 

Attachments

  • IMG_2914.JPG
    IMG_2914.JPG
    118.3 KB · Views: 939
From what I can see, that piece actually looks pretty good - the dip at the handle doesn't amount to much trouble, just the growth in the wood.

Where I have run into trouble is something like a try plane when you're trying to get a flat surface. If it twists a hundredth or two, it's a huge problem. If it moves such that the tail and the nose go a little proud, then that's no problem at all. It's going to move one way or another, even if it just stays in-situ and expands and contracts. You just hope that the movement is in such a way that it doesn't affect use, because there's no need to adjust the sole of a double iron plane unless you do a whole bunch of narrow jointing without much flat work between narrow work - that will wear it a little hollow. The seasonal adjustment described for other types of planes isn't necessary - fortunately. Probably why so many of the double iron planes are still around in near full height.

In terms of wood selection, being particular about grain orientation here in the states can be costly. Horizon is the only mill offering kiln dried 16/4 billets and they cater to larry and others, so they know what's good. It's about $16 a board foot or so, and 3/4ths of what you get will be very good with the other 1/4 being wood that you have to plan something other than long planes for, but it's still nice wood. I have noticed that even on the cheapest late planes (ohio branded and their many sub brands), the billets chosen are generally quartered very well with the pith sawn on center. Even the wedges are nicely quartered. Lots of more expensive planes have been made in the hobbyist era with less good wood. Beech is not very common in most places in the US now due to the fact that it can't compete with oak, fir, and other types of trees that grow fast on open land. The wood database calls fagus grandifolia a tree that "dominates mature forests" - not many of those left in PA, and nobody knows what to do with beech trees when they fall them, anyway, so they get burned.

The handle that I turned for the shooting plane I pictured came from a transitional sole. When I cut it apart, I noticed that it, too, was dead straight with pith on center in every way (finally found a good use for something from a transitional plane).
 
William Armour jack plane build. Part 3
Ok, its time to start the setting out. This is Mr Armour's first instruction
"Measure 5 3/4" from the fore end and strike a line AB." This is called the bed line of the mouth. Strike another line , CD, 3 1/16" (in front) of bed line . This is called the mouth line.".
The measurement from the front is intresting as if the most common pitch of 47.5 degrees is struck from this line, it puts the top of the bed directly in the center of the stock. I have measured numerous British bench planes and they all seem to follow this rule as the top of the bed is always center.

"From the bed line strike the pitch of the bed, AC, which is varied somewhat according to the work to be done. It is generally an angle of about 50 degrees."
The vast majority of bench planes I have examined from this period seem to be bedded at 47.5 degrees. I think this is a good compromise for most work.

......."Then strike a line, DE, from the top ofthe bed line across the top of the plane , this is the top of the bed. From this line measure 1", then strike a line across, this is called the Butment line .
If the iron used is 2 1/4" wide, measure from the butment line 21/2" (it being in nearly all cases of bench planes 1/4" wider than the iron used) Strike a line HK which is called the front, then strike a line BD on the side of the plane from the butment line to the mouth line on the face of the plane.
Next draw a line from the front on the top of the plane to about 7/8" on the side to the line running from butment to mouth".
 
I'm confused about which part is 2 1/2 inches on a plane with a 2 1/4" iron.
 
D_W":23jk3cvk said:
I'm confused about which part is 2 1/2 inches on a plane with a 2 1/4" iron.
Sorry, Mr Armour's text does get a tad confusing. If you refer back to my revised drawing it may help. The butment line is the middle one in this photo, and you measure forward of this line.
 

Latest posts

Back
Top