Making queen-anne legs?

UKworkshop.co.uk

Help Support UKworkshop.co.uk:

This site may earn a commission from merchant affiliate links, including eBay, Amazon, and others.
Wise words from Custard, salvage what you can, even if only for keeping as much as is original as possible.
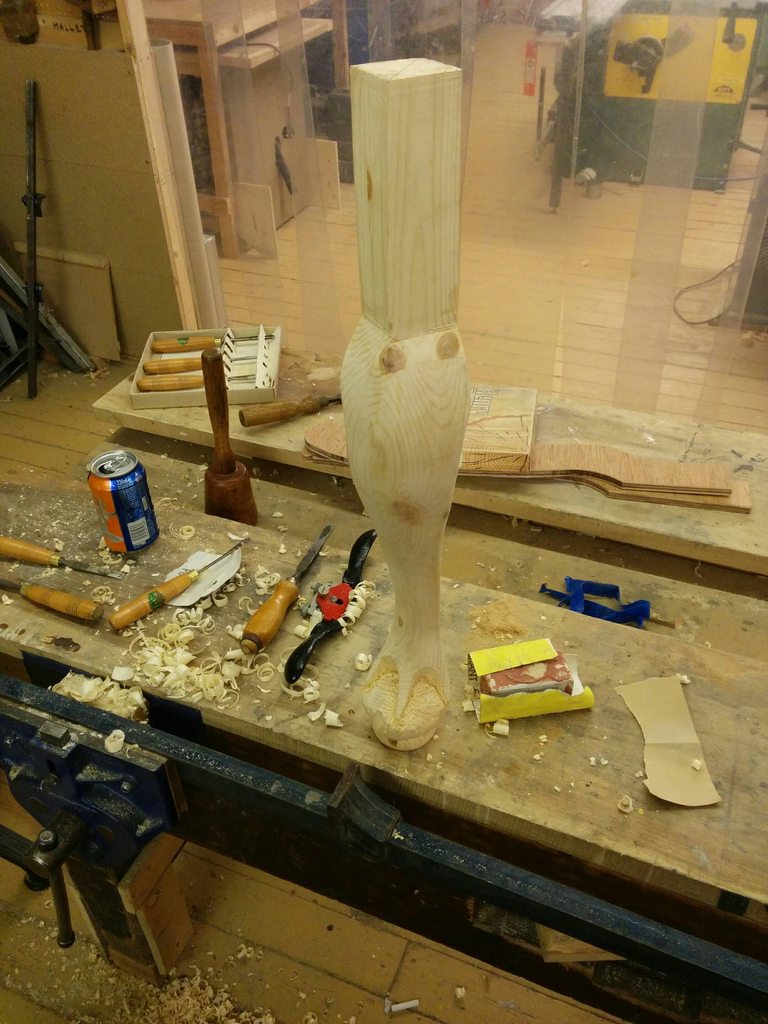
I've cut loads of cabriole legs on the bandsaw, including the tenons, in many different woods and passed them back to the customer or cabinet maker! never finished one.
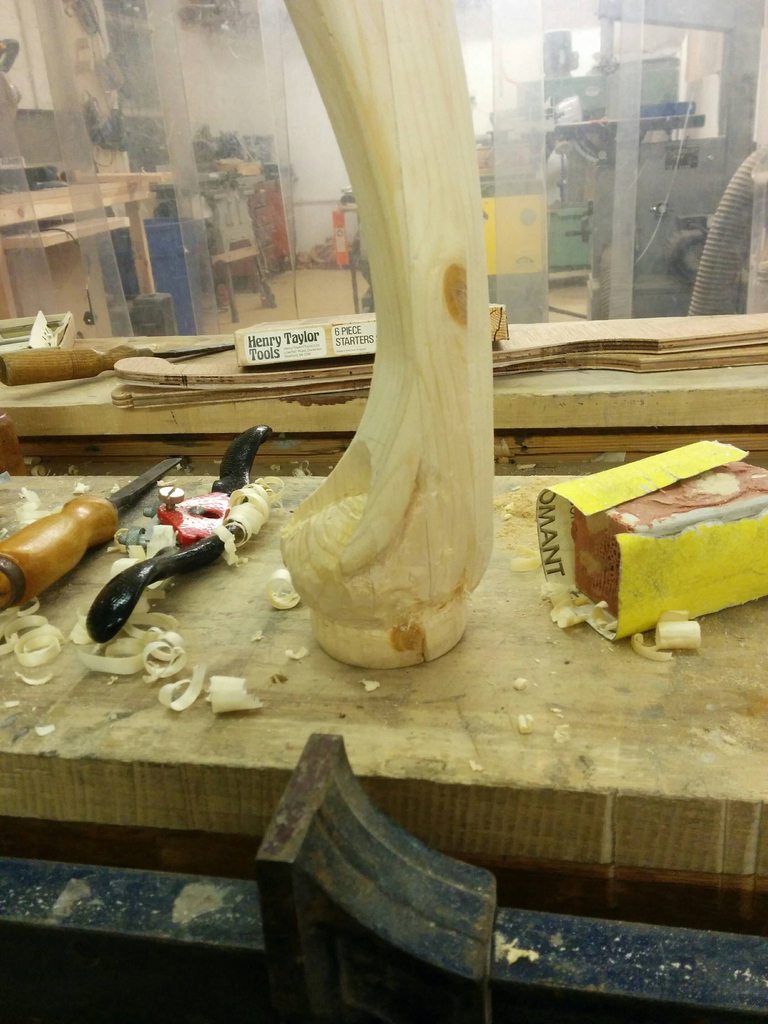
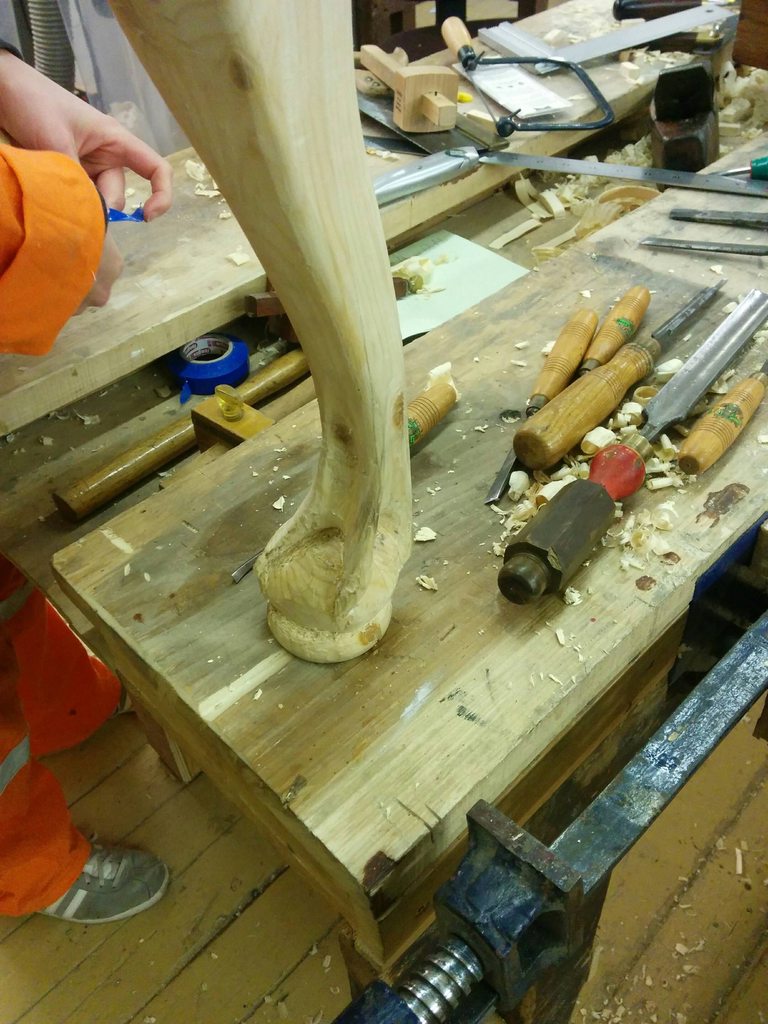
The secret is to turn the ball or bun foot, and leave the end cuts just short and keeping the flat square base for the other side cuts, and good grained and quality timber.
Today I guess that masking tape would work keeping the cuts together.
Here's a link to the Bun foot and band sawing part that I've done, just in case you've missed it!
Regards Rodders
https://www.youtube.com/watch?v=1c6s2kVcHWA
 
I probably won't put a bun on the food of this proto, but that gives me time to practice turning the Buns (I think I'm up to this task, but I know I'm not up to carving a ball and Claw foot).

Went to start bandsawing last night on the bigger gutsier bandsaw, and the blade had almost no teeth (it had done on Sunday though), which is always the risk of sharing a workshop between a wide cross section of people and experience levels. I've got a pair of ¼ 4 TPI blades on order from tuffsaws (everyone raves about them, so I couldn't not try them), I'll be keeping those just for this project, and putting the workshop provided blade back on after use to preserve them.

It seems much less complex than I'd feared now I've started getting my head round it and working on more complex shapes will be good for my skills.

Thank you all for the advice, it's been interesting so far, especially the eccentric turning, which isn't what I'm going for here, but is something I now need to try.
 
Hi Jelly,

I just remembered.......the wood for the ears.

Marking it and sawing from the matching orientations of your glue up i,e face side/edge to avoid rotating the grain, especially noticeable when applying the finish.

Regards,
Dave
 
So the saw blades arrived whilst I was away, had a go tonight and it appears to be relatively straightforward, apart from the fact that my laminated blank sheered in two near the foot whilst I was using the spokeshave, which brought everything to a close whilst I wait for the glue to properly cure.

Used the remaining time to practise turning beads for the pads, which is not nearly as easy as it looks. But I'm now comfortable using a skew to produce beads, just need to work a little on consistency.

I'm considering whether I'd be able to do more of the rough shaping after the bandsaw with a drawknife or axe, as my results with the spokeshave have been a bit mixed (largely down to the dubious nature of my spokeshave, new Stanley with build quality issues).

In a related note can anyone point me at finely stitched but not unreasonably priced cabinet-makers rasps? I have a few coarse to middling rasps from my great-grandfather but nothing which wouldn't need substative tidying up after shaping, I'm thinking a fine rasp before starting on sanding will save quite a lot of time.
 
I would have a look at the damaged items first, we deal in continental furniture, a lot of which as been consigned to markets, car boots and dealers due to some damage. While I could never take it back to showroom condition, which by the way we wouldn't won't to, I can repair it, to a standard that makes it useable and saleable.
Restoring furniture as though it's just come out of the workshop is old school, some pieces may deserve this treatment, museums and stately homes items spring to mind. But good honest day to day items IMO you won't the piece to retain its wear and tear, it's paterna, so from an insurance point of view they may be written off. But you can't replace a pieces history.
 
I've now shaped a reasonably nice leg, thanks to all the advice given.

Then contrary to what might be seen as advisable, embarked on carving a ball and claw foot, which is not as hard as I expected, which still makes it bloody difficult!

I think I'll be able to produce one ball and claw foot, but my skills aren't up to doing four identical ones, not without a lot of practice at least. Advice on shaping the ball would be much appreciated!
 
Just managed to upload some WIP photos.

nNggDuTh.jpg


EoistDph.jpg


Be gentle with the constructive criticism, I'm not very experienced at carving.
 
Not wishing to sound personal, but I see you do have nice leg there!
Looks very good, are you happy with it?
Regards Rodders
 
blackrodd":2d6ce3ar said:
Not wishing to sound personal, but I see you do have nice leg there!
Looks very good, are you happy with it?
Regards Rodders

Thank you, predictably as the maker I'm not quite happy with it.

I had some issues with the PAR I laminated my blank from being undersize, and thus not properly fitting my template, so I had to use the template as a French curve to draw the cut lines, causing some asymmetry which is not too noticable but bothers me.

The carving I'm at once dead pleased with myself for, and reasonably convinced it will never actually look good due to how the redwood is taking the cross-grain cuts.

Overall it' shown me I can do it, and demonstrated the pitfalls that can befall me, exactly what I wanted it to do.
 
That looks like a very good first go to me. If I were you I would rewatch the video I linked to on page 1 - you will see more in it second time round. He seems to make a definite cube first and then remove the corners to leave the ball that was contained inside it.
 
AndyT":ftryq2jq said:
That looks like a very good first go to me. If I were you I would rewatch the video I linked to on page 1 - you will see more in it second time round. He seems to make a definite cube first and then remove the corners to leave the ball that was contained inside it.

I'll do that, I'm still waiting on a quote for having the 17' beam of Meranti I've been offered machined, so I have plenty of time to practice and perfect before I feel compelled to start 'for real'.

I shaped a spoon foot on a pad first, then decided to see if I could carve a ball and claw out of it... The rub being that to shape any of the traditional (well American traditional) ball and claw feet, it's far better to start with a cube.

The more complex French designs seem to be much smaller claws sitting only half way up the sphere, where the ability to shape it closer to the final shape with power tools (or a drawknife, axe or whacking great firmer gouge) is greater, but also the final carving far more detailed.
 
Taking shape now!

1XiyD6yh.jpg


And a closer view...

bZkqtN0h.jpg


Now something for the toolies:

Home made gouges courtesy of my Great Grandad... Both ground like japanese gouges, one from a firmer chisel and one from a beveled edge... It too me a while to work out how to sharpen them, but with some effort achieved the desired effect, then polished to a shiny (not quite mirror) edge on a buffing wheel.

I'd forgotten all about them until yesterday, so sorted them out and cracked on (I still need to buy a 3 sweep cranked fishtail gouge to make my life easier, but these do quite a nice job nonetheless).

Also in the background are two incannel gouges, one firmer and one patternmakers paring which were used to do most of the initial shaping of the web and tendon structures.

srEauCSh.jpg


wF6j1w4h.jpg


And another,

okk0O6Ih.jpg


wF6j1w4h.jpg
 

Latest posts

Back
Top