Making a brass infill plane (Hattori Hanzo, DP)

UKworkshop.co.uk

Help Support UKworkshop.co.uk:

This site may earn a commission from merchant affiliate links, including eBay, Amazon, and others.
Hattori-Hanzo":1a6fml2z said:
.........the finer the mouth the finer a shaving it should produce......

I'm not so sure about this. All it does, I reckon, is prevent the plane taking a thicker shaving. It doesn't make the same blade setting take a finer shaving. That's my reading of the situation, anyway.
 
If you bed the plane properly and have something around 3/2 times the shaving thickness in clearance, it'll function fine.

I have an infill that I made with a 3-4 thousandths mouth a few years ago. It works wonderfully for shavings up to about 2 thousandths and then resistance increases quickly for obvious reasons. It wasn't a miter plane, just a single iron smoother. Using it in actual work next to an older norris with a double iron and a bigger mouth makes it evident why the makers didn't use mouth only to control tearout - it's too limiting, but it's expected on a miter plane as a display of making skill and it makes using the plane on the ends of tiny bits much more predictable (the larger the mouth, the larger the catch you can have on the end of something).
 
Thanks for the input chaps. Agree with both of you, I've got my wires crossed and worded this totally wrong.

Blade protrusion sets depth of cut and in turn shaving thickness, which should be the same regardless of mouth width but am i right in saying a tighter mouth gives a cleaner cut and aids in tear out prevention, especially on end grain?

As i understood it a tighter mouth prevents the wood fibre from "shearing" just ahead of the cutting iron thus reducing tear out and blade chatter? but increases resistance and limits thickness of cut like you've mentioned.

Cheers.
 
Whoops bad wording on my part again, I've got to stop replying late at night (hammer)

Phenomenon indeed I've never seen it either .
 
MikeG.":1s2gsi7g said:
Tear out on end grain? That's a phenomena I have never come across. Does it actually happen?

Miter planes are probably more commonly used on long grain, veneered surfaces, or any other fine work where a fine plane mouth would be appreciated. On marquetry, you definitely wouldn't want a large mouth on a plane.

They're older than other metal planes and were probably used a lot more widely (for more things) before infill smoothers. The size of them makes it so that they're not that great for trimming end grain on their sides unless the wood is really favorable (like mahogany).

That said, a plane with a fine mouth works better even on end grain than a plane with a large mouth. I've made both types, and those with a fine mouth are better behaved when shooting.

Couple that with the fact that they would've been used in small fine and detailed work and it's clear if what you're doing is very small (trimming small parts or sizing a thick veneer), a fine mouth is a good idea. Above all, when you find an older tool that was made for professionals (and not current hobbyists who struggle to saw a straight line), it's wise to copy the tool first and speculate on what may not be necessary later.
 
A friend who knows more about planes than I ever will reckons that mitre planes appeared at about the same time that veneered furniture became fashionable, and that the name is a poor clue as to their intended use. Complex patterns made from lots of little bits of sawn veneer needed to be planed smooth, without tear-out regardless of grain direction. Thinking of them as veneer planes fits with what D_W has just written and their comparative rarity.
 
Thanks for your insight guys it's interesting reading.

I had always thought mitre planes where used as described, mostly for planing end grain. It makes sense they where intended for very fine work with their small mouth opening.
I had also thought that they were a small plane around the size of a block plane but I've since seen some larger ones around the size of a jack plane.
Was there a common size or where they all different?
 
A Spiers catalogue of around 1900 listed mitre planes from 6" up to 10 1/2". I think about 8 or 9" is commonest.
 
Hattori-Hanzo":157rxlhq said:
Thanks for your insight guys it's interesting reading.

I had always thought mitre planes where used as described, mostly for planing end grain. It makes sense they where intended for very fine work with their small mouth opening.
I had also thought that they were a small plane around the size of a block plane but I've since seen some larger ones around the size of a jack plane.
Was there a common size or where they all different?

They predated metal smoothers, too - by several hundred years. I suspect that our thoughts about their use is in the context of the library of planes that we have, but we need a different context.

I'm not much for studying planing history unless it's about something right in front of me or the difference is stark (like this - the difference is stark vs. our visions of laying a plane on its side and trimming end grain - but it hasn't encouraged me to look much further as I use a stanley plane to do most things - or an infill equivalent (metal with double iron and no steep bed). I have made an infill shooter (which works fabulously), but also don't usually use it unless there's a specific reason to. What little furniture making that I do, the doors are usually M&T and the ends of the sticking are sawn off or the mark is made short of the end where it counts.

I think most users these days haven't grasped that all planes work well on end grain and they will cut effectively much longer with wood in a vise and the plane sitting on top of it than wood laid down and the plane also laid next to it.

(I tested irons earlier this year and found a well hardened O1 iron capable of about 850 linear feet of planing in endgrain and leaving an acceptable surface in all).

Hopefully, you get a chance to use this one on very fine work as they were intended!!
 
Thanks guys, really appreciate your contributions to the thread. I'm enjoying reading about the history of these planes and found an article about them here Amazing how far back they date.


I've taken some short video clips of the progress so far and started to put them into a video.

It's nothing fancy, just sped up clips and a few short descriptions of what I've been doing along the way.
Might be interesting to some of you.

[youtube]eqrZ54j7x-s[/youtube]
 
I've started making the wooden infills for the plane. I've gone with Wenge as I had a spare piece from another job, its very hard and dense so should make nice infills.
It's really tough on tools mind, blunts saws and chisels in no time.


U7mOgT0.jpg
 
The plane is coming along, both infills are made and I'm just working on the wedge now.

Got to wait for the tool steel to arrive then I can start making the blade.

[youtube]wpwwTmMCm4M[/youtube]
 
Got the wedge finished today just have to sand it up. I managed to work a cupids bow into the bottom of it too which I think complements the bow in the bridge nicely.
Wenge dust leaves a really nasty taste in my mouth so mask on when sanding. The more I look at it the more I like wenge, I wasn't overly keen on it as first but I think it's rich deep colour works really well with brass.

I'd love to get my hands on a really nicely figured bit of Cocobolo or Zebrano to use as an infill, I think that would look stunning in a plane.


5WvaBt2.jpg


The tool steel for the blade has arrived so I can continue with that soon too.
It's 4mm thick O1 tool steel.

vMWSUzT.jpg


Uploaded video Part 3 for any one following.
In this part I finish filing the body of the plane before making preparations for bending it to shape.
Then nearly giving myself a hernia I start to bend it.
I was given this brass by a colleague and it started as L section which I cut into flat bar. It's 6mm thick and unfortunately I have no idea what grade it is (which comes back to bite me, I'll explain later) so as you can imagine it was pretty tough to bend.

[youtube]jKKCucKSnqI[/youtube]
 
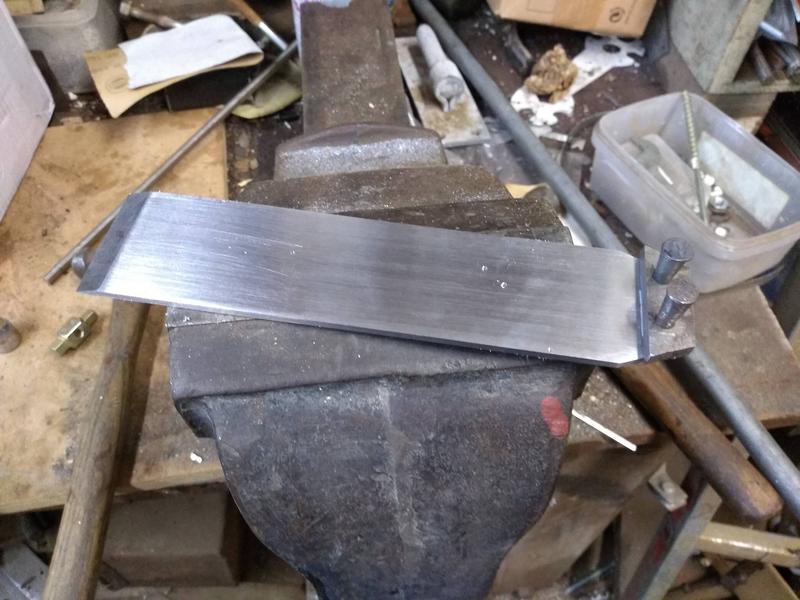
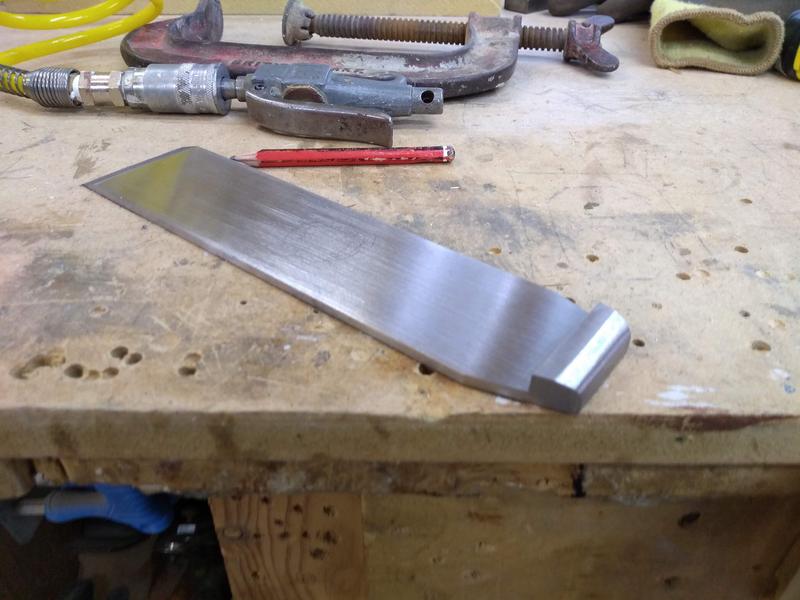
I've made a start on the blade. It's tedious work, endless hours of flattening and sanding.

I decided to have a go at a snecked blade, I was unsure if bespoke makers mill down a thick piece of steel to form the sneck in one piece of steel or if it is two pieces joined together.

I had no way of doing the former easily so opted to pein the sneck onto the blade

s11Gycg.jpg


I was pleased with how it turned out, still a lot more filing and sanding to do.

bZMrrLZ.jpg


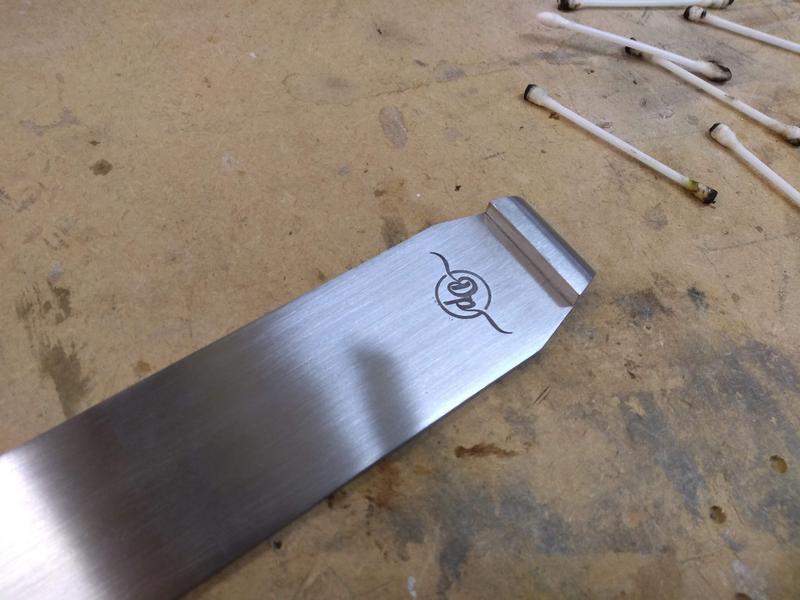
but before that I etched my mark onto it

This blade is narrower than the last so I asked my friend if he could laser me some new stencils which he kindly did.

I wasn't sure how well it would turn out as the stencil was half the size of the last one but thankfully it came out really well again so I'm pleased with that.

k4dyyVJ.jpg


And again for any one interested part 4 has just gone up.
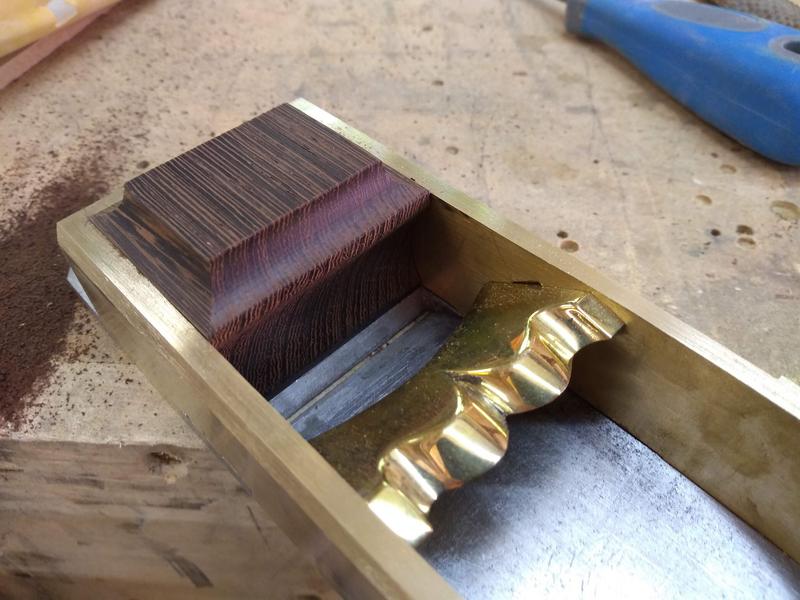
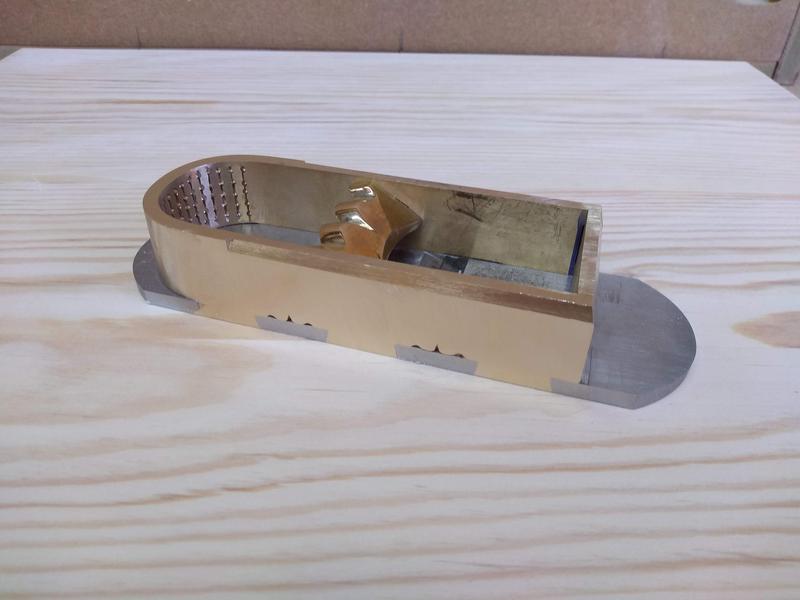
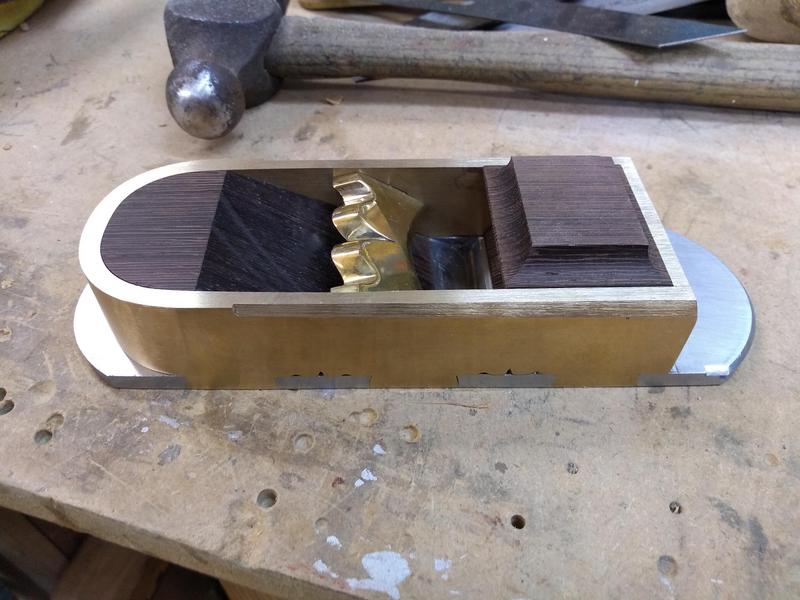
In this part I start to assemble and pein the body of the plane together.
I also make a start on cutting the mouth and blade bed into the sole.

[youtube]_fmTWtGp0VQ[/youtube]
 
Its lovely work. And great videos - but I am confused. The way you are putting the videos up one at a time implies the project is ongoing - but I watched all the videos on YouTube end-to-end last week??
 
Thanks for the comment Gasman, glad you enjoyed the videos.

When I started to make the first plane I also started a thread about it on another forum which I would periodically update as the build progressed.
Towards the end of that build one poster recommended this forum to me as I'd not come across it before, so I signed up and started this thread copying over my posts from the other thread.
I enjoyed making the first plane so much that I started on this one and started to make videos as well. (another suggestion from a poster)

As the plane progressed I updated that thread with the videos but also pictures and text too.

To keep continuity with the other thread I though it be best to gradually update this one as if it was an on going project, I'm still updating the other thread so was wanting to catch this thread up to it at which point my posting amount will drop dramatically as I'll be up to date on both threads and only posting with "new" content.

I didn't want to bombard this thread all in one hit as there was and still is a lot of content.
I also thought it would be nice if any one had questions or critique about a certain part of the build I could answer them in the relevant part of the thread.

Thanks again for your comment, hope this made sense :?
 
The plane is starting to take shape now.
I've been busy with my daughter over the last few weeks, she's finally learnt how to crawl so is keeping me busy!

The body of the plane is pretty much complete other than a final bit of finishing, I've added a bevel to the top edge to make it a little more comfortable to hold.

Kdy1uLK.jpg


And both infills are made and dry fitted, I won't be fixing them permanently until near the end of the build.

HKfX6Xw.jpg


Part 5 has just gone up.
In this part I file the mouth of the plane and V-joint which holds it in position. I also finish cutting and filing the sole dovetails as well as adding the cupids bows.

[youtube]NZpjQVQzFn4[/youtube]
 
Hattori-Hanzo":2jv10v9l said:
To keep continuity with the other thread I though it be best to gradually update this one as if it was an on going project, I'm still updating the other thread so was wanting to catch this thread up to it at which point my posting amount will drop dramatically as I'll be up to date on both threads and only posting with "new" content.
And there was me thinking you were putting in massive shifts in the garage every evening :wink:

Still bl**dy brilliant work though, and great to see.
 
Thanks sploo.

Unfortunately I don't have time to do long sessions on it though I'd like to.
I try to do an hour or so an evening depending on how the day has gone.
The first plane took around 4 months to finish, the second was slightly quicker.

It's just nice to be doing something new and different.
 

Latest posts

Back
Top