


9fingers
Established Member
WIP report for the Jet 260 planer lock modification kits.
Not strictly woodwork but certainly connected to woodworking.
The whole process is broken down into steps that need little or no machine setting changes. This is the part that takes the time so making things in batches is much quicker – not dissimilar to some woodwork projects.
1st step: Take one 500mm length of 2” x ¾” steel bar and cut into seven pieces. Thanks heavens for the power hacksaw nodding away under the bench as I file off the burrs from the parts.
This picture shows the saw on another un-related task.

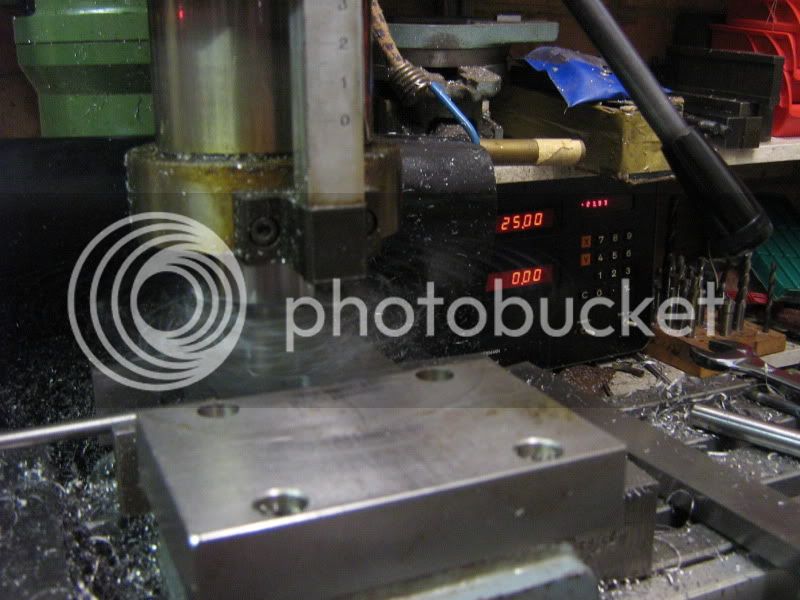
Now to machine the sawn parts to the same length to within 0.1mm.
That’s those all done!

With all the parts the same size the holes can be roughed out undersize but on the correct centres.
Watch the swarf fly! It was a hot day in the workshop so no shirt on. Steel swarf getting stuck in chest hairs – not funny!!
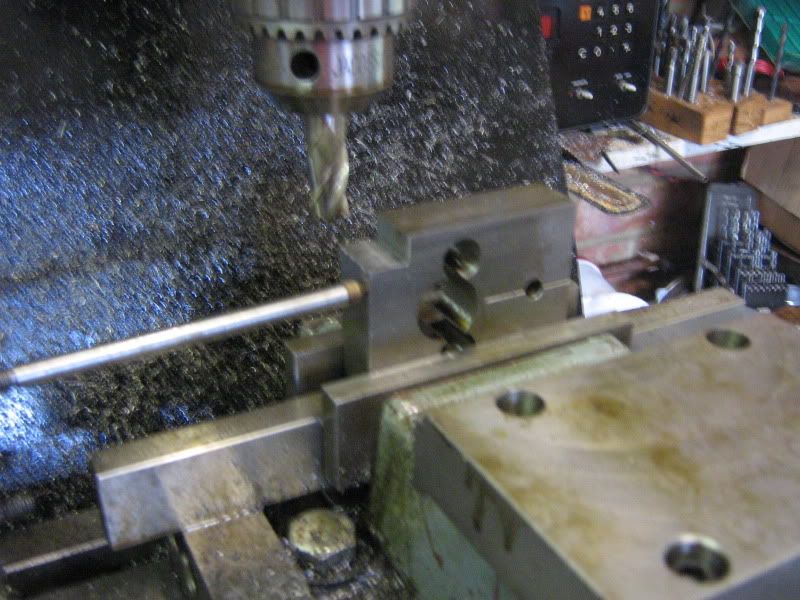
The digital readout on the milling machine enables the holes to be accurately located to within 0.01mm repeatedly, whilst the brass tipped steel rod coming in from the left allows each piece to be located in the vice in exactly the same place.
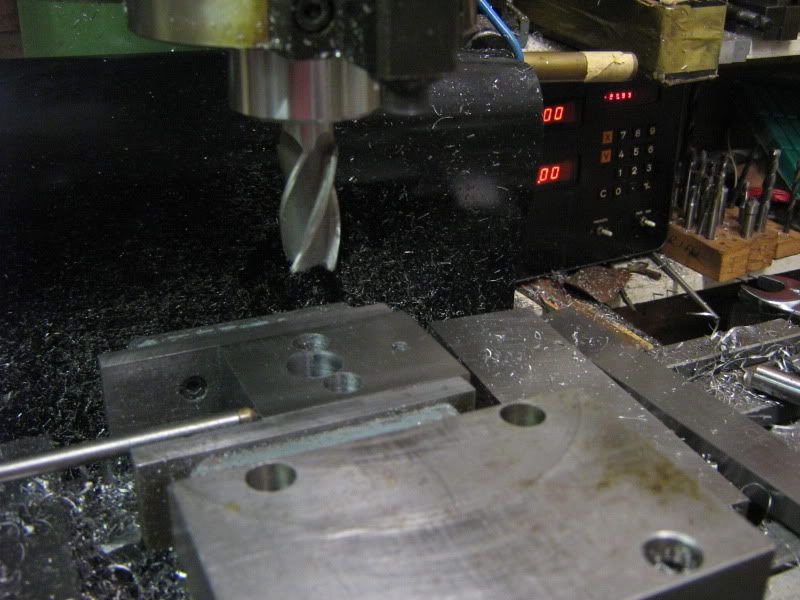
The batch all ready for the next step – boring the holes to the final diameter.
The photo also shows the drilled 6mm hole for the locating pin that fits into the planer
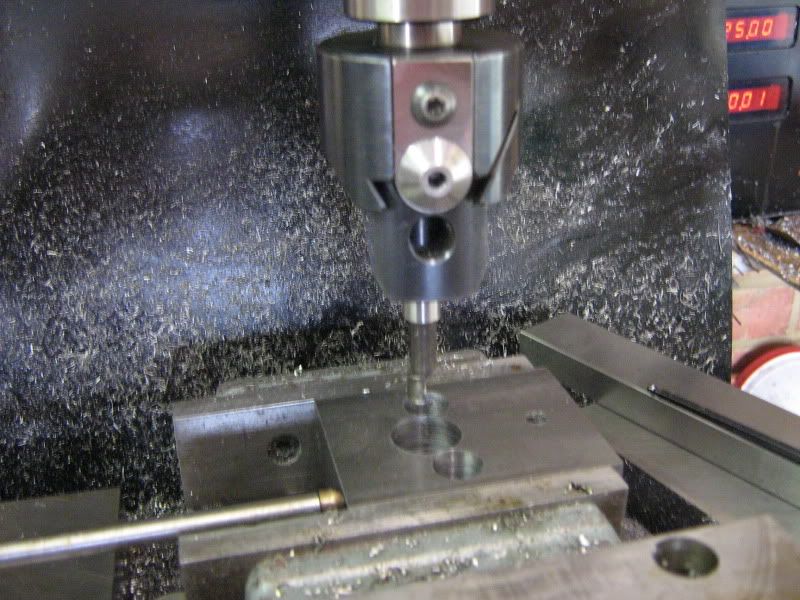
The mill is now fitted with a boring head and single point cutting tool on an adjustable radius to increment the holes to final size.
The next step is to machine a shoulder in the bottom right hand corner of the block to locate the hexagonal head of the pinch bolt. I forgot to take a picture of the previous step which was the engraving of a datum line for those planers that have a graduated dial readout. That line can also be seen in the next photo.
Also not shown is the drilling of the hole for the pinch bolt. Well, drilling ¼” holes is not that exciting!!
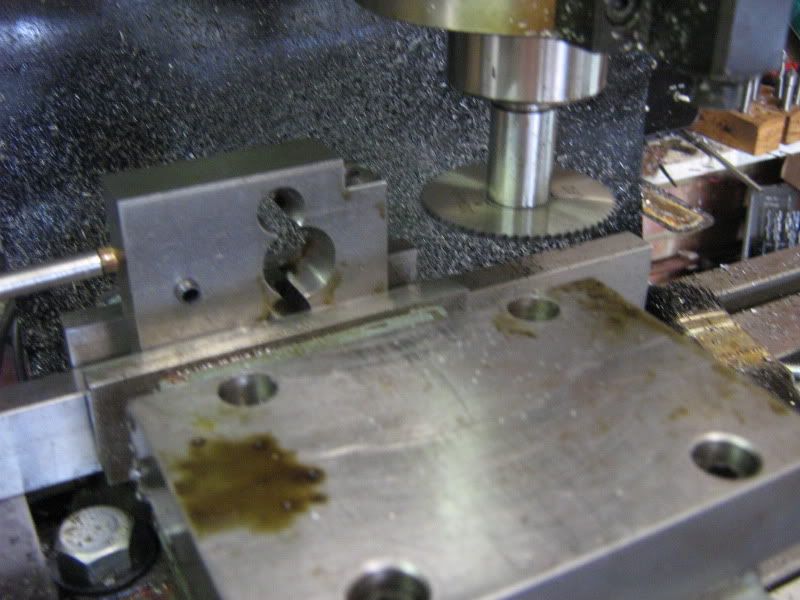
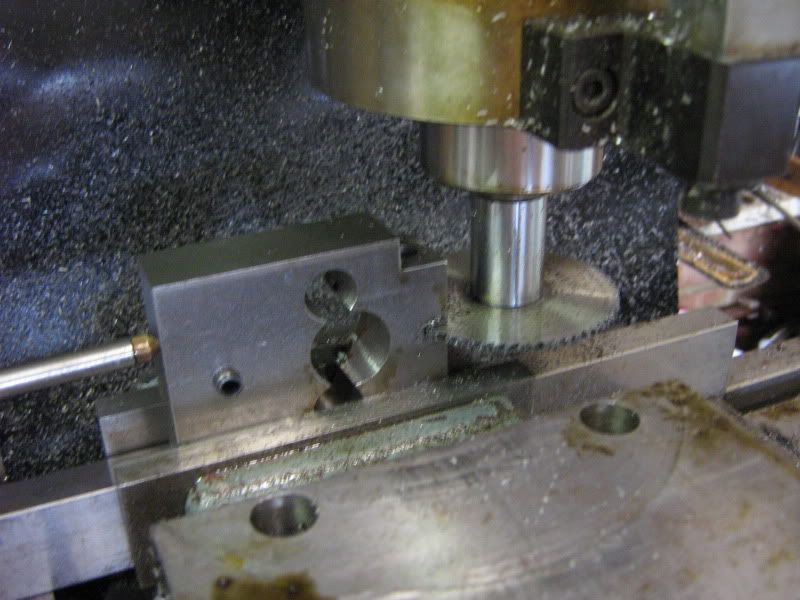
Next job is to cut a 2mm wide slot to allow the pinch bolt to compress the jaws around the planer adjustment shaft.
A slitting saw is fitted to a vertical arbour and the cut advanced very slowly by hand until the slot breaks through into the bore of the hole.
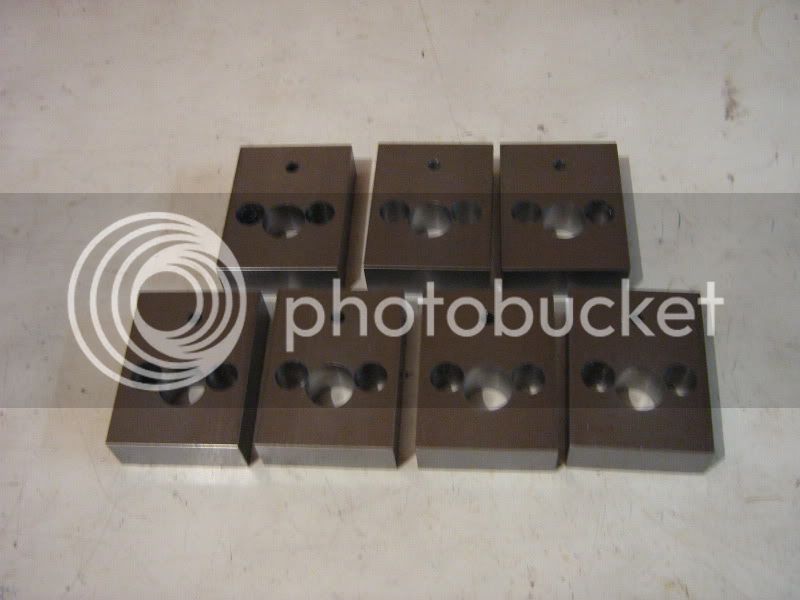
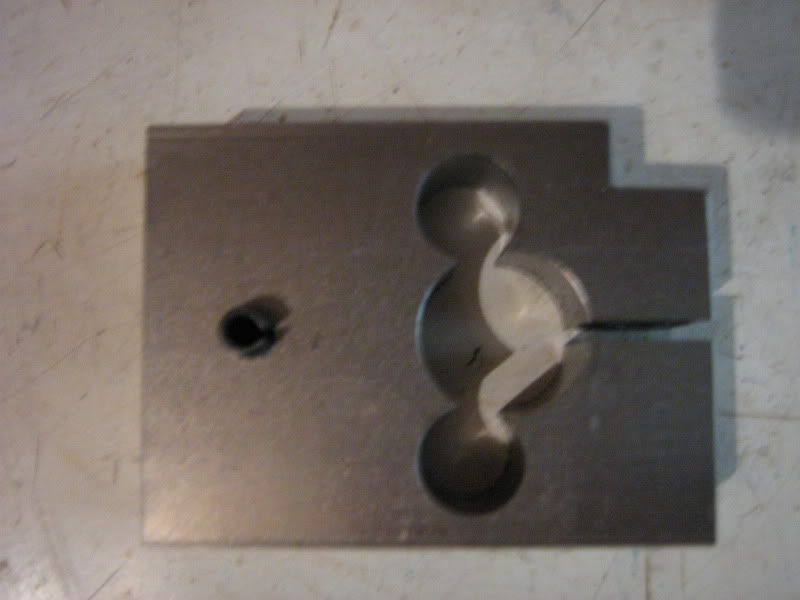
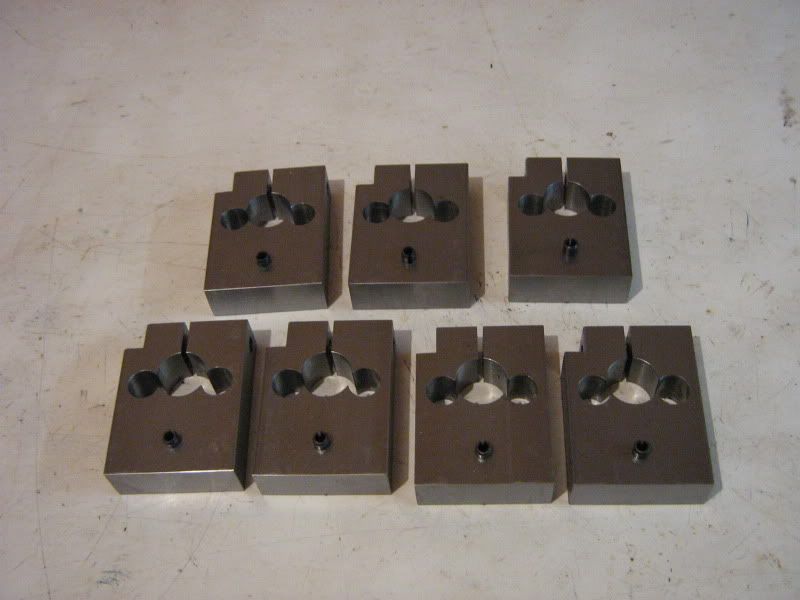
The finished lock-block
And a group shot with a roll pin fitted into each of the 6mm holes
Final assembly shows the pinch bolt fitted and the Bristol lever that is used to apply the lock. Also in the picture is the shaft extension that is required for those models that use a digital readout instead of the graduated dial.
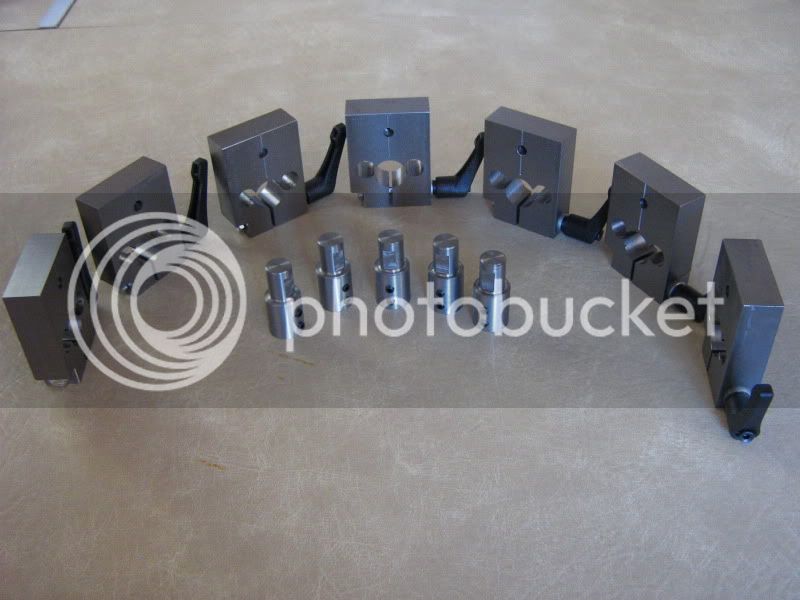
The “artistic” shot of all 7 blocks and 5 extenders needed to meet the orders placed all ready to pack and send off when I get back from holiday.
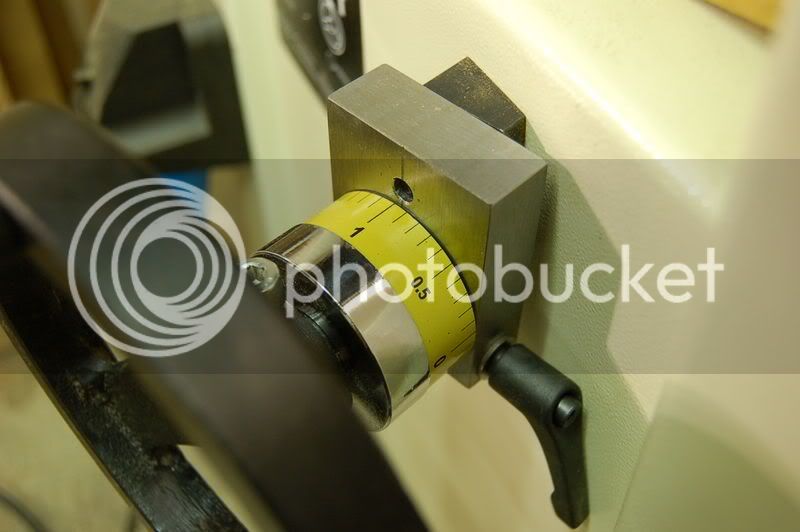
Here is the lock fitted to a graduated dial machine
And this is the lock fitted to a digital readout version of the machine.
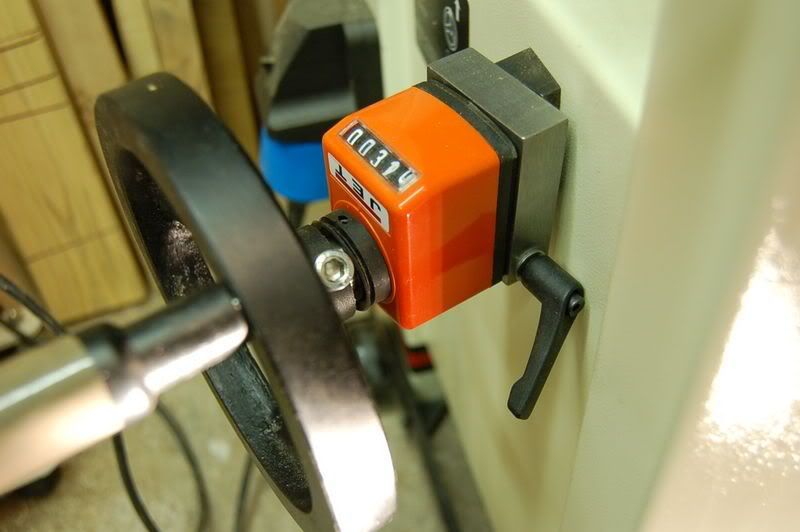
Thanks go to Wizer for taking the last two pictures for me as I don’t own a Jet JTS260 myself.
Thanks for reading and I hope it was of interest.
Bob
Hmmm! Note to self - must try and take better close up pictures - might be an excuse to buy a different camera. Tom's are so much better.
Not strictly woodwork but certainly connected to woodworking.
The whole process is broken down into steps that need little or no machine setting changes. This is the part that takes the time so making things in batches is much quicker – not dissimilar to some woodwork projects.
1st step: Take one 500mm length of 2” x ¾” steel bar and cut into seven pieces. Thanks heavens for the power hacksaw nodding away under the bench as I file off the burrs from the parts.
This picture shows the saw on another un-related task.
Now to machine the sawn parts to the same length to within 0.1mm.
That’s those all done!
With all the parts the same size the holes can be roughed out undersize but on the correct centres.
Watch the swarf fly! It was a hot day in the workshop so no shirt on. Steel swarf getting stuck in chest hairs – not funny!!
The digital readout on the milling machine enables the holes to be accurately located to within 0.01mm repeatedly, whilst the brass tipped steel rod coming in from the left allows each piece to be located in the vice in exactly the same place.
The batch all ready for the next step – boring the holes to the final diameter.
The photo also shows the drilled 6mm hole for the locating pin that fits into the planer
The mill is now fitted with a boring head and single point cutting tool on an adjustable radius to increment the holes to final size.
The next step is to machine a shoulder in the bottom right hand corner of the block to locate the hexagonal head of the pinch bolt. I forgot to take a picture of the previous step which was the engraving of a datum line for those planers that have a graduated dial readout. That line can also be seen in the next photo.
Also not shown is the drilling of the hole for the pinch bolt. Well, drilling ¼” holes is not that exciting!!
Next job is to cut a 2mm wide slot to allow the pinch bolt to compress the jaws around the planer adjustment shaft.
A slitting saw is fitted to a vertical arbour and the cut advanced very slowly by hand until the slot breaks through into the bore of the hole.
The finished lock-block
And a group shot with a roll pin fitted into each of the 6mm holes
Final assembly shows the pinch bolt fitted and the Bristol lever that is used to apply the lock. Also in the picture is the shaft extension that is required for those models that use a digital readout instead of the graduated dial.
The “artistic” shot of all 7 blocks and 5 extenders needed to meet the orders placed all ready to pack and send off when I get back from holiday.
Here is the lock fitted to a graduated dial machine
And this is the lock fitted to a digital readout version of the machine.
Thanks go to Wizer for taking the last two pictures for me as I don’t own a Jet JTS260 myself.
Thanks for reading and I hope it was of interest.
Bob
Hmmm! Note to self - must try and take better close up pictures - might be an excuse to buy a different camera. Tom's are so much better.
") ). My pics are taken with additional lighting (a torch) and a tripod. Those two things will improve your shots tremendously. Each photo is taken on the timer too, this avoids shake when pressing the button.
). My pics are taken with additional lighting (a torch) and a tripod. Those two things will improve your shots tremendously. Each photo is taken on the timer too, this avoids shake when pressing the button.