Jay Bates Inspired Mitre Station

UKworkshop.co.uk

Help Support UKworkshop.co.uk:

This site may earn a commission from merchant affiliate links, including eBay, Amazon, and others.

DuncanDesigns

Established Member
Joined
1 Apr 2014
Messages
22
Reaction score
2
Location
Coosktown, Co. Tyrone
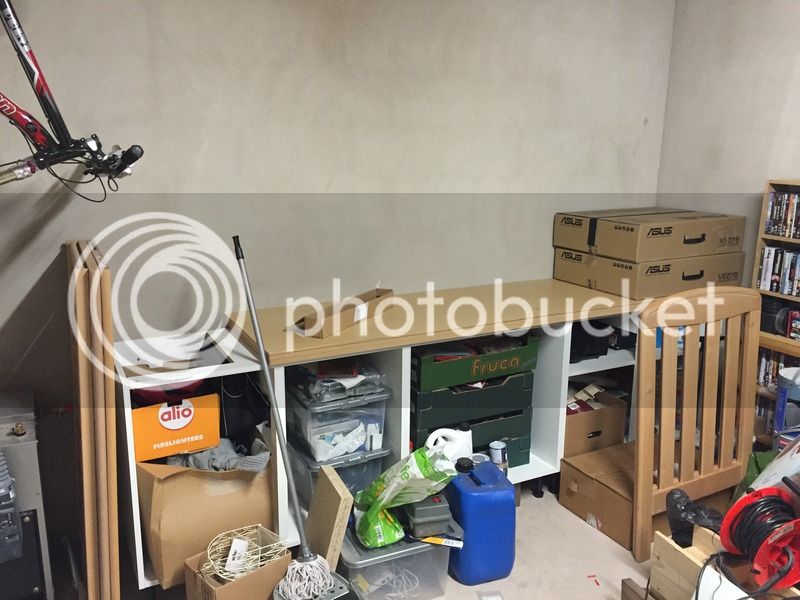
So I decided I wanted to build some form of storage in the garage and what started out as a quick and inexpensive project, turned into a 12 month marathon which became an obsession after watching Jay Bates Mitre Station videos on YouTube. The garage had become a tip that had no order or layout. With my new found inspiration I hoped to kill two birds with the one stone.

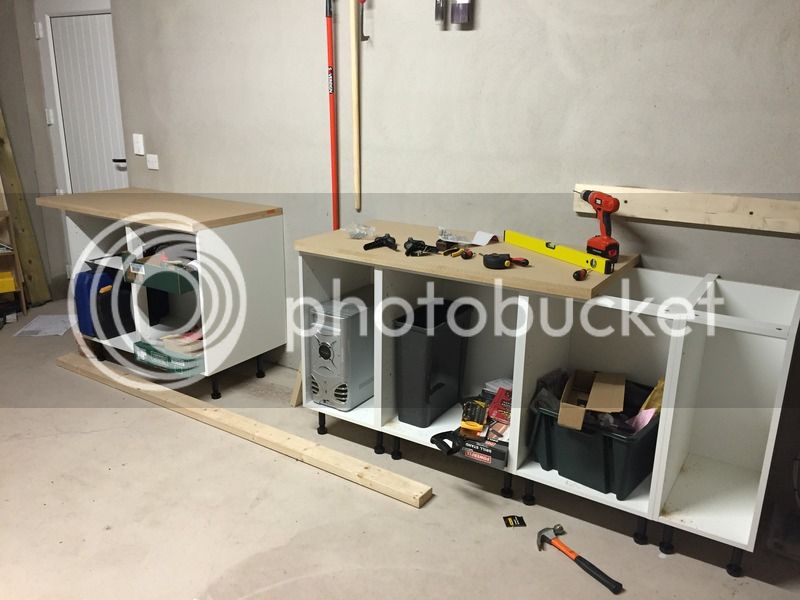
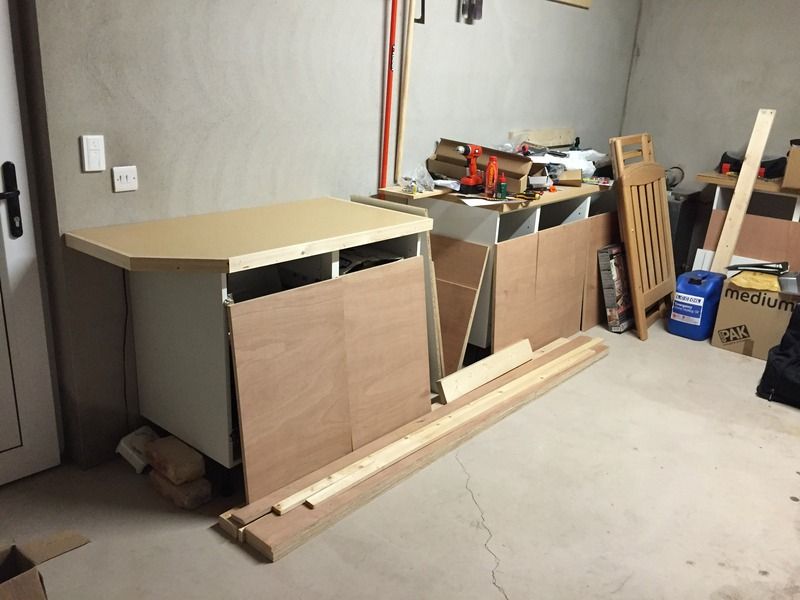
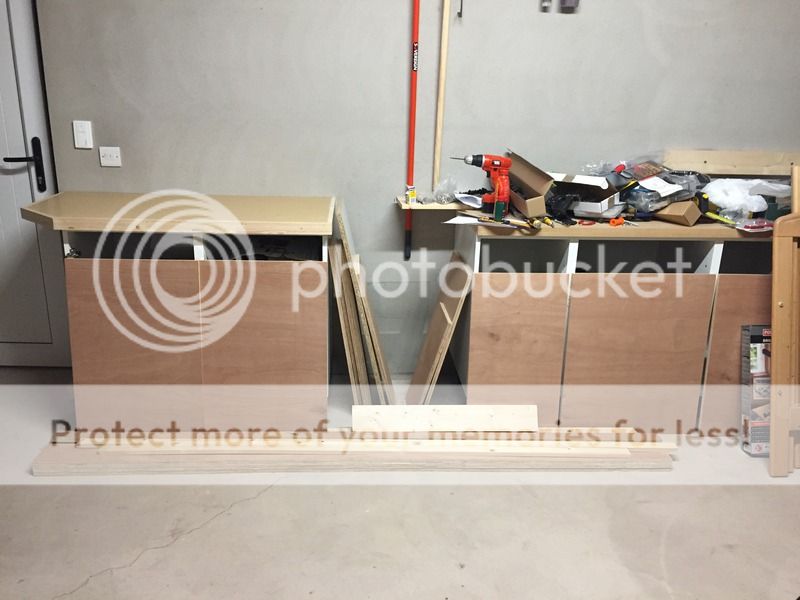
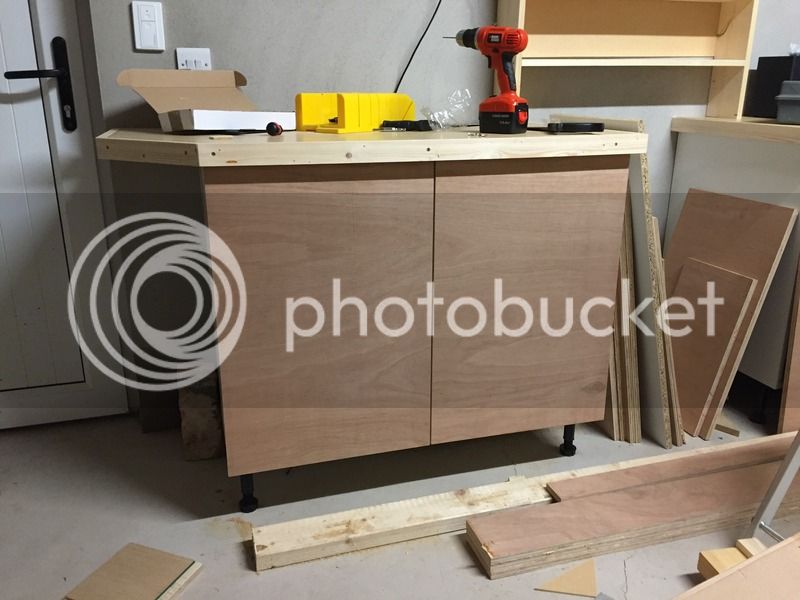
It started out with picking up these carcasses when a local B&Q were closing down. I had intended to build my own shells but when I saw these going for about £100 I decided it was too good an offer to pass up. I set them out and shifted them around until they were in a configuration I was happy with.

2FD70381-1794-4A4F-A58D-6C684EF3CFC3_zpsveuifdyq.jpg


0A8A22D7-C443-40C5-AE7C-ACFFD2C41964_zps2emjkwif.jpg


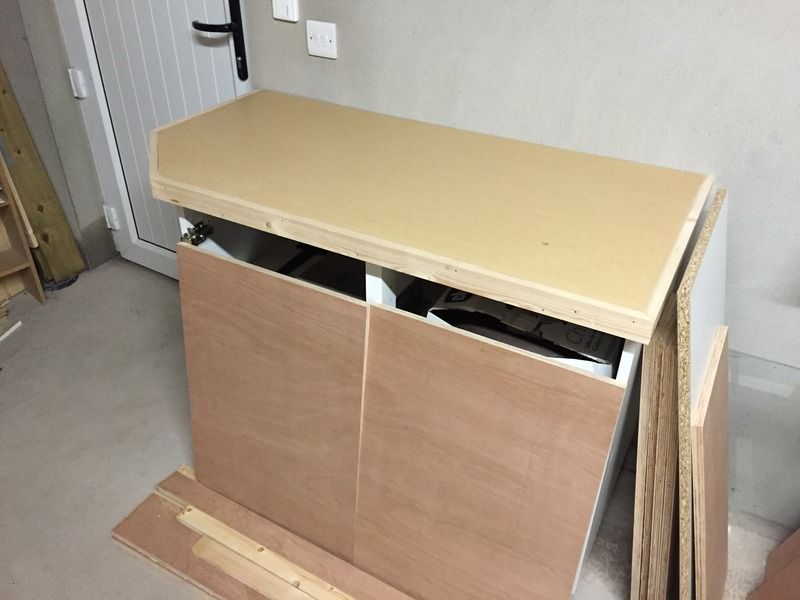
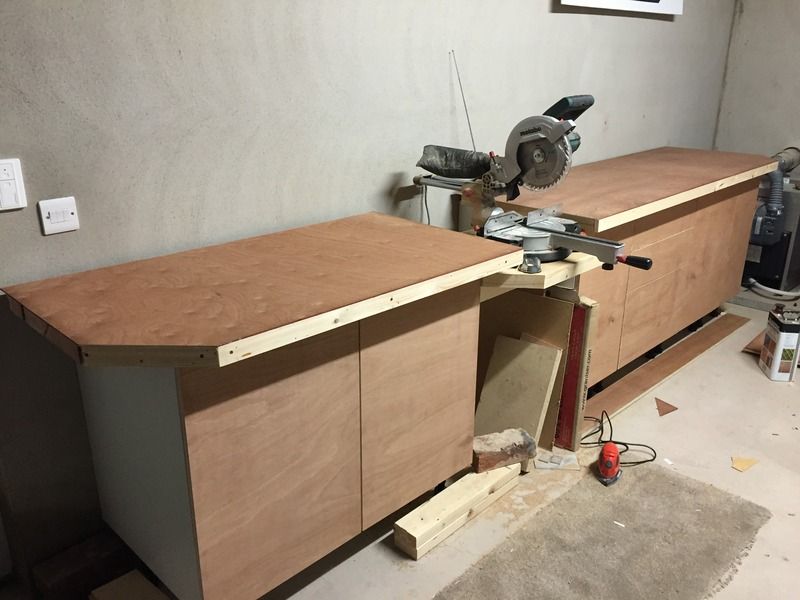
I decided I wanted to keep the overall look simple and straight forward so I used MDF for the worktop, doubling it up to make the depth required and then adding a 4mm MDF sheet to use as a waste board on the top surface. Under the mass of clutter it can just about be seen.

F1E34922-FD97-47BD-9AA9-1287C4B1D6BF_zpsuirkofbc.jpg


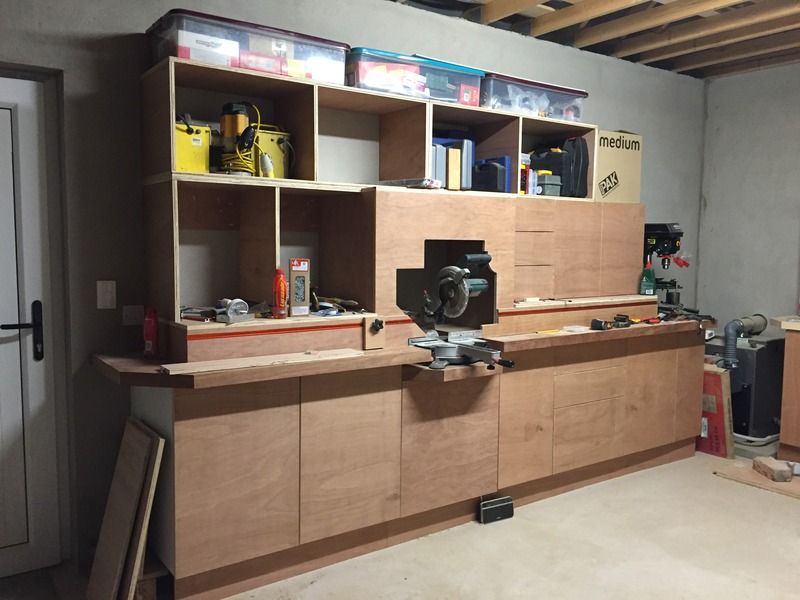
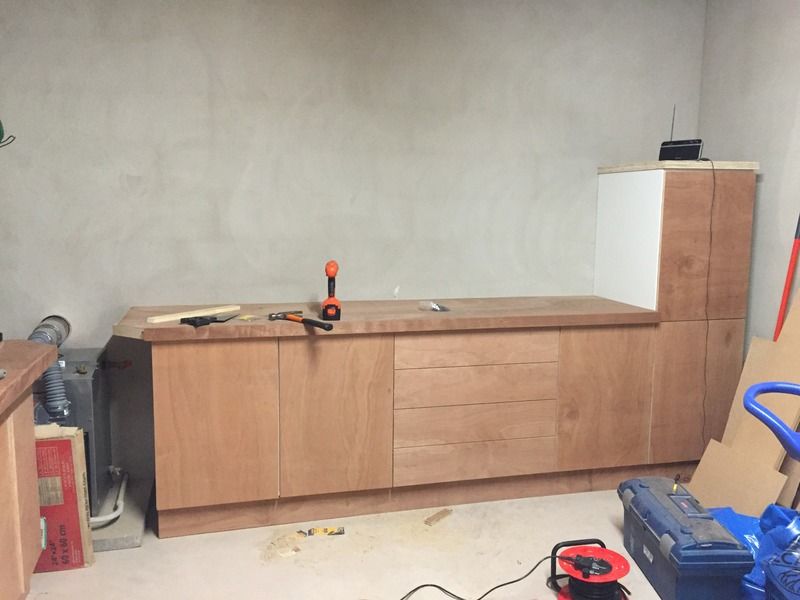
When everything was levelled up and placed where I was happy with, I started adding the worktops on each of the sections

C4E598AA-3CA9-4D42-92C6-1692517FB7D6_zpsycazvkyy.jpg


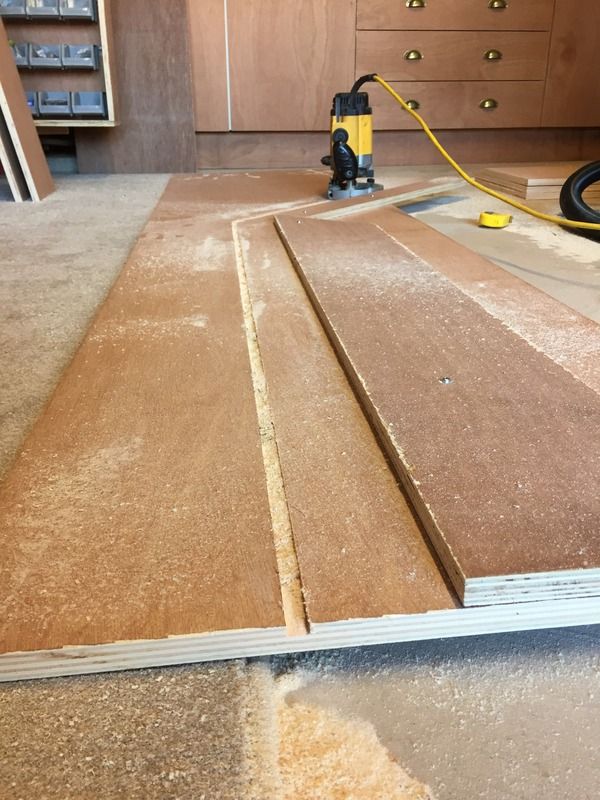
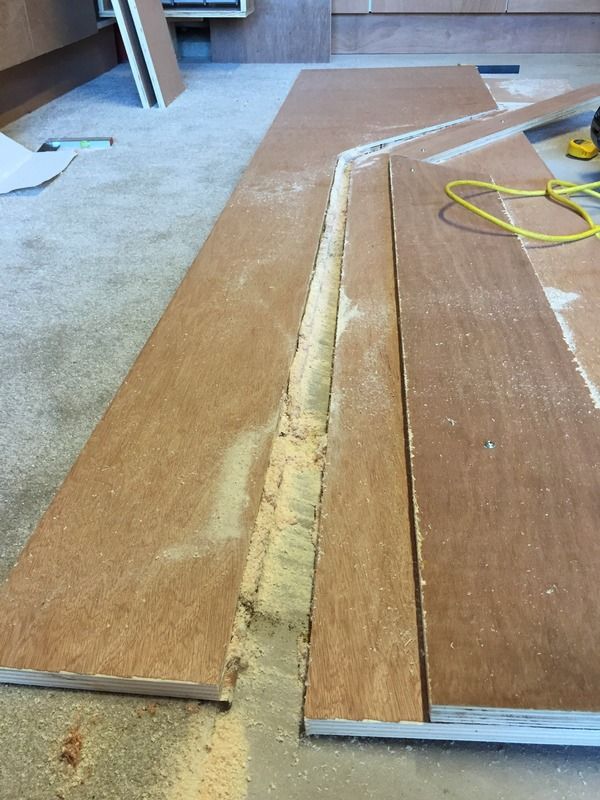
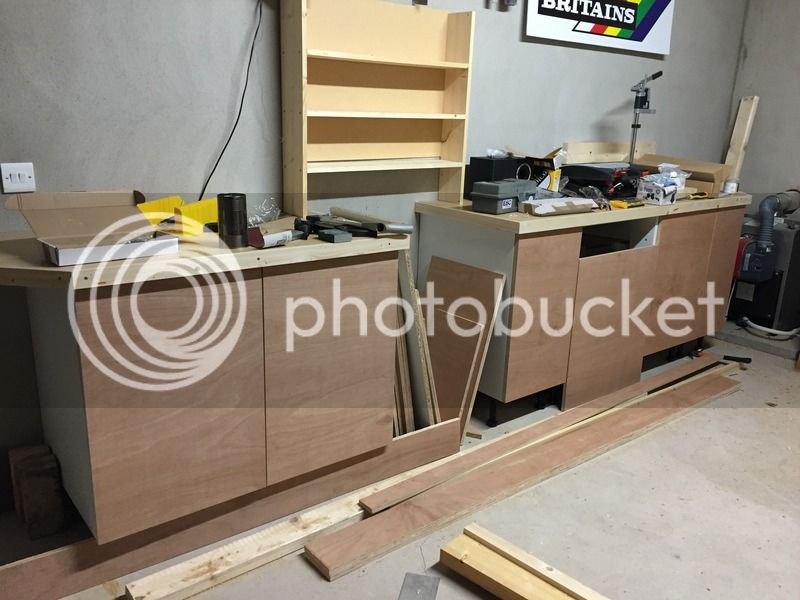
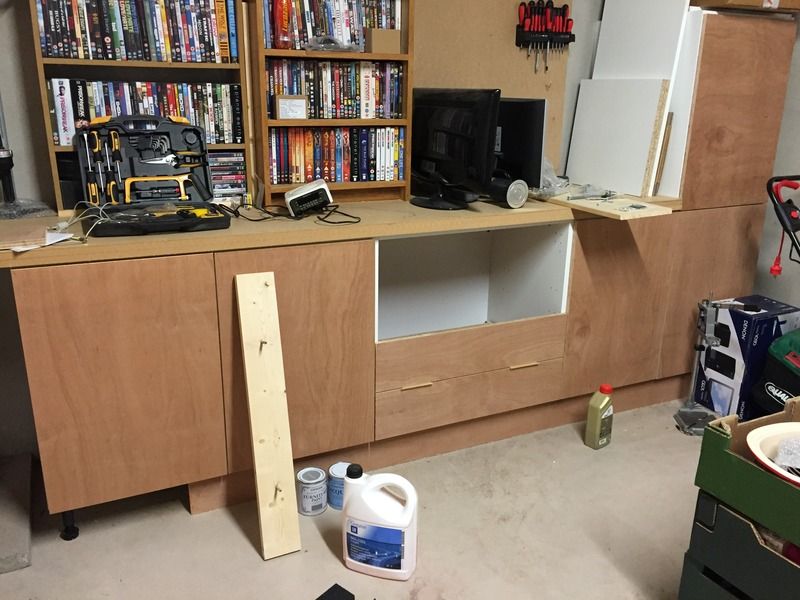
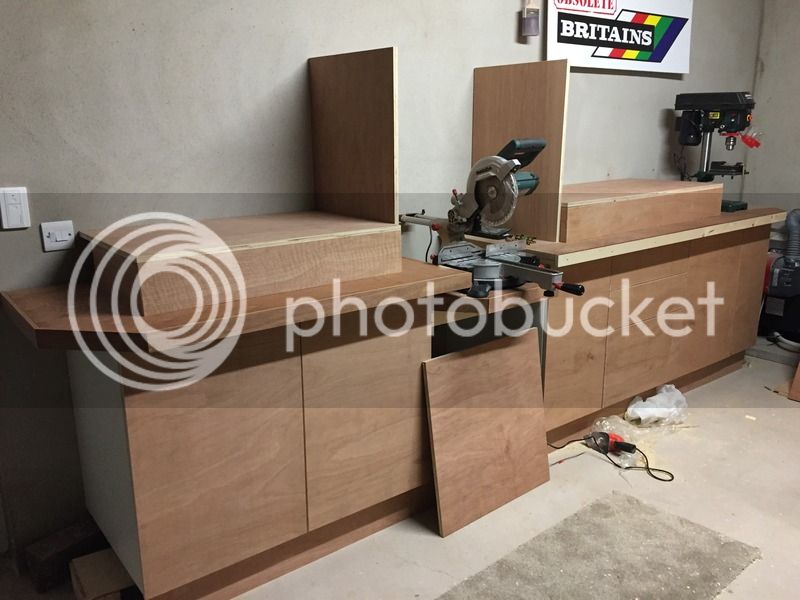
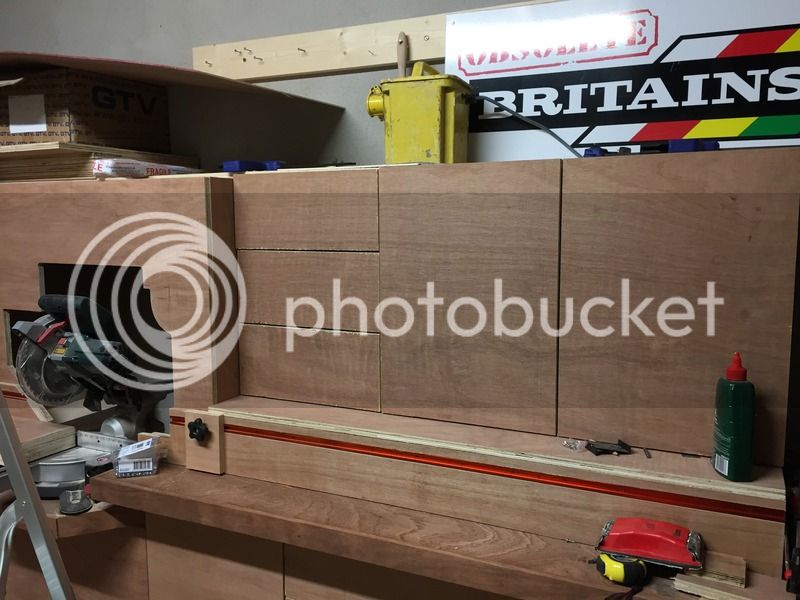
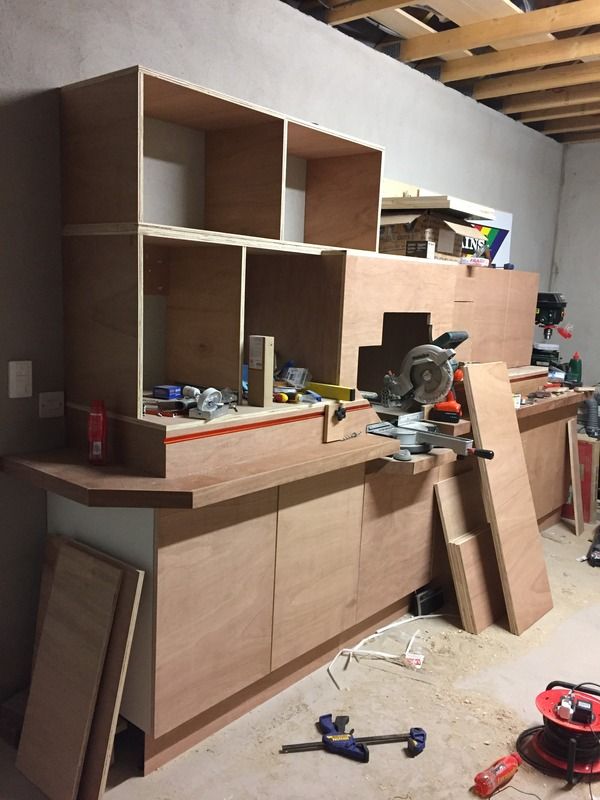
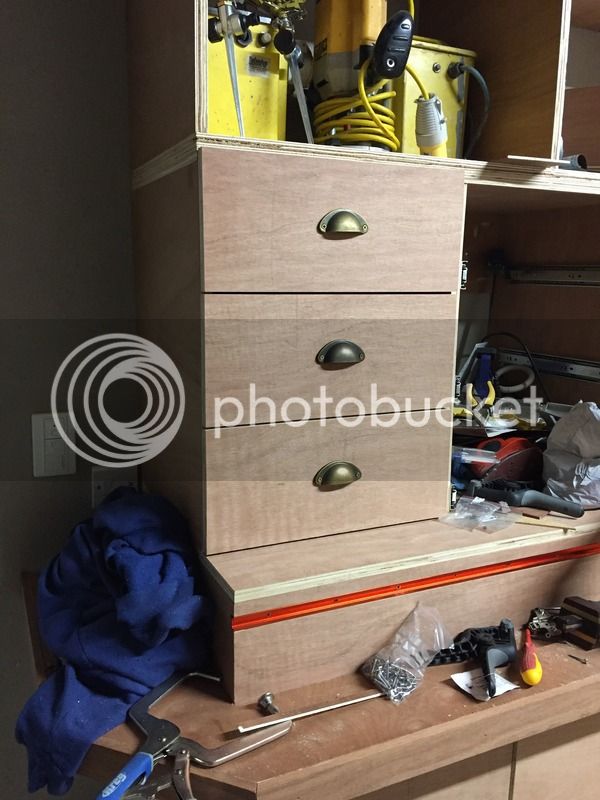
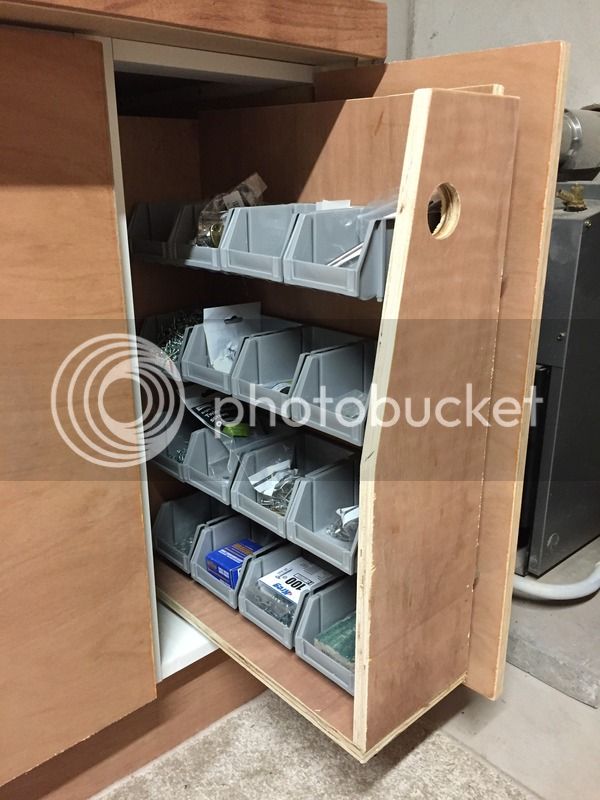
I added some edging and also bought a box of hinges to hang the doors - bargain of £17 on eBay for 20. I got a few sheets of 18mm Plywood cut to size to use as doors and drawer fronts. For now they are just set against the cupboards until I am ready to attach them to the hinges.

C438C296-6D7C-4643-9F0D-C129DCBAAB54_zpsfd4o9xes.jpg


D4252DD8-4DB6-463A-AA79-151CBDF1B017_zpsurgoyfl0.jpg


C0D05A9B-AEF3-4379-B5F0-462E5141CF6D_zpsalpugvbg.jpg


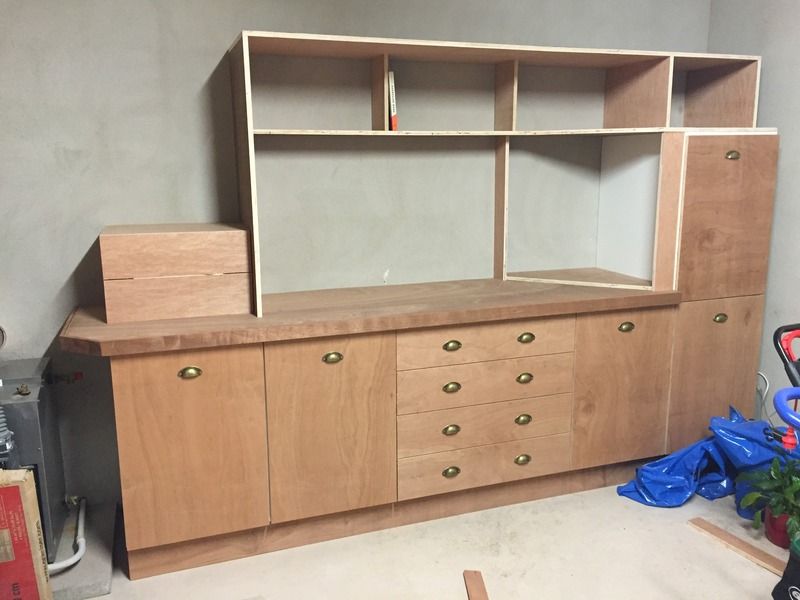
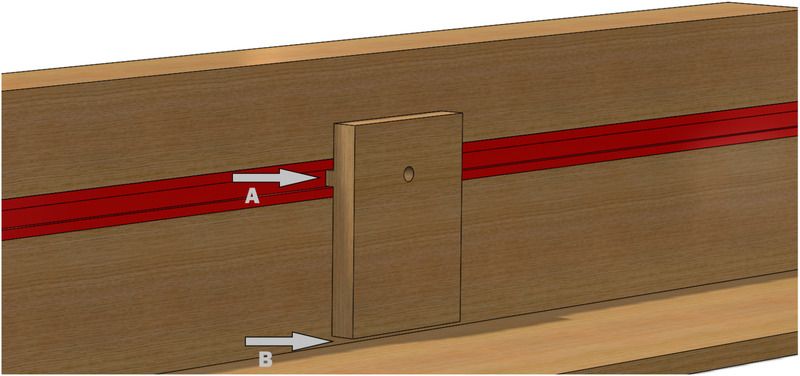
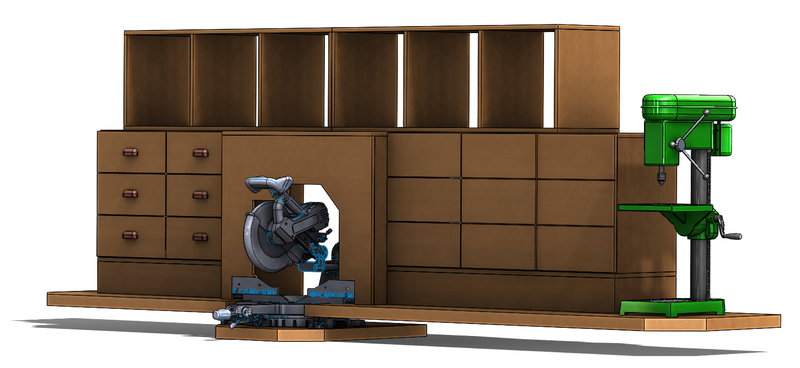
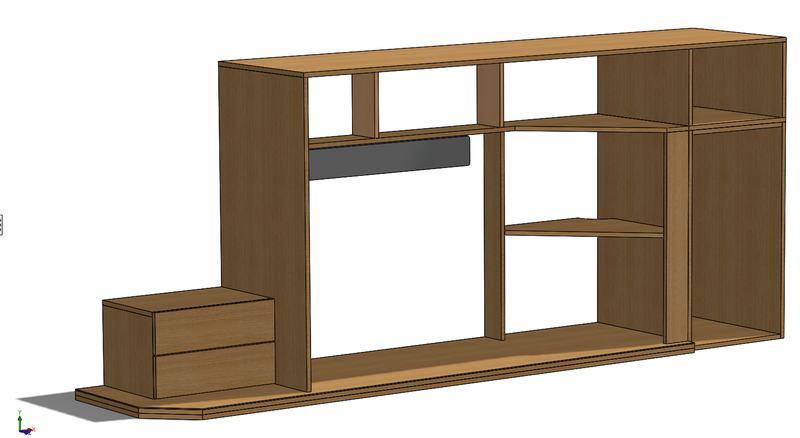
It was at this stage I decided I had to do some proper planning to work out exactly what I hoped to achieve. I drew a quick CAD model to work out some general sizes etc. I'm hoping to end up with something that resembles this when I'm done.

0F74DBB7-CE80-4B12-8435-5C013FF25866_zpsgwtl7urd.png


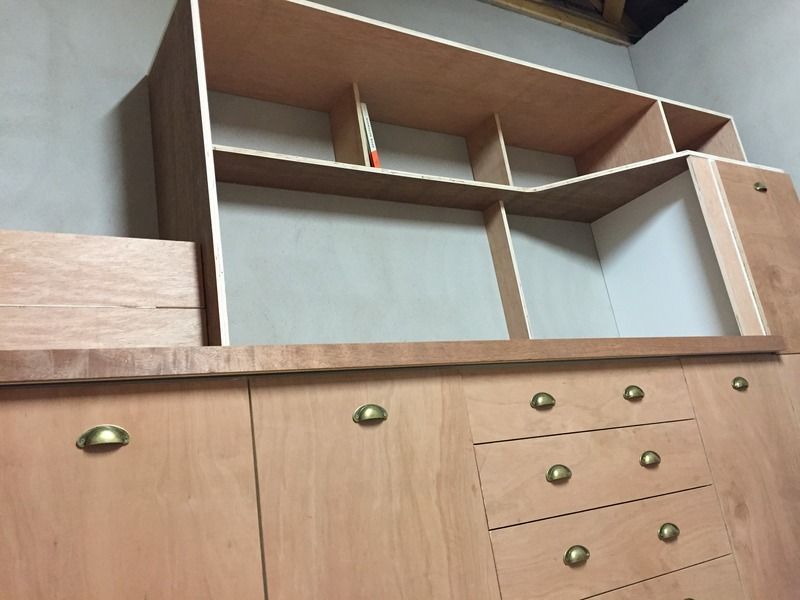
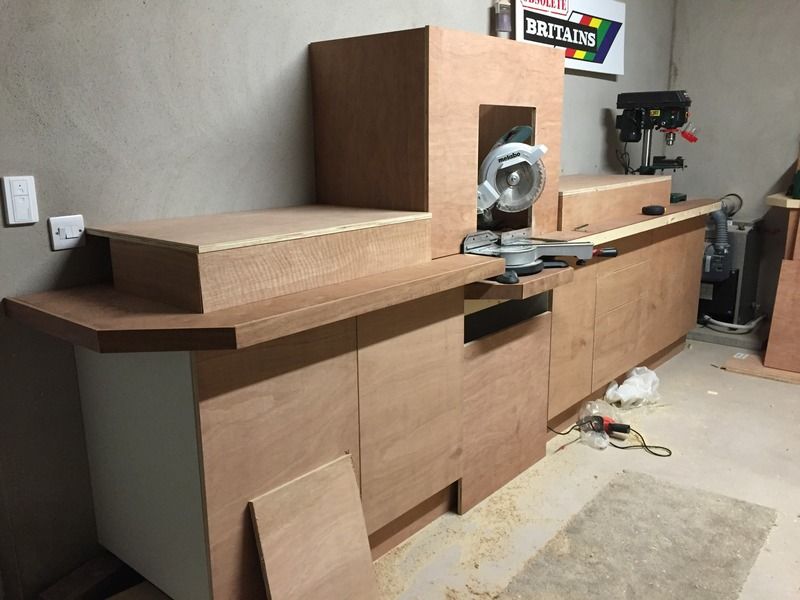
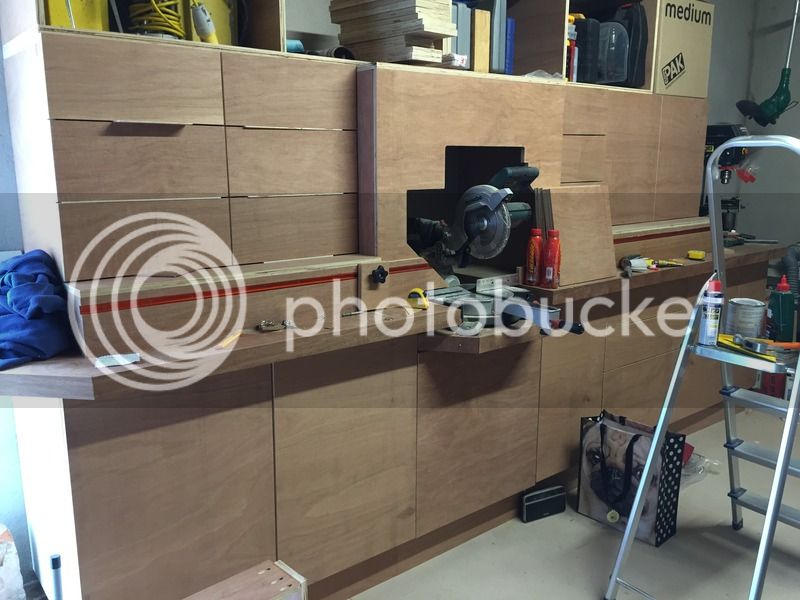
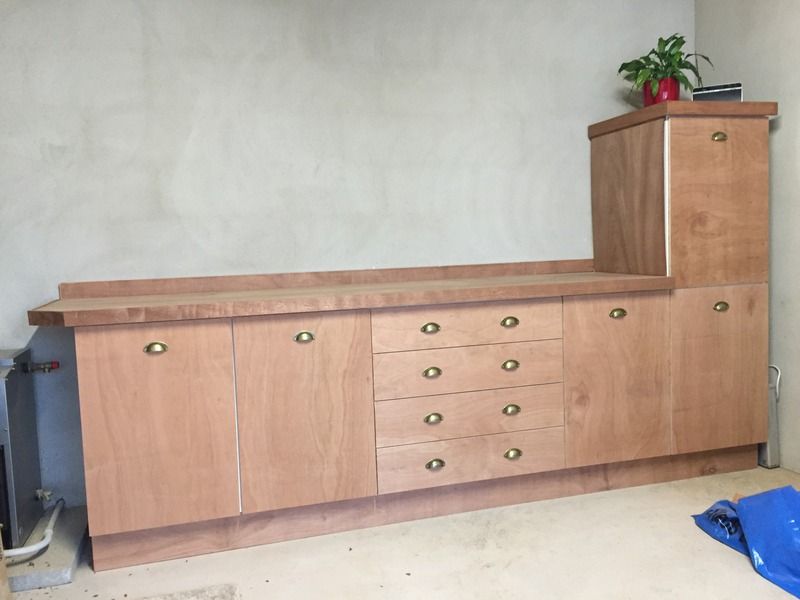
Then I started to add the doors

EEF2CF31-9F49-4DC0-B864-57378C7FB6BF_zpsgbmbqsq3.jpg


CAB55582-70D1-4326-8188-D7AB7F73FFF5_zpsk5e000ow.jpg


CAB55582-70D1-4326-8188-D7AB7F73FFF5_zpsk5e000ow.jpg


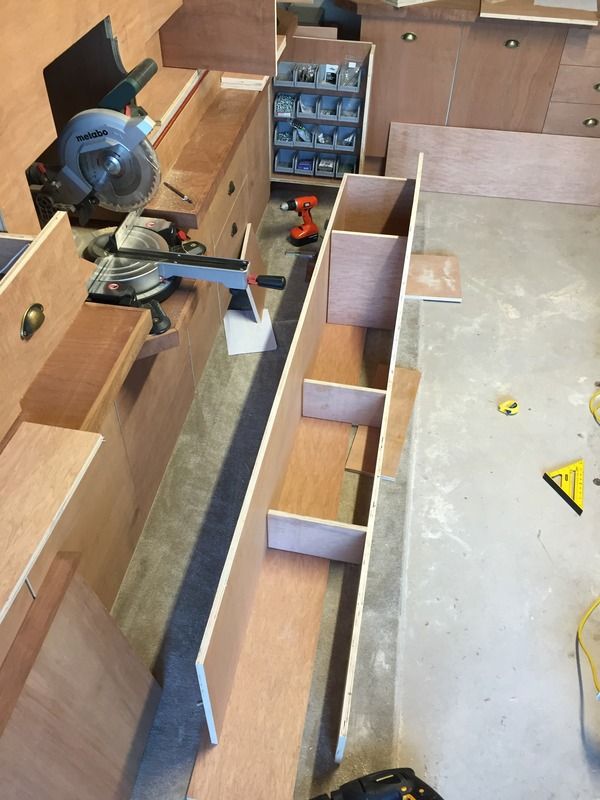
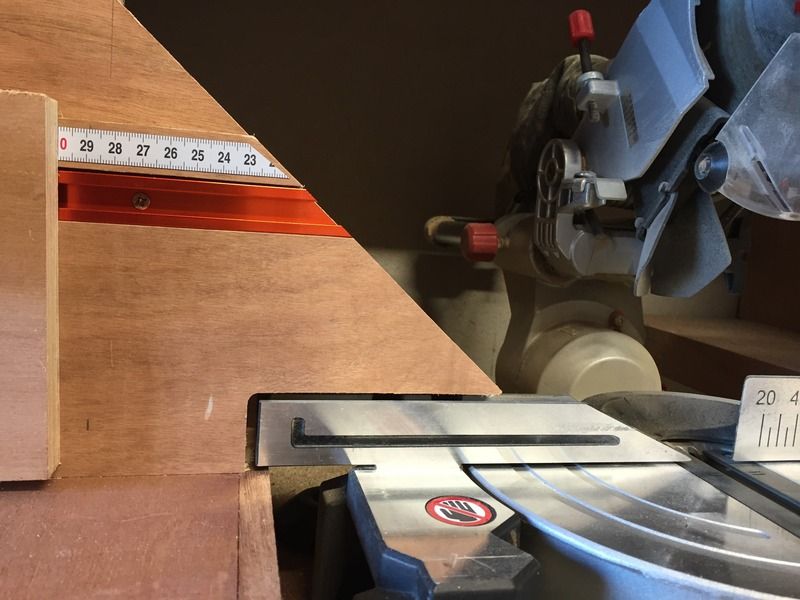
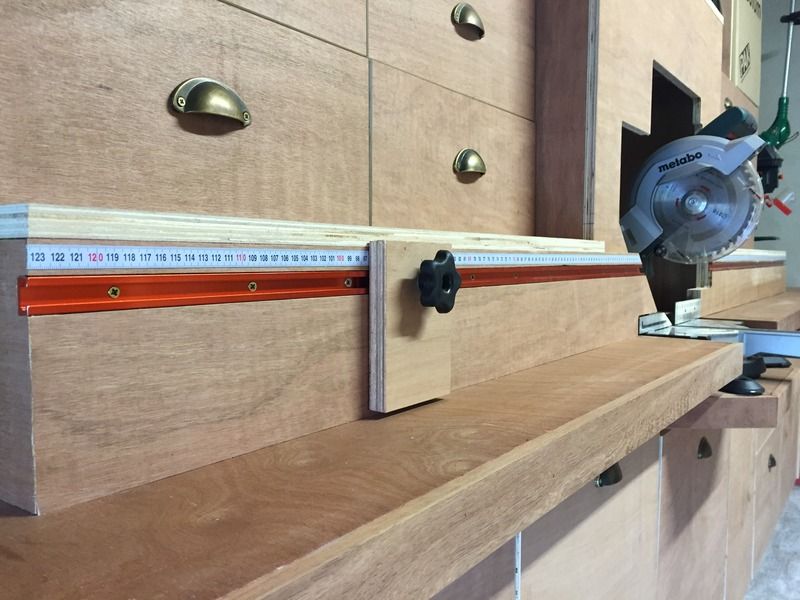
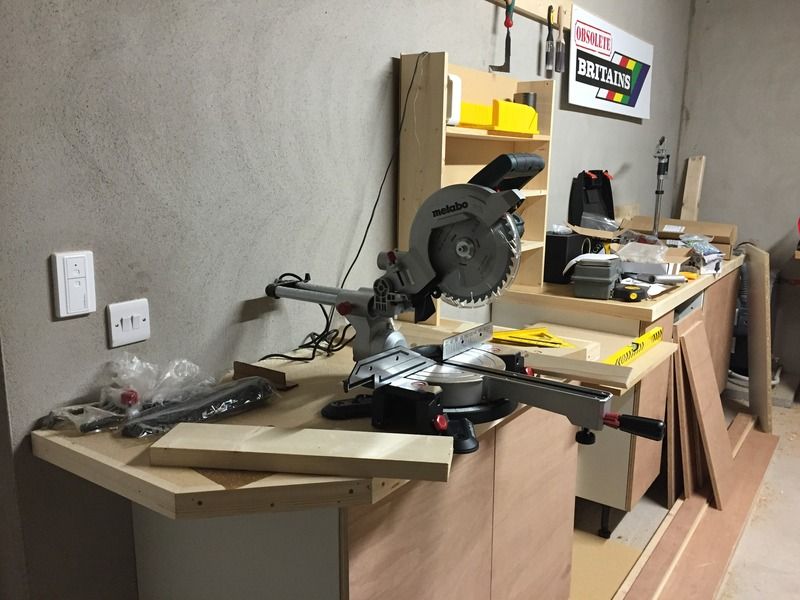
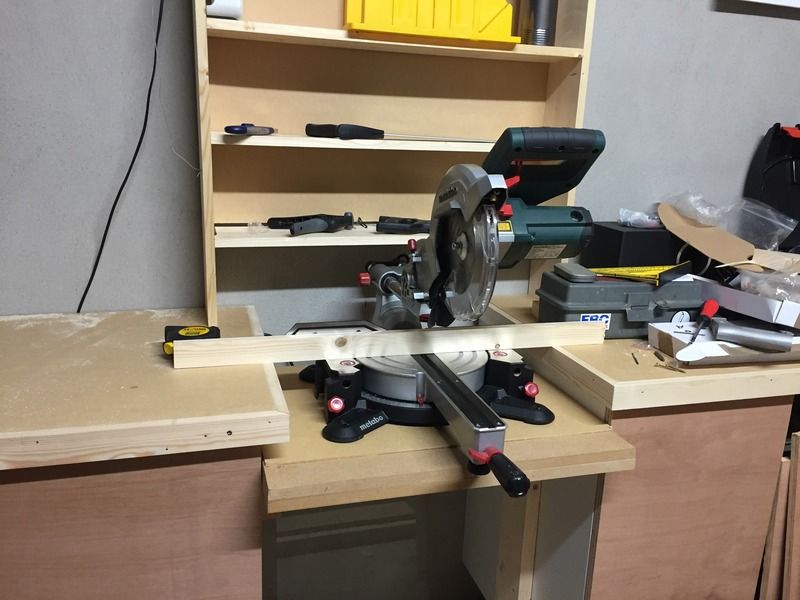
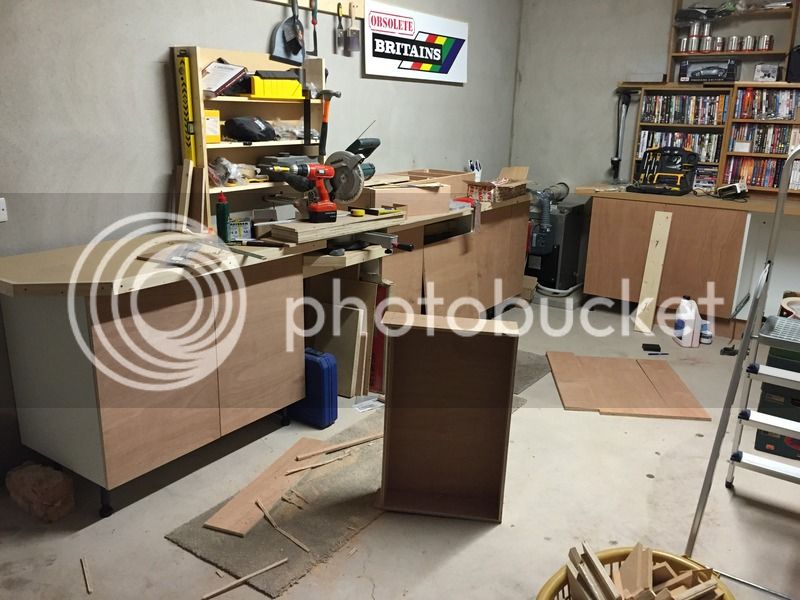
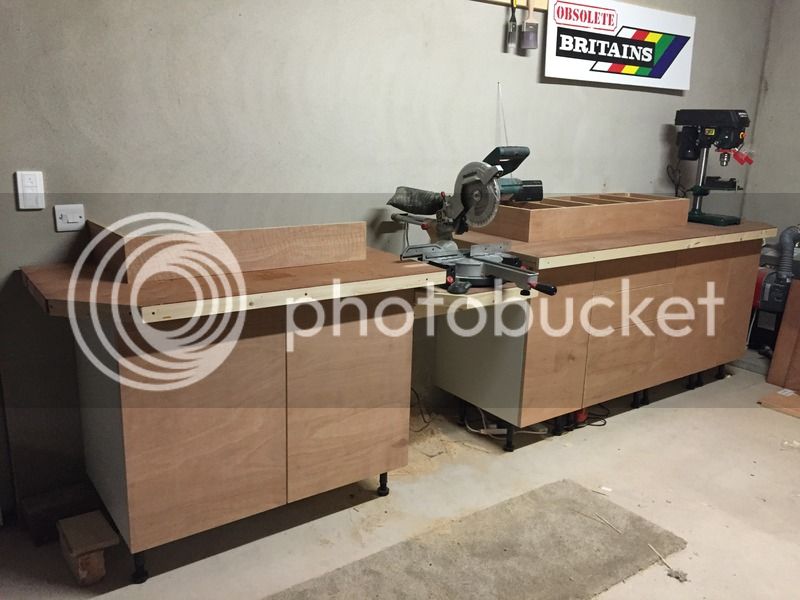
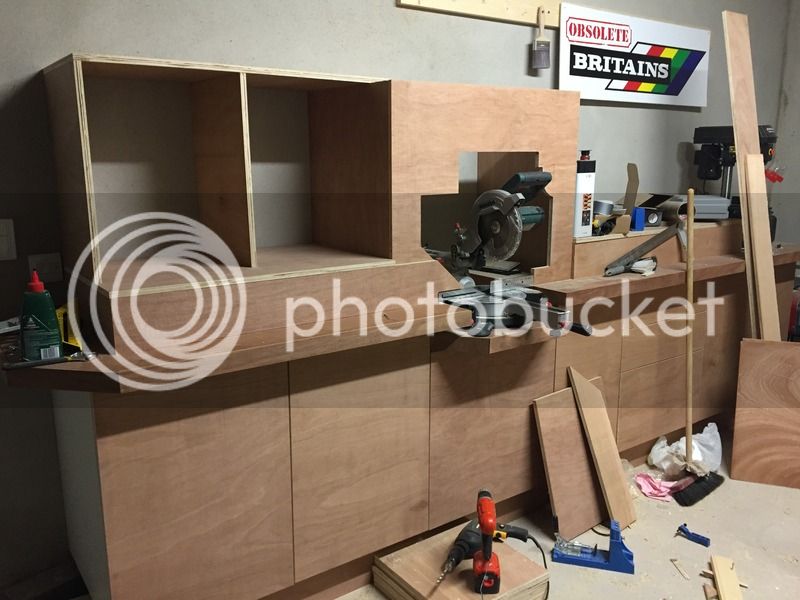
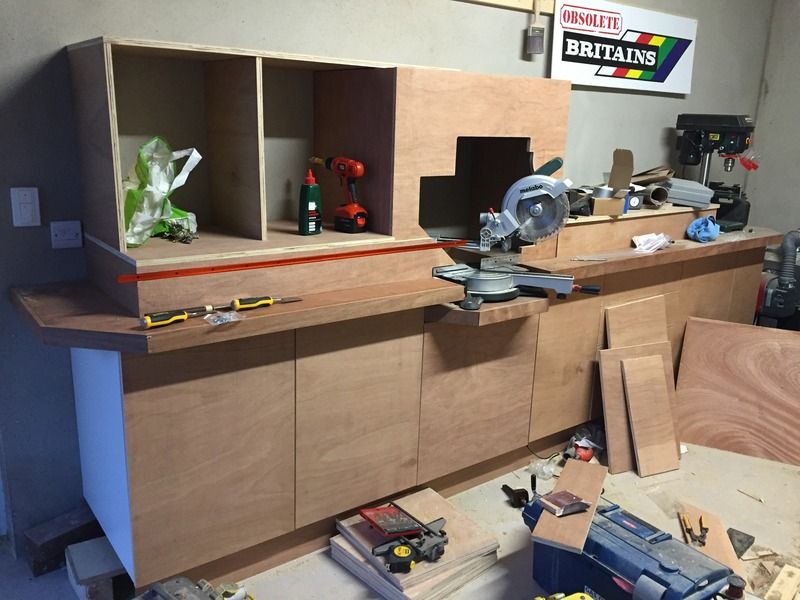
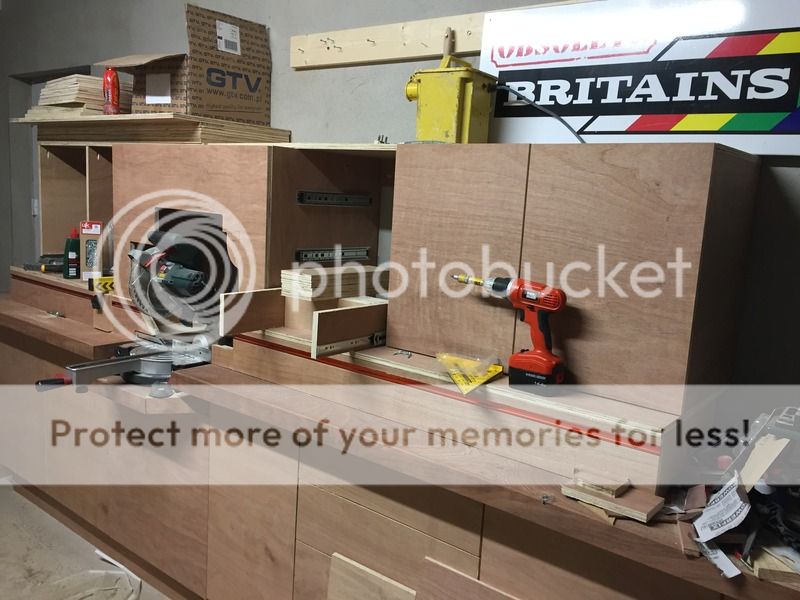
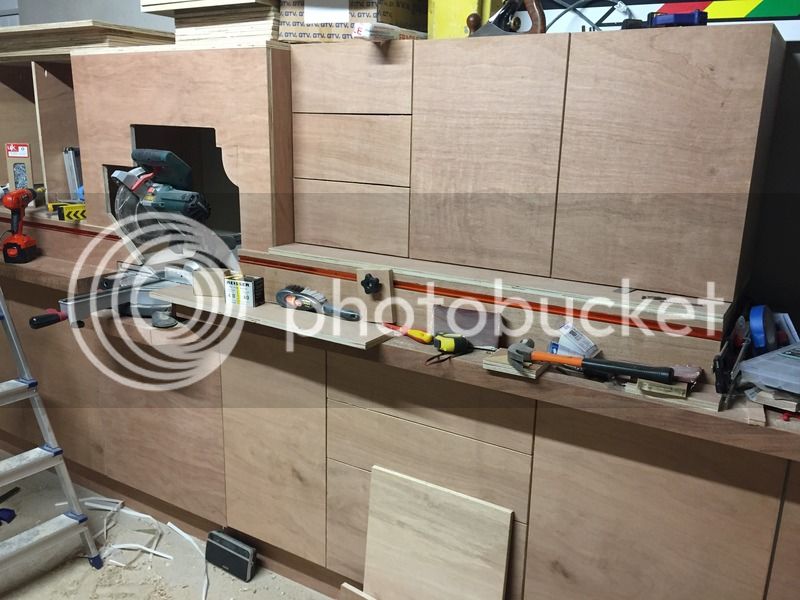
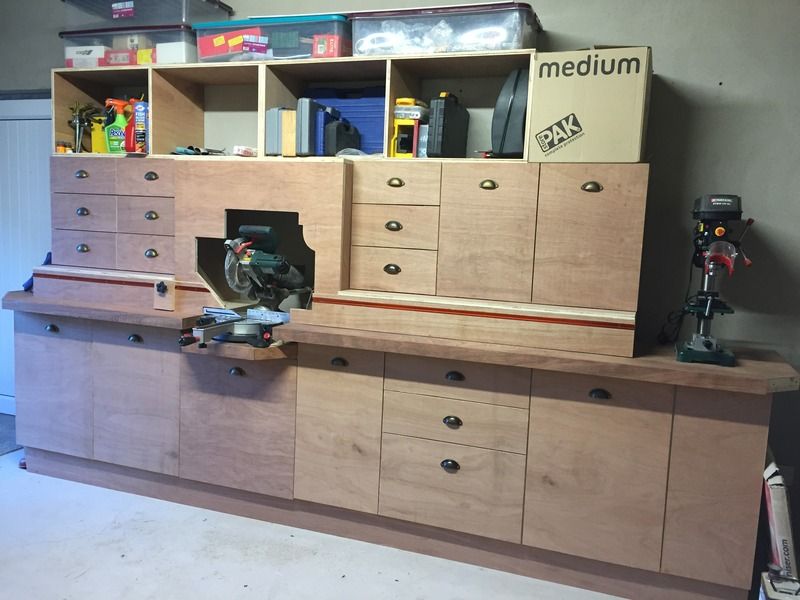
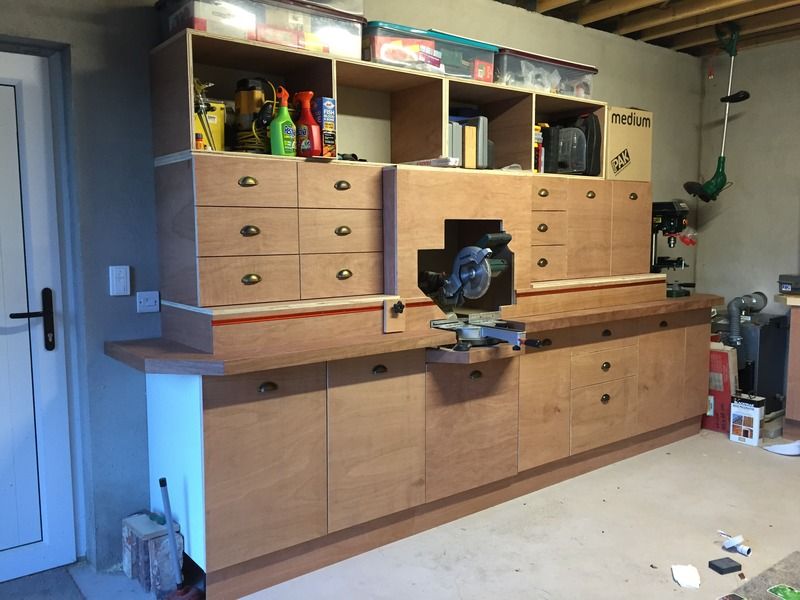
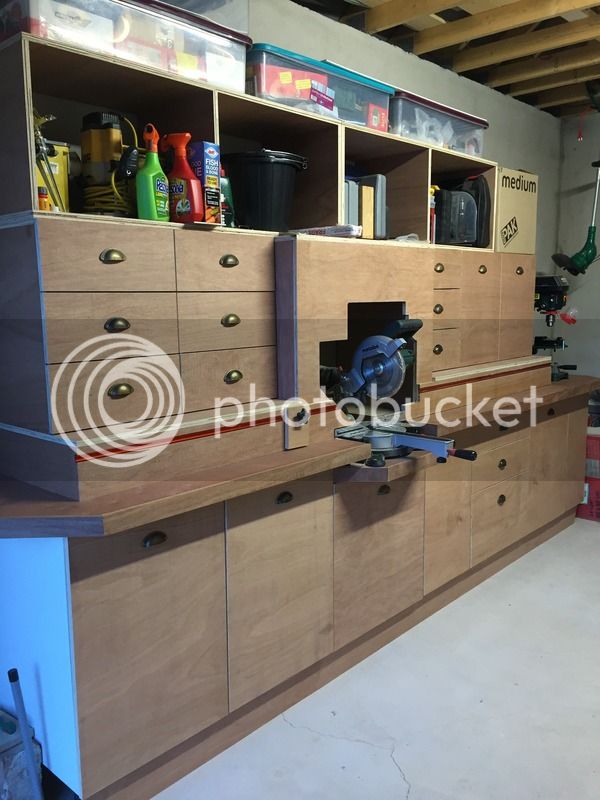
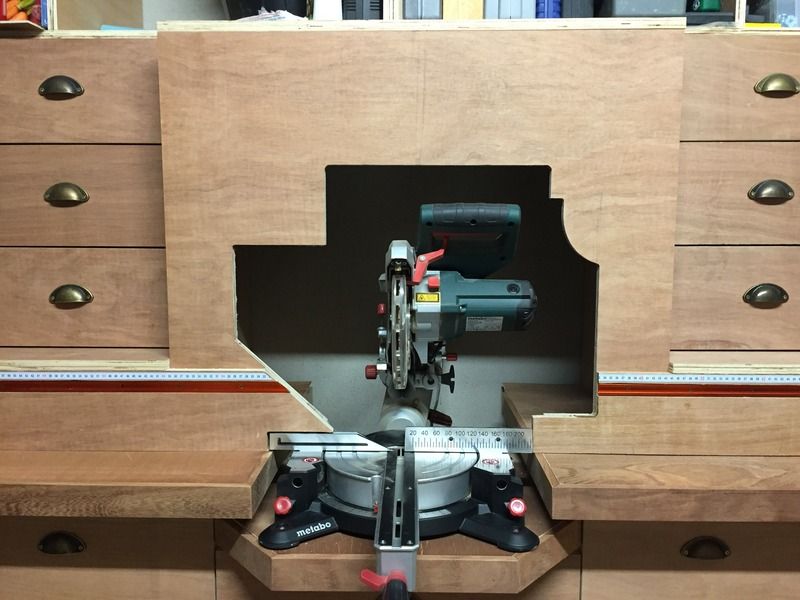
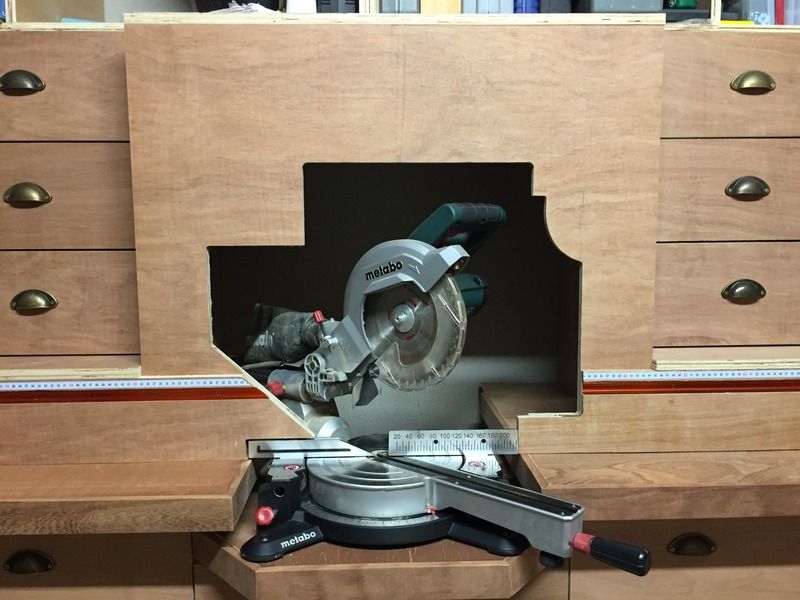
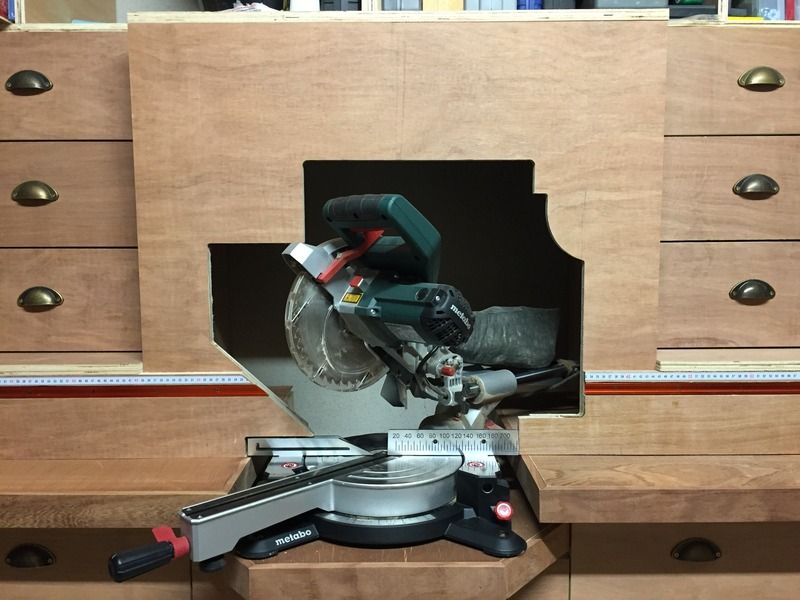
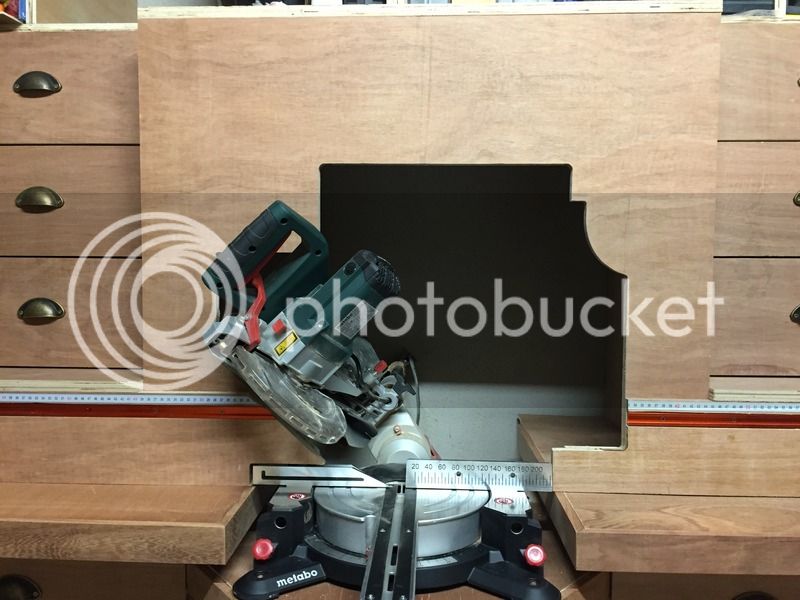
I then managed to pick up a small Mitre Saw at good value in the Christmas sale on ToolStop for £150. After measuring up the space and height requirements, a shelf was installed to hold it, and finished in the same style as the rest of the bench top.
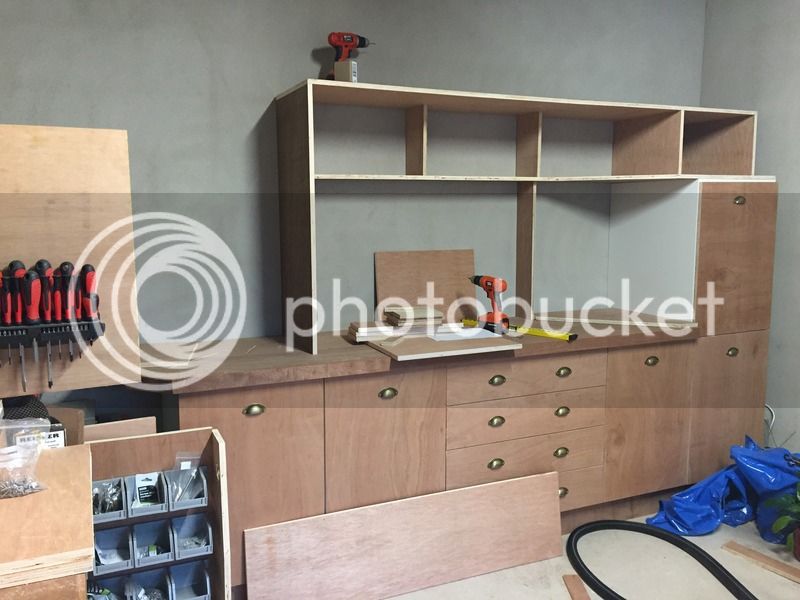
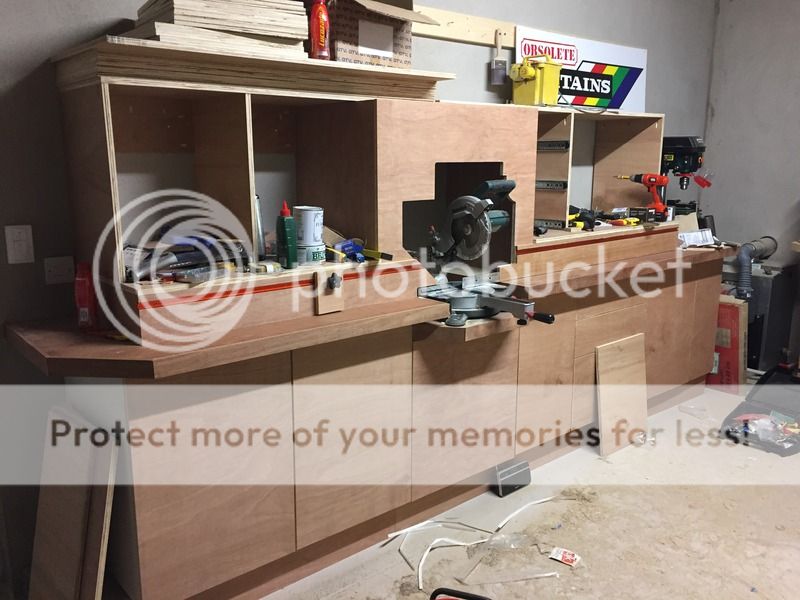
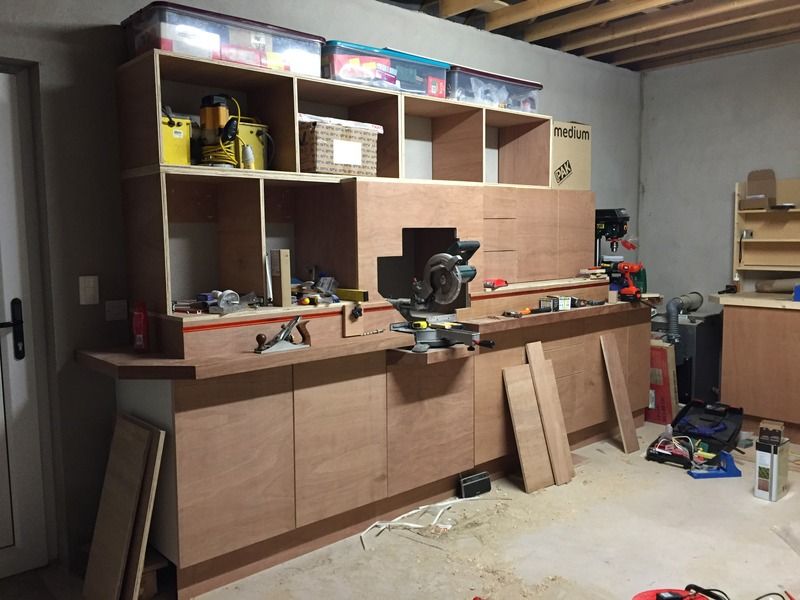
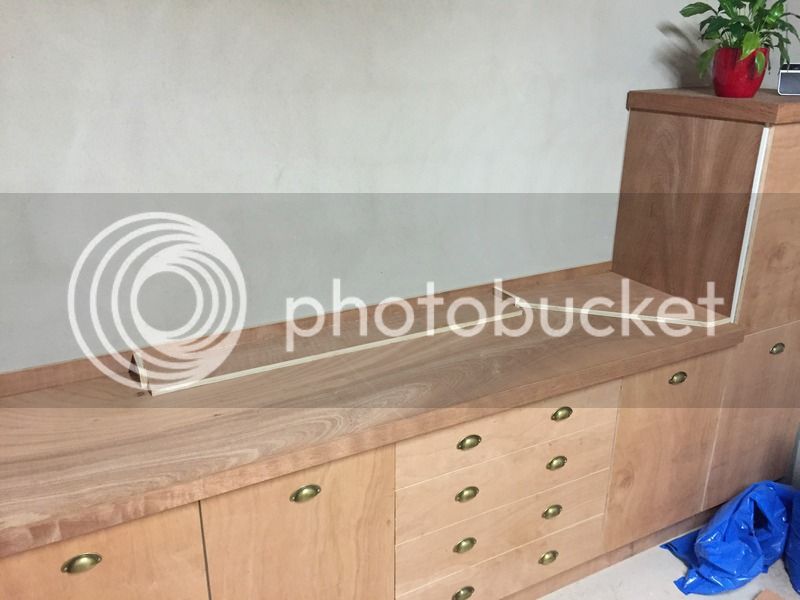
18EC1983-C748-40A4-A648-1A0CD08002EC_zps7rqsqdwe.jpg


53F2DE7E-0469-414C-BD13-9DC489D85E6F_zpsdi1ed4wj.jpg


Overall view so far

01403520-E1A4-4DCA-AEA7-566FD89DC896_zpsg4czy6d5.jpg


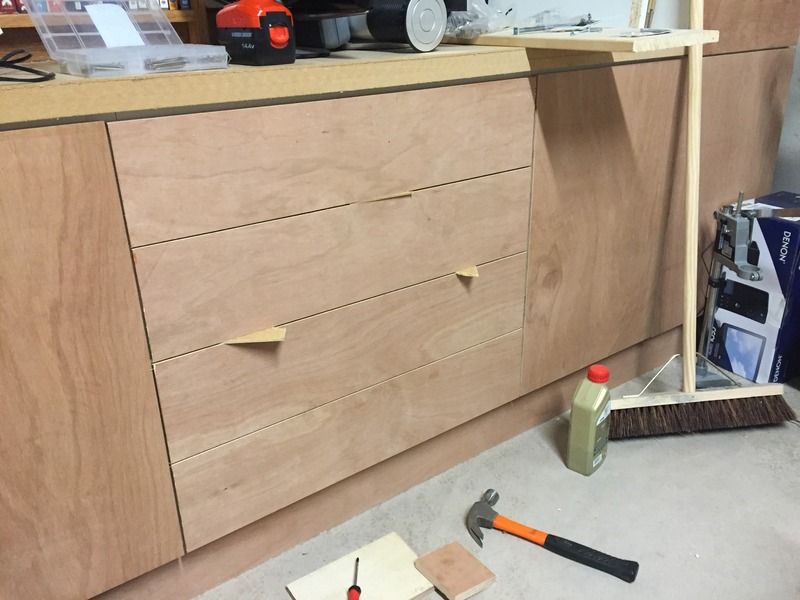
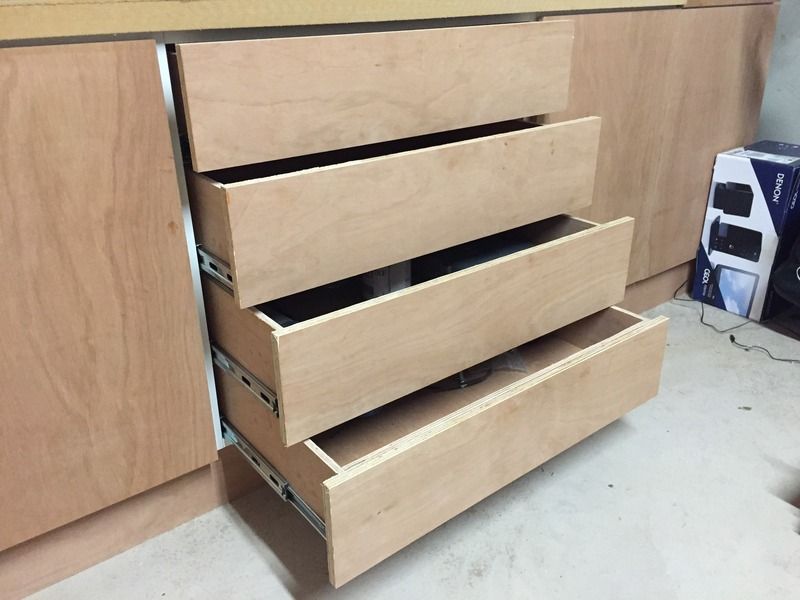
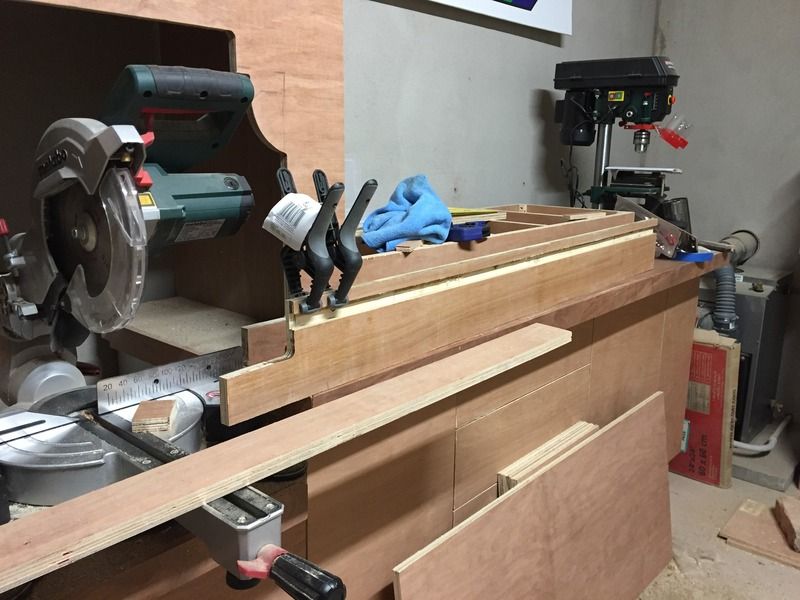
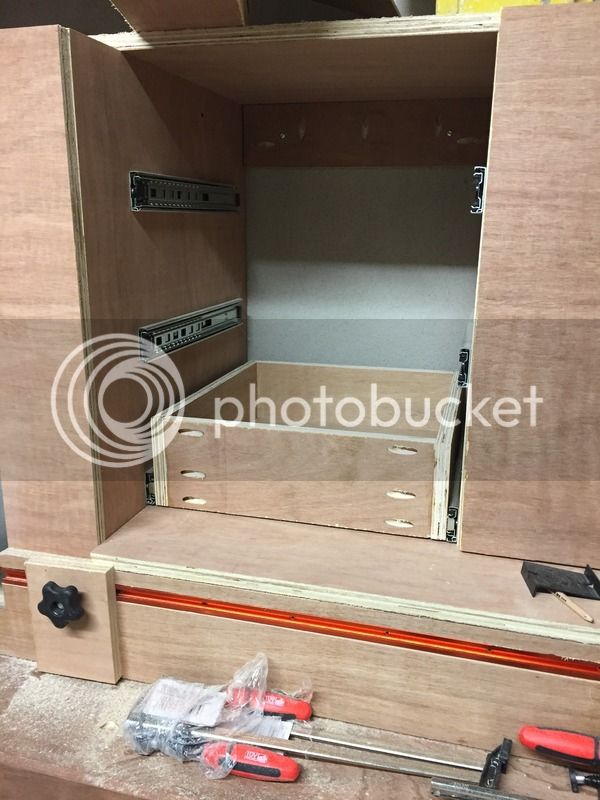
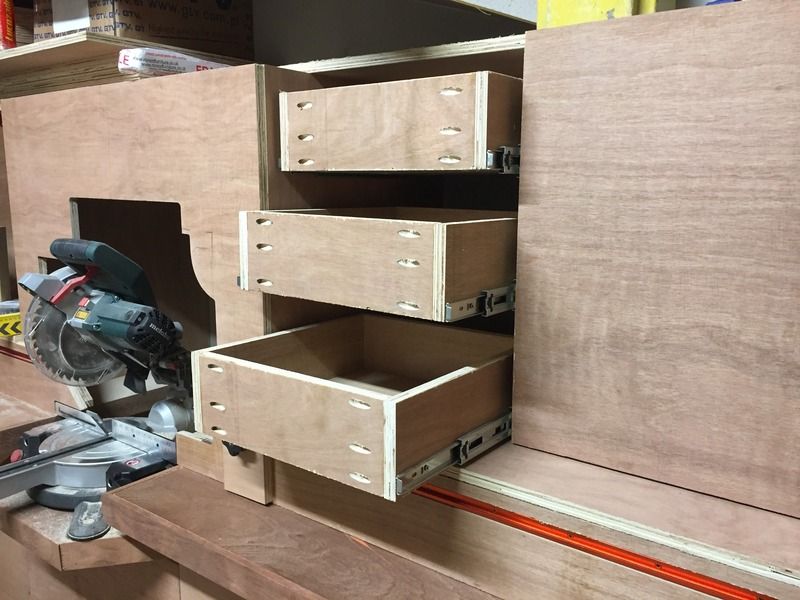
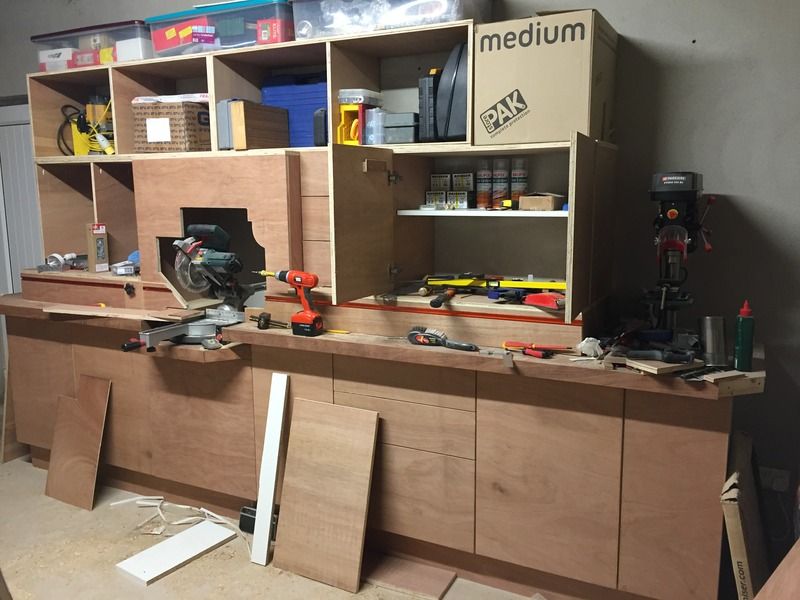
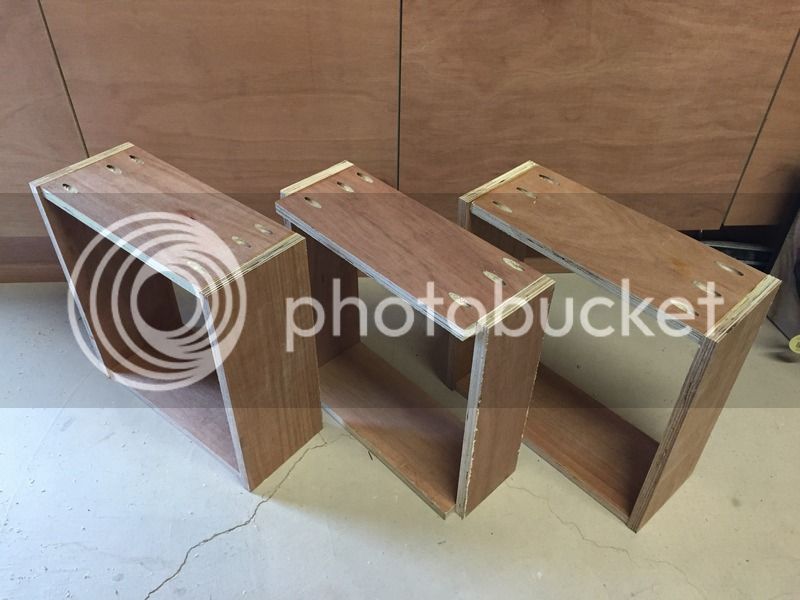
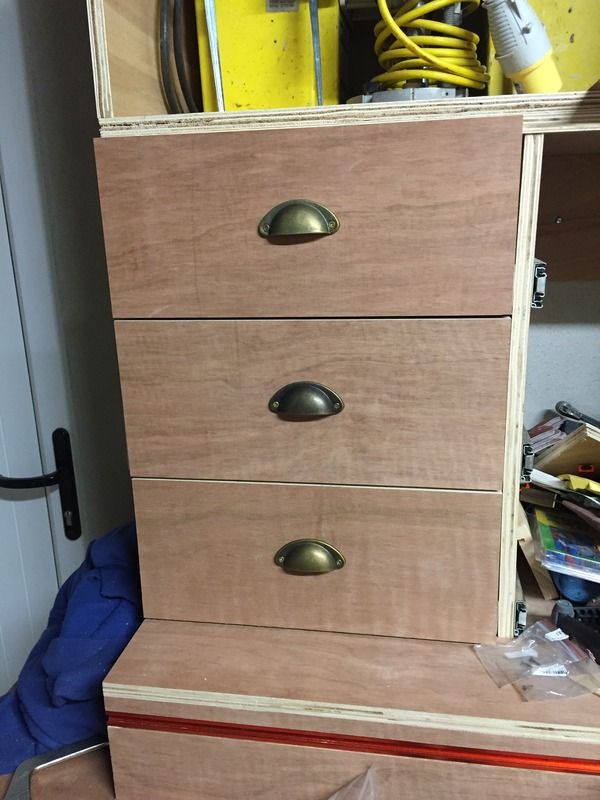
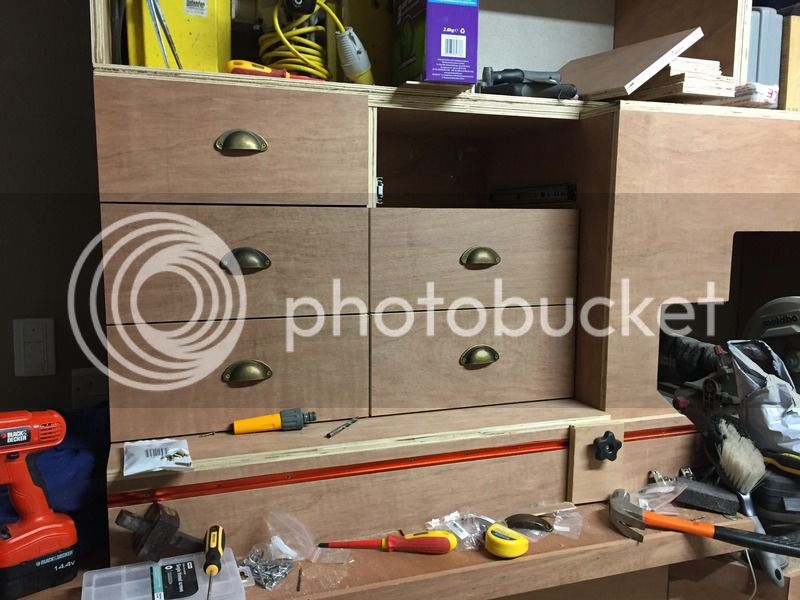
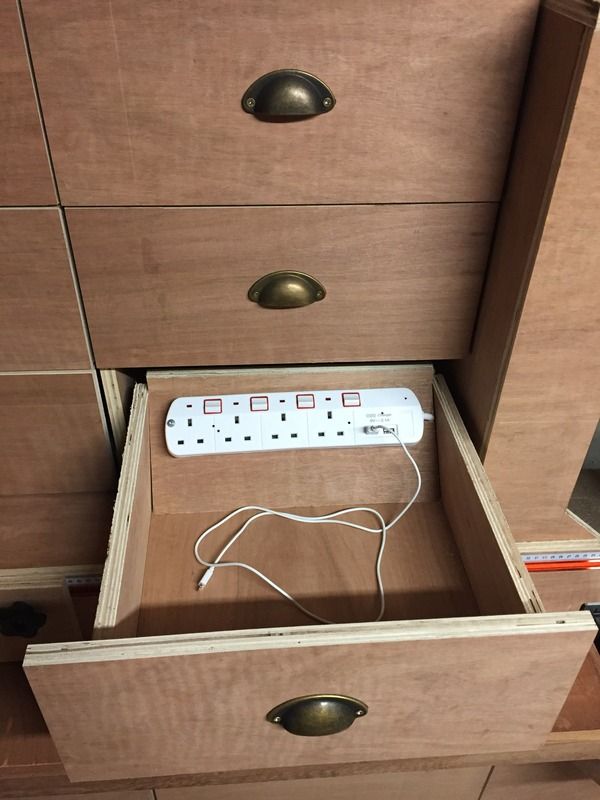
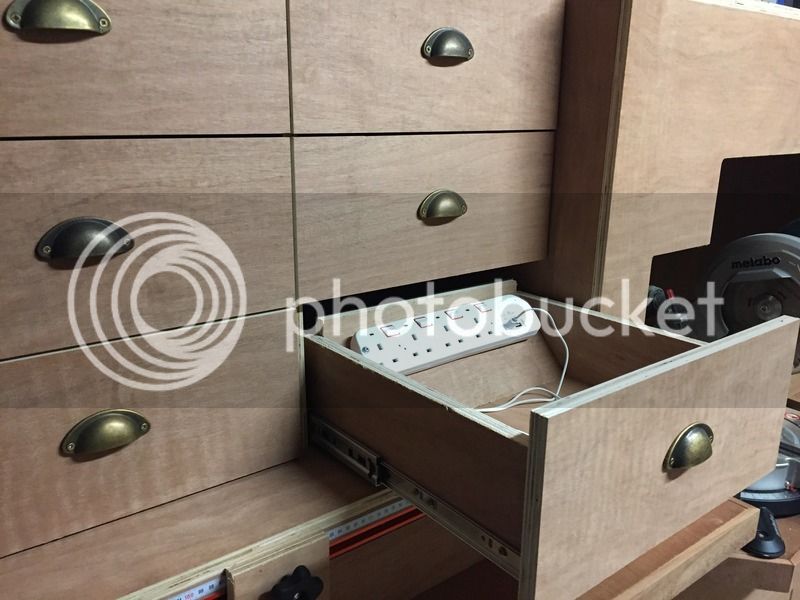
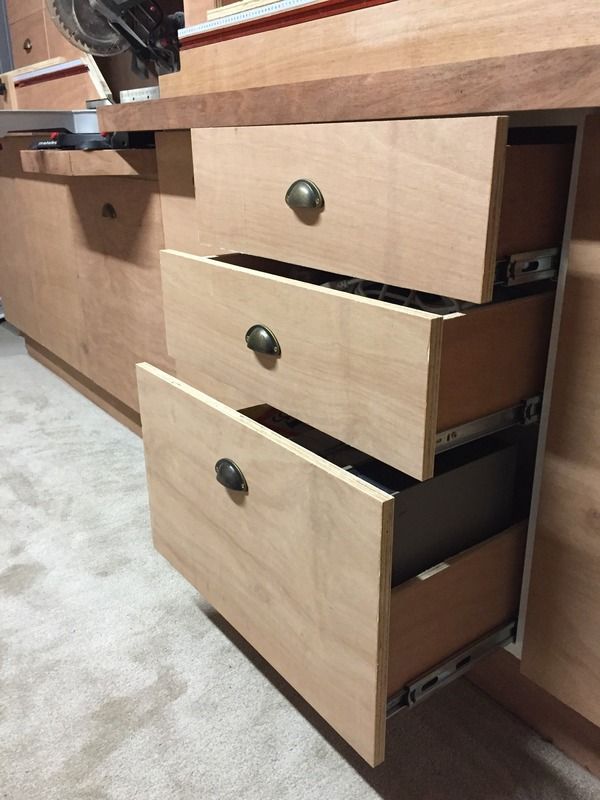
Next was time to make the drawers which will be set into the units. I'm not a wood worker and decided to do this project as a bit of fun/ learning but I have to say that this portion of the project nearly drove me to breaking point. This near killed me! If I don't have to make another drawer for several years i'll be very happy


90B96A2F-DE3F-4177-B163-20BB8B890ACD_zpsa4mjbxdt.jpg


30DBFCD1-7959-45EF-9658-DFED71DDB173_zps708iximz.jpg


0DD8B5A7-11DF-452F-BF8B-64655110BC37_zpsny5s0wk9.jpg


86D000B7-3794-4C98-82C8-9ADB6CCEE396_zpsu4ts4abv.jpg


88A501BF-0DF8-4128-B9DE-3D167D409D8D_zpsptvlckfu.jpg
 
I'm so jealous! I'm dying to build one of these, but have to wait for a while host of things first (spare cash, leveling the garage floor etc).

Looking forward to seeing the end result. One thing though - will the mitre saw shroud allow for bevelled cuts?
 
It was at this point I decided I didn't like the bench top as I felt it didn't match with the image I had in my head. So I bought some 4mm sheeting which was a similar colour to the doors and covered the bench top. I was much happier with how this looked

E07DFAA0-BE93-4133-A281-579D1436270E_zps27z5oj9h.jpg


Shortly after the Christmas break I saw a small pillar drill advertised in Lidl for £49. Never one to pass up a bargain I brought it home. My little workshop is starting to become populated!

407155CF-98EC-4C5B-AAF5-5E4341C77B7D_zpsfi5xexqe.jpg


I made some guide walls that were in line with the guide rail on the mitre saw. When I was happy with the placement I attached them to the benchtop. I should point out at this point that when I set out on this project I decided I didn't want to have any screws visible when the project was finished. Perhaps to someone in this game, and who knows what they are doing this may be an easy task, but to me it proved quite the challenge. Especially at this step and over the next couple of stages.

520343EC-7C60-4F16-83C1-6C40CC4E18E6_zpswe6vqviv.jpg


Mitre Saw with dust box added to contain some of the dust it creates when in use.

00954BC5-82D0-4969-B0B5-33B89FFDF80E_zpstegyne7y.jpg


F82ADA4A-2DFE-4B96-A388-338F6244E80A_zps4dtfrzxt.jpg


At this point I also managed to get a few strips of red wood edging and added it along the edges where the white wood was exposed previously.

The carcass for the eye level drawers start to take shape

5C01842F-A36E-456C-A2A5-489B3A5CB518_zpsgmqjx56f.jpg


Another major portion of this project for me was cutting the groove necessary in the guide walls to house a tape and length guide. It took me about 3 nights but I eventually got there. Was very pleased with this feature and how it turned out.

FC3BAC4B-C9AA-40C0-83A5-08854639DCEF_zpsvpde7dti.jpg


Same challenges apply to both sides!

AB53D8E5-12B9-48B9-9A8F-1A40986811DD_zpsuorxjx91.jpg


And with the drawer carcasses added to the right side

AA6BD9DC-382B-490B-8E61-43D59C345372_zpsxtus1hbx.jpg


Cupboard doors and drawers going into place here. More drawers. Aghhh!

B72F1D7F-7A4F-42E3-AAF0-C50C8A0729F2_zpsgrqb9niu.jpg


A84800B1-6662-43EE-8DA0-47273C195799_zpsunchv5kt.jpg


BD377677-D40A-4C4C-BF81-5DD3280015E9_zpsatwdhupi.jpg


953C3305-D1AF-484F-B4B8-C011C1788BE1_zpsdcnswjrk.jpg


E8674CB5-5526-4CD2-8894-9A087F5C53C7_zps1cyse136.jpg


Some additional open storage was added up top for tool boxes and other items that weren't used very often. Anything up here is about head height so its easily seen and accessed when needed

955982B2-2725-47E7-BF70-28515093B84D_zpsudy2j3pp.jpg


2CB18EFD-06BA-4422-8AD9-C33F468971E5_zps5tldqbhx.jpg
 
I had planned to do all drawers on the top section but given my previous experiences with drawer making I decided to make a cupboard instead. It can be seen here with the doors open, with the drawers beside it.

B5FEC03B-9A6A-4C3C-A263-8286DE2C6EA1_zpsoejgtebj.jpg


A little rack added to the back side of the doors to house some of the tools

4358DE2F-9632-460C-AA3D-4771603E5AC7_zpsyfcxv3u2.jpg


Starting to take shape now

B4882BDA-734F-410F-92A7-50350D24B68E_zpsjmxsmmwo.jpg


More effin drawers....

E5292E1D-AC3D-476D-B3C9-AFE2BEC263C6_zpsn6jwajov.jpg


Trying out the drawer fronts here to see how they line up/ grain pattern matches

2495F226-3A6B-4BB8-9A4E-2E4F3D36BFD0_zpsduxqsr4e.jpg


45241167-8F48-4F7A-88B7-C3C0EAB8D4ED_zpsvkmb0z4v.jpg


I managed to pick up 25 handles on eBay for £4.99 so they were used on the drawers and cupboards. The first few were added at this point.

5CB3B090-5FCF-49ED-BD3D-C4F718A64B48_zpsiqn3tic1.jpg


12D65BFE-CD28-4B53-8997-44B92596316E_zpsaam3rnmc.jpg


47A85F9B-0866-419E-AAE1-895012426A0F_zpszpqtnane.jpg


And with all the drawers finished and in place. Handles were added too. Hurray! This was a happy day.

64B3CB2B-95CA-4ED3-9502-F07286FA8B25_zpsgjnmrwjo.jpg


D5CBC8CE-394B-4133-829E-DF3A44AC83EE_zpsvab0qjqe.jpg


C6DA4709-42DB-4017-B7CB-C9669EDC27D0_zpsgjksef1h.jpg
 
Now that the Mitre Station was complete, attention was shifted to the work bench at the back of the garage. Again, a worktop was added and edging to match the style of the Mitre Station.

90D09B5E-E97F-480B-AB63-1B7F000F0B3C_zpsy6ncm0wv.jpg


And handles added

6A9B5CDA-8111-4140-B6DF-57763215EDF8_zpsia9qyclf.jpg


So this is as far as I have got to date. I'm hoping to get more done this weekend. Plans of what I have in mind are shown below. The large black 'box' is a sound bar that I will use for music and also for sound from the computer which will be in the corner unit. This picture shows the upper section of what already exists. Hope this makes sense! I will add more pics when I have the works completed.

27613298-8737-45AB-8AF2-5307871C8A4C_zpsfy8va1sr.png
 
I'm afraid I've got bad news for you; you are a woodworker! Looks very smart and bespoke.

And a potted plant in your workshop... flash git :wink:
 
BONUS POST!

Some of the design features I forgot to mention.

1. A stow away screw/ bolt section. This is mounted on runners which slide in and out and are covered with a 300mm cupboard door to keep them out of view.

0B63F450-D6EB-4703-A171-86BB403F5ED9_zpsbpxunkl9.jpg


8A7736E0-C5CF-4B1E-B235-4F93651E418C_zpstuoynhpn.jpg


2. Hidden plug sockets. When building this unit I covered some exposed plug sockets in the wall but I didn't want to lose the use of these sockets so I installed them in a drawer with 2 USB sockets also for charging my phone when I'm out there working.

16EC7679-9B6D-4482-8BD0-2E8A7E5F27A0_zpslt43cy7o.jpg


6BB14629-1B01-44D8-A604-5584749246C9_zpsxrvfht9v.jpg


3. Double depth lower drawer for larger items

00DE9576-BD22-4CB4-A8C0-B4FACAF5A8B0_zpswdfooahs.jpg


4. Bench area for pillar drill. From here I can pull the drill forward and slide it back when not in use to allow full use of the bench area for cutting at the Mitre Station.

67C0445F-C7C9-434D-8080-EAC83605E121_zpsytsfgfqv.jpg


I was also asked about the range of movement of the saw. I have taken pics to show how it fits to the opening in the dust shroud area. I'm happt to report that I have full movement and can cut at full extent in all directions.

F77804D6-AC22-44E7-BDE6-6CF1F5D27D92_zps2mnxiybv.jpg


E865E004-FA81-4449-AAF3-21CF9FA683A4_zpshu46oo9v.jpg


14788C54-59A3-40C2-99E1-C1C3A692DD4F_zps0ttnuwvy.jpg


D618CF9D-ED67-4E1C-AB22-CEE52282B70F_zpsn5yzoaor.jpg


I have laid out the rough assembly of what I plan to do on the back work bench. It can be seen below

4B37DC92-963F-4AC4-B0F6-73702D0F3CEB_zpsg0sseunt.jpg
 
Very good!

I would love a mitre station like that...i like the pull out storage for hardware etc.
 
Marvellous work, I'm so envious, well done.

How can you listen to music with saws and extractors going full blast? And I don't know how much of an issue it might be, but consider the dust going into the PC and risking it overheating.
 
Looks fantastic mate, great storage ideas too.

Can you explain the tape and length feature?

Also I notice you used alot of pocket holes, do you have a cheap source for the screws as they seem quite expensive to me, or can you use any screws?

Looking forward to seeing more of the completed work.

thanks

Colin
 
MattRoberts":1qvw568f said:
Expensive? Aren't they like £6 for 150 or so?

Really? I thought they were alot more than that.....Just had a look around and youre right, Maybe I was looking at dollar price or something.

:)
 
So I had another go at the garage tonight, working on the back bench area.

To start I needed to make a cut that wasn't fully straight. It would be straight for roughly 1250mm and then taper off at 45 degrees to act as a corner shelf. I don't have many tools nor do I have a table saw that would make this chore a bit less troublesome so I had to improvise with what I had. By making small scores on each pass I could follow a jig which was screwed to the waste piece and run the router along the line. With 3 or 4 passes I eventually had the piece I needed.

95596C7D-13BC-43A0-A0F5-74D2499C2136_zps9dhonrof.jpg


126D1F53-E1F5-422B-A6CB-23DFD33A8787_zpswh42cpmz.jpg


A bit hairy now but a wee touch up with the sander and it'll be grand

A few more bits cut to size and I can start to see the shelf area coming together

69CAABBB-4586-4355-A11E-5DAAD3D9C977_zpsatn8tgug.jpg


And when all was screwed together, I set it up into place to see how it measured up. Looks alright to me so onward to the next step...

8FDAE699-51B6-4FB2-AB34-AD868A9364FC_zpsfoq616u7.jpg


Now that I have my shelves into position I have to check that my wood books fit!

7B6FE4B0-48C7-4FD3-B3FD-5EAD3A8AC6FE_zps3w99dhbm.jpg


Again, I'm happy with that

So to finish off for tonight, I set up the drawer areas and dusted it off. For now, this will suffice. Tomorrow is another day

B183C5F8-4064-4901-B806-34843DC6EAF6_zpsigfum5ty.jpg


And an artsy shot for good measure

95EE99C6-14CC-4FDA-9299-CE7768430E82_zpsfpsu0jaz.jpg


Hopefully another few nights will finish it. Thanks for reading!
 
technium":1siy96kq said:
Looks fantastic mate, great storage ideas too.

Can you explain the tape and length feature?

Also I notice you used alot of pocket holes, do you have a cheap source for the screws as they seem quite expensive to me, or can you use any screws?

Looking forward to seeing more of the completed work.

thanks

Colin

Not quite sure if I'm understanding you right here but i'll have a go answering what I think you mean!

At each side of the mitre saw I have tape measures that run from 0 - roughly 1.5M, marked at 1mm intervals. If I want to cut a piece of timber at 254mm, I line it up with the marking on the tape and make the cut. If I want to make repeated cuts of exactly the same length, I use the stop block by sliding it along the rail and tightening the handle. The block is removable and can be used either side of the saw.

I hope this helps and I am answering your question correctly!

Here's a couple of close ups of the tape feature with the stop block

27A32012-FCCF-4C6D-9A31-1B78B4526D90_zpsep9hblv3.jpg


A4B9D6A6-B61D-4B66-8ABE-C4193B973D83_zpsoq0y3p3n.jpg
 
Where did you get the t-track from? It always seems so expensive over here.

And doesn't the stop block wiggle as it's too short? :D
 
Thanks duncan thats great, I wondered how you did the tape measure and also the track stop. Keep it up, im very envious of your setup!

Colin
 
MattRoberts":3t8v4j8i said:
Where did you get the t-track from? It always seems so expensive over here.

And doesn't the stop block wiggle as it's too short? :D

Matt, I have added a drawing here to show you how I have overcome the problem you describe.

Mitre%20Stop%20Block%20drawing_zpsftd4ejjq.jpg


At the back of the stop block I have added a small strip of wood which sits snuggly into the groove in the T Track. (A) This ensures that it runs perfectly square to the bench top.

I have raised the stop block up 4mm off the bench as this allows any dust created to clear and not clog the block making further cuts inaccurate or causing it to jam when i want to move it. (B) With the 4mm gap I can run the hand brush easily under it and clear any dust that may get stuck in there.

I bought my T Track on eBay but didnt buy Kreg as it was quite expensive. This brand is UJK and works just as well. I did notice after however that the price I paid was more than it should have been. Axminster sell it at a more affordable rate. You can find it here - http://www.axminster.co.uk/ujk-technology-universal-t-track-ax889077
 
I think i might spend the weekend building a new version of my mobile mitre saw stand.

I haven't got enough room to build one like yours, but i could do with making mine more streamlined.
 
Thanks Duncan. I'd seen the ones on axminster but thought they were more expensive than that.

Clever solution for the stop block - nice one. You're definitely getting me fired up to build a station like this! Thanks for the detailed pics
 
Back
Top