Help needed - sticky situation

UKworkshop.co.uk

Help Support UKworkshop.co.uk:

This site may earn a commission from merchant affiliate links, including eBay, Amazon, and others.

memzey

Established Member
Joined
8 Apr 2013
Messages
1,753
Reaction score
16
Location
St. Albans
Hi gang,

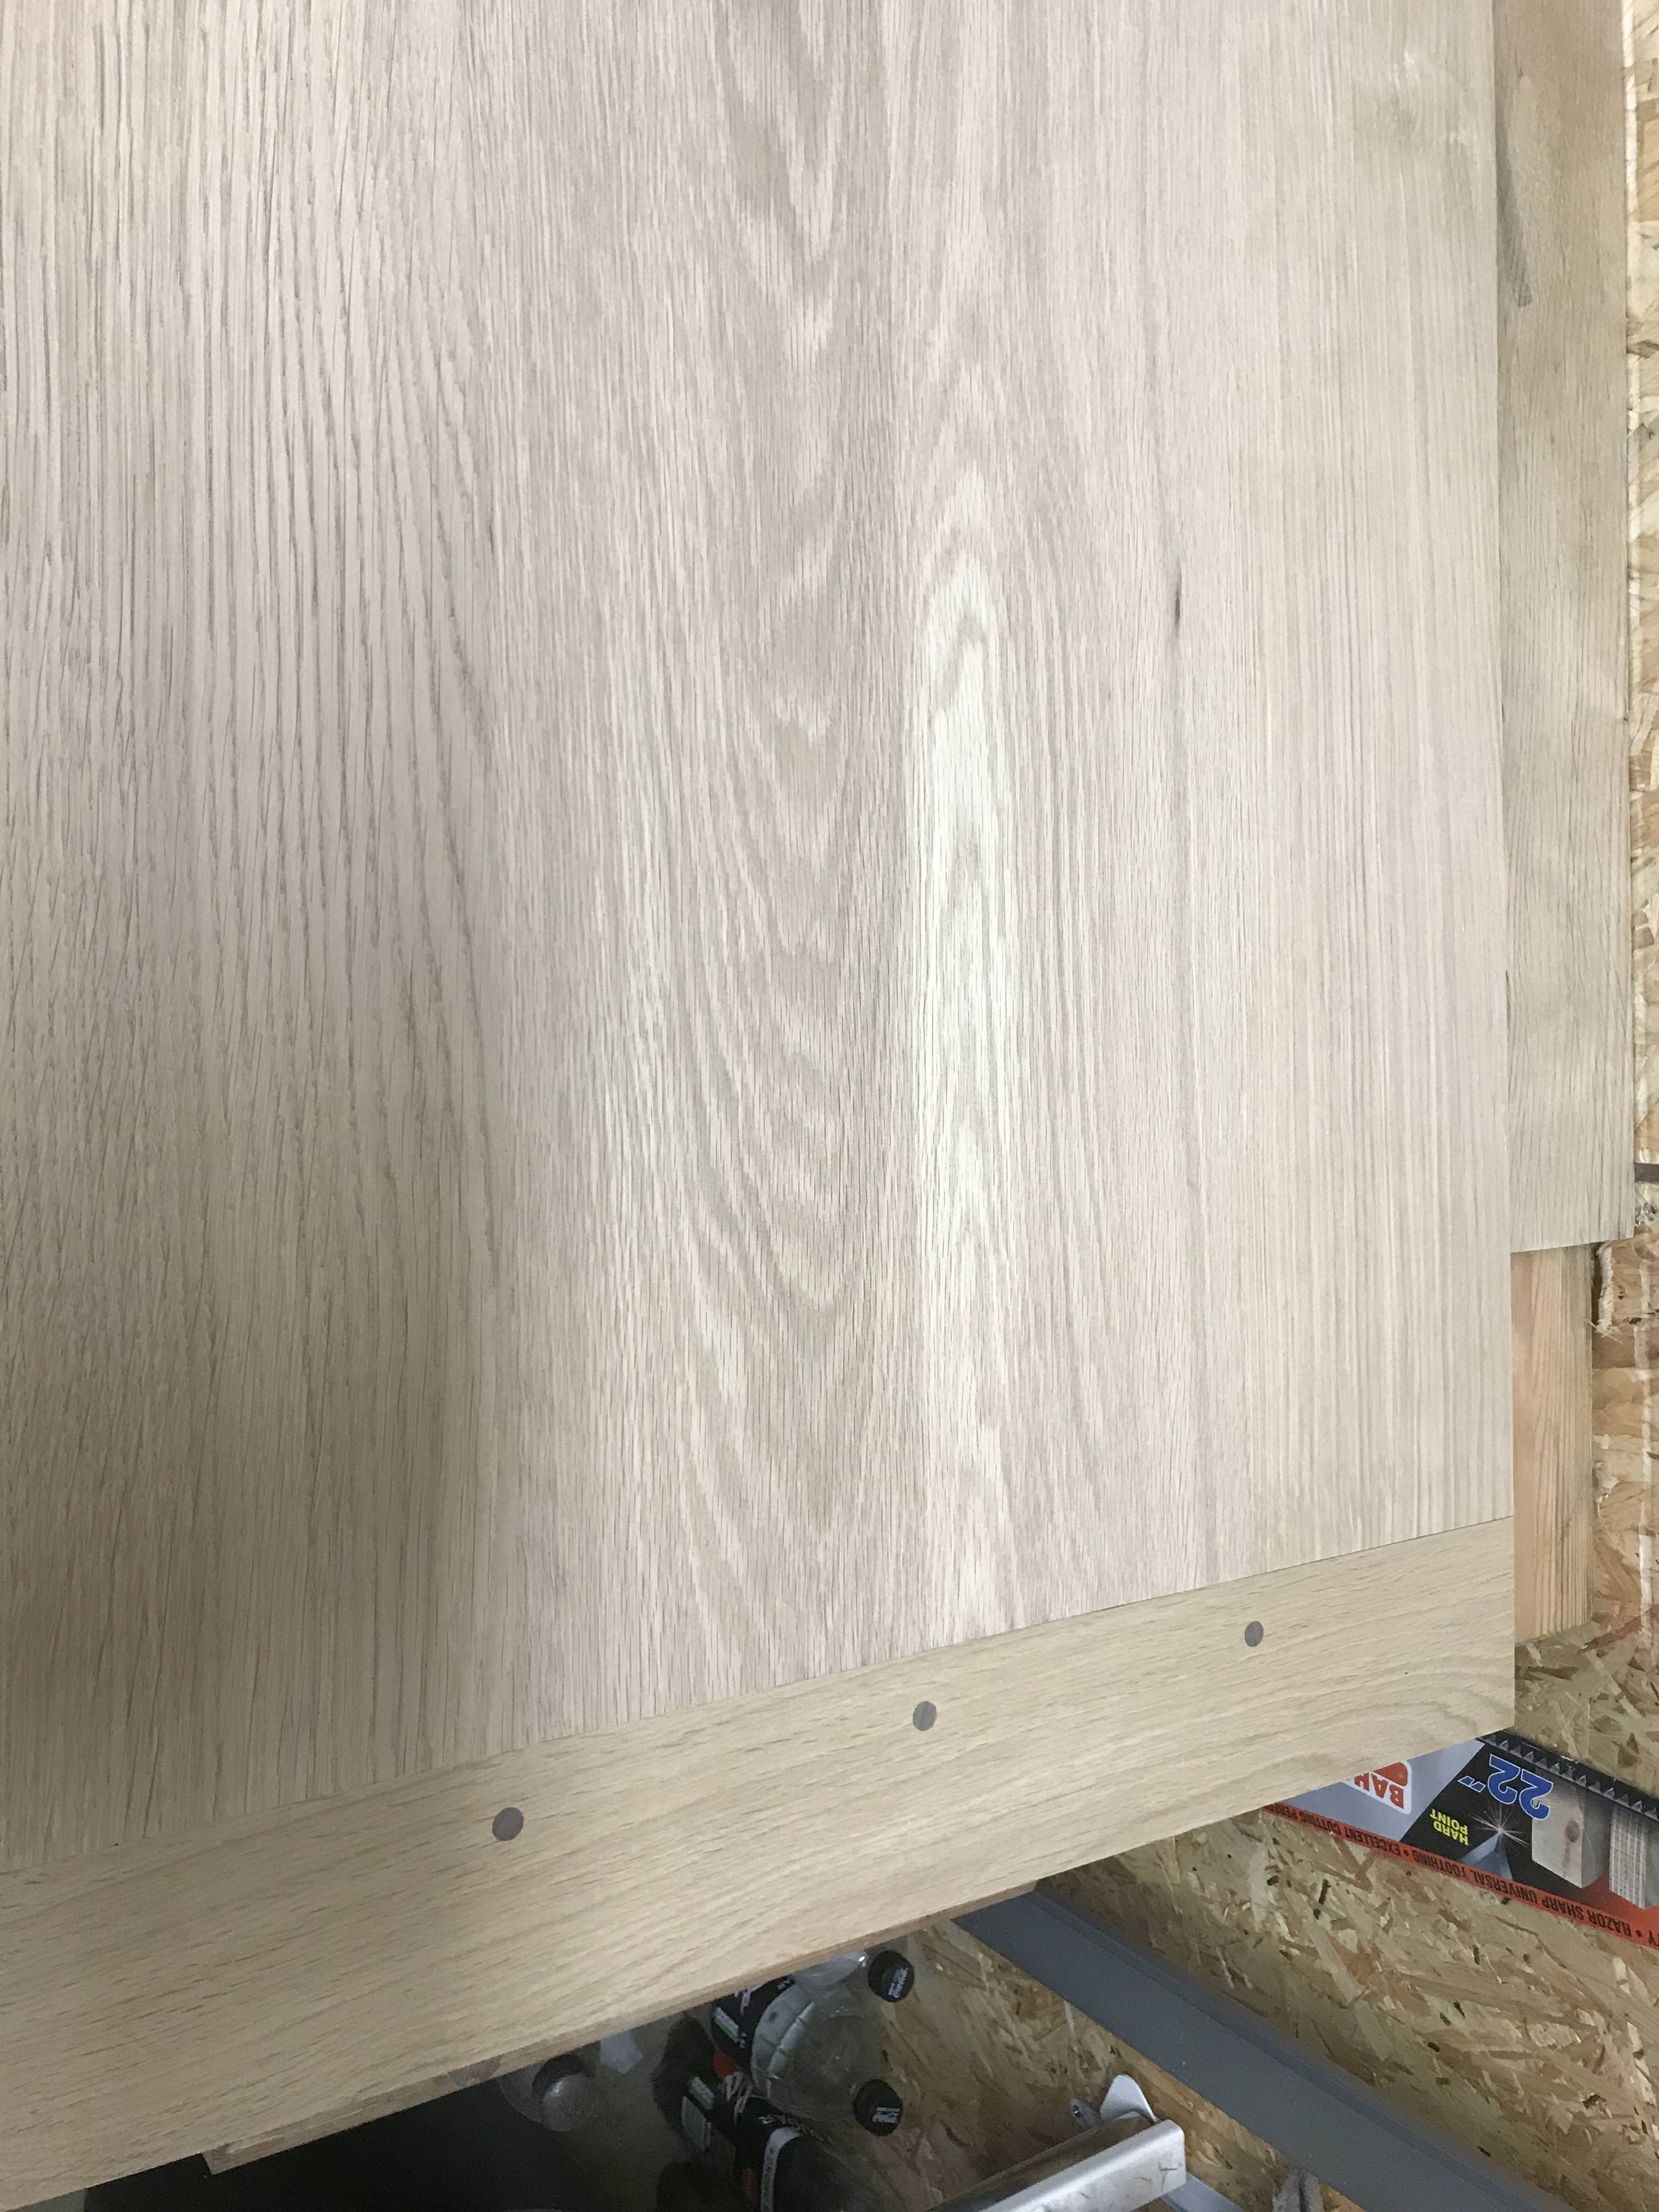
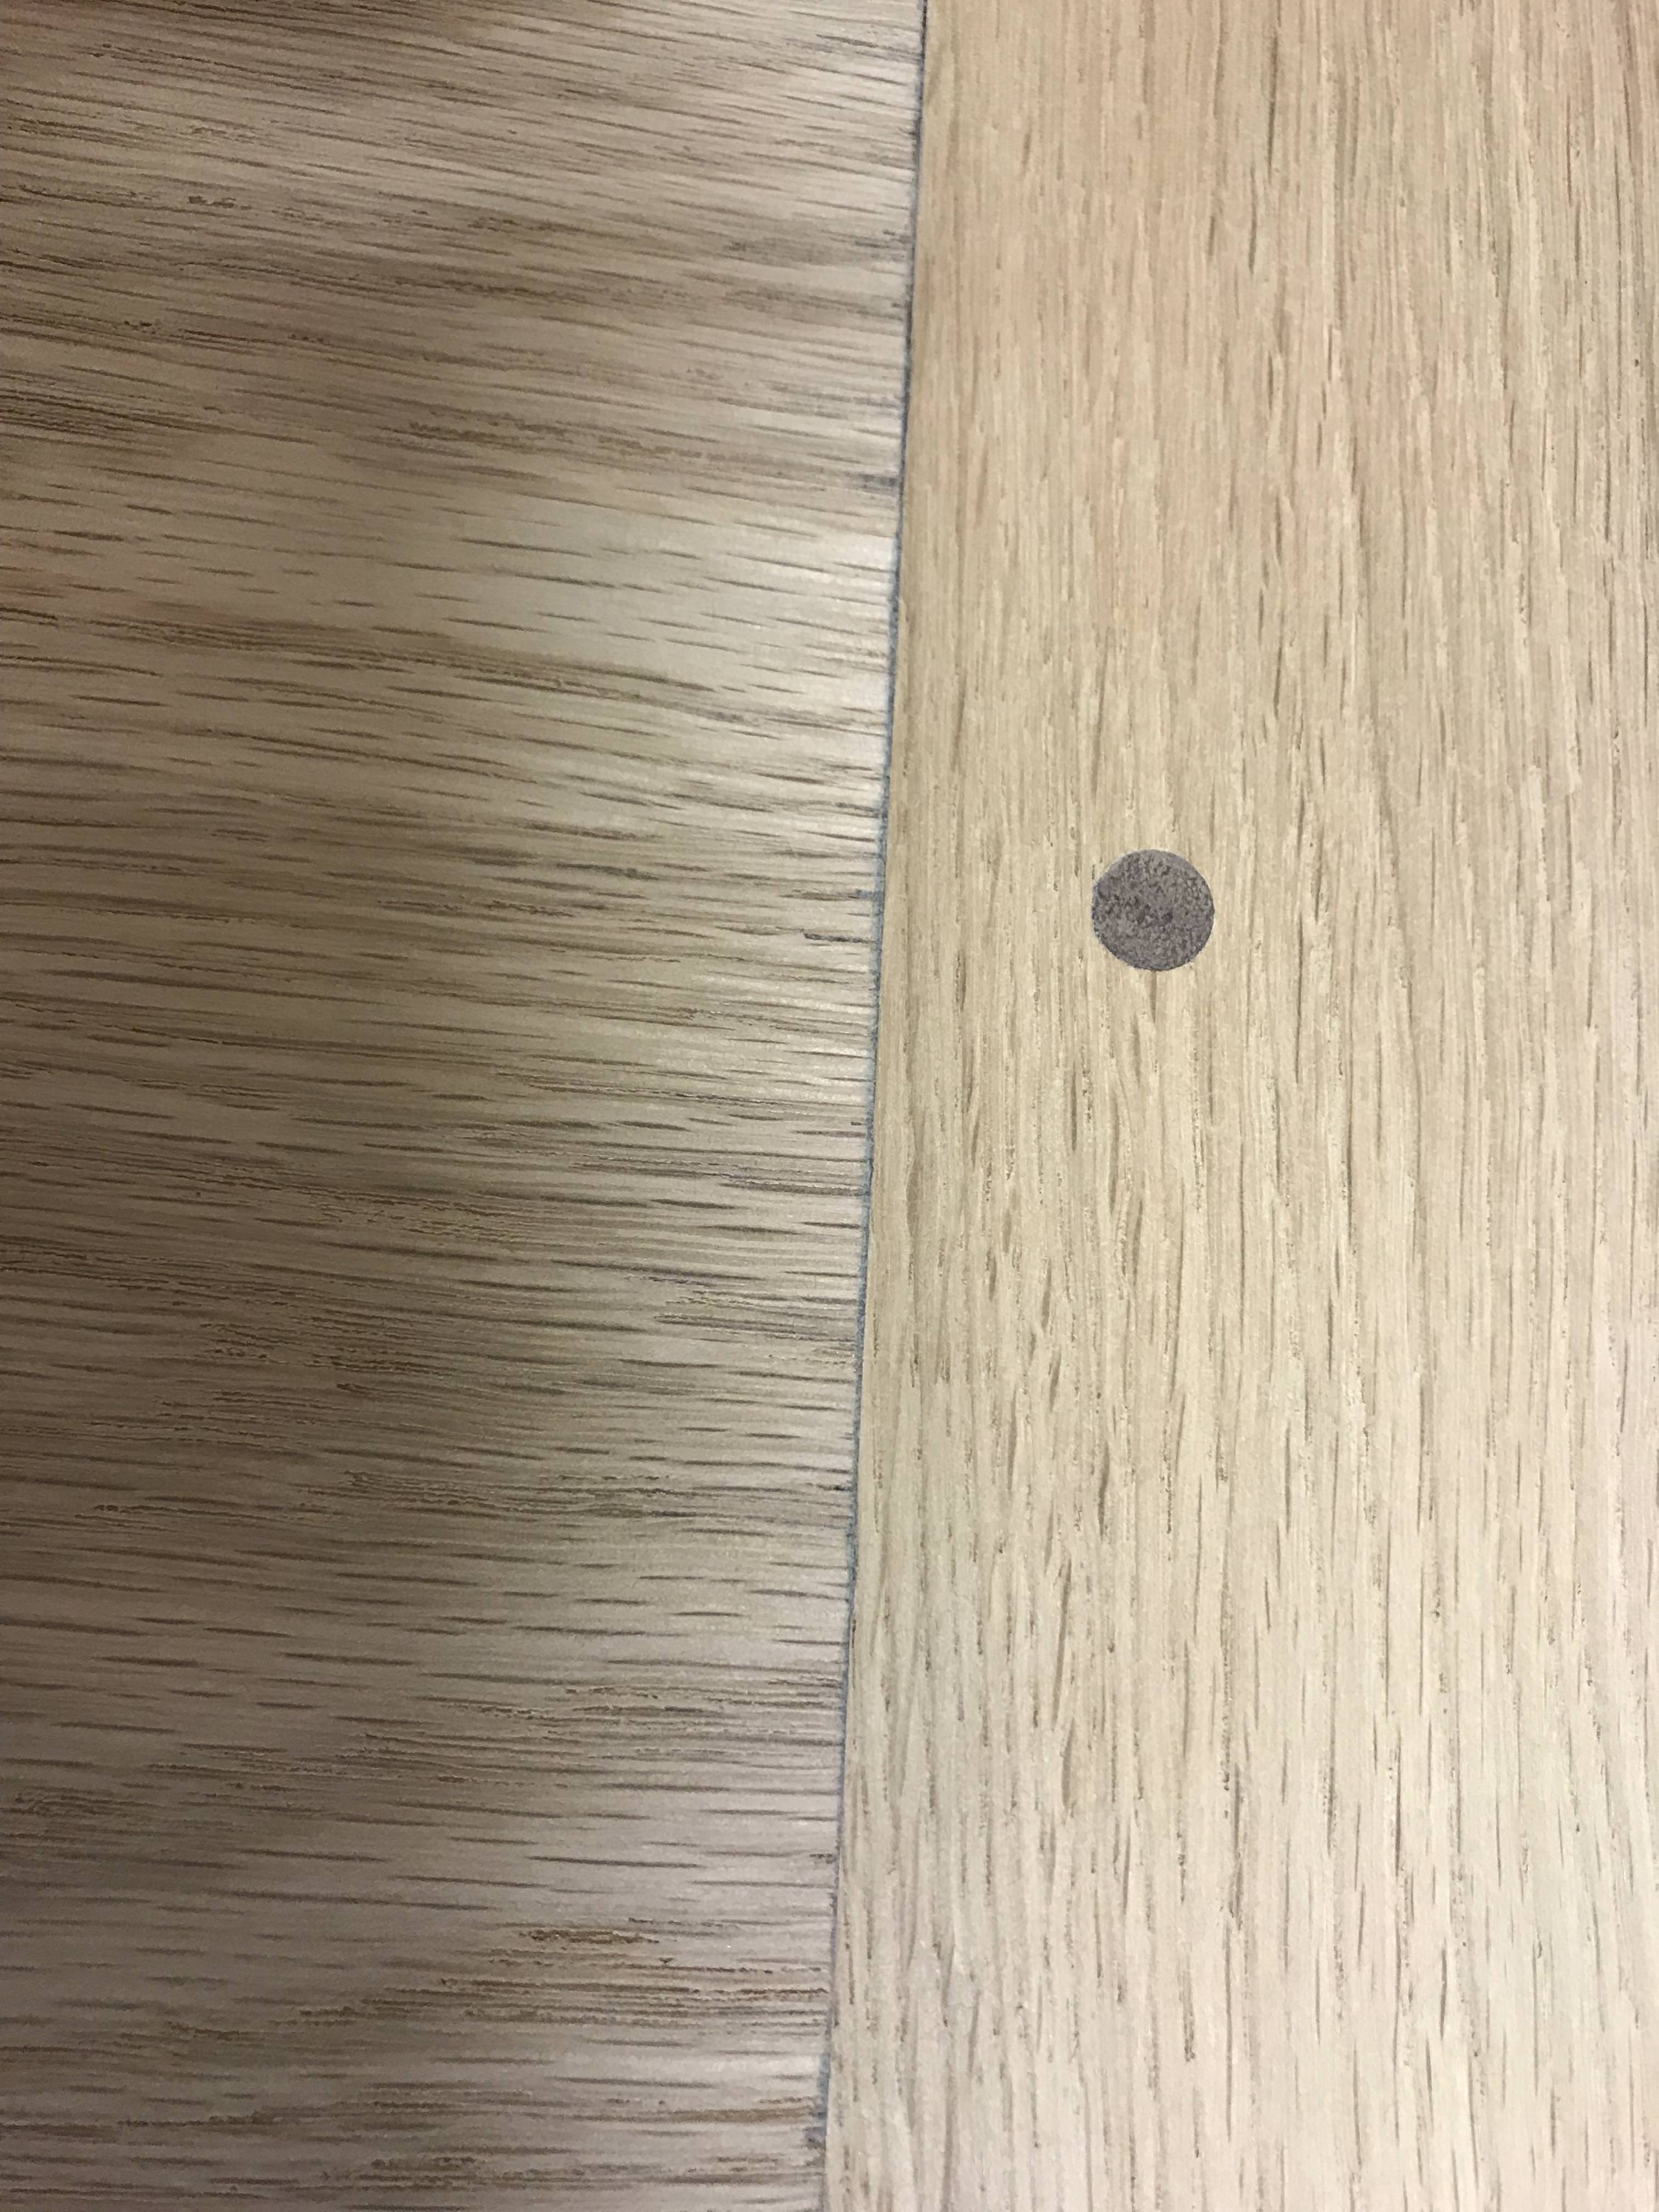
So I’m making slow and painful progress on a coffee table for SWMBO and am essentially in the home straight. I’ve cut all the joinery for the base, glued up the top and fixed the breadboard ends. When I fixed those ends on, I glued about 2” of the tongue at the centre while leaving the rest to float and here is where my problem arises. When I fixed the breadboard ends, one had a bit of squeeze out at the shoulder. I cleaned this up with wet shop towels and went on my merry way. Now I’m sanding the top down and I have found that some of the towel appears to have become stuck in the shoulder and is casting a visible blue line:
zccML0X.jpg


Not good.

Any clever tips for sorting this out? I doubt anyone else has committed this particular act of oafishness before but perhaps someone might be able to offer a neat solution?
 
The answer has to involve a table saw!

(sorry memzey, no sensible suggestion 'cos its well above my pay grade)
 
My only idea is sympathy and more sanding. :(
(And cloth rags not paper next time!)
 
I think I would probably take a sharp broader chisel (1" to 1'-1/2"), and use it as a scraper across the grain, gently. Very gently. You obviously need to control the edge nearest the breadboard end very carefully indeed. You might try finishing off with the grain, but starting the scraping on the face of the board takes some skill. Once you have cleared the offending stuff away, you'll need to determine whether the breadboard end needs adjusting, and a quick plane, scrape or, for some, sanding, will clean that up nicely.

The other approach is to leave well alone, knowing that you'll probably make things worse and that no-one will notice anyway. Or flip the table top over and use the underside as the top. They're both as good, aren't they? ;) *

* They shouldn't be, if you're being authentic.
 
Following on from the router suggestion, how about routing a shallow groove along the join and inserting some stringing in a contrasting wood?
 
Some times the only cure is not to look to closely, 99% of people won't notice it.

But it looks like you could sand it more and remove most of it, I would scrape rather than sand.

What is the other side like? can you turn it over?

Pete
 
Geoff_S":2lk8pxgj said:
Mild bleach solution?
I was going to suggest scraping too but this is brilliant!

memzey, test the bleach on a scrap of shop towel and if it removes the colour (as I suspect it will, the paper is likely dyed not pigmented) you're in luck.
 
ED65":vnt96cku said:
Geoff_S":vnt96cku said:
Mild bleach solution?
I was going to suggest scraping too but this is brilliant!

memzey, test the bleach on a scrap of shop towel and if it removes the colour (as I suspect it will, the paper is likely dyed not pigmented) you're in luck.

Never mind what it does to the towel.......test it on some oak first, and see what it does to that. Oak is very reactive, and this could possibly be making a minor nuisance into something worse.
 
Thanks everyone - both for the suggestions and not taking the mickey! I’ve a bit more sanding to do on the top but the bulk removal has been done already so I don’t think that will help too much. I did try gently prying away at it with a knife but no joy. Bleach sounds like a smashing idea though. Would that be the normal bleach as used by Mrs. memzey diluted 50:50 or something else? As Mike suggests I’ll test it on some scraps of oak first.
 
You have my sympathy Memzey, you've put your heart and soul into a project and any tiny flaw is just awful. One the other hand, it's exactly those sky high standards that will propel you up the craftsmanship ladder.

You don't mention what glue you used. If it had been hide glue (or even one of the liquid hide glues like the ones from Titebond or Old Brown Glue) then a scrub with boiling water would have removed all trace of the squeeze out and the scraps of blue towel.

However, I guess you've used PVA, which means the blue paper fibres are now effectively encapsulated within dried, moisture resistant, PVA. So I doubt bleach will touch them. What bleach will do however is affect the Oak. Bleached Oak is a very fashionable finish at the moment, but it needs multiple applications to even out the colour shift and prevent patchiness; that or a two-pack bleach which is a huge faff. In other words I think bleaching will involve you in a lot of work for negligible benefit.

Looking closely at the photos it's clear that the cross cut is quite ragged, and it's those minute chips that have left pockets for the glue and the paper fibres to reside. So one option that will both remove the blue paper fibres and tidy up the breadboard joint, is to sand, plane, or scrape down the entire surface by about 0.5mm. If you find yourself in my neck of the woods we could whack it through the drum sander and three or four passes would see the job done. Alternatively (unless you've got a decent random orbital disc sander) you're looking at an hour or so's careful work with hand tools. But that's what I'd do.

Good luck!
 
Incidentally, I'd never use a cloth of any description for cleaning up PVA squeeze out, all it does is force the excess glue into the grain where it'll bite you when you come to apply your finish.

Personally I prefer to wipe up the excess with a plastic scraper and then set to with boiling water and an old toothbrush. I repeat the scrubbing process three times, changing the water if it becomes cloudy. That might sound like a lot of faff, but all the experienced furniture makers I know do something similar, having found out from hard experience that a bit of extra effort at this stage saves a great deal of extra effort later on!

Glue-Up,-Edge-Joint-10.jpg
 

Attachments

  • Glue-Up,-Edge-Joint-10.jpg
    Glue-Up,-Edge-Joint-10.jpg
    78.9 KB
If the timber is oak, and you used water for the clean-up, the blue is more likely to be iron staining which can happen very easily with oak, just from little specks of iron floating around in the air or on a not very clean rag. If it is, the marks should come out with oxalic acid, which is sold as wood-bleacher.
 
memzey":1wtjzwuq said:
Bleach sounds like a smashing idea though. Would that be the normal bleach as used by Mrs. memzey diluted 50:50 or something else?
Yes regular household bleach, a sodium hypochlorite solution. Ideal dilution will depend on the concentration, the old standard was for ~5% solution but some are more concentrated than that. With standard bleach 1:1 could work perfectly.

You need to clean the wood off afterwards. Some sources suggest using vinegar to neutralise after bleaching with standard bleach, the idea being a weak acid neutralises the alkali of the bleach. But it's completely not necessary as bleach breaks down upon drying to leave just common salt! You only need to flush or wipe down with plenty of clean water afterwards to get rid of it.

If it is iron staining as peter-harrison suggests then oxalic acid will treat it. Even jet-black old stains from rust can be brought down so it should have no trouble at all with this. Again you just need to flush with water after the surface has dried (three times minimum).

BTW unless you can meticulously paint along the line with a fine brush it's generally advised to coat the entire surface, not just spot-treat the problem.
 
Thanks for the tips everyone. Someone even used the words “memzey”, “high standards” and “craftsmanship” in the same paragraph! “Oafish wood butcher” in that order is probably more accurate.

Anyway before I get on to progress - thank you Custard for your very kind offer. I have absolutely no doubt you would have followed through with it, if requested to do so, as such generosity is your established M.O. on these boards.

To all those that suggested “sanding” as the answer - gold star duly awarded. I do have a decent ROS (Makita) and attacked the top with a bit more 80g. 45 minutes or so later things were looking much better:
MCODveA.jpg

A further going over with 120g followed which helped a bit more. I’ll probably go through the grits now to 240g with my finishing sander to get things ready for finishing (wash coat or two of de waxed blonde shellac followed by Matt Osmo PolyX).

I’ve had so much help on this little project from people on these boards I feel I owe it to the community to finish it off with a wip thread. I was reluctant to do so at first as I knew I’d have to complete this project in little bites which would not make for good reading but I think I’ll bite the bullet and see if I can post up my progress to date and document the ending.

Thanks again.
 
Well done Memzey, that just looks so much better.

Incidentally, some years ago I made myself a dining table from Oak with breadboard ends.

Breadboard-Ends-Oak.jpg


I can see no difference in the quality of the edge jointing or the fit of the breadboard ends, between your work and mine. So I guess we're both "oafish wood butchers"!

On a more serious note, might be a good idea to investigate why your original cross cut was slightly ragged, and remedy the problem. I appreciate that Oak can be quite brittle and prone to chipping out, but if you don't cure this it'll plague all your future projects.

Once again, kudos for going the extra mile, and I look forward to your WIP.
 

Attachments

  • Breadboard-Ends-Oak.jpg
    Breadboard-Ends-Oak.jpg
    100 KB
I've got caught in the same way myself in the past - that blue paper roll from Toolstation. So thanks to Memzey for bringing it up and Custard for sharing a Really Good Tip.

There are two differences though (a) I haven't dared attempt breadboard ends yet, and (b) if I did, bits of blue paper stuck to the joint (almost invisibly!) would be the least of my worries!

Seriously, and possibly one for Custard, I think I'd have grabbed my #80, given it a biggish camber (but little projection), and attacked on a diagonal (so it's paring both the main boards and the end). The idea being to reduce the amount of any necessary sanding to a minimum.

Assuming I wasn't totally ham-fisted about it (big assumption, incidentally), am I missing some big gotcha?

E.
 
Hi everyone,

Apologies are due to all who contributed to this thread as I’m afraid I’ve gone and finished the table without opening a wip. I did intend to post my progress as I took several pictures along the way but what with one thing or another I couldn’t find the the time to both make and publish :(.

Sorry gang. I promise to share my oafishness more freely next time.

In terms of what next, I wonder whether a post showing the steps along the way would be preferable to a couple of shots of the finished article? Please let me know and I’ll find the time to post it up tomorrow.

Thanks again to all that helped.
 
Back
Top