FINISHED - Multi-function workbench WIP

UKworkshop.co.uk

Help Support UKworkshop.co.uk:

This site may earn a commission from merchant affiliate links, including eBay, Amazon, and others.
Yes, I thought of that but I'd be worried about it cracking if I was being particulary brutal with something on the bench. Concrete should put up with anything I throw at it since the concrete floor already does :D
 
Four 25kg sacks of ready mixed concrete and hhe floor area where the benches will stand is now dead flat :D
3923026020_6919954d46.jpg
 
Thats some serious lengths to go to for a flat work surface!

You will be leaving the wood in place to protect the edges, as with out them its likely to get chipped away over time?
 
Chems":3dvyrl6u said:
Thats some serious lengths to go to for a flat work surface!

You will be leaving the wood in place to protect the edges, as with out them its likely to get chipped away over time?

Oh no I won't be :shock: :D
The outside edge of the concrete plinth is exactly along the line of the bench fronts so I hope it won't cause a problem. I could of course glue some nice quarter-round bathroom tiles along the edge as extra protection. Now that's a good idea :D

I agree that this was overkill, but the only alternatives I (and others) came up with were hacking off the legs at different lengths, putting blocks under each leg or using self levelling compound. I think the cast concrete plinth was the safest and most permanent solution and it only took me the best part of 1 day to complete it !!!!!!! Still, it's done now and I can continue with the bench knowing that when finished it'll be FLAT. :wink:

More pictures and status report tomorrow morning.

Mark
 
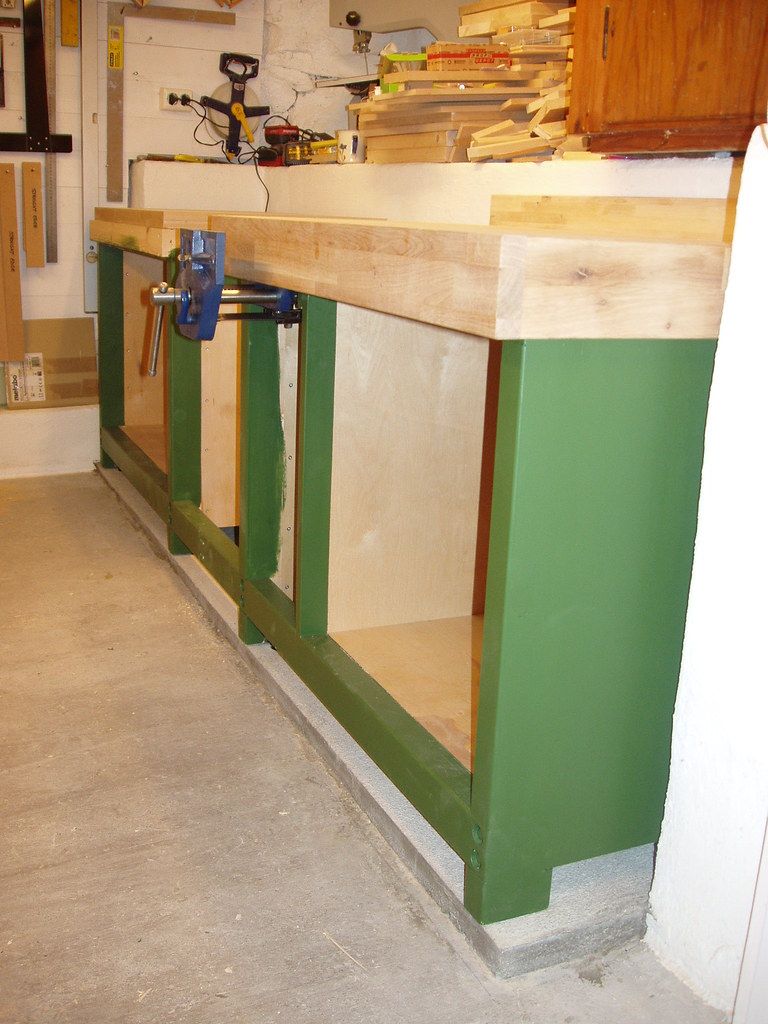
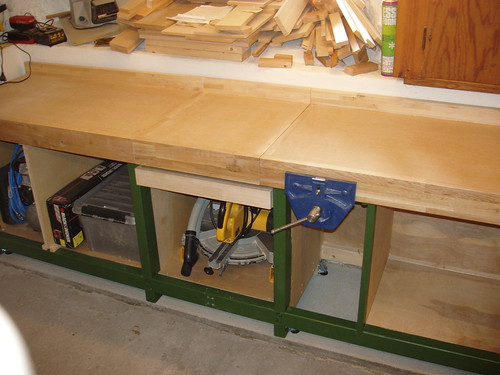
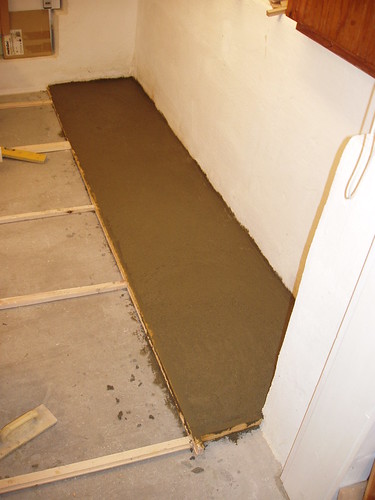
With the concrete plinth drying it was back to bench building Tuesday with the MDF tops next.
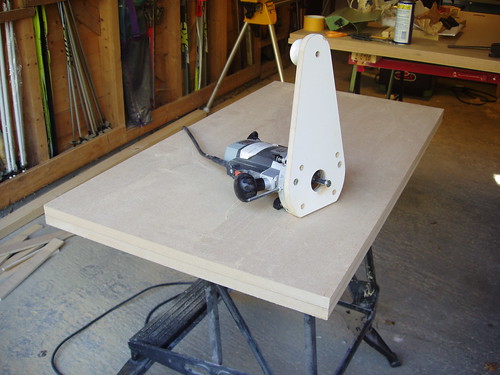
After first braking down a sheet of 19mm MDF to 4 pieces, 1cm over size, I then carefully trimmed 1 piece to exact size using a guide rail and my Elu 96 fitted with a straight cutter, making sure all the corners were exactly 90 degrees. I then fixed the “master” to the next piece with double-sided tape and trimmed it back using a panel trim cutter with bottom bearing and the Elu fitted with my homemade extension base. I then had 2 identical pieces, one for each bench top.
3924233722_fa2677f732.jpg


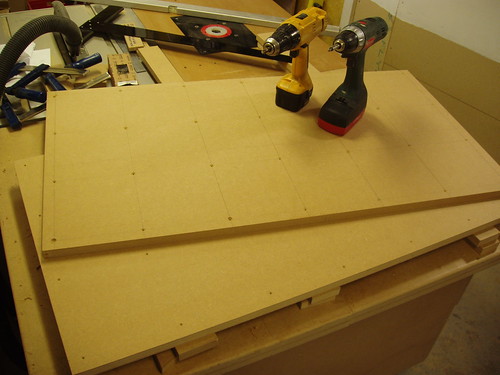
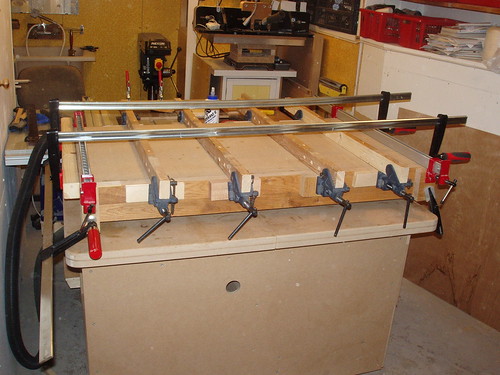
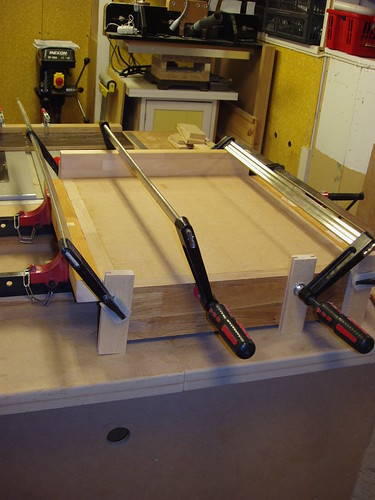
Instead of going the traditional route of gluing and loads of clamps I decided to use screws instead. After clamping the master to one of the other oversized sheets I drilled a grid of countersunk holes straight through the top sheet and a couple of millimeters into the second sheet.
3923449391_8f3d7e86d9.jpg


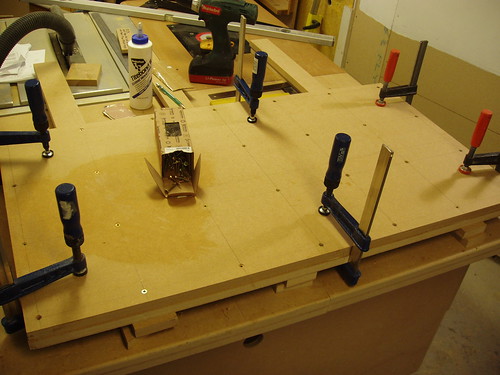
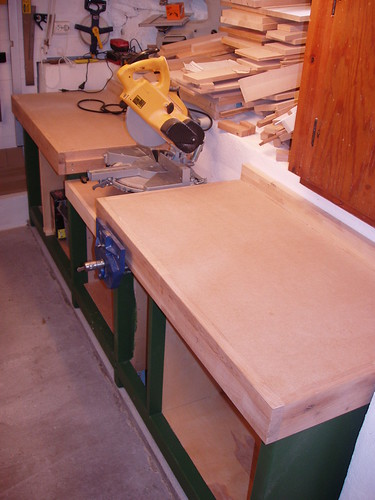
After de-burring all the holes I then spread a good layer of Titebond II, clamped the 2 sheets together and drove in all the 35mm countersunk screws. Same procedure for the second top. After leaving them both for about 2 hours I removed all the clamps and trimmed back, again using the Elu and the same bottom bearing panel trim cutter.
3923450741_8f11ccf476.jpg


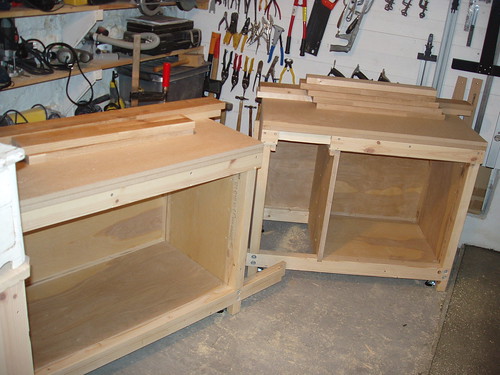
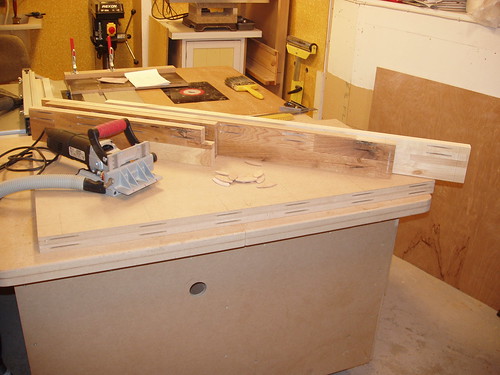
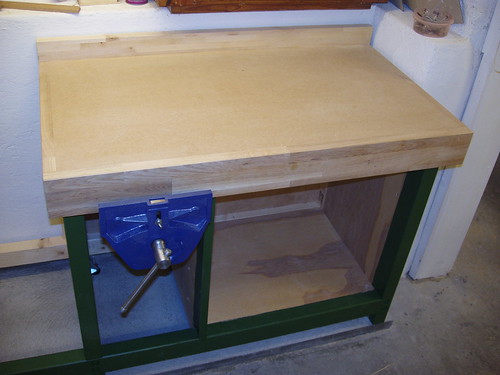
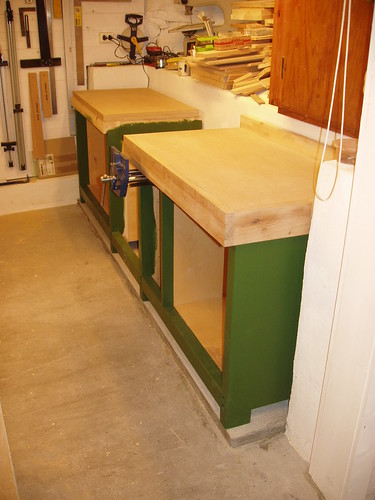
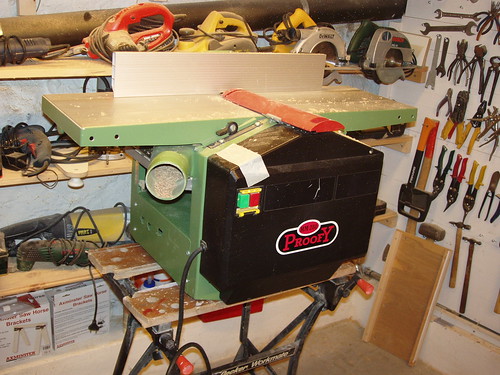
Whilst the tops were drying I cracked on with some other jobs; adding the 12mm ply bases in each cupboard and dimensioning up all the material for the top cappings and aprons etc. Unfortunately the chunk of beech working top I’d planned using proved to be too small but instead I found enough 28mm oak and birch in my stash of kitchen worktop offcuts to make the front and sides in oak and the backs in birch.
3924237812_f6aaa3eea7.jpg


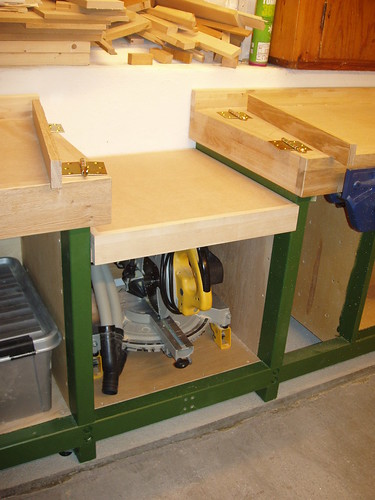
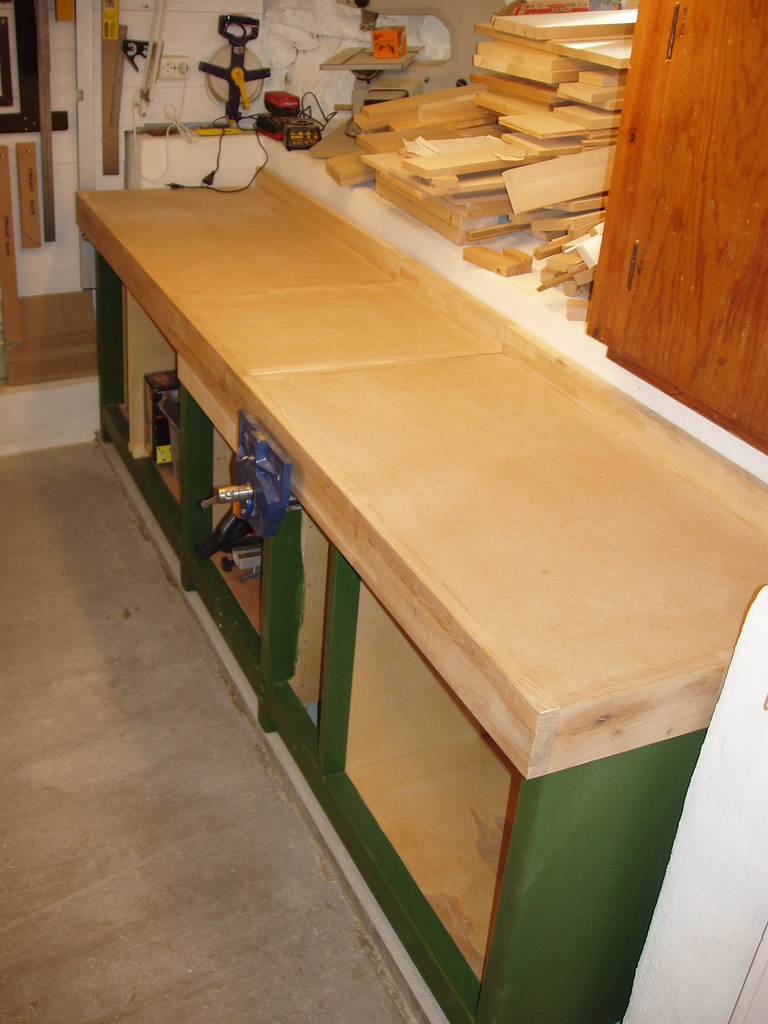
Next up is to bicuit and glue the cappings and aprons in place and fit the tops before I then drag the now very heavy benches up on the concrete plinth and continue with the SCMS table arrangement.

Thanks again for watching :D
Mark
 
Looking great! No reason to trust the glue when all the screws will be hidden!

I really like your way of truing the edges with the router! Have to try that!
 
With the concrete plinth now dry I continued with the MDF tops at the weekend.
After first cutting all the aprons to exact length I attacked them and the edges of the MDF tops with my biscuit jointer and with copious amounts of titebond and lots of clamps glued them in place
3939919275_d6f7d6d677.jpg

3939918087_ff8584f2b1.jpg


Whilst the glue was drying I decided the frameworks would look a lot better with some kind of finishing. Considered dark stain but ended up with 2 coats of dark green (sort of Record Power colour) paint. I think it's a vast improvement over cheap-and-nasty pine !!!
After a good sand I added a slight chamfer to the aprons and screwed the first top to the cupboard/bench frameworks with M6x70 coach screws from underneath.
First one finished. :D
3940698376_2b51eb6e51.jpg

3939919009_76a909d850.jpg


The now (almost) exactly level concrete plint worked really well and after screwing both benches together to one unit I only needed to adjust the feet a bit here and there to get the whole bench exactly plumb and level :D
3939932483_d4d0b482fb_b.jpg


Next job is to complete and fit the left hand top and make an oak front jaw for the vise. After that I'll move on to the SCMS table in the centre.

Mark
 
With the left hand bench top finished and fitted during the week I got stuck into the sunken SCMS table and middle bench section today.
The SCMS table I made from 2 layer of 19mm MDF wrapped in 16mm birch and mounted on 2 beech batterns screwed into the bench frameworks (remember how I closed off the tops of each cupboard end/leg assembly). The table protrudes 20mm from the framework at the front in order to cover the top of the doors I'm planning for the saw cupboard.
I also made up 2 oak batterns as supports for the removable bench top. They'll screw and glue to the ends of the left and right benches. After scouring the local hardware shop for some kind of fitting I could use to hold down the middle bench top I finally found some large hinges with removable pivot pins. These I plan to use to secure the bench top to the batterns. To remove the top I'll simply pull out the 4 pins and lift off.

3956042935_76040c4337.jpg


The removable middle bench top I also made from 2 layers of 19mm MDF but this time wrapped in the same 28mm oak I used on the main bench tops. Here it is glued up ready for fitting tomorrow.

3956818678_a06f948b29.jpg


And the reason for the whole exercise of relocating the SCMS and scraping it's stand ! My newly acquired Luna/Proofy/Mafell PT.
3956820024_cf8014393b.jpg


Thanks for watching again.
Mark
 
Looks like a nice neat and strong build nice work definately.

One thing though, aren't the point of thoses effing little screw feet to go on an akward floor? :p
 
Nice build, I look forward to seeing the finished bench.

I'm currently planning on putting a workshop in our cellar but we have even less head height then you, about 1850mm so I can just stand upright. Do you find the lack of height to be a big problem? I can certainly see it being a problem if I ever want to make a wardrobe for example.

I was also wondering about how damp your cellar is. Ours isn't damp proofed at all but it is normally fairly dry (well it would be if the drain hadn't blocked over the summer and flooded it :( ). Do you measure the humidity at all? Last thing I want it for all my tools to go rusty.
 
Krysstel, how are you intending to fix the scms in place. I found that it was easiest to leave it permanently in place rather than continuely removing bolts.
 
Wobblycogs - Actually a bit of an exaggeration to say my cellar i 2 meter high. It's more like 1.85m since I'm 1.83m (6 foot) and can just stand upright. When I've had trouble assembling tall items I usually end up outside or in the garage !
I have a very slight damp problem in the corner behind the bench I'm builiding now. Nothing serious but the white paint has become discoloured over time and it smells a bit musty in that corner. Otherwise the cellar is bone dry and I have absolutely no trouble with tools rusting. The house is from 1921 which is way before anyone thought of damp proofing in Norway !
One thing that is a serious issue with the low roof is dust control.

Jlawrence - I've considered various ways of fixing the SCMS but I think I'm now decided on 3/4" mitre track recessed into the top of the table and ratchet handle bolts to hold it down. Hopefully it should then just be a matter of rotating the ratchet handles and sliding the whole assembly off.
Another challenge I've had is fixing down the replacement middle bench top section. Todays idea is rare-earth magnets, but I'm still thinking !!

Anyway, here are 2 pictures showing the now (almost) completed bench with SCMS either stored in it's cupboard or in place on it's table.
All I've got left to do is make a front jaw for the vise + cupboard doors and drawers + finishing.
In the 2nd pic you can see the oak batterns into which I'll probably be recessing some magnets to hold down the extra bench top.

3962933209_fae97ce507.jpg


3963711112_ef18f3ce4a.jpg
 
Great work Mark! 8)

Whats your plan for the cupboard under the vise? Just wondering sense i can see the concrete there....

And do you got any thoughts about dustcollection from the SCMS? Is there enough room behind it?
 
The cupboard under the vise won't be a cupboard but rather 3 drawers.
You can just see that the grey extraction pipes stick out from the saw above the level of the window sill behind. The plan is to run them vertically up to an extraction pipe at ceiling level.
 
Nice work and thanks for the insights regarding putting a workshop in a cellar. What is the problem with dust control? Obviously a ceiling mounted extractor is out. Is it just a lack of space?
 
Back
Top