wizer
Established Member
- Joined
- 3 Mar 2005
- Messages
- 15,589
- Reaction score
- 1
I managed just a couple of hours out there today, pain got the better of me.
Not a complete success, but progress was made...
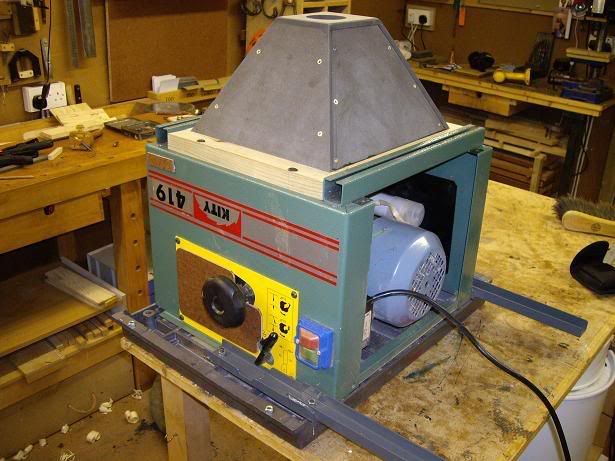
I started by turning the saw upsidedown. This was easier than it sounds as it was just a case of rolling it on it's side then again on it's back. Hardly any effort was needed.

It was still a bit messy under there, so I took some time to clean it up. I hope my daughter doesn't mind me using her tooth brush I know it's just going to get messy again, but it makes working on it more pleasant and doesn't hurt to clean up all the moving parts. Which are noticeably smoother running now.

I then spent quite a bit of time just looking around it trying to work out how it all goes together. It's a fairly complicated affair and I decided I wasn't going to disassemble the whole thing if I didn't need to. After Robs comments above, I knew I wanted to take the dust cowl off. The dust extraction isn't great at the moment, so it's no great loss having it off. Tho, once I'd started, I wish I hadn't! It was very fiddly. Idealy the whole thing needed to be taken apart to get it off. But I wasn't going to do that. I could just about get enough access to the first nut to get it off relatively quickly. But the 2nd bolt was almost impossible to access. In the end I just managed to get a spanner round it and could turn it less than a 1/4 turn. 30mins later...

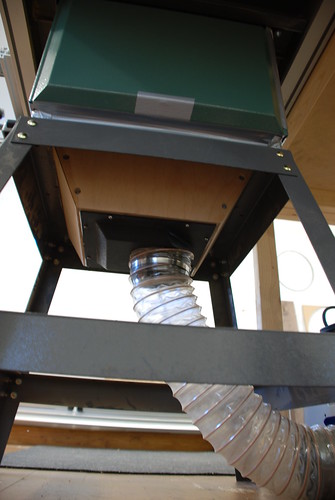
With the dust cowl off you can see the belt and pulley from the motor. I don't think this will pose any problems, but I'm open to suggestions

Now it was time to set about the blade alignment. It is about 10thou out, angled away at the back. So I decided to move the back in, rather than the front out. I loosened the two screws at the back of the blade that go through the table in to what I thought held the motor assembly to it. However, after tapping it lightly, checking and then giving it a whack and checking it, I'm not entirely sure I'm doing it right. Basically nothing much was happening. This is the block that I was tapping

My understanding is that the black rod that hooks into the alu block is the motor assembly. The screw on the top of the table goes through the alu block and into the nut you can see in the above pic. One on either side of the hook. But when loosening those bolts, the alu block is free to rattle around. So that can't be what I should be tapping? Should I tap the motor housing itself? This didn't seem to do much either. It didn't seem to matter how loose the bolts where, the reading remained about the same. I'm wondering is the motor assembly will actually move at all without removing the other parts that connect it to the frame. Such as this part at the back:

Ideas?
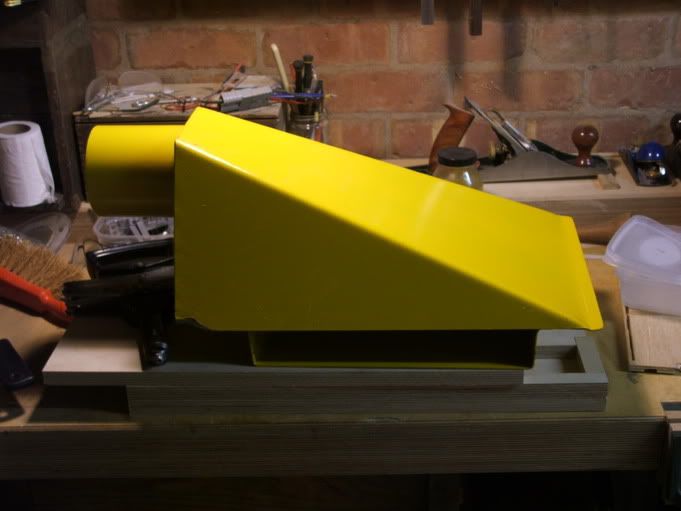
On a lighter note, the replacement (bandsaw) fence arrived

Not a complete success, but progress was made...
I started by turning the saw upsidedown. This was easier than it sounds as it was just a case of rolling it on it's side then again on it's back. Hardly any effort was needed.
It was still a bit messy under there, so I took some time to clean it up. I hope my daughter doesn't mind me using her tooth brush
I know it's just going to get messy again, but it makes working on it more pleasant and doesn't hurt to clean up all the moving parts. Which are noticeably smoother running now.
I then spent quite a bit of time just looking around it trying to work out how it all goes together. It's a fairly complicated affair and I decided I wasn't going to disassemble the whole thing if I didn't need to. After Robs comments above, I knew I wanted to take the dust cowl off. The dust extraction isn't great at the moment, so it's no great loss having it off. Tho, once I'd started, I wish I hadn't! It was very fiddly. Idealy the whole thing needed to be taken apart to get it off. But I wasn't going to do that. I could just about get enough access to the first nut to get it off relatively quickly. But the 2nd bolt was almost impossible to access. In the end I just managed to get a spanner round it and could turn it less than a 1/4 turn. 30mins later...
With the dust cowl off you can see the belt and pulley from the motor. I don't think this will pose any problems, but I'm open to suggestions
Now it was time to set about the blade alignment. It is about 10thou out, angled away at the back. So I decided to move the back in, rather than the front out. I loosened the two screws at the back of the blade that go through the table in to what I thought held the motor assembly to it. However, after tapping it lightly, checking and then giving it a whack and checking it, I'm not entirely sure I'm doing it right. Basically nothing much was happening. This is the block that I was tapping
My understanding is that the black rod that hooks into the alu block is the motor assembly. The screw on the top of the table goes through the alu block and into the nut you can see in the above pic. One on either side of the hook. But when loosening those bolts, the alu block is free to rattle around. So that can't be what I should be tapping? Should I tap the motor housing itself? This didn't seem to do much either. It didn't seem to matter how loose the bolts where, the reading remained about the same. I'm wondering is the motor assembly will actually move at all without removing the other parts that connect it to the frame. Such as this part at the back:
Ideas?
On a lighter note, the replacement (bandsaw) fence arrived