


SkinnyB
Established Member
I have recently needed to sharpen a few planer blades for a few machines that I have. As I like to do things myself I had a look at some diy versions like the ones below. However, I don't like the hardwork and time it takes, plus I need to be bale to remove material quickly as I have a few deeper nicks to remove.
I thought I could turn this whole jig around and use my drum sander to do all the hard work. Im surprised to say it really worked well for me. With a few improvements I will be using this method in the future.
The blades I will be testing are some rusty ones that came from a Multico TH1 I brought and restored a while back.
https://www.ukworkshop.co.uk/forums/multico-th3-restoration-project-t104066.html
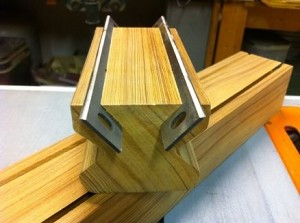
This is the jig I would like to emulate. There are a few versions around but the general idea is that you lay down some wet and dry and go through the grits.
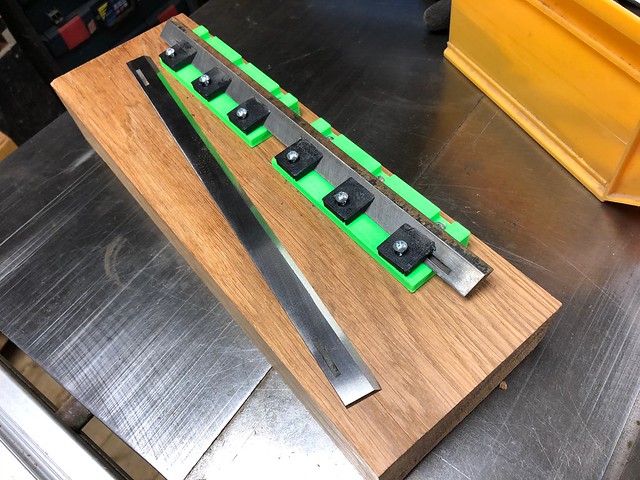
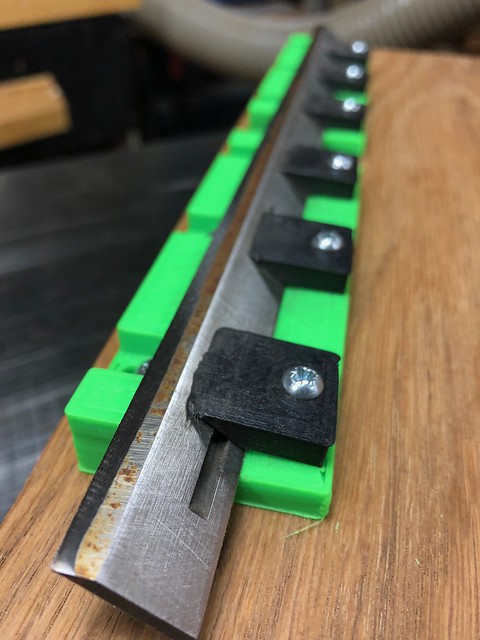
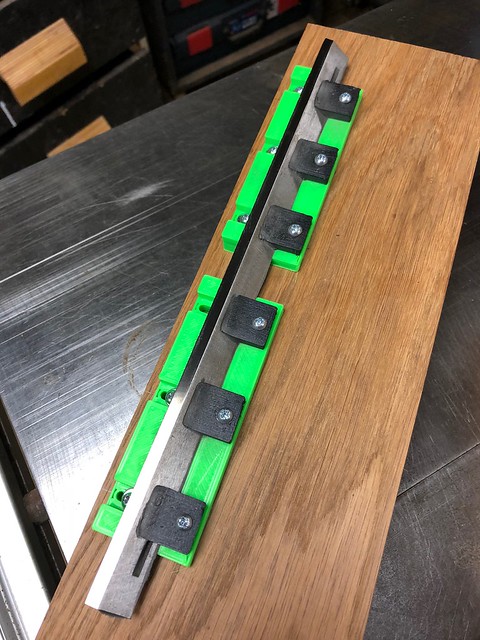
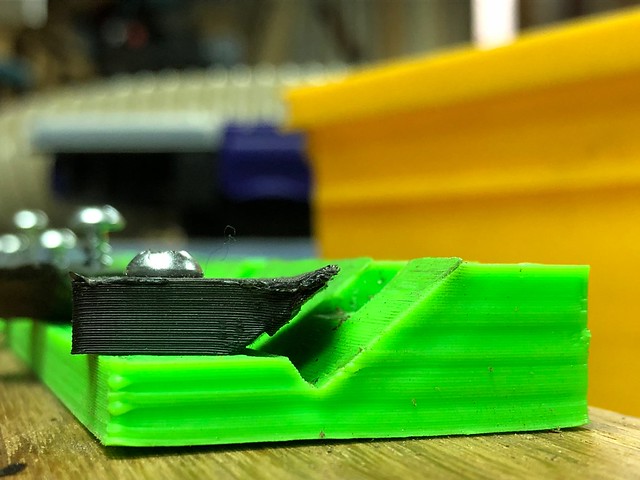
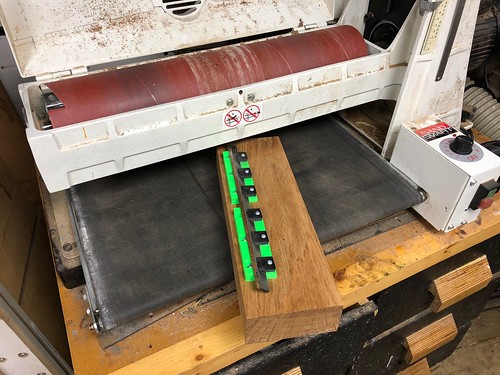
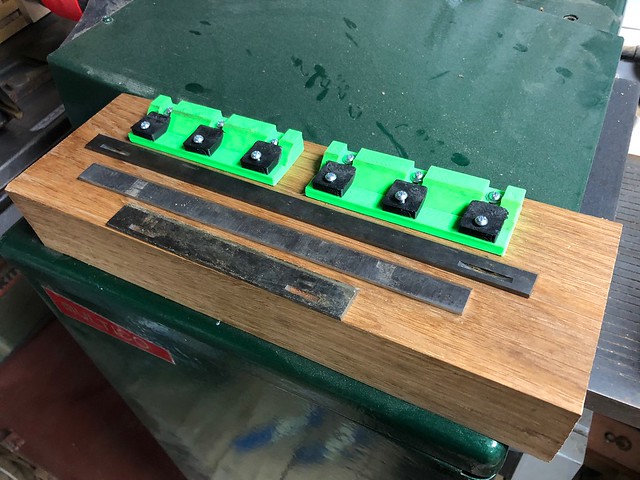
Here is my prototype version.
The main part of it is Its 3d printed. Each section you see is 120mm long, the blade is held at an angle of 40 degrees. There are 3 hold downs on each section.
The blade lies on the ramp and held in place by each clamp which is tightened via a screw. There is a 'shelf' in which the blade sits in and is aligned to the same position each time.
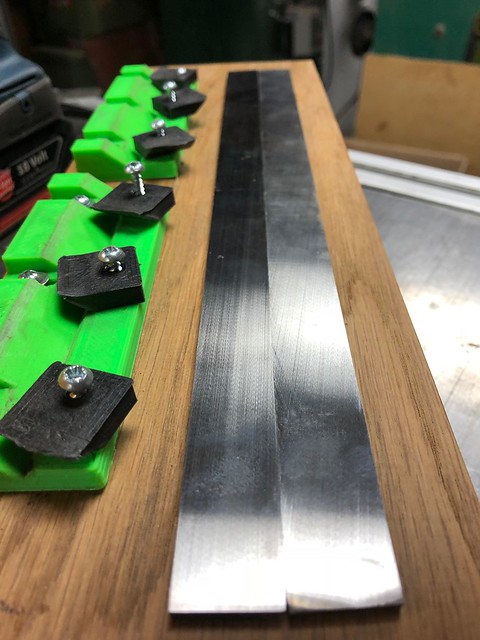
To add rigidly and stability the 3d printed parts are a attached to a heavy piece of Ash which has been milled square with parallel faces. Important!
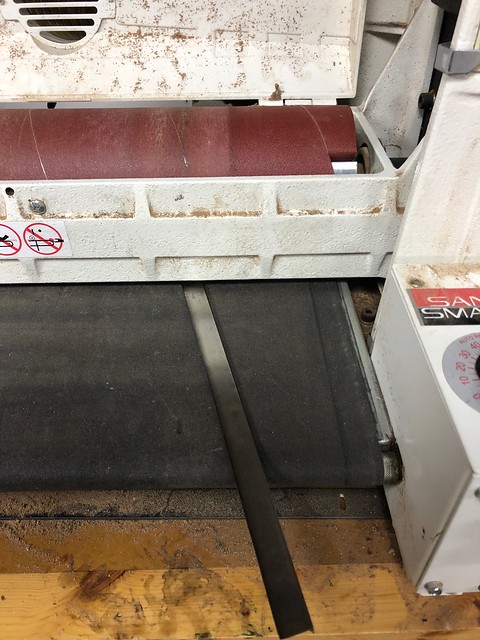
Step 1 is to place the blade in the jig making sure it is seated flat on each end and tighten the hold downs.
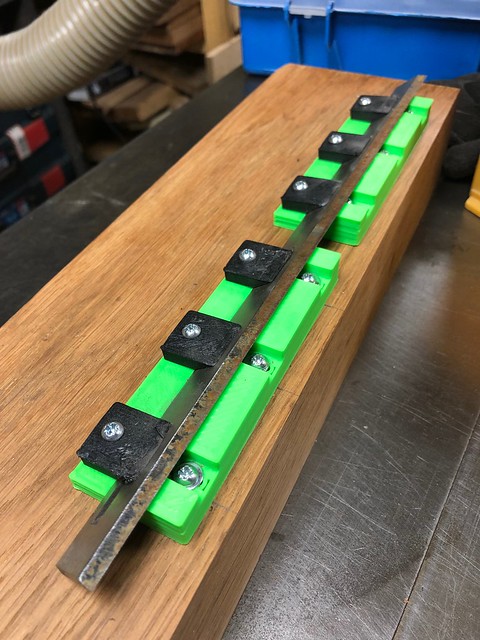
Im using an old 240 grit sandpaper on my drum sander which is no longer suitable for wood but is fine for this application.
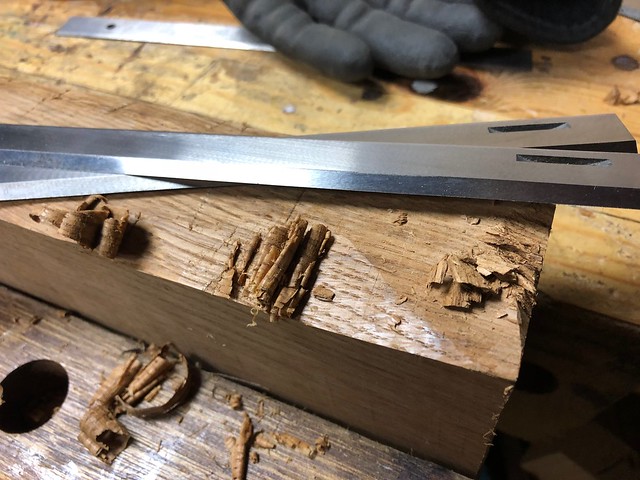
Step 2 is to remove material with each pass.

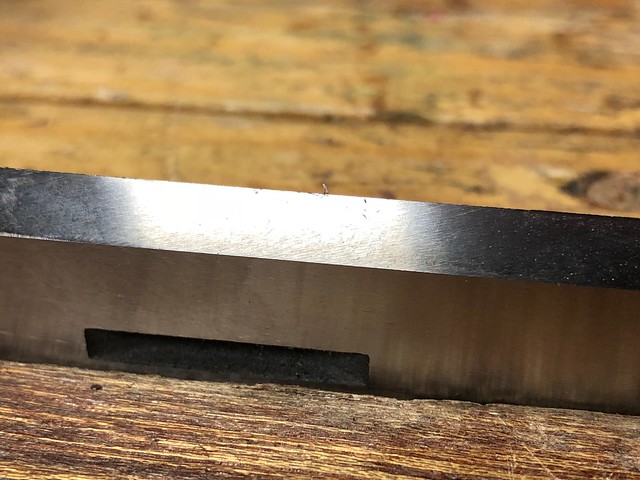
You can see here the material that has been removed. Im thinking that the Multico blade may be at a slightly different angle to my other blades as its not removing material evenly.
The cutting edge now is all cleaned up across the whole surface.
This part I was not sure if to do before or after the sharping the cutting edge. The back of the blade needed to be cleaned up as It was very scratched and dirty and would be hard to tell later on if the blade was sharp. Much like you would flatten the back of a chisel before sharpening. In the end I decided to do the back after as this would remove the burr created in the first step. It worked very well for me.
I started with 120 grit then finished up on 240 grit.
The back and front of the blade came out very nice better than I was hoping.

At this point I had some burrs that needed to be removed.
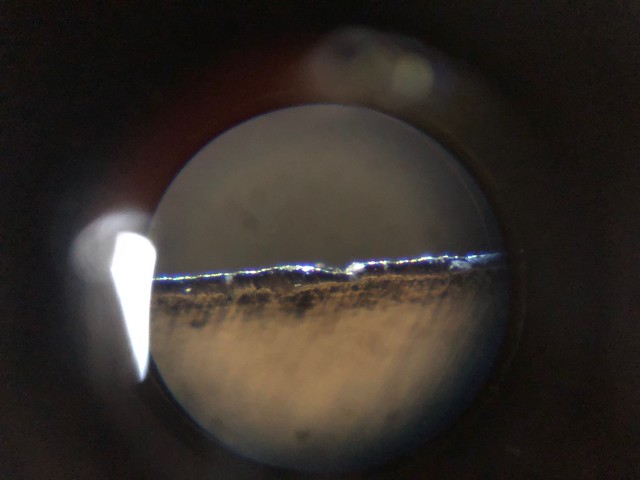
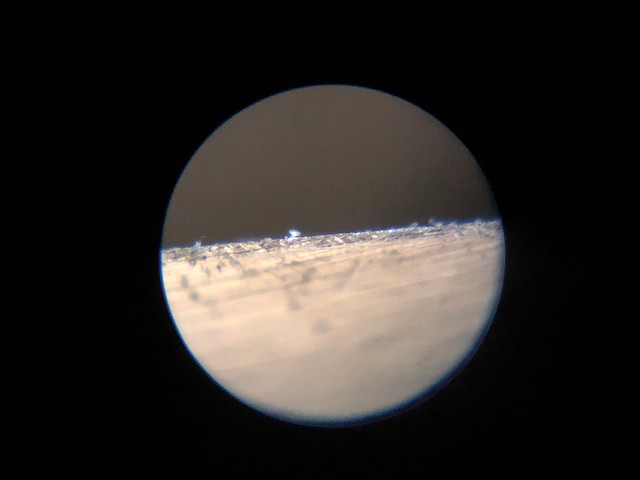
Burr under a microscope.
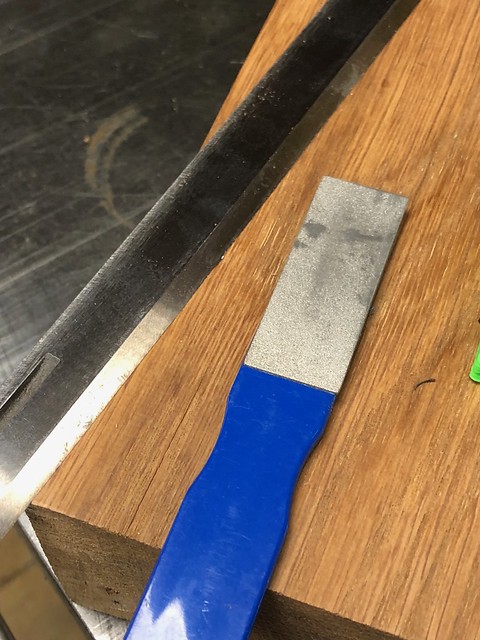
I used a small diamond pad to remove them. Used very light pressure at the same 40 degree angle.
Finally I made a few light passes on a stone to the back.

Before and after shot of the same blade after sharpening.
Before 60x Magnification.
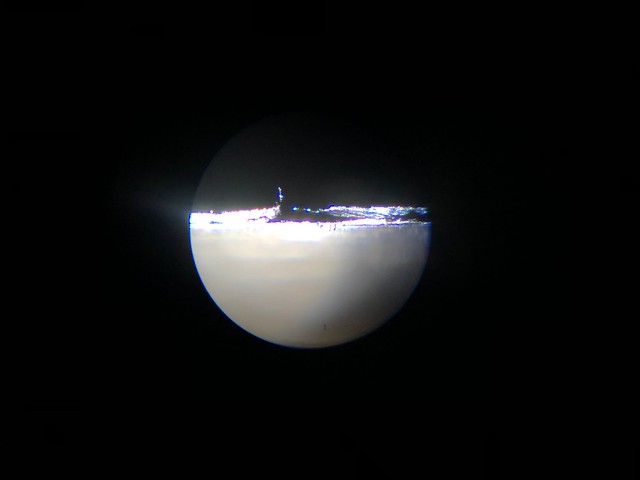
After 60x Magnification.
Conclusion:
Well it worked great, I tested the blades under a microscope and against some Ash hardwood. I had some blades that were new and could not tell the difference between under the microscope or against some ash. So I am hopeful I did a good job.
1. I have a few things to note. Unsurprisingly metal gets HOT while sanding and Plastic becomes SOFT when HOT (hammer).
Using plastic parts may not be such great idea when removing lots of material on these blades. The heat build up became a little to much for the clamps. So for removing lots I need to wait between passes/compressed cold air etc. However I was taking a lot off, In the future I hope I will just be doing a few passes so heat build up will be minimal. The main construction (green parts) I think had enough surface area so was not affected from what I could see.
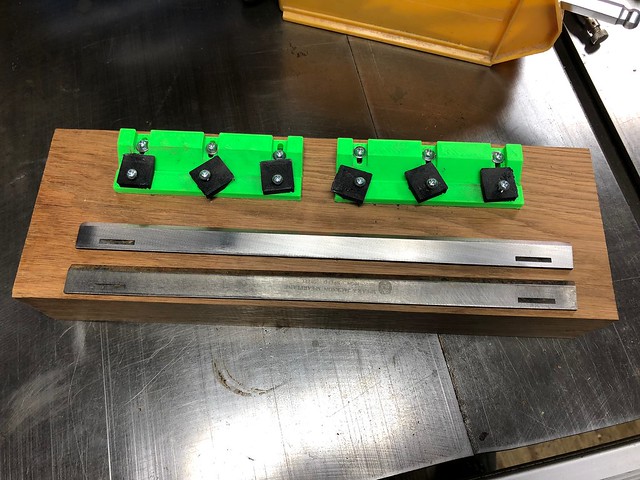
2. One major concern was how straight the blades would be after this process.
To my surprise the blades came out very straight. Placing them side my side so any deviation would be doubled I could not see any gaps and no 'rocking occurred'.
3. Blade feed direction/angle.
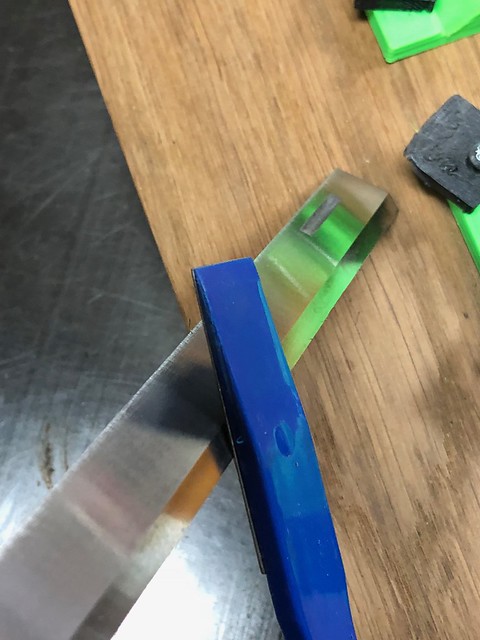
I think I can overcome some of the burrs dependant on which way the blade is fed into the drum sander. My thought was to have the blade edge pointed away so that I was not 'cutting' the sandpaper like below and extending its life. If I were to reverse this angle so have the blade edge leading the burrs should not be created.
4. Next steps and upgrades.
I want to have better hold downs. Maybe something that won't warp as easy. Something bigger that can dissipate some of the heat. The hold downs worked for 2 blades and I had to take many passes to get the aligned with the jig in the first place.
Print some 'slopes' (green part) which are of better print quality
Socket Screws. Change the hold down screws to socket cap screws so that I can use an allen wrench rather that a pozi screw.
Testing I do not need to fit these yet as I have a brand new pair in my machine currently. I am however on my last set for my Kity so will be on to those next.
Overall it was a successful project. Now I have the means to sharpen my 3 lengths of planer blades.
If you haven't seen my Drum sander Chisel Jig prototype it here:
https://www.ukworkshop.co.uk/forums/drum-sander-chisel-sharpening-jig-t108548.html
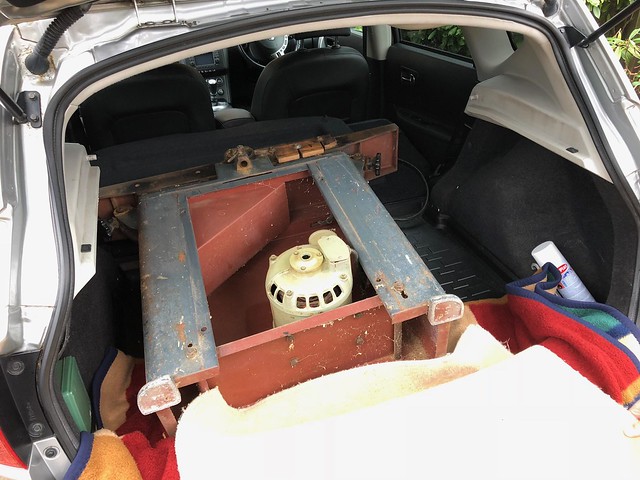
My next project will be restoring this Multico 6' planer that I picked up recently. Very solid machine.
I thought I could turn this whole jig around and use my drum sander to do all the hard work. Im surprised to say it really worked well for me. With a few improvements I will be using this method in the future.
The blades I will be testing are some rusty ones that came from a Multico TH1 I brought and restored a while back.
https://www.ukworkshop.co.uk/forums/multico-th3-restoration-project-t104066.html
This is the jig I would like to emulate. There are a few versions around but the general idea is that you lay down some wet and dry and go through the grits.
Here is my prototype version.
The main part of it is Its 3d printed. Each section you see is 120mm long, the blade is held at an angle of 40 degrees. There are 3 hold downs on each section.
The blade lies on the ramp and held in place by each clamp which is tightened via a screw. There is a 'shelf' in which the blade sits in and is aligned to the same position each time.
To add rigidly and stability the 3d printed parts are a attached to a heavy piece of Ash which has been milled square with parallel faces. Important!
Step 1 is to place the blade in the jig making sure it is seated flat on each end and tighten the hold downs.
Im using an old 240 grit sandpaper on my drum sander which is no longer suitable for wood but is fine for this application.
Step 2 is to remove material with each pass.
You can see here the material that has been removed. Im thinking that the Multico blade may be at a slightly different angle to my other blades as its not removing material evenly.
The cutting edge now is all cleaned up across the whole surface.
This part I was not sure if to do before or after the sharping the cutting edge. The back of the blade needed to be cleaned up as It was very scratched and dirty and would be hard to tell later on if the blade was sharp. Much like you would flatten the back of a chisel before sharpening. In the end I decided to do the back after as this would remove the burr created in the first step. It worked very well for me.
I started with 120 grit then finished up on 240 grit.
The back and front of the blade came out very nice better than I was hoping.
At this point I had some burrs that needed to be removed.
Burr under a microscope.
I used a small diamond pad to remove them. Used very light pressure at the same 40 degree angle.
Finally I made a few light passes on a stone to the back.
Before and after shot of the same blade after sharpening.
Before 60x Magnification.
After 60x Magnification.
Conclusion:
Well it worked great, I tested the blades under a microscope and against some Ash hardwood. I had some blades that were new and could not tell the difference between under the microscope or against some ash. So I am hopeful I did a good job.
1. I have a few things to note. Unsurprisingly metal gets HOT while sanding and Plastic becomes SOFT when HOT (hammer).
Using plastic parts may not be such great idea when removing lots of material on these blades. The heat build up became a little to much for the clamps. So for removing lots I need to wait between passes/compressed cold air etc. However I was taking a lot off, In the future I hope I will just be doing a few passes so heat build up will be minimal. The main construction (green parts) I think had enough surface area so was not affected from what I could see.
2. One major concern was how straight the blades would be after this process.
To my surprise the blades came out very straight. Placing them side my side so any deviation would be doubled I could not see any gaps and no 'rocking occurred'.
3. Blade feed direction/angle.
I think I can overcome some of the burrs dependant on which way the blade is fed into the drum sander. My thought was to have the blade edge pointed away so that I was not 'cutting' the sandpaper like below and extending its life. If I were to reverse this angle so have the blade edge leading the burrs should not be created.
4. Next steps and upgrades.
I want to have better hold downs. Maybe something that won't warp as easy. Something bigger that can dissipate some of the heat. The hold downs worked for 2 blades and I had to take many passes to get the aligned with the jig in the first place.
Print some 'slopes' (green part) which are of better print quality
Socket Screws. Change the hold down screws to socket cap screws so that I can use an allen wrench rather that a pozi screw.
Testing I do not need to fit these yet as I have a brand new pair in my machine currently. I am however on my last set for my Kity so will be on to those next.
Overall it was a successful project. Now I have the means to sharpen my 3 lengths of planer blades.
If you haven't seen my Drum sander Chisel Jig prototype it here:
https://www.ukworkshop.co.uk/forums/drum-sander-chisel-sharpening-jig-t108548.html
My next project will be restoring this Multico 6' planer that I picked up recently. Very solid machine.