Dovetailed Infill - First Fumblings

UKworkshop.co.uk

Help Support UKworkshop.co.uk:

This site may earn a commission from merchant affiliate links, including eBay, Amazon, and others.
Looks good! Speaking of casting, I noticed some smoothing and panel bronze infill castings on ebay the other day if you fancy a try at that approach!
 
Andy RV":p4yaltod said:
Looks good! Speaking of casting, I noticed some smoothing and panel bronze infill castings on ebay the other day if you fancy a try at that approach!

They've been there a while Andy...and one...I think the smoother...even had a lever cap moulding with it...you might ask.

Don't be under any illusion that the casting is the easier or quicker route....the precision required for finishing is very unforgiving and you have to take great care in ensuring that the bed for the iron emerges from the mouth perfectly...the mouth being cut at the same time. This is not as easy as it seems.

Even creating the infill wood blocks in three dimensions is a bit of an art. If it were me...I would try the parallel sided mitre plane casting first. You don't need a cap for that model...you just need to make a bridge out of brass or gunmetal and make a wedge.

I also quite fancy the panel plane...love that style.

Jim
 
Richard, I love the new planes!!! Can't wait to see these progressing!!

I actually drew up a panel plane as a 3D CAD exercise a while ago, but never got around to making it...
 
Thanks Aled .... parallel sides - a breeze compared to the "boat shaped". Once you have the marking right, the discipline of sawing and filing is quite enjoyable; especially as I have got a side measured, cut and fitted in an afternoon.
What takes the most time is grinding/draw filing the scale off the hot/black steel sheet. I feel a progression to bronze/01 coming on ...

You drew it up ? To make it in what material ???
 
Yes I can see how it would be easier to mark out and cut, but the time involved would still put me off, I've been spoilt with getting parts water jet cut.

Here are the two planes I drew up a while ago.

The Panel Plane
Panelplanesideview.jpg


And the Thumb Plane
Thumbplane.jpg


I've already pulled down the drawings for the thumb plane, and am halfway to re-modelling the Panel plane in my current CAD software.

Cheers
Aled
 
Thanks Rod, I've posted them on here before, but it was months, maybe even a year ago.

I may have a go at the Thumb Plane in the new year, I've not made a plane for a good while!

Cheers
Aled
 
Looking very good Aled. Do you still have your sources for bronze and steel? And can you get bronze thin enough for a panel length plane? I have found a place in Brum for bronze but I don't yet know what recipes or gauges they do ...
I used 4mm thick mild steel for the sides of mine and 5mm for the sole; and the difference in ease of cutting the joints was quite something. I marked and cut one side - 9 dovetails in two hours last time.
Another time saving wheeze I have employed is a jig for marking the sole pins. Just two boards and a shoulder screwed together at ninety degrees - screws heavily countersunk so I could plane it exactly square - so I can clamp the sole to the upright face in the vice, then clamp the cut side onto the top and score down through the tails with out anything moving. Also I've found that rather than clamp it dead on, to clamp the side a hair's breadth low. this really pulls on tight to the sole - a bit like an offset peg hole in a tenon.
Then when finishing the pins I cut with the saw short of the inside of the lines but file through to the far side of them. Logic tells me that this would be too much but it isn't. It's the only way it's going to fit something like first time without endless tapping and re filing ... loosing your lines in the process and being likely to over do it in places. Much better and quicker to be right in the first place I've found.

I don't know what kind of a finish water cutting leaves but don't you have to file to fit afterwards any way? I'm sure I read that Konrad. S does...
 
I've never used Bronze, but used to get my Brass from ebay, or from a stockholder in Cardiff - Fromstock. The soles of my planes are from O1 Gauge plate, usually bought from MSC J+L Industrial (and tagged onto a school order to avoid the VAT) Cromwell also have good prices for Gauge Plate.

Yes I can see that when you're in the swing of things that you'd get the cutting done quite efficiently. Bill Carter uses Gauge Plate, and just saws a number of vertical cuts just shy of the line and then takes the remaining "fingers" out with a cold chisel, the Gauge plate is a little more brittle than Mild Steel, so they pop out easily, he then files the cut face back down to the line.

A waterjet cut surface looks as if it were sandblasted and has a slight taper on the edge (1-2deg), I just give the surface a light filing to square the edge. The waterjet only cuts vertically, so I still need to file the dovetail angles on the sole, but that only takes a couple of swipes on each side with a small turnip file. I had my first batch of CNC cut blanks cut on a Lazer machine, but found that the localised heat from the lazer actually hardened the surface to such a degree that a couple of swipes with a file took all the teeth off one edge of a brand new 14" turnip file!! I then turned to water jet cutting...

If you're interested in how I go about working from pre cut blanks, just PM me your email address and I'll send you a copy of the instruction manual I wrote for my Small Shoulder plane kit, it has quite detailed instructions about the dovetailing process.

Cheers
Aled
 
I've been neglecting this thread long enough - I've been working on the three planes in fits and starts since new year and have been taking the odd photo along the way so here are things to date.

I peined up the 2 - 1/4" a while ago having made it its own support around the form.

DSCN0208.jpg


DSCN0280.jpg


I ground up a cross pein punch to spread from side to side better.

DSCN0284.jpg


DSCN0287.jpg


DSCN0288.jpg


I chose a bit of Walnut with an interesting grain for the rear infill ... a bit too interesting in places - this hole got wider and wider but I went on with it in the hope that the handle would be just where it was, and its continuation would not show at the back [-o< I left a "sneck" on the back for ease of getting in and out.

DSCN0378s.jpg


Started to chop out the mortice - was dreading this .. Fitting the handle often ...

DSCN0382s.jpg


Going down ...

DSCN0386s.jpg


DSCN0388s.jpg


until finally I forstenered through and cleaned it up.

DSCN0389s.jpg


Dispensed with the sneck, but left it long to tap in and lever out.

DSCN0391s.jpg


More later...
 
Looking wonderful Richard - I'm admiring your skills and thinking of how good the old guys were making these things for a living!
 
Very nice indeed!! Those dovetails cleaned up lovely, great choice of wood too, I used Walnut for my smoother.

Can't wait for the next installement!
 
Things of beauty are worth waiting for.....

And that is one beautiful plane my dear friend!

I'm glad you're paving the way mate....I will be a virtual expert by the time I get up the courage to make my mitre!

I particularly love the walnut...it has a fantastic grain...really interesting and I can't wait to see that grain pop out when the finish is applied.

I am sure that when you next see Mr Carter he will be looking for tips!

Cheers mate and keep 'em coming!

Jimi
 
Thanks folks - just had a bath and my hands are the same colour as before ... the only down side of Walnut I've found so far ..

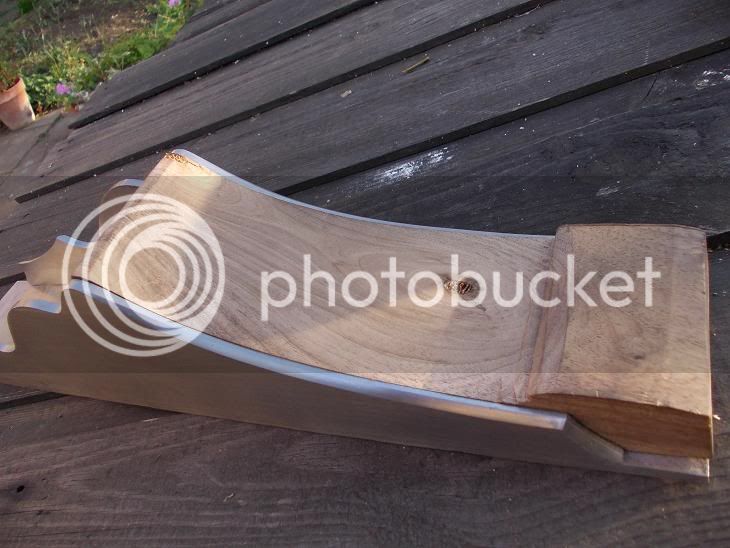
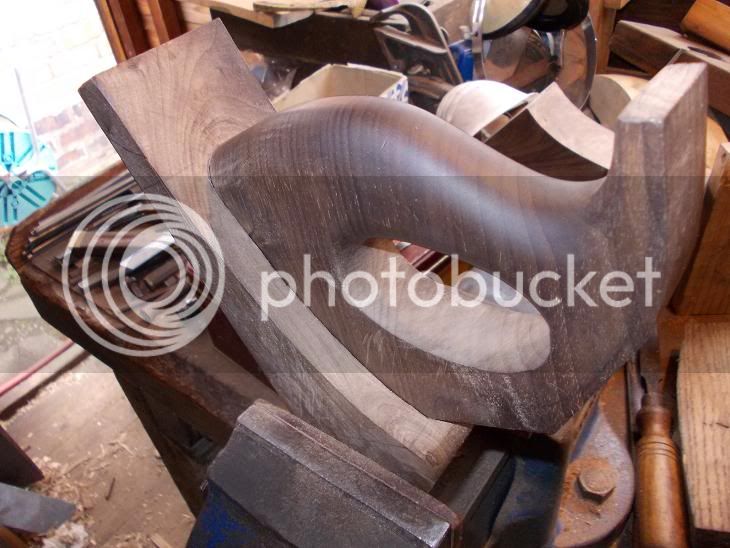
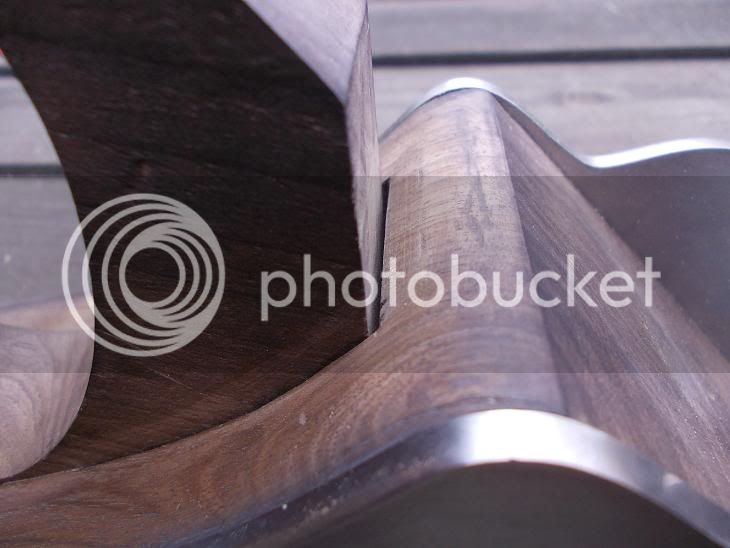
Got the handle in much better than I expected though there are gaps around the side. I think this is due to me concentrating on the mortise and no so much on the tenon - I must have been more concerned for its handleness than its parallelness.

DSCN0394s.jpg


The real bum however, is at the front. I just could not get this lined up. :evil: Though it is tight as anything, and a really good fit lower down, there is a gap where it shows.

DSCN0398s.jpg


The obvious solution to this is to never show it to anyone with the iron out. :oops:

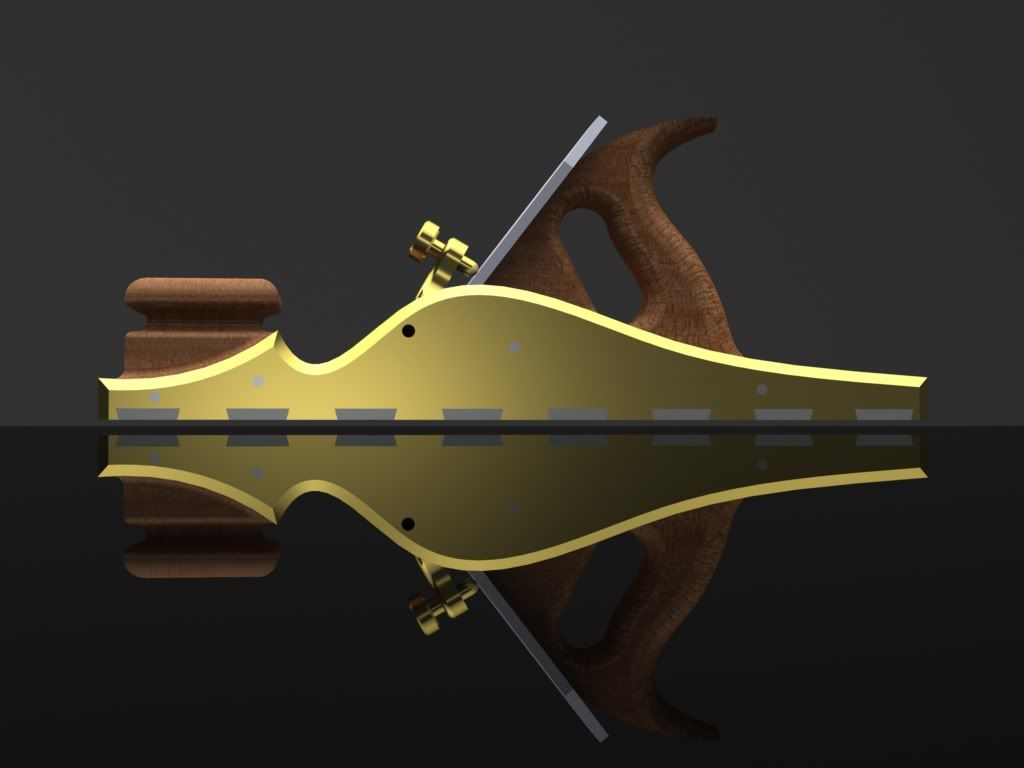
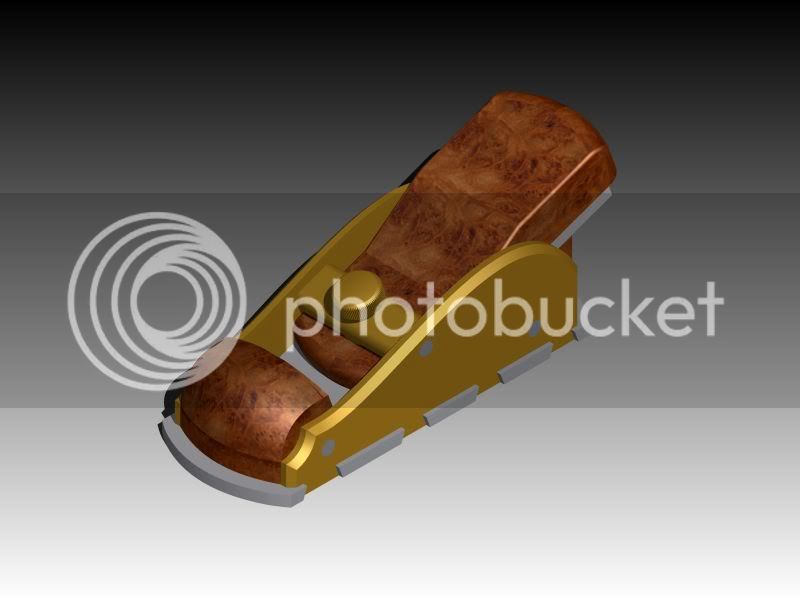
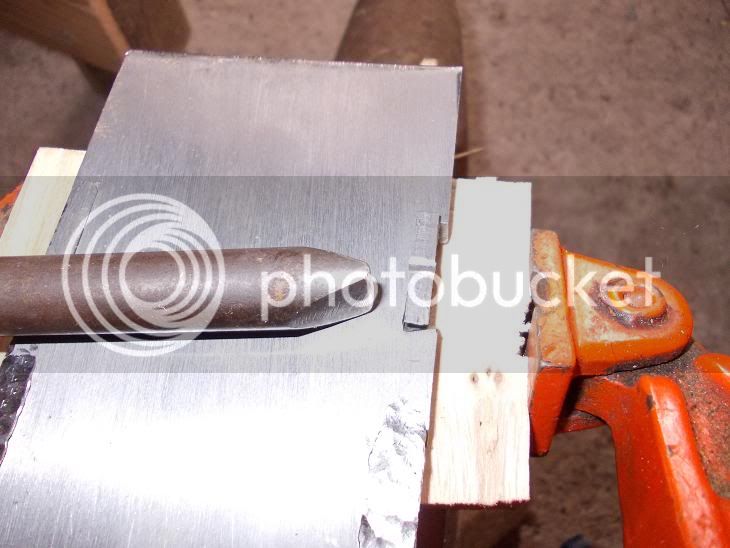
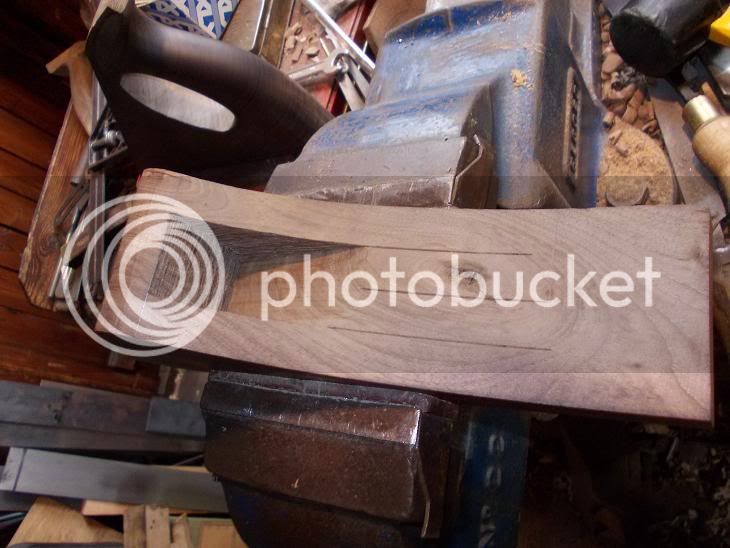
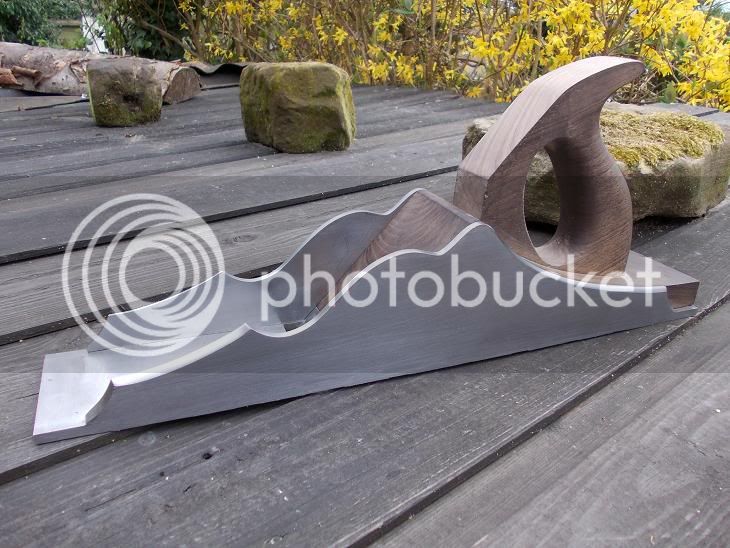
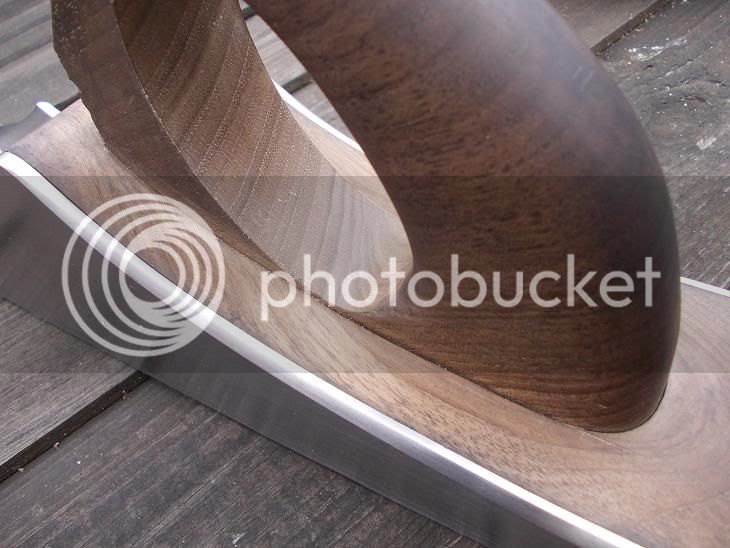
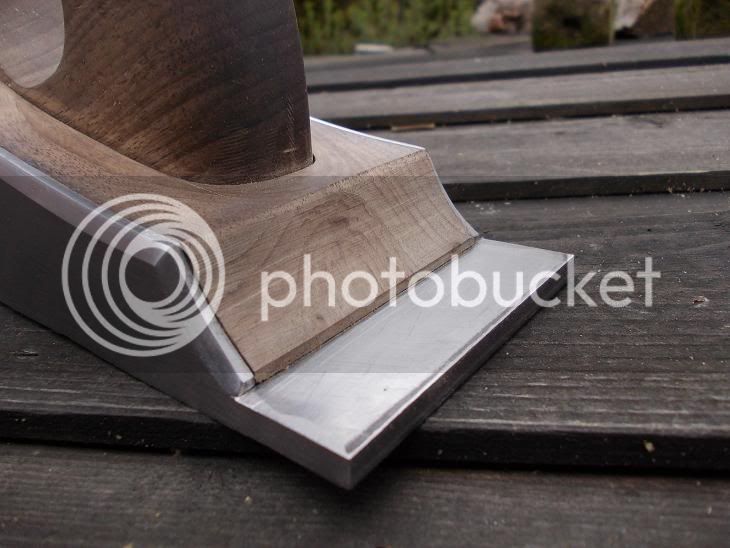
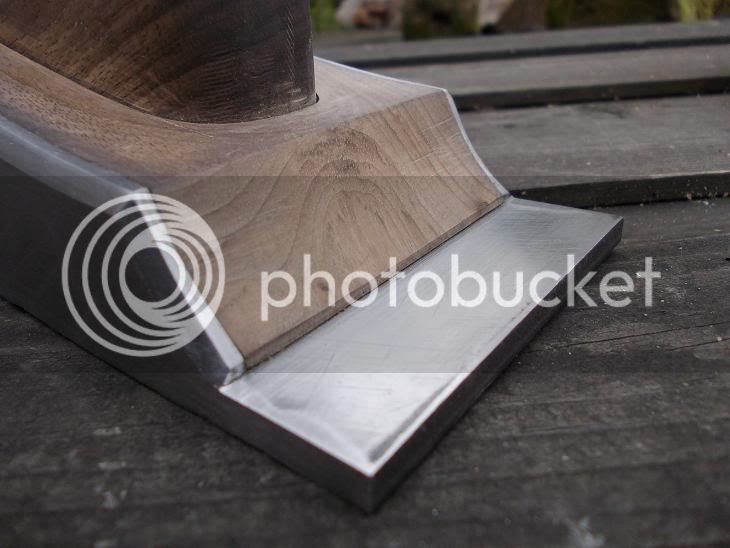
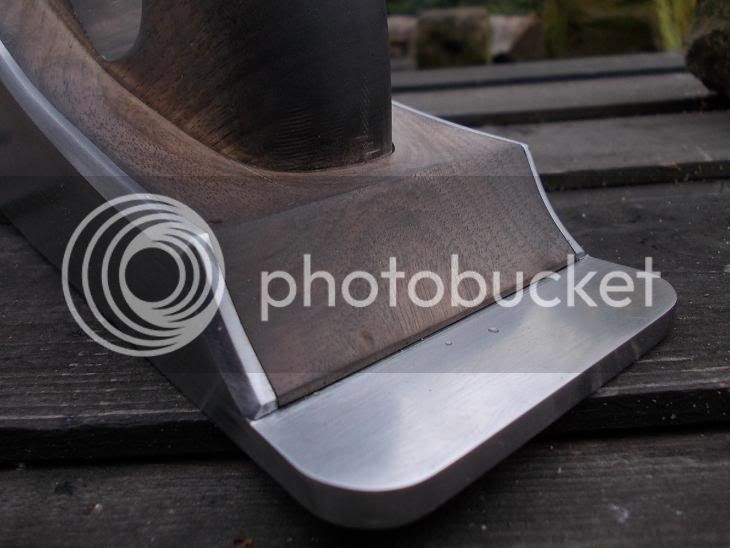
Today I've been working on fitting the back. For some reason this is something I have been really looking forward to ... what is it about those sweeps and the way the wood joins them? Everybody seems to comment on these details.
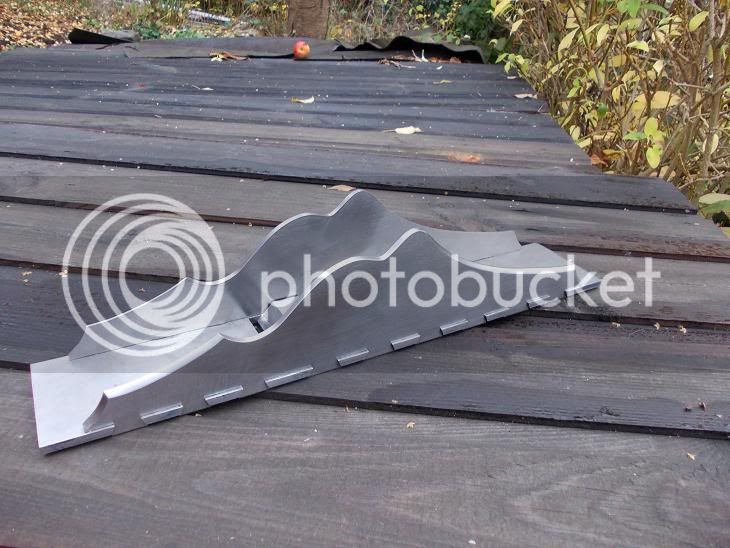
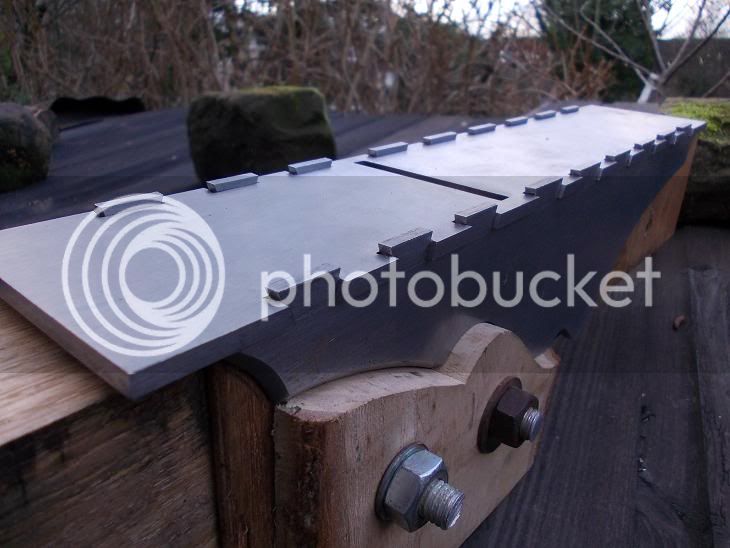
I cut the over hang off.

DSCN0395s.jpg


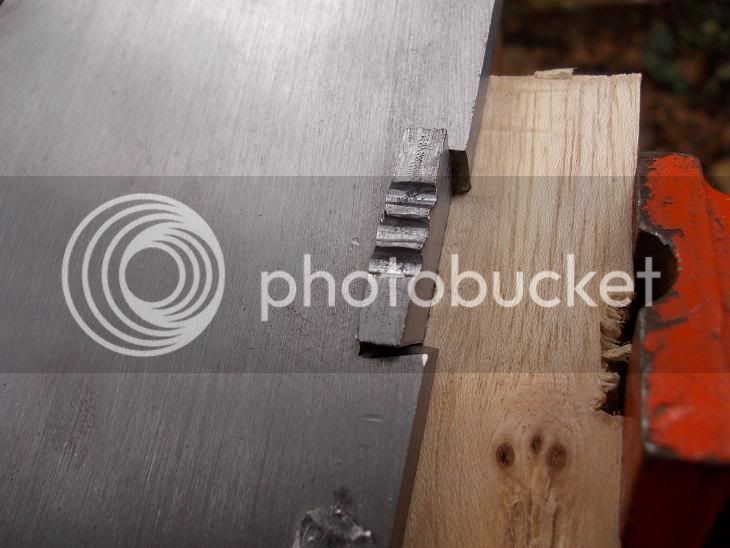
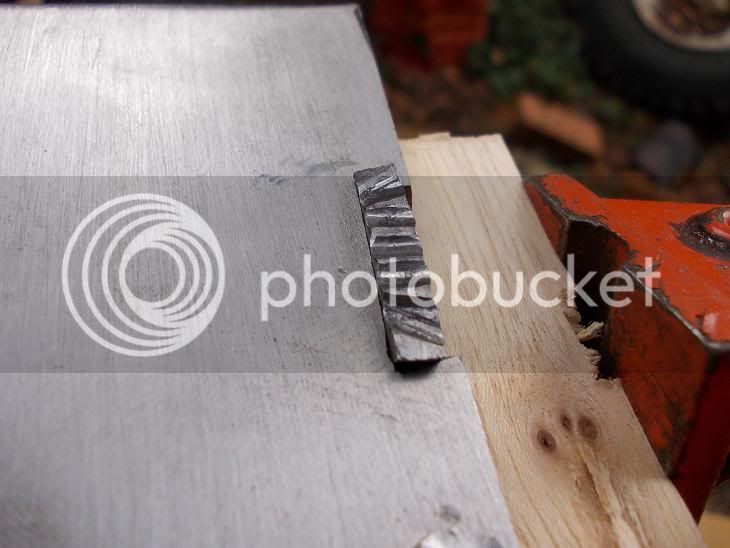
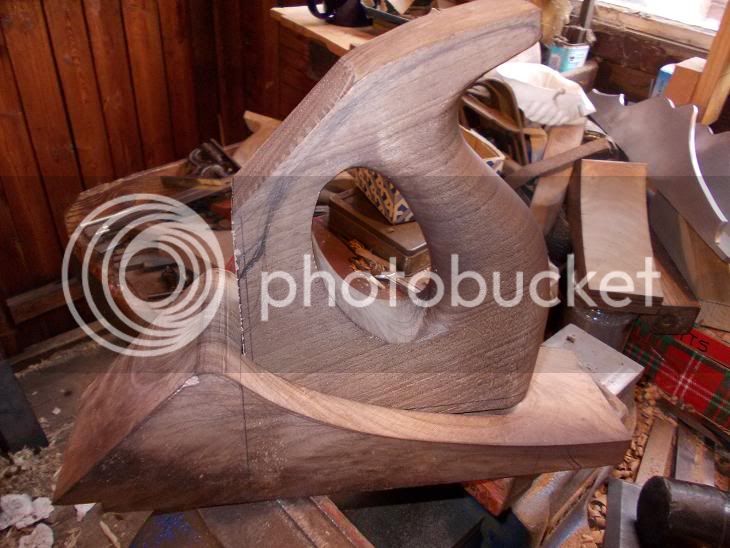
And worked back with paring chisel and gouge,

DSCN0396s.jpg


before switching to files and emery cloth.

DSCN0397s.jpg


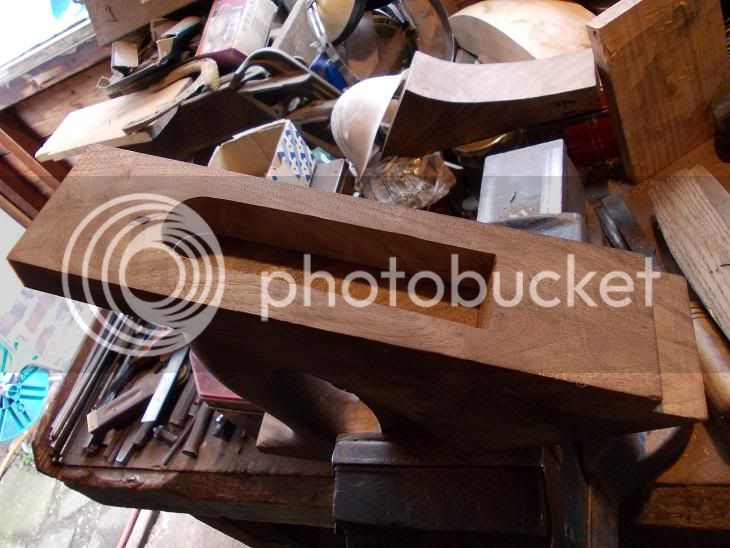
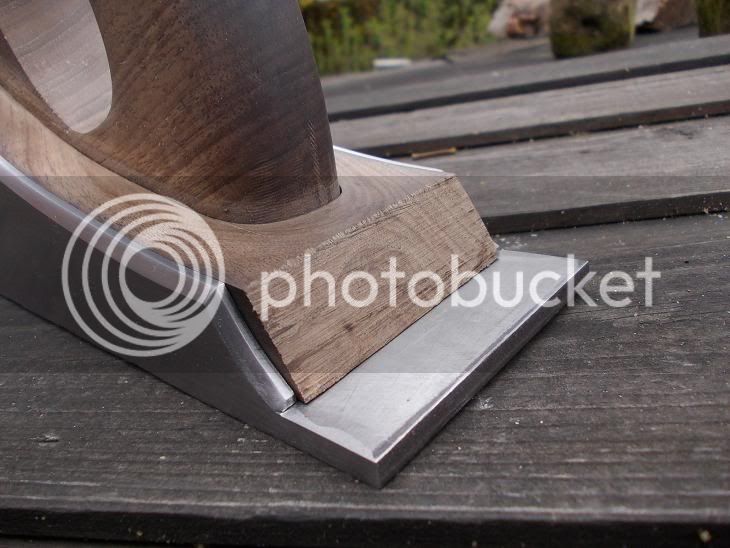
Finally today, I did some origami to make a stencil to mark symmetrical rounds for the corners - nothing too precise, I wanted to do it by eye but with a little help; these things can easily get out of hand like trimming equal amounts from either side of a moustache, you often end up clean shaven.

DSCN0399s.jpg


I'm getting quite excited about this one now - it's starting to look like a "proper one". :) I really hope it stays that way.
When I have had the practice I will attempt an adjuster. It's not making the adjuster that bothers me as much as fitting it; having made the appropriate wood work to fit it in to. Though steel dovetails are nowhere near as daunting for me as they were, I hope the infilling follows suit
.
 
Thanks Jim,

I may have a small job for you in the near future ... regarding heat treating. Not sure which way I'm going yet though. We must have speaks. :)
 
Hi Richard

Sure thing mate....thick iron..01 steel....780 degree sort of thing?

Regarding the gap...I bet you anything you like those sort of things happened all the time in production.

If it were mine I would get either a piece of veneer that thick or cut some exactly right and wedge/glue it in place and then par it off.

There is no way you will even notice it once it's finished and waxed.

You'll know it's there but you'll get over it (one day!) :mrgreen:

Jim
 
Yup Jim, exactly that sort of thing. :wink:

I don't know about filling the gap - I might leave it as a reminder. What really peeves me is that I can't think how it happened; and I was there doing it. #-o Though I think I will consult the oracle again before I rush into getting me a mortiser. I do enjoy cutting big mortises by hand but as I have no more room for timber frames I haven't been getting the practice.
Another thing I won't do again is scribe down too far for the mortise. That left hand line is still there past the curve. I realised before I scribed the right but ... hey ho. :roll:
 
Absolutely stunning Richard; once again I find myself completely in awe of the skill and quality of work you demonstrate with your plane making.

And yes...

Richard T":1678mtiv said:
I've been neglecting this thread long enough

You have. Sit on the naughty step and think about what you've done. Don't let it happen again! :wink: :mrgreen:

El.
 
Back
Top