flying haggis
Established Member
is it actually a hole in the ridge or just an indent


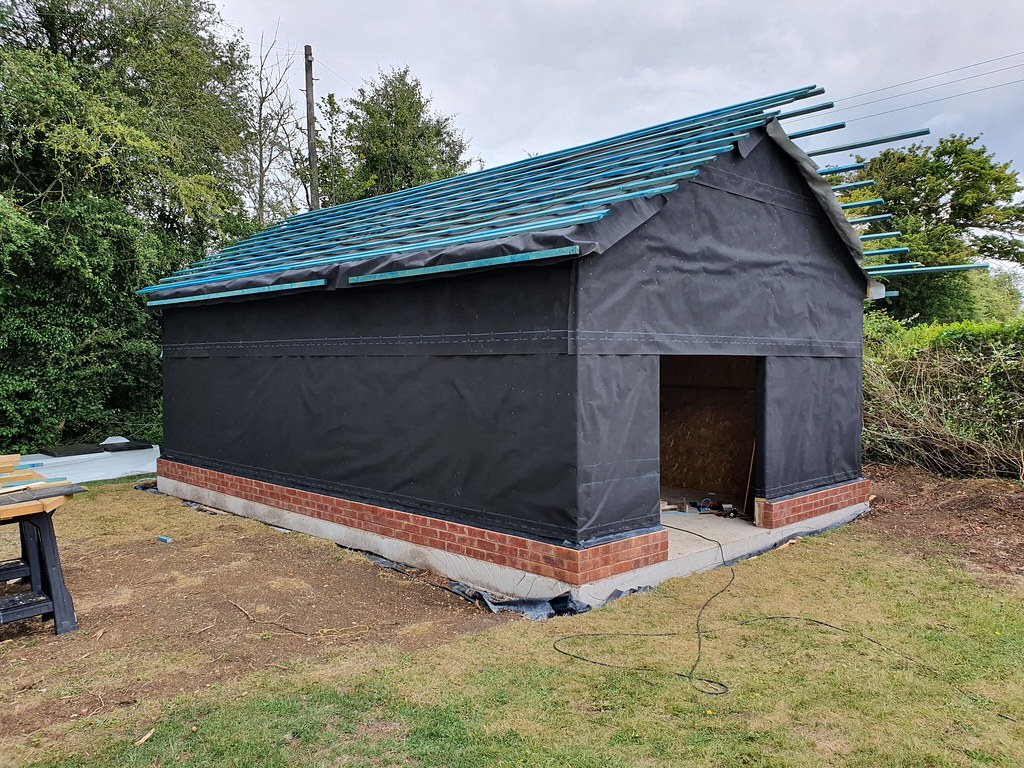
My duo ridge are identical to that, except I don’t have any holes in the top. Hence I used four 60mm per tile.DBT85":97ncts92 said:Well half of the roof it battened apart from the last bits right at the ridge. Just taking stock of what I have and what I'll need so I can see if I can get a delivery in any reasonable time frame.
Anyway, the unvented Cembrit ridge tiles I have here have a hole in them just like this one. Its about 1/3 the way along the ridge.
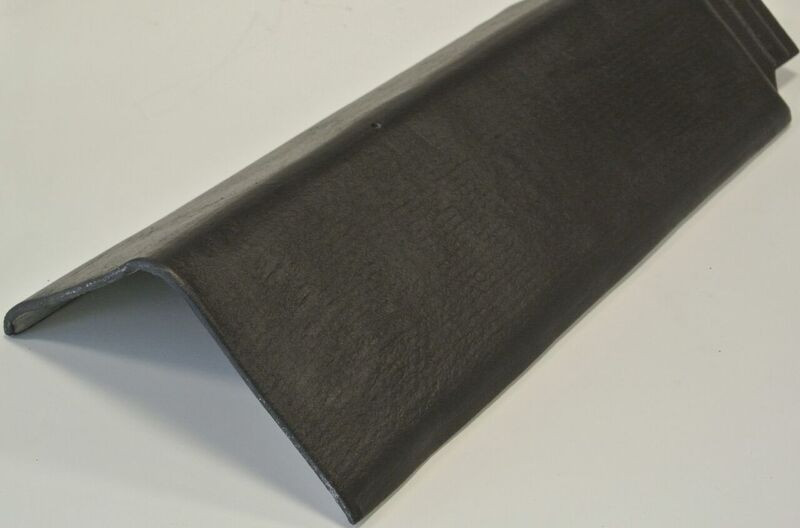
I can't fathom why, as they are supposed to be secured 75mm up from the bottom edge with 2 screws on each edge.
Any ideas?
Sheptonphil":1ek33dcp said:My duo ridge are identical to that, except I don’t have any holes in the top. Hence I used four 60mm per tile.
These pictured are for use with the Marley dry ridge vent system. A roll of vent strip Is stuck to the slates, steel supports for a centre 2x1 batten, and then these ridge tiles screwed through the top to the 2x1. You won’t have a central 2x1 batten.
Cembrit supplied or not, they are the wrong ones.
Won't start till a fascia is up. I have one bit here and more arriving tomorrow.Sheptonphil":1ek33dcp said:How are you going to start tiling without putting the fascia on first? You’ll have nothing to carry the lower edge.
And the verge?
Have you worked out how/where that will finish, as it will be where you put your very first slate.
Your battens look right at the bottom, are you running a 245mm batten spacing, 110mm headlap?
Looks like you’ll have this little project wrapped up by the end of July. :shock: looking really good.
I shall I shall. I literally don't know where to start yet so need to have a read first.mindthatwhatouch":1ek33dcp said:Cracking on nicely,
Re the door. GET ON WITH IT, if I can manage it you can definitely cope.
(Mind you I am having some shrinkage issues at the moment) :?
Work out from middle to the verges for setting out maybe, but not for laying them.DBT85":7zsiwkzo said:[
I know roughly where the end will be but the suggestion from the materials is to site the first tile in the middle and work out toward the verges. I need to ponder more before I begin.
DBT85":26jg43a5 said:Holy carp I've just seen the cost of Bedec (homer)
Did you paint both sides of your featheredge with the mist coat before fitting or just the visible parts and then a second coat when fitted?MikeG.":yznxry1f said:DBT85":yznxry1f said:Holy carp I've just seen the cost of Bedec (homer)
....and you need more of it than you think. Their coverage figures are optimistic. The thing is, you'll possibly never need to repaint. Put that into the equation and isn't quite so bad.
DBT85":1nz53z9w said:Yeah I'm firm on using bedec, just wondering how the "medium oak" one will look on treated wood.


DBT85":2ydj96n1 said:......Did you paint both sides of your featheredge with the mist coat before fitting or just the visible parts and then a second coat when fitted?......
Ohh now for some ambiguity.MikeG.":3g3k3iki said:DBT85":3g3k3iki said:......Did you paint both sides of your featheredge with the mist coat before fitting or just the visible parts and then a second coat when fitted?......
A mist coat and a single proper coat all round before fixing in place (I also paint all cut ends with one heavy coat, and fit whilst wet). Then a final coat over the outside when the boarding is complete. You can spray it, but I just use a woolly 4" roller.
Enter your email address to join: