You are using an out of date browser. It may not display this or other websites correctly.
You should upgrade or use an alternative browser.
You should upgrade or use an alternative browser.
DBT85s Workshop - Moved in and now time to fit it out
- Thread starter DBT85
- Start date


Help Support UKworkshop.co.uk:
This site may earn a commission from merchant affiliate
links, including eBay, Amazon, and others.
DBT85
Established Member
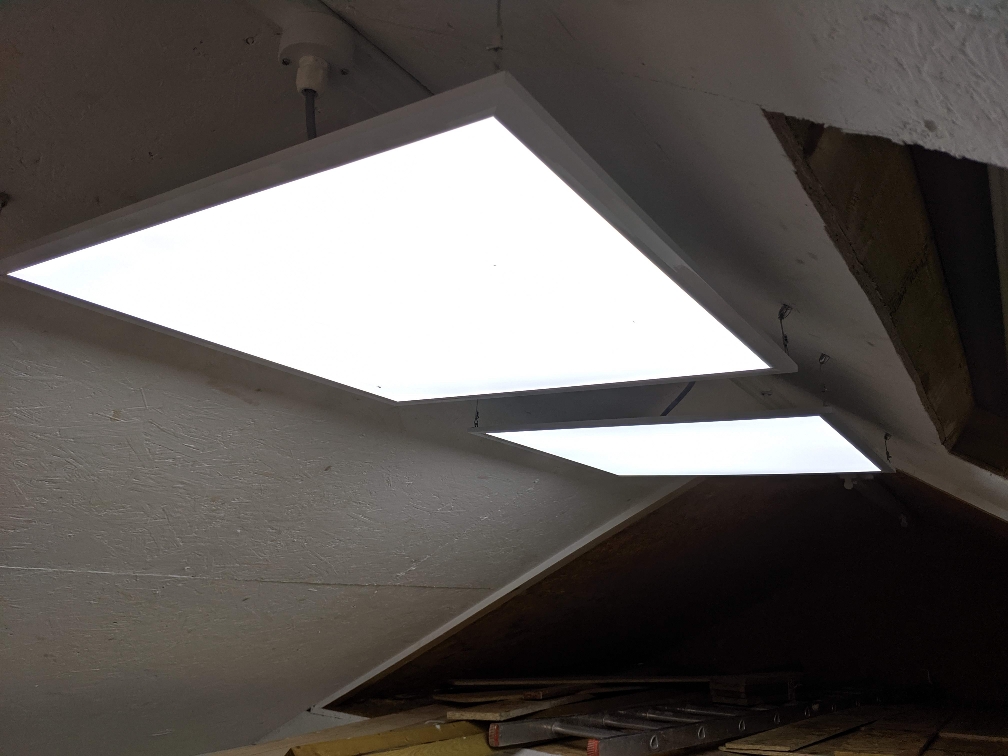
Thanks for input on the lights chaps. I'll have a think.
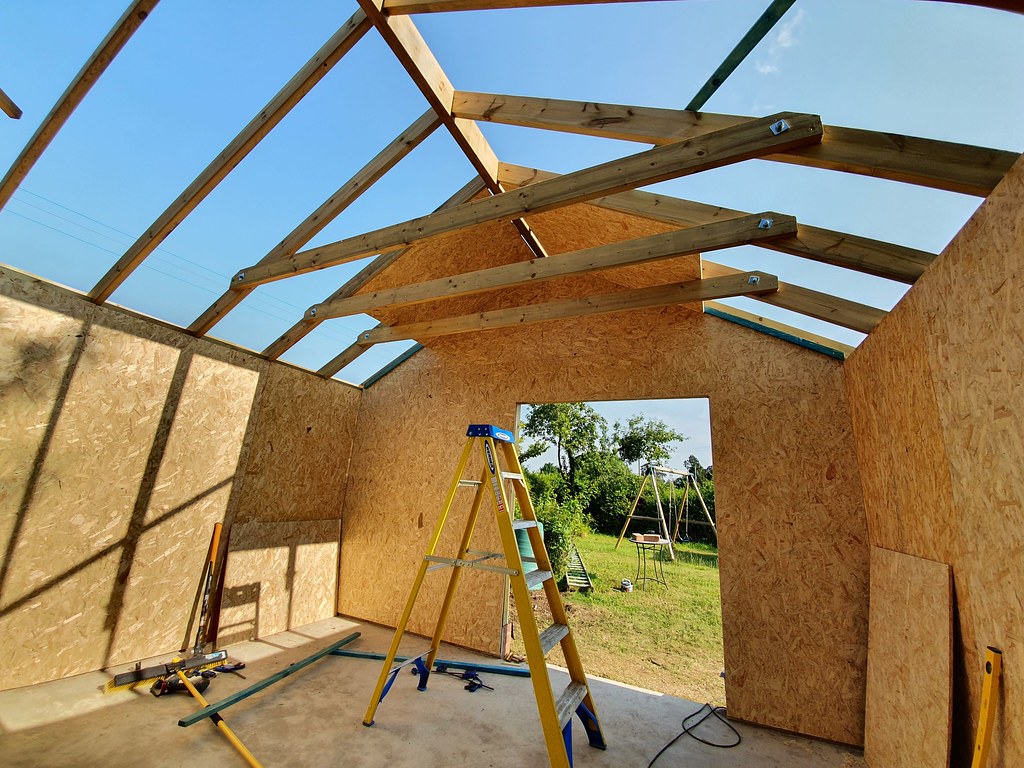
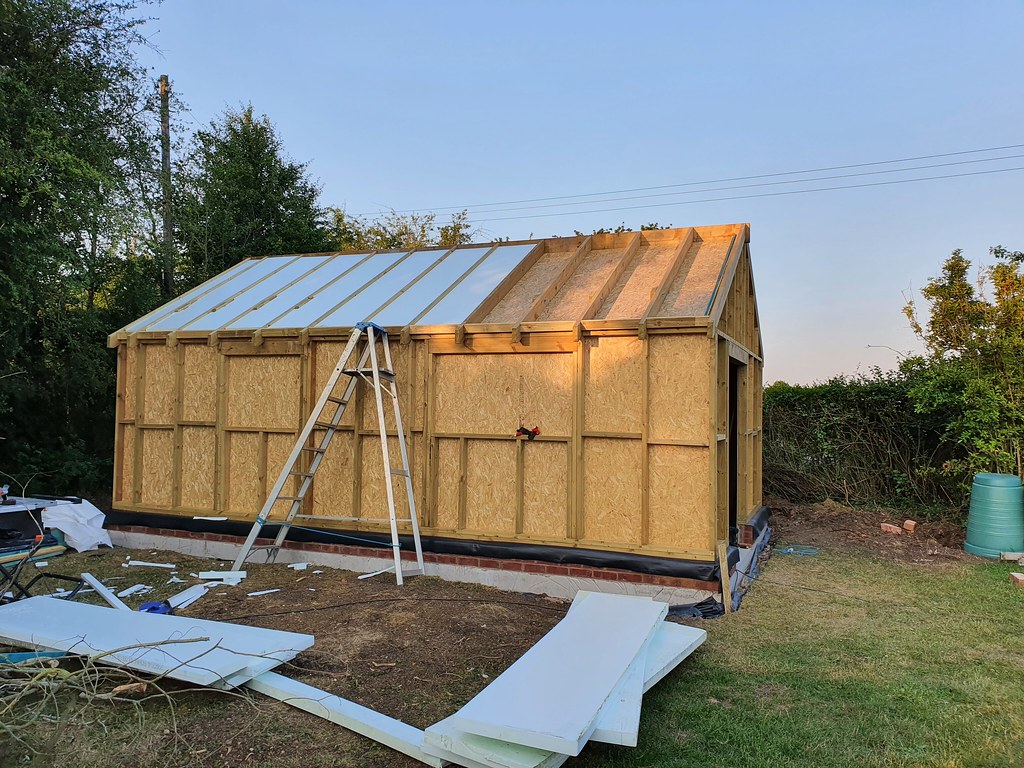
A productive day again today. With the long walls finished off yesterday it was time to start on the gable walls. I did the easy end first and did the easy part of that first, just the sheets that went along. I was fortunate enough that with my shape I was able to cut the whole gable peak from one sheet of OSB. A small notch later for the ridge and one end was done.
Easy gable done
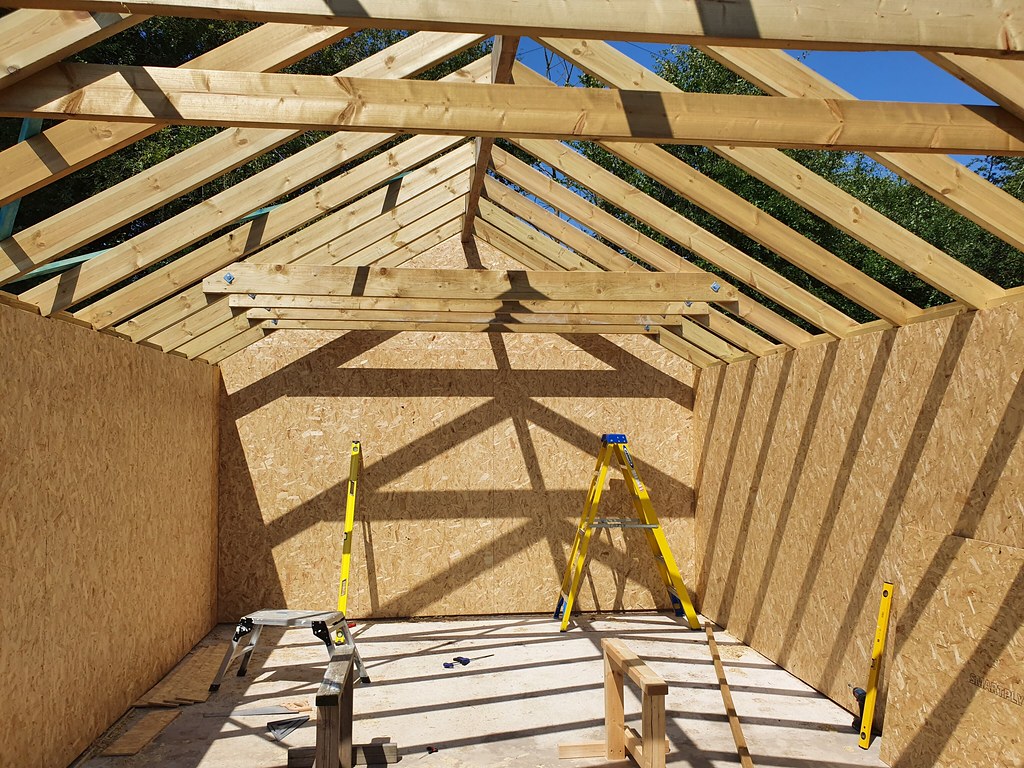
Diagonal cut needed to make the gable triangles.
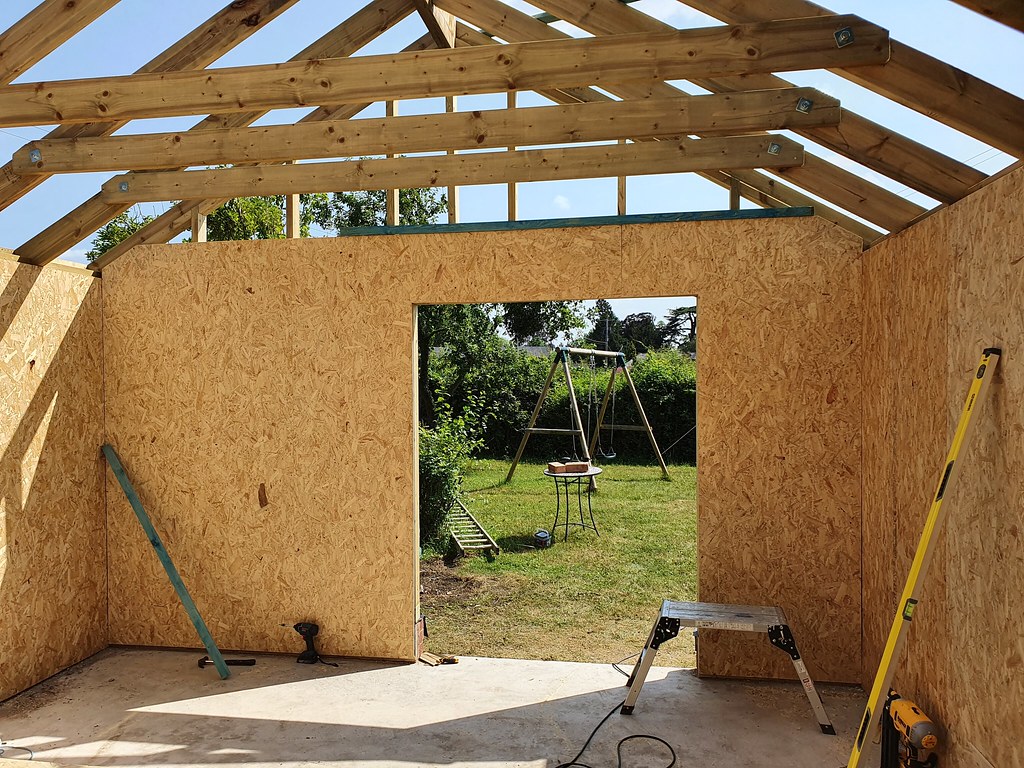
With that end done I set about the door end. Wifey helped by marking out where the door hole was while I held the sheet up on both sides and then I just needed to make a little infill for the section above the door. The batten you can see was something I added to push my sheets upto to get the same height all across. It's hard enough lifting them with one hand and holding them there, let alone trying to align them too!
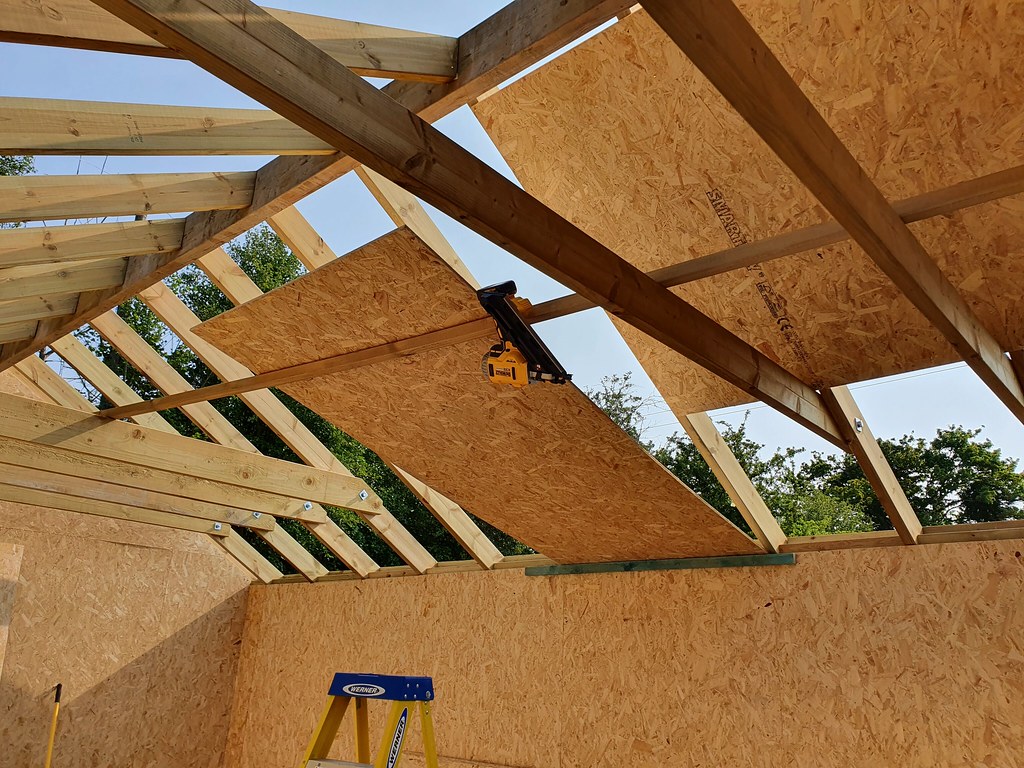
Before I could start boarding out the rafters I had to add yet another piece for the boards to secure to, this was the first real mistake I'd made on the job so far. For reasons known only to me (I'm claiming heat stroke) I didn't check where that new piece needed to go properly. Batten was secured to the gable rafters at sort of the right place, and then I realised it needed to be in the actual right place for the sheets to nail to. First use of the crowbar helped get the 60mm nails out without too much grief. With the battens properly secured in place (Using another pair of battens clamped to the underside of the rafters as a guide), I could start on the boarding.
I decided to stick to boarding in the same orientation as the walls and to begin by boarding above the joists up to the ridge. Naturally I had to cut the board a little short to allow it to swing past the ridge, but that gap will be closed off by securing more OSB to the underside of the ridge.
With the first 2 boards cut to the correct width (the first boards on the walls fly past the gable wall, so I had to cut these ones down as they would be butting up to the internal OSB) and height, I could lift them onto the joists and then get up there and nail in place.
That was all for the day. We also had a crew come in to take some of the Ash branches down so the garden is looking a little busy!
I'm really hoping to get the boarding done tomorrow so that I can get the insulation in and the membrane over at least the roof before the rain comes back in earnest. Right now it's supposed to be 50% chance of rain on Friday, so I've got my work cut out.
A productive day again today. With the long walls finished off yesterday it was time to start on the gable walls. I did the easy end first and did the easy part of that first, just the sheets that went along. I was fortunate enough that with my shape I was able to cut the whole gable peak from one sheet of OSB. A small notch later for the ridge and one end was done.
Easy gable done
Diagonal cut needed to make the gable triangles.
With that end done I set about the door end. Wifey helped by marking out where the door hole was while I held the sheet up on both sides and then I just needed to make a little infill for the section above the door. The batten you can see was something I added to push my sheets upto to get the same height all across. It's hard enough lifting them with one hand and holding them there, let alone trying to align them too!
Before I could start boarding out the rafters I had to add yet another piece for the boards to secure to, this was the first real mistake I'd made on the job so far. For reasons known only to me (I'm claiming heat stroke) I didn't check where that new piece needed to go properly. Batten was secured to the gable rafters at sort of the right place, and then I realised it needed to be in the actual right place for the sheets to nail to. First use of the crowbar helped get the 60mm nails out without too much grief. With the battens properly secured in place (Using another pair of battens clamped to the underside of the rafters as a guide), I could start on the boarding.
I decided to stick to boarding in the same orientation as the walls and to begin by boarding above the joists up to the ridge. Naturally I had to cut the board a little short to allow it to swing past the ridge, but that gap will be closed off by securing more OSB to the underside of the ridge.
With the first 2 boards cut to the correct width (the first boards on the walls fly past the gable wall, so I had to cut these ones down as they would be butting up to the internal OSB) and height, I could lift them onto the joists and then get up there and nail in place.
That was all for the day. We also had a crew come in to take some of the Ash branches down so the garden is looking a little busy!
I'm really hoping to get the boarding done tomorrow so that I can get the insulation in and the membrane over at least the roof before the rain comes back in earnest. Right now it's supposed to be 50% chance of rain on Friday, so I've got my work cut out.
flying haggis
Established Member
looking good, lets hope the rain holds off but at this rate you will have it roofed and watertight by thursday...............
one thing you will miss is being able to see through the walls to see where you left something.
one thing you will miss is being able to see through the walls to see where you left something.
DBT85
Established Member
I'm hoping so Haggis but its going to be a slog tomorrow cutting around those joists. Insulation and expandy foam is on site so hopefully I can do it before anything too bad happens.
The Framing video is now uploading for anyone who wants to watch me bumble about for another 9 minutes. Should be done in the next 5 or so.
https://youtu.be/_5LDYIWEbas
The Framing video is now uploading for anyone who wants to watch me bumble about for another 9 minutes. Should be done in the next 5 or so.
https://youtu.be/_5LDYIWEbas
Not sure this helps at all but for lighting, why not consider LED tubes? They are discreet and look very similar to older fluorescent tubes.
But are superior in every way. I have them in my loft, small workshop and other outbuildings - love them to bits. Great for working under and easy to attach to the underside of your ceiling members, say every other one
Good luck for the rest of the week, (hammer) erm possibly the hottest few days of the year so far :roll:
Sheptonphil
Scrumpy junkie
Not sure how you hold those OSBs up to the rafters to nail them alone, can’t be easy. Bet you won’t be sad to see the back of that job.
Fantastic progress, fingers crossed the weather holds.
Fantastic progress, fingers crossed the weather holds.
DBT85
Established Member
Westwood":1ndtvazo said:Not sure this helps at all but for lighting, why not consider LED tubes? They are discreet and look very similar to older fluorescent tubes.
But are superior in every way. I have them in my loft, small workshop and other outbuildings - love them to bits. Great for working under and easy to attach to the underside of your ceiling members, say every other one
Good luck for the rest of the week, (hammer) erm possibly the hottest few days of the year so far :roll:
I've not been that keen of tubes and I've already ordered these panels now. Thanks though. It's going to be a scorcher today. At least I'm making my own shade!
A batten at the bottom will hold one end and it only takes a couple of nails in to hold the rest. The difficult ones are going to be the 4 full sheets for the open section just because of the size, every other sheet needs cutting down so at least lifts easier.Sheptonphil":1ndtvazo said:Not sure how you hold those OSBs up to the rafters to nail them alone, can’t be easy. Bet you won’t be sad to see the back of that job.
Fantastic progress, fingers crossed the weather holds.
Girl is at nursery this morning so if I need assistance wifey can help more easily. Don't mind a sheet falling on us but would rather they don't fall on a 3 year old!
flying haggis
Established Member
dont know about making your own shade, more like making your own sauna.
keep up the fluid intake :wink:
keep up the fluid intake :wink:
DBT85
Established Member
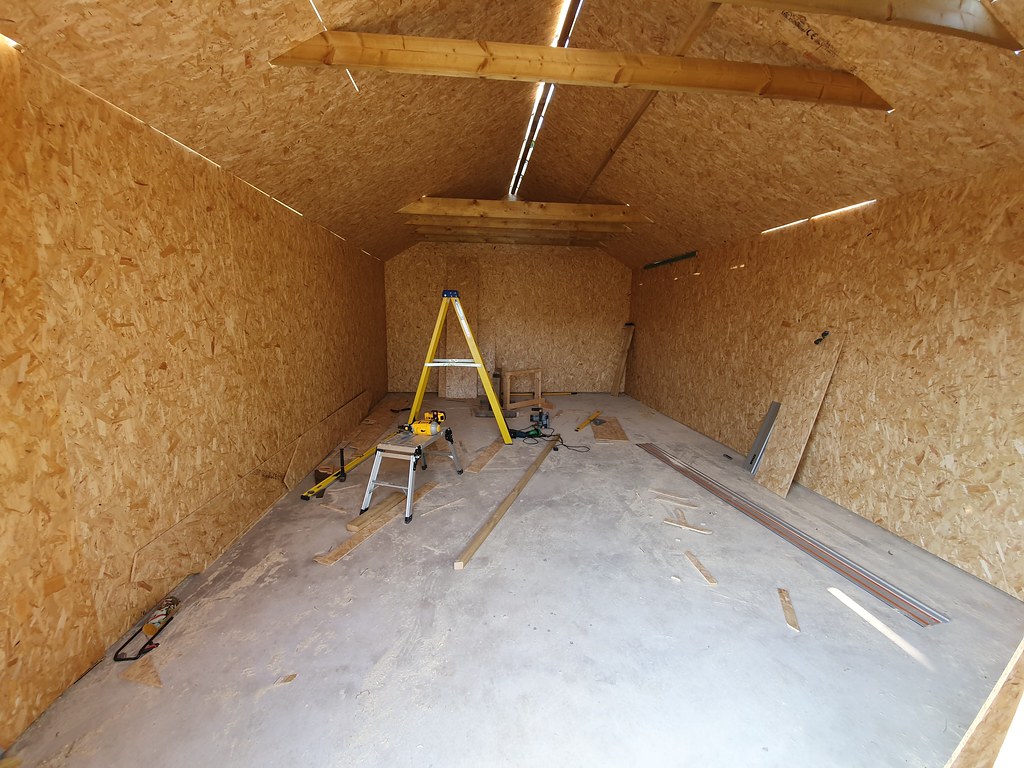
Another grand day today. I started off by getting the easy boards up in the roof, this comprisedof 2 whole sheets, 2 99% whole sheets and then 4 smaller cut peices. With those in place I could start the fiddly bit of cutting around the rest of the rafter ties/joists.
A handy resting place for an unwieldy sheet
"Easy" sheets complete
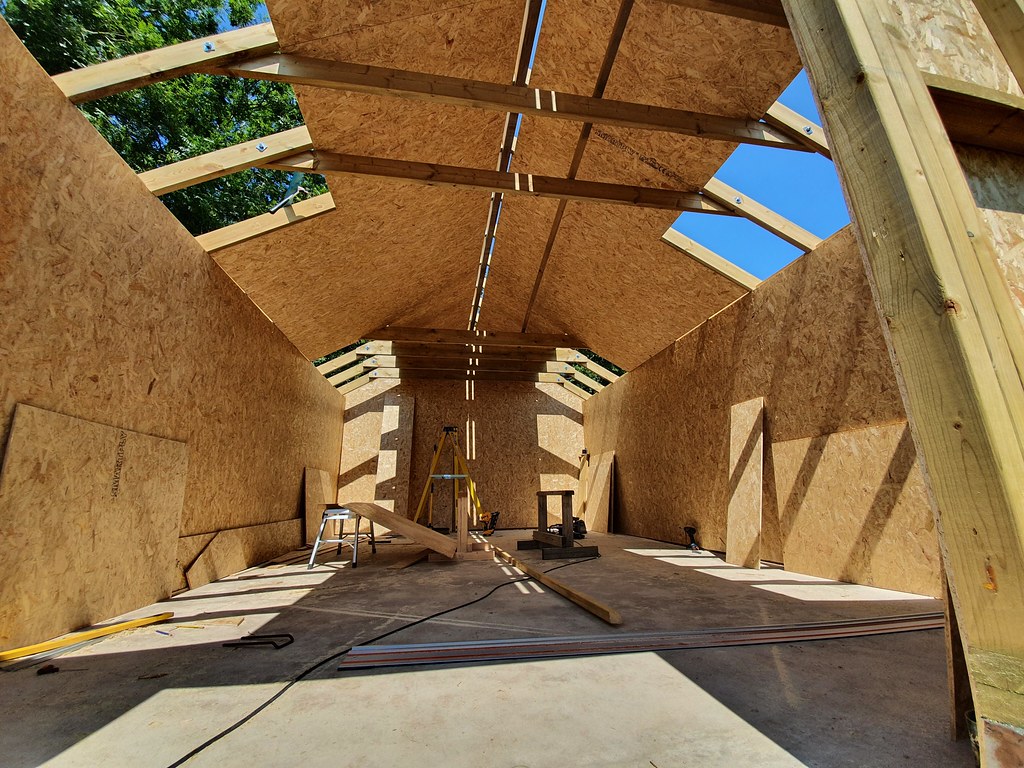
I was once again fortunate that the distance from the wall to the ridge was nigh on 2480mm, and I needed to leave a little gap to be able to swing boards up past the ridge as it sticks out below the rafters. So a 2440 sheet pretty much filled the gap entirely. The gap at the ridge will be covered with a single piece nailed to the underside of the ridge.
So with the offcuts of my earlier exertions I could begin measuring, marking, measuring again, writing on the wall, checking and finally cutting. All in all not too difficult, though true to the rest of the project I was unable to not copy Mike in one more way. For one cut, just one, I had measured the distance to the rafter, and not the joist. Ploppers.
Todays cockup
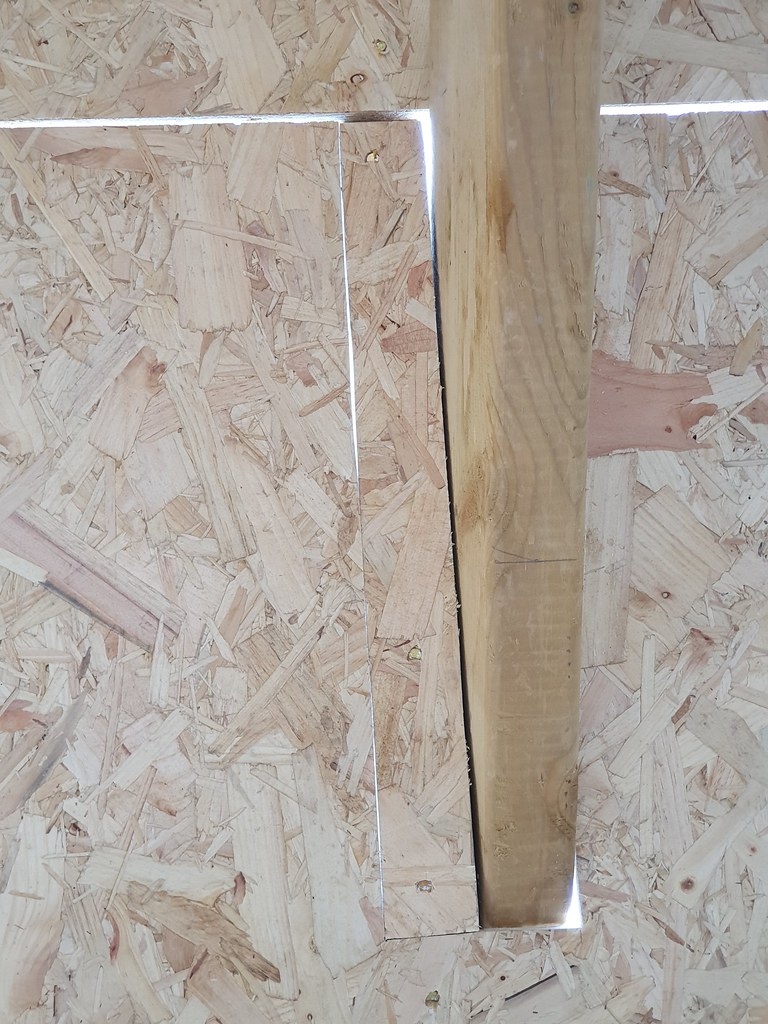
Todays result
With that all finished I could hop (more like teeter) onto the roof and nail on some supports for those cut ends, then come down again to finish the nailing inside.
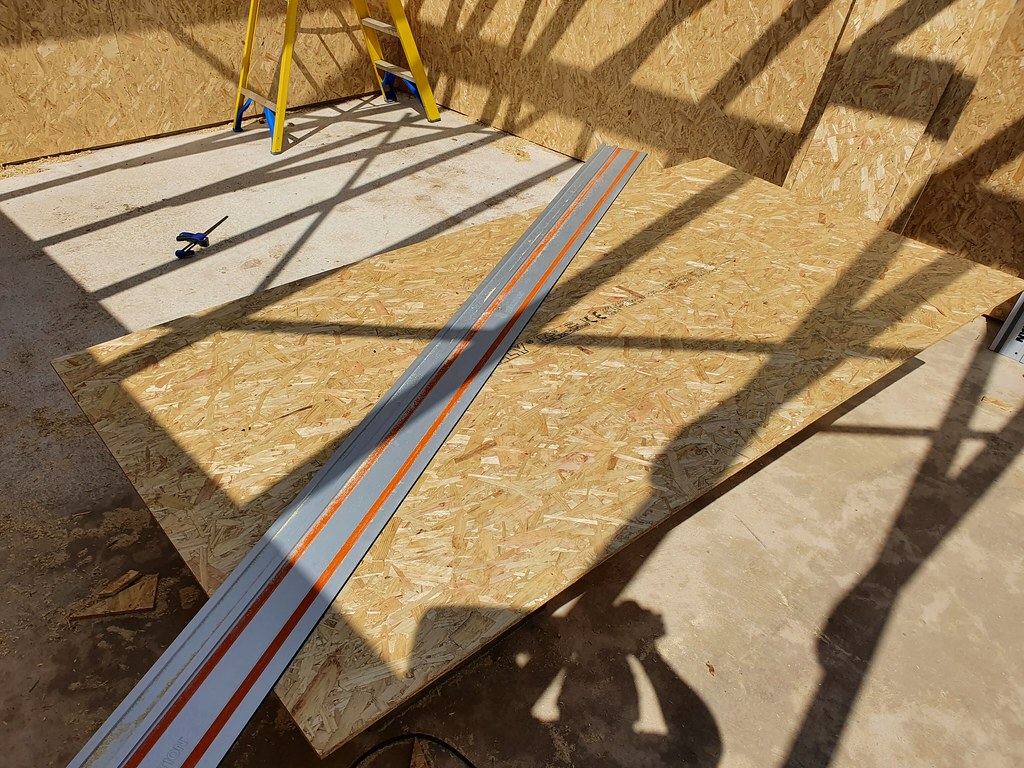
Next up it was time to attack the insulation. I had 23 sheets of 610x2440 60mm insulation already up from the farm. While the stuff is easy enough to cut I do find that handsaws make an inordinate mess. Add to that an element of drunken blade wander and I figured since the table saw was still out it was the work of a moment to rip all the sheets down to size, and lo, it was. A nice finish on the edge too so less bits flapping around.
This is the insulation that cost £120 for 60 sheets, so thats 30 full sheets, equalling just £4 for a full sheet. The joy of farmers sales. The second batch did test the wallet a bit though at...£6 per full sheet. Again, these were not bought for this job, they were bought for use around the farm (cottages, houses etc) over a year ago.
So off I started carving them up to work around bolts and joists and so on. Once you have a pattern for the first one the next become much easier. I ended the day doing the nice easy sheets in the vaulted section with no pesky bits to cut out. Just trim an angle off the end of the first piece and in they sailed.
I'll have more insulation and expandy foam brought up tomorrow morning while I'm sorting the remaining sheets out. Hopefully I can get them all done, foamed and membraned before the expected thunderstorms on Friday morning. It would be nice to get the walls done too, but its just not going to happen. I'm a little less worried about those.
Yes it was a little hot boxy by the end of the day! Did feel a little less burny than yesterday despite high temps today though.
A handy resting place for an unwieldy sheet
"Easy" sheets complete
I was once again fortunate that the distance from the wall to the ridge was nigh on 2480mm, and I needed to leave a little gap to be able to swing boards up past the ridge as it sticks out below the rafters. So a 2440 sheet pretty much filled the gap entirely. The gap at the ridge will be covered with a single piece nailed to the underside of the ridge.
So with the offcuts of my earlier exertions I could begin measuring, marking, measuring again, writing on the wall, checking and finally cutting. All in all not too difficult, though true to the rest of the project I was unable to not copy Mike in one more way. For one cut, just one, I had measured the distance to the rafter, and not the joist. Ploppers.
Todays cockup
Todays result
With that all finished I could hop (more like teeter) onto the roof and nail on some supports for those cut ends, then come down again to finish the nailing inside.
Next up it was time to attack the insulation. I had 23 sheets of 610x2440 60mm insulation already up from the farm. While the stuff is easy enough to cut I do find that handsaws make an inordinate mess. Add to that an element of drunken blade wander and I figured since the table saw was still out it was the work of a moment to rip all the sheets down to size, and lo, it was. A nice finish on the edge too so less bits flapping around.
This is the insulation that cost £120 for 60 sheets, so thats 30 full sheets, equalling just £4 for a full sheet. The joy of farmers sales. The second batch did test the wallet a bit though at...£6 per full sheet.
Again, these were not bought for this job, they were bought for use around the farm (cottages, houses etc) over a year ago. So off I started carving them up to work around bolts and joists and so on. Once you have a pattern for the first one the next become much easier. I ended the day doing the nice easy sheets in the vaulted section with no pesky bits to cut out. Just trim an angle off the end of the first piece and in they sailed.
I'll have more insulation and expandy foam brought up tomorrow morning while I'm sorting the remaining sheets out. Hopefully I can get them all done, foamed and membraned before the expected thunderstorms on Friday morning. It would be nice to get the walls done too, but its just not going to happen. I'm a little less worried about those.
flying haggis":129711lh said:dont know about making your own shade, more like making your own sauna.
keep up the fluid intake :wink:
Yes it was a little hot boxy by the end of the day! Did feel a little less burny than yesterday despite high temps today though.
MikeG.
Established Member
=D> =D> =D>
Sheptonphil
Scrumpy junkie
Superb progress. Interior space looks amazing. =D> =D>
DBT85
Established Member
Thanks chaps. Yes it's nice to be able to feel the exact size of the workshop internally now. It's a little echoey at the moment as there is only an inch of sawdust on the floor so far.
A thought occurs about the membrane, do I use some of the nails I've got for the tiles, do I use the hammer tacker? Do I have to put battens on it?
Hopefully whatever rain we do get come Friday won't be too bad and I can get the walls done.
A thought occurs about the membrane, do I use some of the nails I've got for the tiles, do I use the hammer tacker? Do I have to put battens on it?
Hopefully whatever rain we do get come Friday won't be too bad and I can get the walls done.
MikeG.
Established Member
Initially you staple the membrane in place. (One tip here is to avoid staples on the top of the end rafters, and instead wrap it over the sides and staple there. Otherwise you will inevitably find yourself trying to pull them out at some stage). Then if you've time you fix battens in their proper final location. More likely, though, are a few fly battens. These are just battens stuck up there in no particular location to stop the felt from blowing off. DON'T HAMMER THE NAILS HOME! And you certainly don't need a nail at each rafter......maybe every third, something like that.
I can't remember what is going on your roof. Whatever it is, do you have it on site?
I can't remember what is going on your roof. Whatever it is, do you have it on site?
DBT85
Established Member
Thanks Mike.
Yes I have the tiles on site.
Not sure how I'm going to lay the membrane over the ridge while avoiding sticking a boot through the stuff below though!
I take it usual fixing is staples in the top which will later be overlapped and the battens holding it down everywhere else, to minimise puncture points.
Staples wherever you want, as long as it's draping between the rafters slightly you should be fine. If you're going to put the battens on straight away you'll only need a few staples unless it's windy. It tends to get windy as soon as you pick up a roll of roofing felt even if it's been calm all day :lol: Put the bottom piece of felt on first, batten up say 3/4 of that and then stand on the battens to do the next bit of felt.
MikeG.
Established Member
As Owen says, you build your own ladder up the roof out of battens. If you are properly battening as you go, then do as he describes. However, I sense you are wanting to just get the place semi-waterproof before it rains, in which case you'll likely be fly-battening. You still have to climb on these to reach the top of the roof..........but be bloody careful. I would only stand on them at the point where they are nailed.
DBT85
Established Member
Righto, I'll have to wokr something out.
Months of bleedin sunshine and all I want is 2 more days worth.
Months of bleedin sunshine and all I want is 2 more days worth.
If you're temporarily battening it, do the top piece of felt first but don't nail the bottom edge until you get the piece below on, no climbing on dodgy Battens then. You only need day 4 nails, nailed in by hand half way not with the nail gun to hold a 4.8m batten down. If you have to walk on the temporary battens stand where the nails are
Sheptonphil
Scrumpy junkie
On mine I did the top down route (page 9?)
I found it easy to lay the membrane across from the ridge first, leaving the bottom foot or so free of fixings. When laying the next piece down it is relatively simple to position and then fix the overlap. There’s a clear 150mm marking along both edges to help with keeping the membrane level as well.
I found it easy to lay the membrane across from the ridge first, leaving the bottom foot or so free of fixings. When laying the next piece down it is relatively simple to position and then fix the overlap. There’s a clear 150mm marking along both edges to help with keeping the membrane level as well.
DBT85
Established Member
Perfect thanks Phil. Useful I bought the same as you!
It's 9:40 and it's 23 degrees already. I have at least got my next batch of insulation here already and this side of the roof is complete. Time to take on water like the Titanic and cut the next 24 boards to width.
It's 9:40 and it's 23 degrees already. I have at least got my next batch of insulation here already and this side of the roof is complete. Time to take on water like the Titanic and cut the next 24 boards to width.
Similar threads
- Replies
- 13
- Views
- 976