Curved kitchen doors

UKworkshop.co.uk

Help Support UKworkshop.co.uk:

This site may earn a commission from merchant affiliate links, including eBay, Amazon, and others.

HOJ

Established Member
Joined
21 Oct 2014
Messages
1,080
Reaction score
611
Location
South Norfolk
I have been asked to consider making a Kitchen, the only issue is that it has loads of curved doors, I have made curved veneered panels in the past using bendy ply and MDF etc with a vac press but not doors, as yet, the final style is to be confirmed, at the moment it is for a shaker style panel door.

I am trying to sell the idea of flat faced doors, using Ply with an HPL face and balancer, leaving the edges as exposed Ply.

Has anyone any advice and guidance to follow as to the best method of construction to adopt in the first instance (Shaker style), no budget has been discussed, but quotes from Kitchen designers are in the region of £20K (without work tops)

Kitchen.jpg
 

Attachments

  • Kitchen.jpg
    Kitchen.jpg
    89.1 KB · Views: 398
I'm not a pro but helped build a few kitchens. If I were going to do a one off job like that I would look into buying them from a cabinet door company that specializes in curved doors. I searched for curved kitchen cabinet doors and found lots. One put a price on their website and a curved shaker door starts about 200 pounds so the corner doors represent more than 10% kitchen of what the designers told you if not a lot more. I can't see from the image you put up whether there are any curved drawers or just doors but they would be a consideration and making the cabinets will be more complex too. I would get the doors before making the cabinets if for no other reason than if the curvature ended up being out of tolerance a little you can adjust to fit them.

There are a lot better than this one below but it is a starting point.
http://www.qualitykitchensonline.com/pr ... tyleid=116

I'll add that if the scale of the image is correct when the concave doors are opened it will be difficult to get past one to reach inside the contents. That needs to be mocked up or drawn to scale to see how much the bulge of the open door gets in the way.

Pete
 
If you do end up buying them online, make sure you get true quarter round doors. Most companys sell them but with flat styles so they look horrendous with 2 together as you get a curve, big flat, curve.
If you PM an email address I'll send you some images of how it's done.
Is it in frame or lay on?

I do a lot of curves and still hate them with a passion, very easy way to lose a lot of money and time if you get the price wrong!!

Something like this?

qMgArdY.jpg
 
Hi Doctor Bob, is it possible to show on the site how to do some curved doors as I can't seem to be able to pm you
 
Just an aside.......this shows what can happen if you use a kitchen "designer". Those pointless curves have produced cupboards it will be virtually impossible to access properly, and worktops which are unnecessarily wide. Frankly, if what they were after was a practical working kitchen they'll be disappointed: it's awful.
 
doctor Bob, at this time the preference is for in frame doors, but I am trying to convince them to go for lay on, to make life easier, also trying to get rid of the 2 internal curved recess, like you, Mike G, I don,t like the design at all and have already passed comment, which has been noted.

I am toying with a method to make the curved stiles by laminating up, to the correct curve, a blank panel +/- 22mm thick, then ripping strips off at the required widths (coopering principle) I can't see why the same method can't be used to make the top and bottom rails as well, cutting across the panel width rather than along its length.

Probably need to make carriers for them to run them though the spindle to cut grooves and mouldings at the correct pitch.

I will PM you, doctor Bob, in any case, and appreciate any advice you can offer, if I don't offer it out to you to manufacture, as you enjoy making them so much....
 
doctor Bob":1qkvqbx8 said:
I do a lot of curves and still hate them with a passion, very easy way to lose a lot of money and time if you get the price wrong!!

I know a few cabinet makers who trained at Parnham, they say they had lectures on how to cost projects, the advice given was that if you assume a rectilinear project will take say 100 hours, then if the same project has a curve in one dimension you should immediately allow 300 hours, and if it's curved in two dimensioned then the same project will take 900-1000 hours!

I've done a few curved projects and if anything that sounds like an understatement to me. I've found myself in situations on curved work where I had to actually make jigs in order to make other jigs that the project required!

Another one where I've been caught out is putting arms on dining chairs. Cabinet makers generally say you should double the build time for a carver, it sounds implausible but when I've done it and counted up the hours it turns out it's not a bad rule of thumb.
 
HOJ":26b5oq7t said:
I am toying with a method to make the curved stiles by laminating up, to the correct curve, a blank panel +/- 22mm thick, then ripping strips off at the required widths (coopering principle) I can't see why the same method can't be used to make the top and bottom rails as well, cutting across the panel width rather than along its length.

There are lots of ways that plan can come back and bite you. I need to get back into the workshop and start cracking on with my own stuff, but quickly off the top of my head,

-the glue will pool towards the centre of the panels so when you cut through the middle you'll get a very uneven glue line from the edge into the centre

-spring back is a problem, you'll need thin laminates and a glass hard UF glue to keep it manageable

-that probably rules out PVA and vac pressing, so then you have to cost in making big beefy formers like these,

Lamination-Work-02.jpg


-just making those formers so you get a perfect and consistent 22mm gap between the two mating surfaces is no where near as simple as you'd imagine, it probably took me about 8 hours to make those even after I've made the master curve template, and I've done this loads of times!
 

Attachments

  • Lamination-Work-02.jpg
    Lamination-Work-02.jpg
    80.2 KB · Views: 240
I would recommend using flexi ply, not kerfed MDF. It doesn't crack up the way the MDF does, and costs about the same. I'd also suggest you use styromoulds from Bagpress- they are made by CNC from rigid foam and are well worth it for a job like this. I have made several kitchens like your design and they are a headache. Be super-careful to get everything square, and leave the doors as wide and as high as poss until you've done most of the fitting.
 
I fancied doing some curved doors but decided that it would be one step too far for me. Well two or three maybe.

But on my travels through the internet trying to see how it's done, I discovered this tool.

http://www.curvomatic.com

I was nearly persuaded :?
 
I generally try to talk customers out of them if I can.

As for getting the former cnc cut by an out side firm, instead of making your own, check it is true when it comes, I had one made and when we came to put the doors together we found that no matter what we did we could not get them to glue up correctly.

The doors always came out in twist, after a lot of head scratching and swearing we discovered that our nicely CNC cut former was in fact the cause and the curve was not parallel to the rectangular base.

I now have one back to making my own so at least I can sort any problems should they arise.
 
I did post up about curves a while back but the images are probably gone due to being on photobucket, when I get a chance i'll start a new thread on making curved doors and frames.
 
Here is my recent efforts at curved doors on my 'workstation':-

P1050838.jpg

P1050836.jpg
P1050837.JPG


I made them with traditional frames and panels with M&T joints - not easy, but I enjoy a challenge!
The panels are veneered bendy ply made over formers and glued in my vac press.
The curved rails are laminated in 3mm cherry plys and glued between male/female formers.
I had a frustrating time assembling them as they were difficult to hold and cramp whilst trying to keep them true in 3 dimensions. Inevitably errors crept in and so I had to make adjustments to the carcasing on installation.
Some time soon SWMBO wants a matching TV cabinet (for the tele to sit on not in) but I think new approach is required for the doors; possibly structural panels with an imitation 'frame' stuck on.
I hope these notes will give food for thought.
Brian
 
Custard, that is all food for thought, with regards the time factors and technical points, this project will not be time dependent as such, as its for a pal of mine who is quite happy to cover costs etc, so not such an issue if I don't take it on as a priced commission, mates rates!!

I try to spend a couple of days a week making and tinkering with ideas and small projects that don't detract from my core of work, I may try my theory of making a panel and cutting into strips just to see what the outcome is, I already have some foam CNC cut former's from other projects to play with, nothing ventured as they say, but I will wait to see dr Bobs methods on the door making.

I won't post in dr Bobs other thread as that would be good if it becomes a permanent post, really appreciate all the advice given, I have already learnt more from this forum and members in the last 24 hours than a month of researching and googling.

Brian, the cupboards look really good, thanks for the inspiration.
 
HOJ, let me pick up on the glue line and adhesive issues. The problem with laminations is that when you're making components where the laminations are visible you're forced to make some awkward trade-offs.

You can get almost invisible glue lines with PVA, but you'll likely have problems with creep and spring back, plus PVA carries quite a lot of water so that can cause problems too.

UF glue will give moderately visible glue lines provided you apply sufficient pressure, UF dries glass hard so creep isn't a problem, but there may be some spring back and deformation as you're still adding at least some water into the equation via the glue.

Epoxy will probably give you the worst glue lines of all because even with extraordinary pressure you'll never squeeze as much of the adhesive out of the joints as you'd like, like UF there'll be no creep, but unlike UF and PVA you're not introducing any water which is a plus.

You get a stiffer component with the least spring back by having more, thinner laminations. But more laminations means you need a glue with more open time to get it all assembled before the glue sets, and of course more laminations means more glue lines!

There aren't right or wrong answers to all this, but in practise the solutions I generally follow are these.

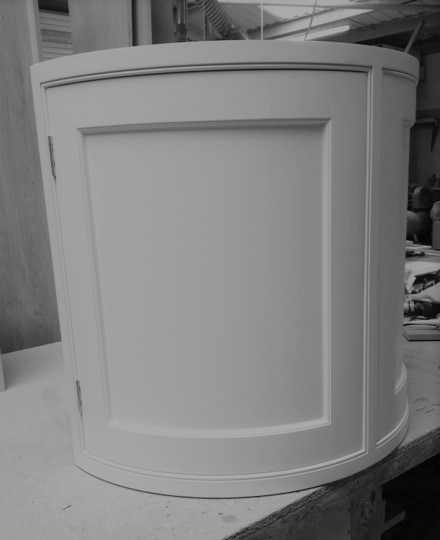
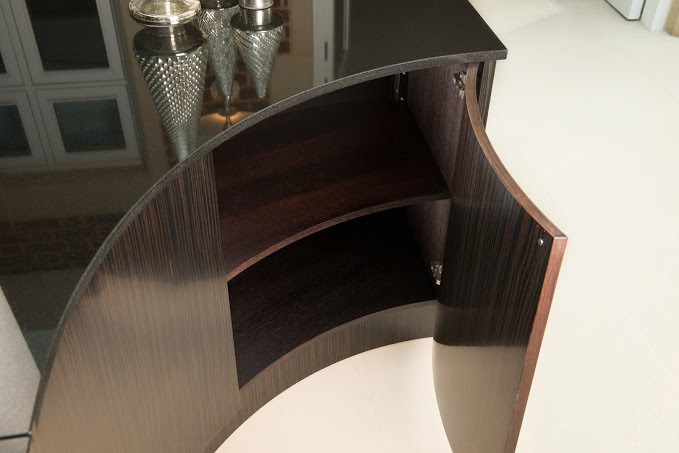
Laminate panels in a vac bag over a single, male former. The edges of most panels won't be visible so the glue line problem goes away. Where ever possible veneer over man made sheet goods, it's just simpler and more predictable.

Laminate curved rails and stiles using UF glue between male and female formers using multiple F cramps or sash cramps for maximum pressure. Cut your own lamina from solid timber. Leave in the formers for at least a week, the glue will have cured long before this but you want to allow time for any surplus moisture to evaporate out while the component is still held rigid.

Aim for lamina that are between 1.5mm and 2.5mm thick. Less than 1.5mm and, even though you'll have a very rigid component, the ratio of glue lines to solid wood tends to make the component darker than the rest of the piece. Much above 2.5mm and, even though the job goes faster, you'll increasingly suffer from excess spring back.

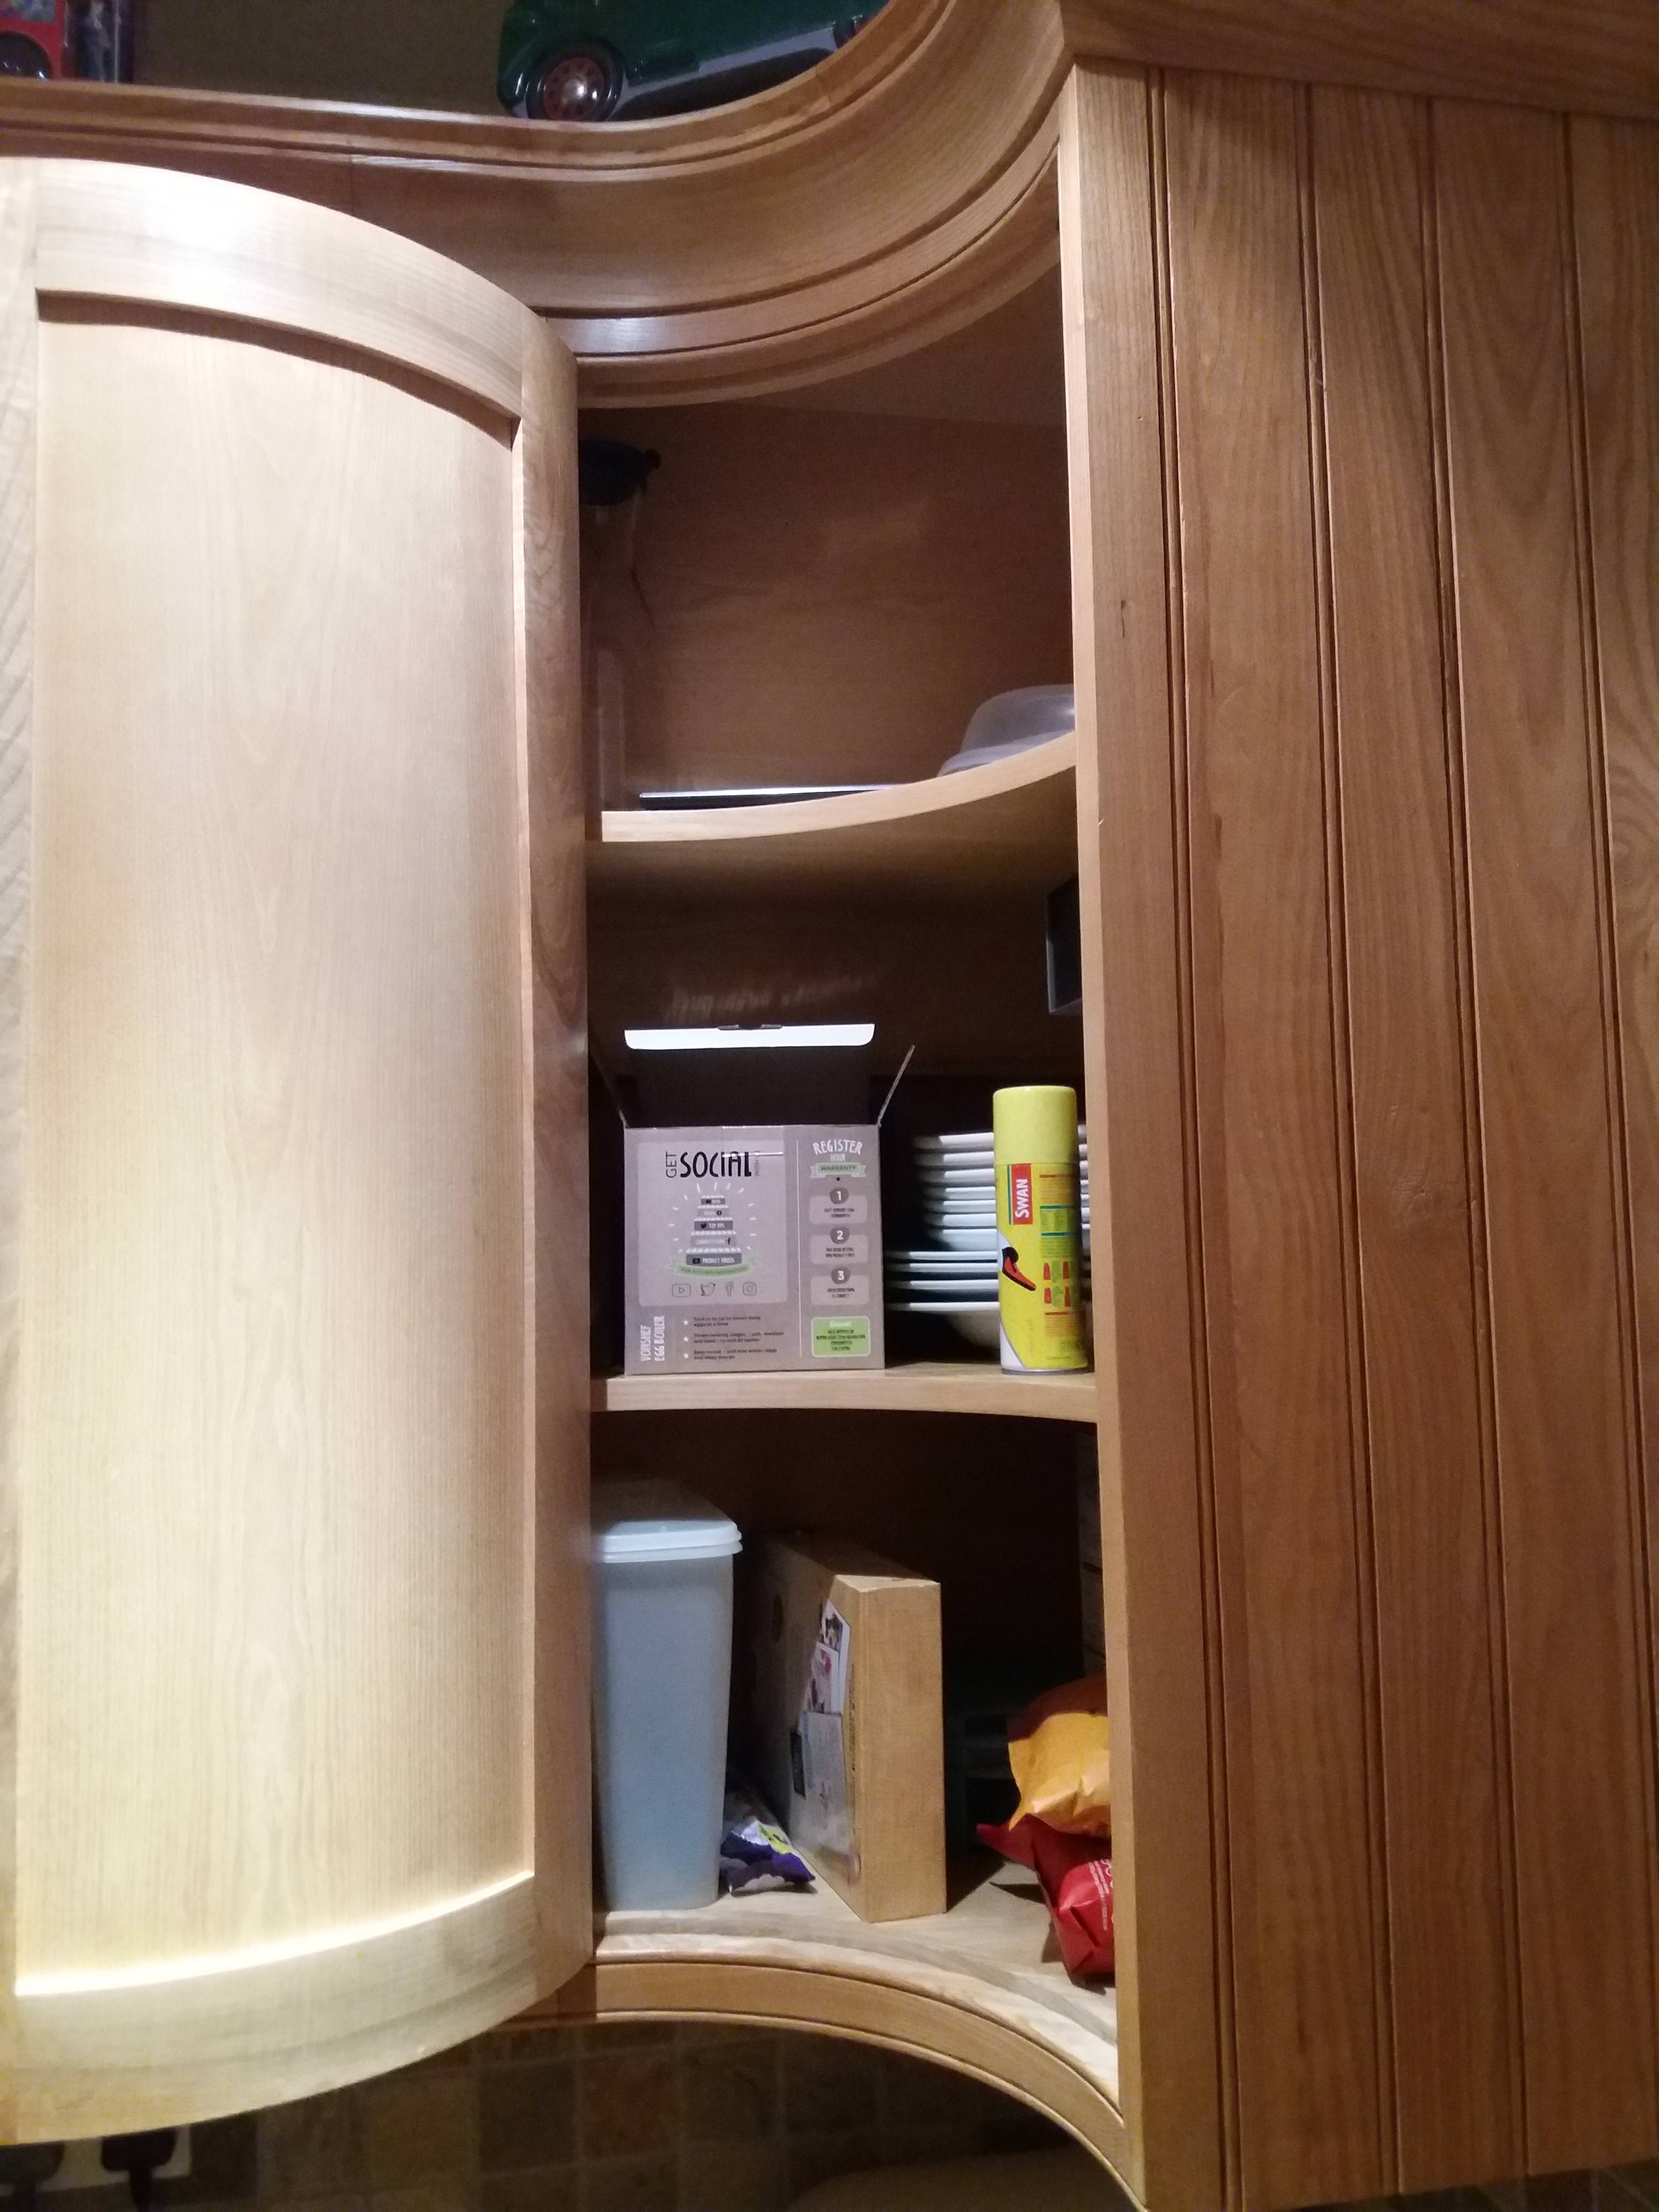
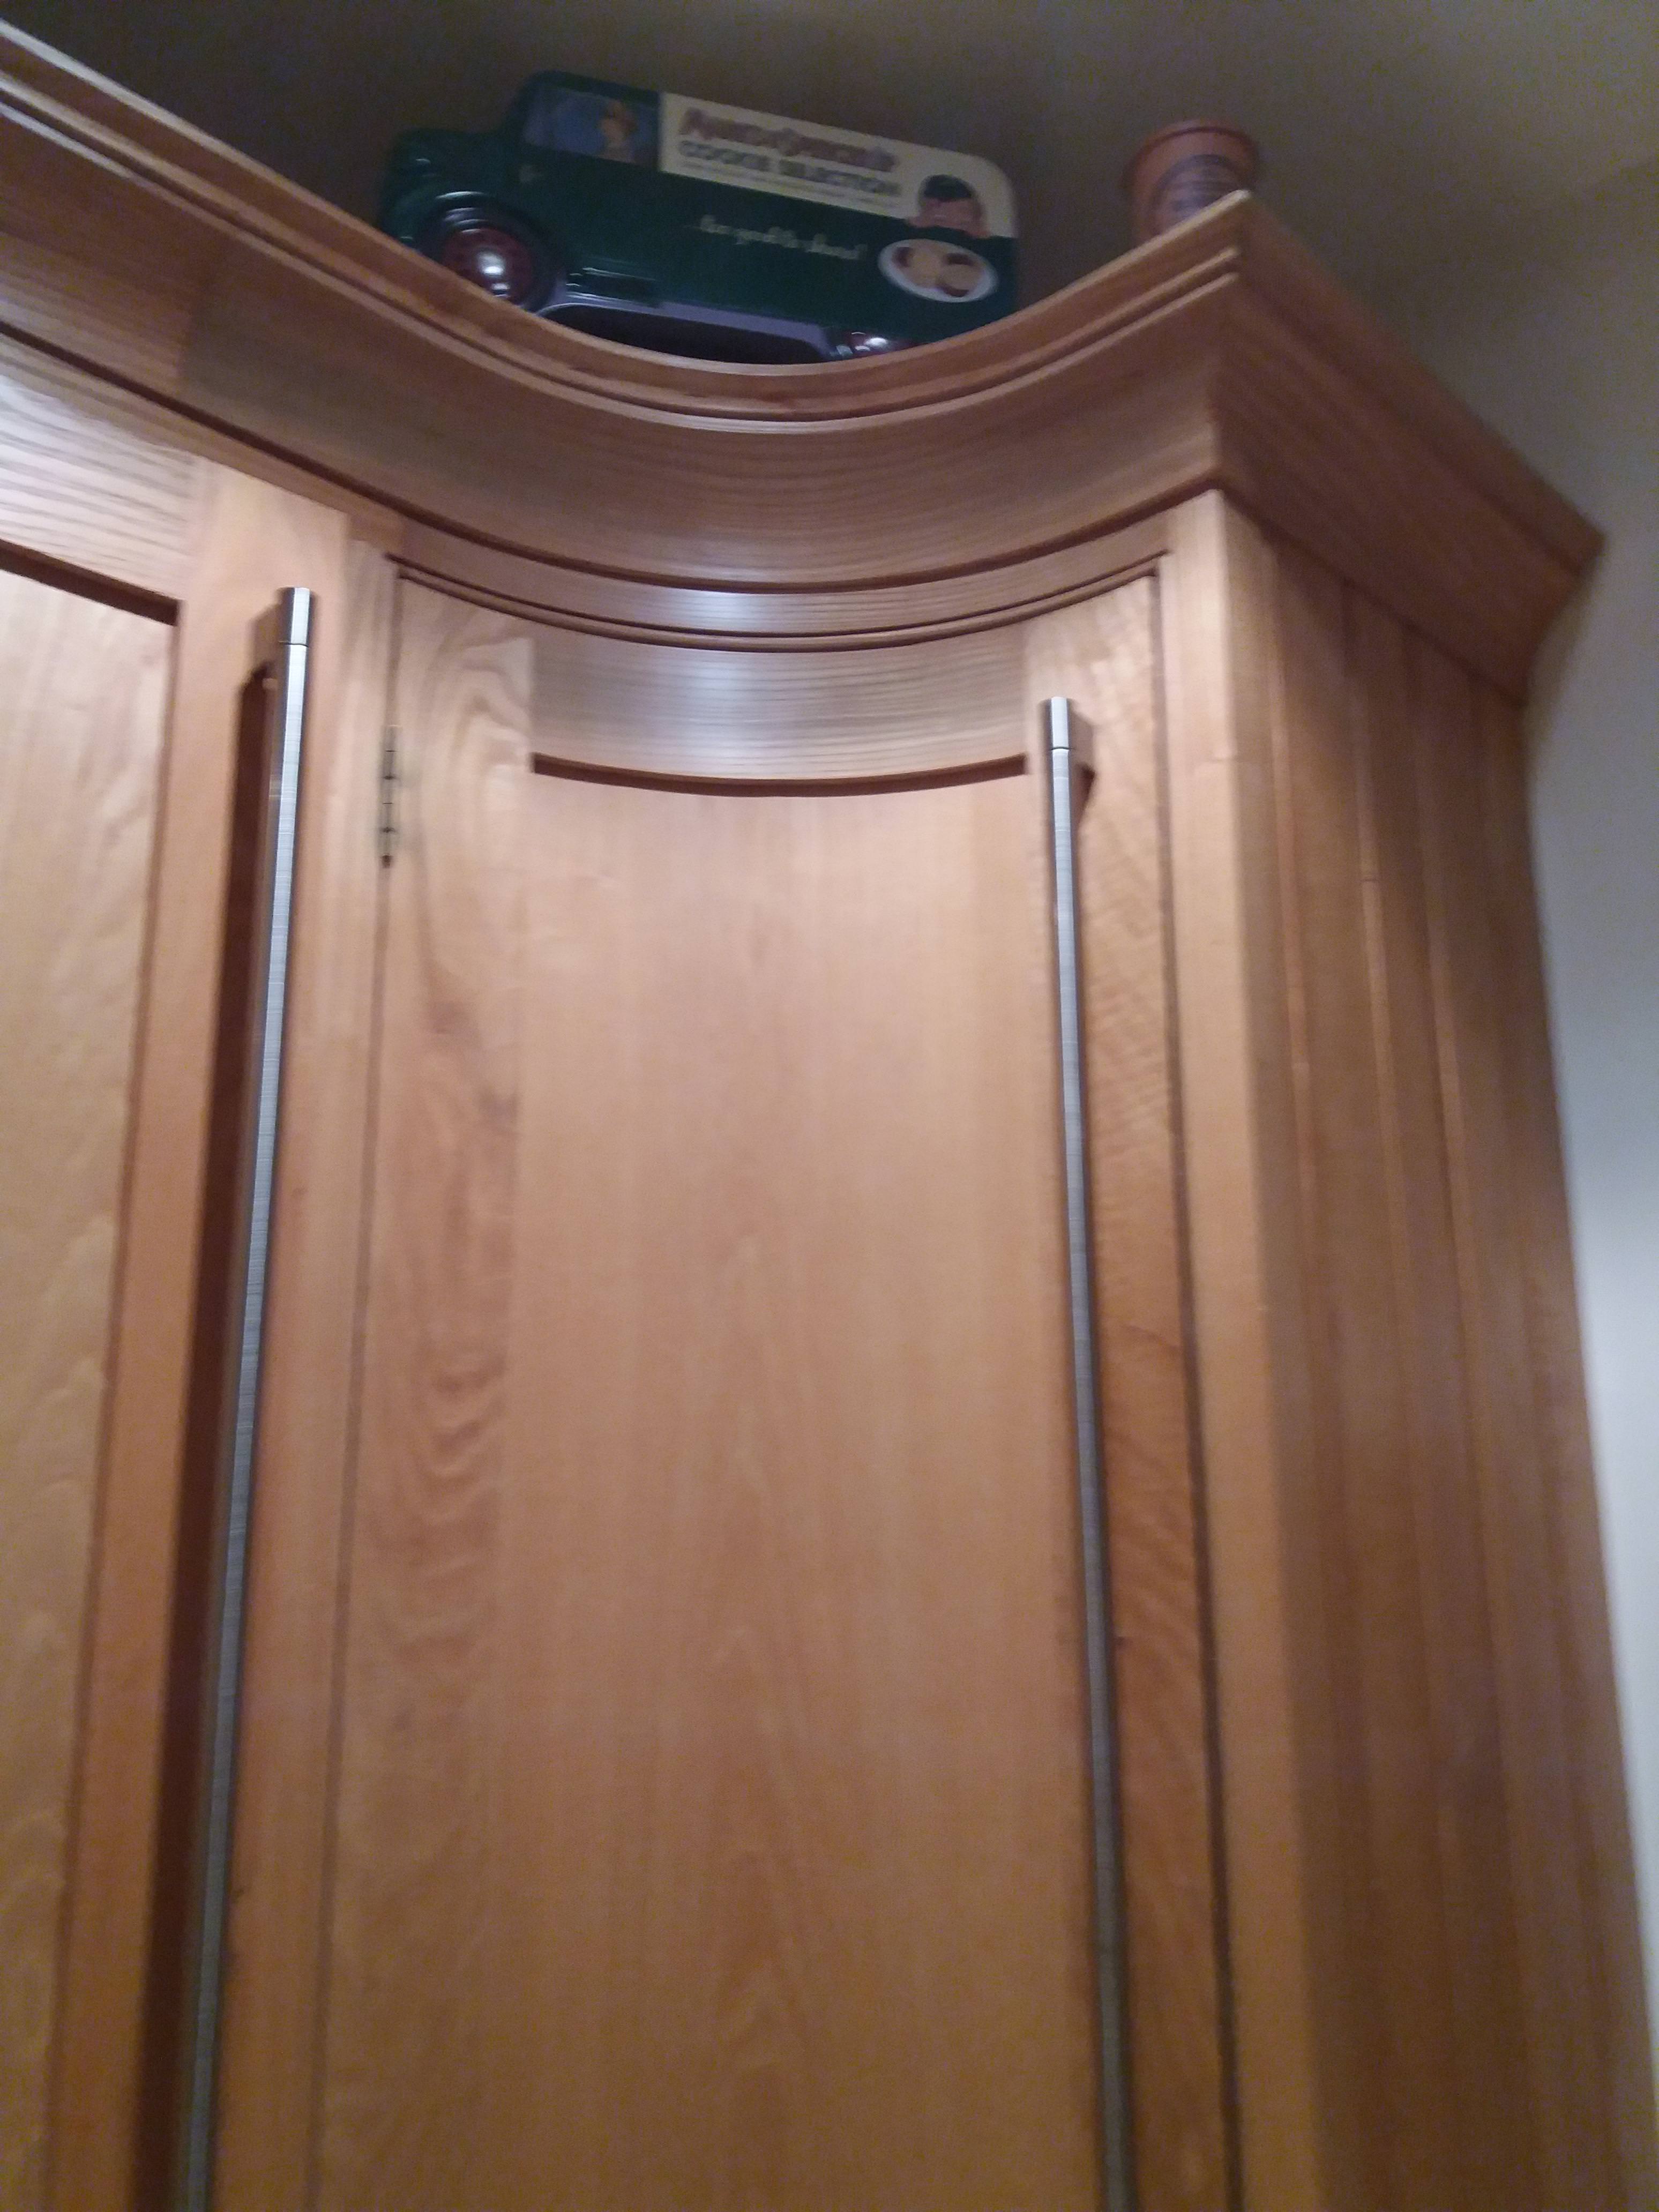
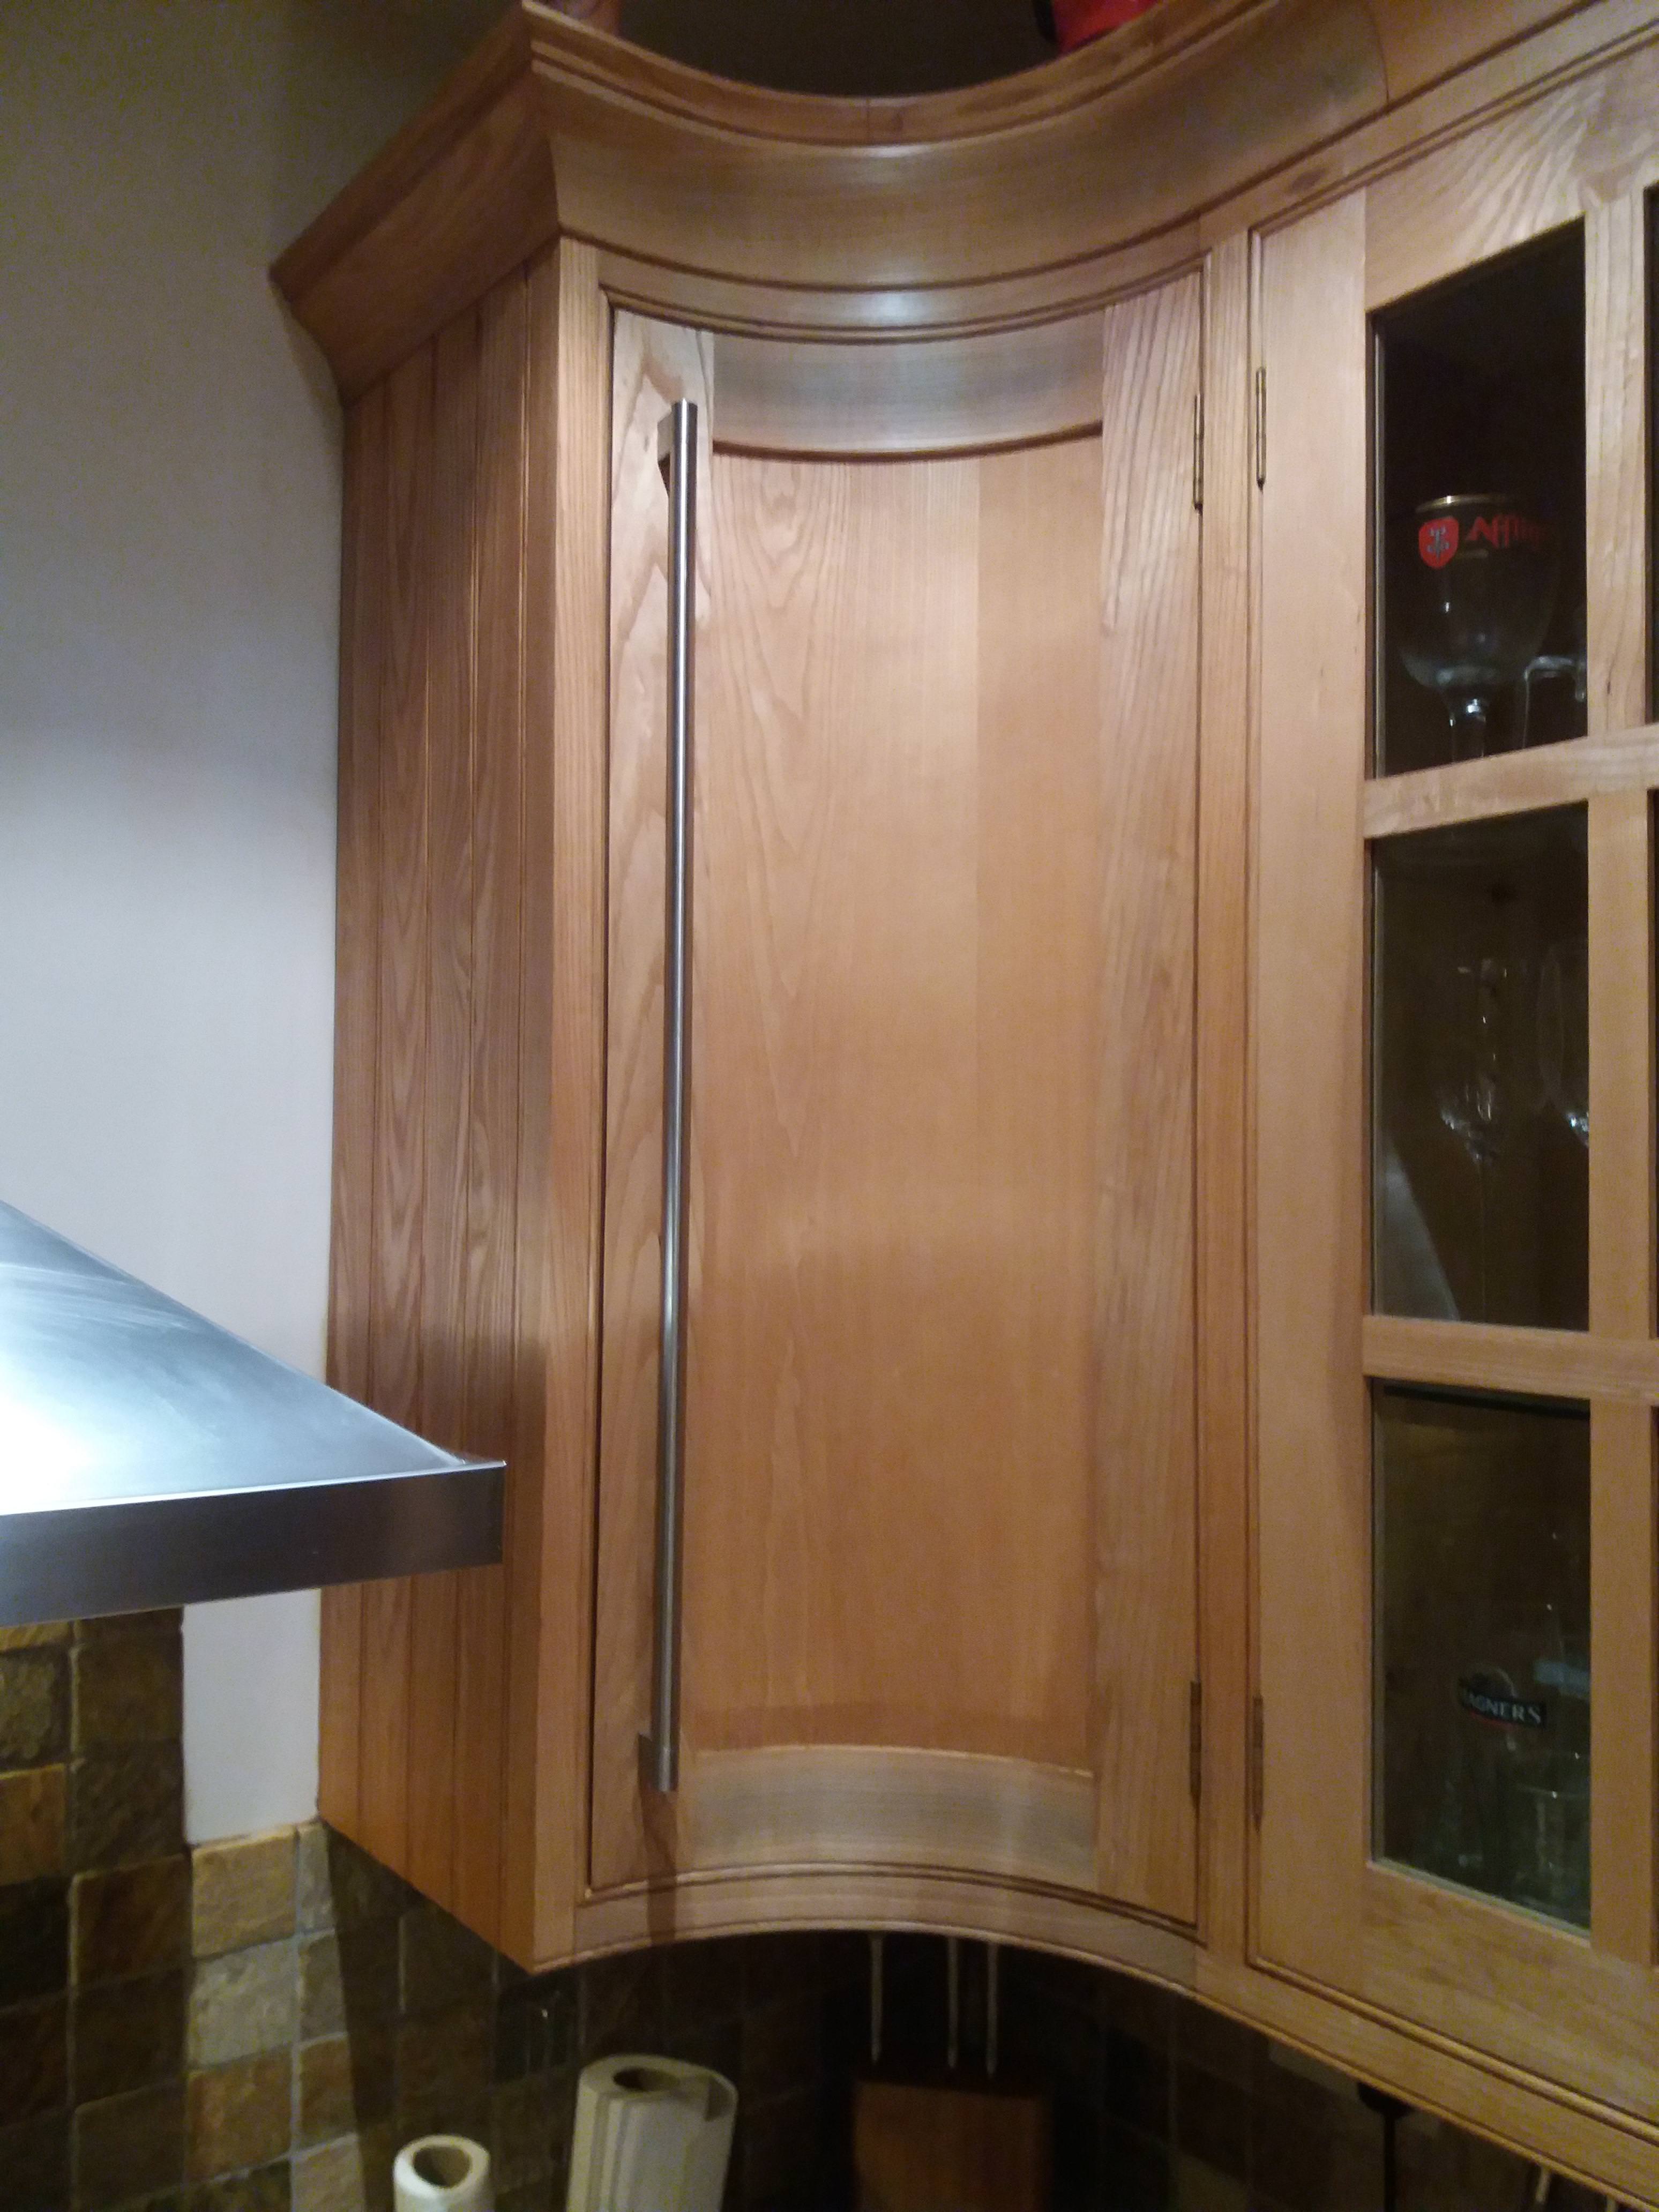
This chair is a practical example of lamination work done in this way,

Pear-Chair-1.jpg


Pear-Chair-2.jpg


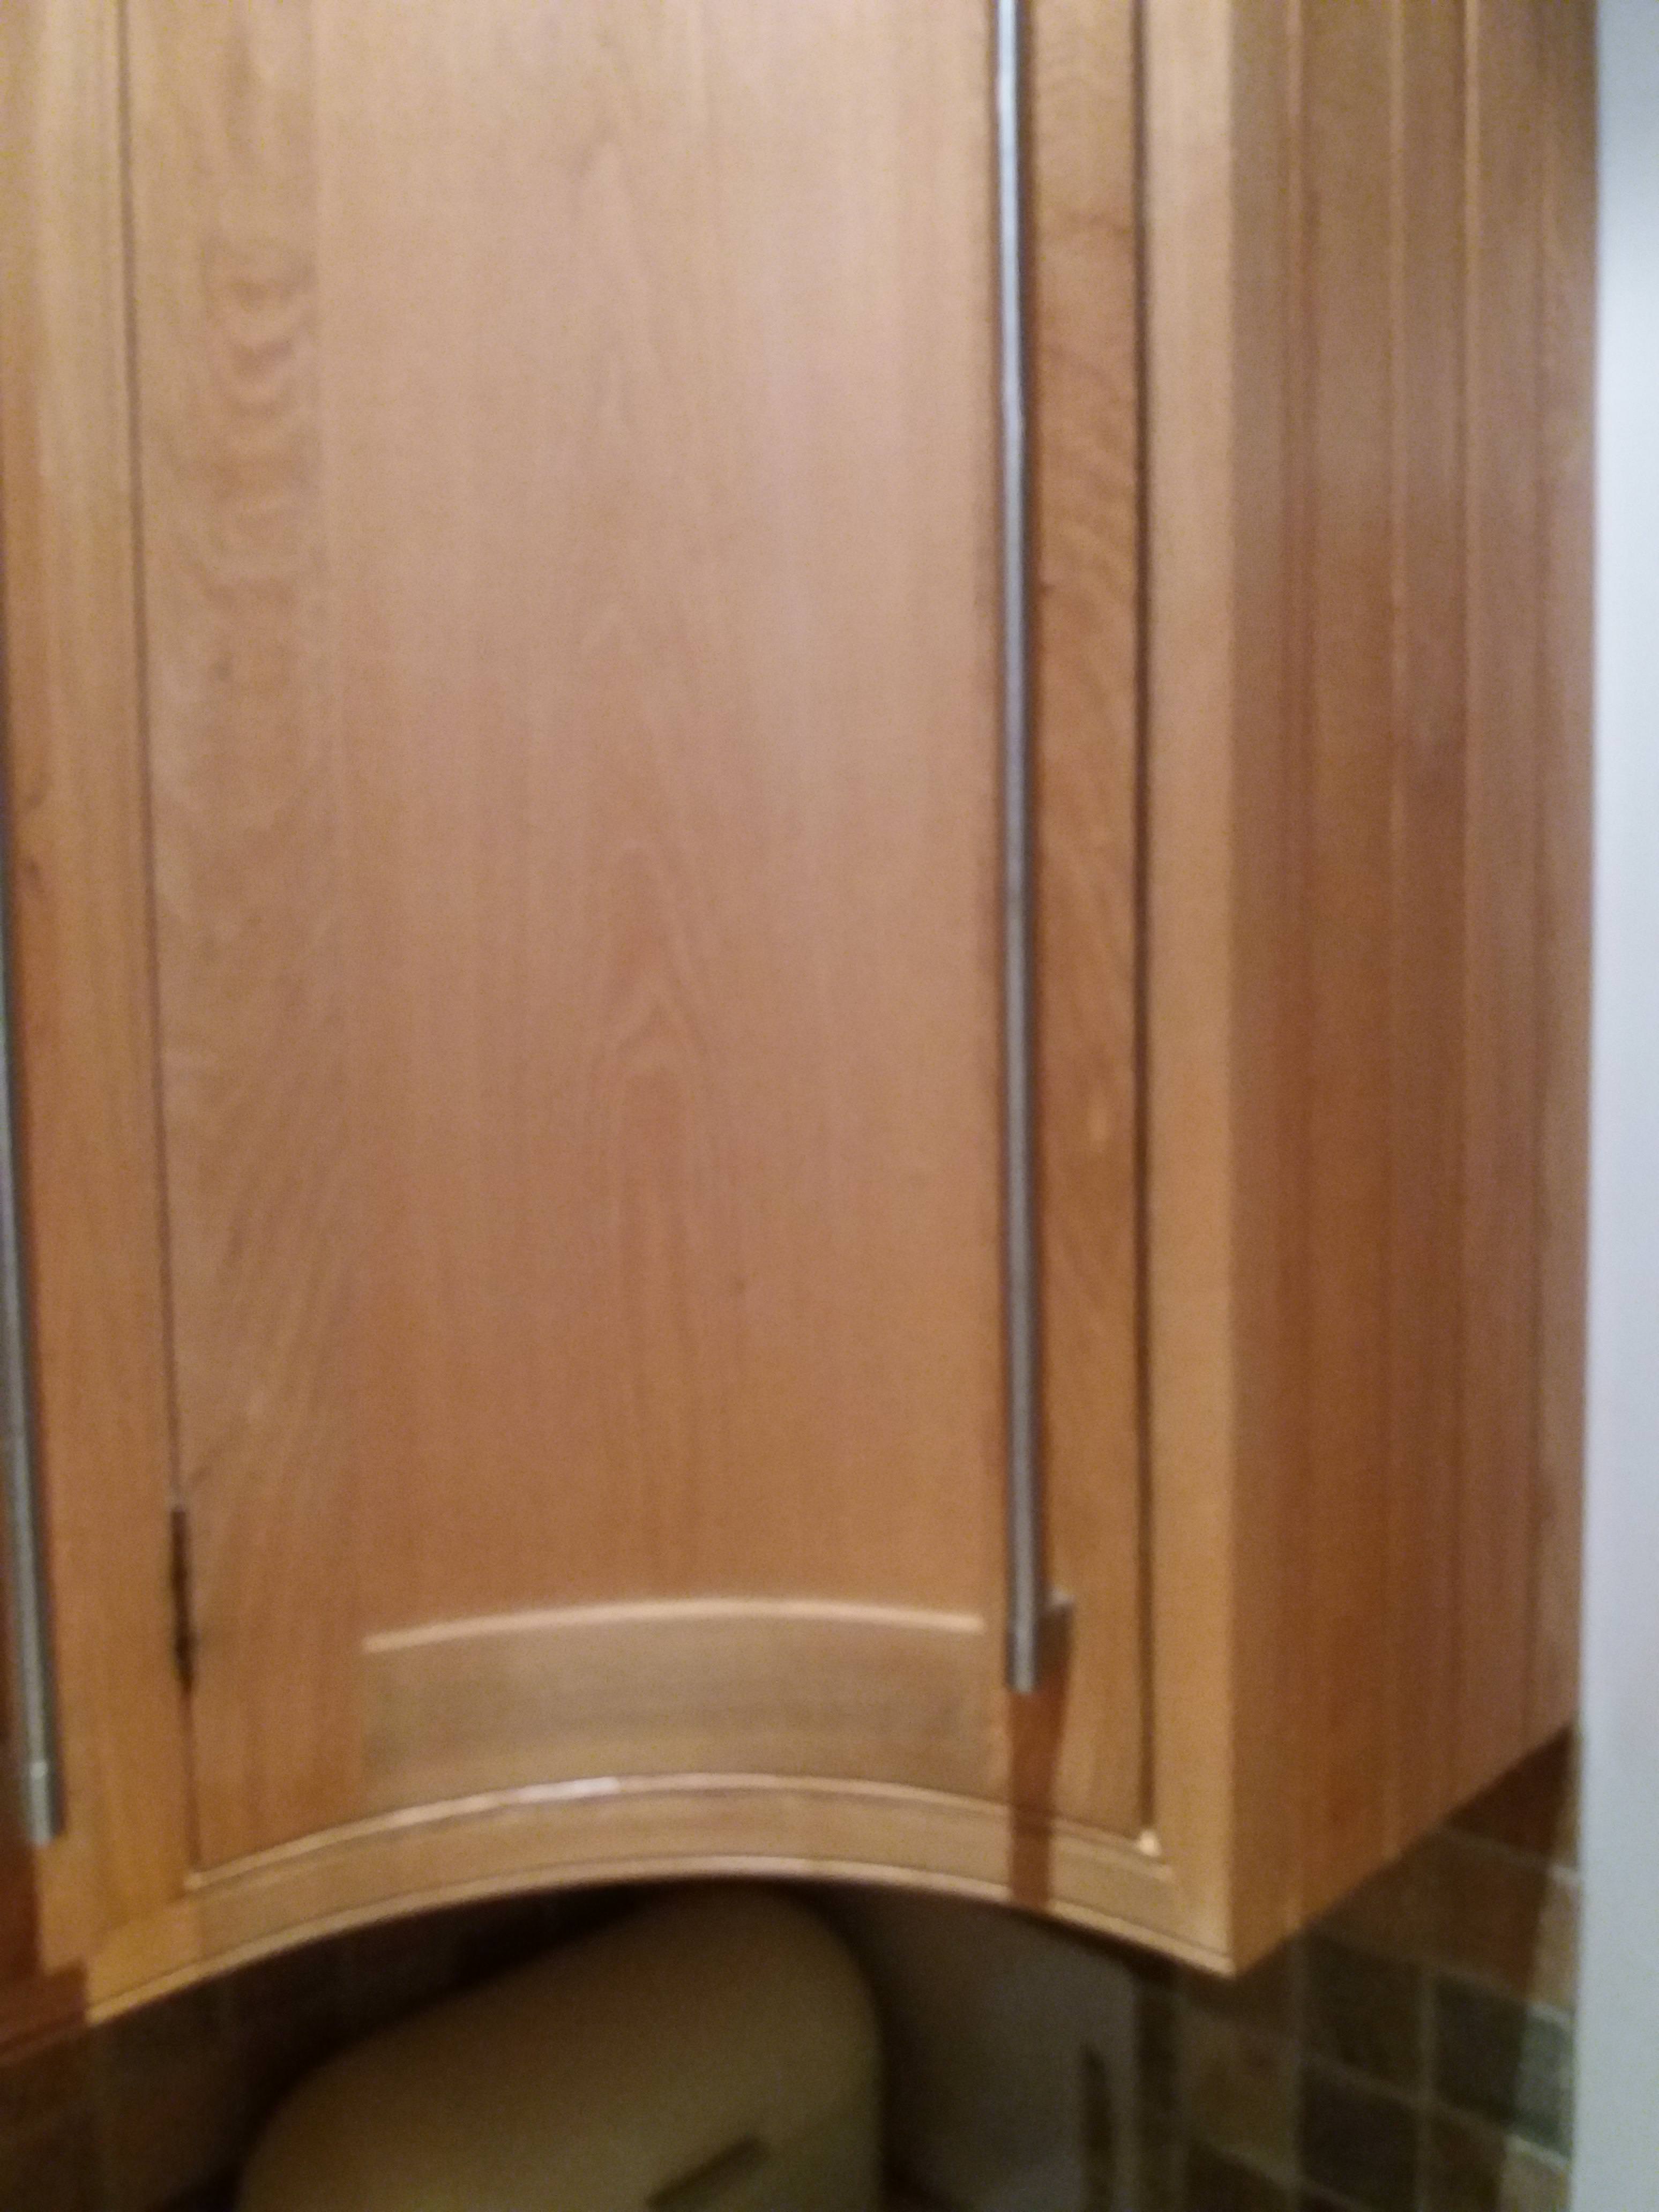
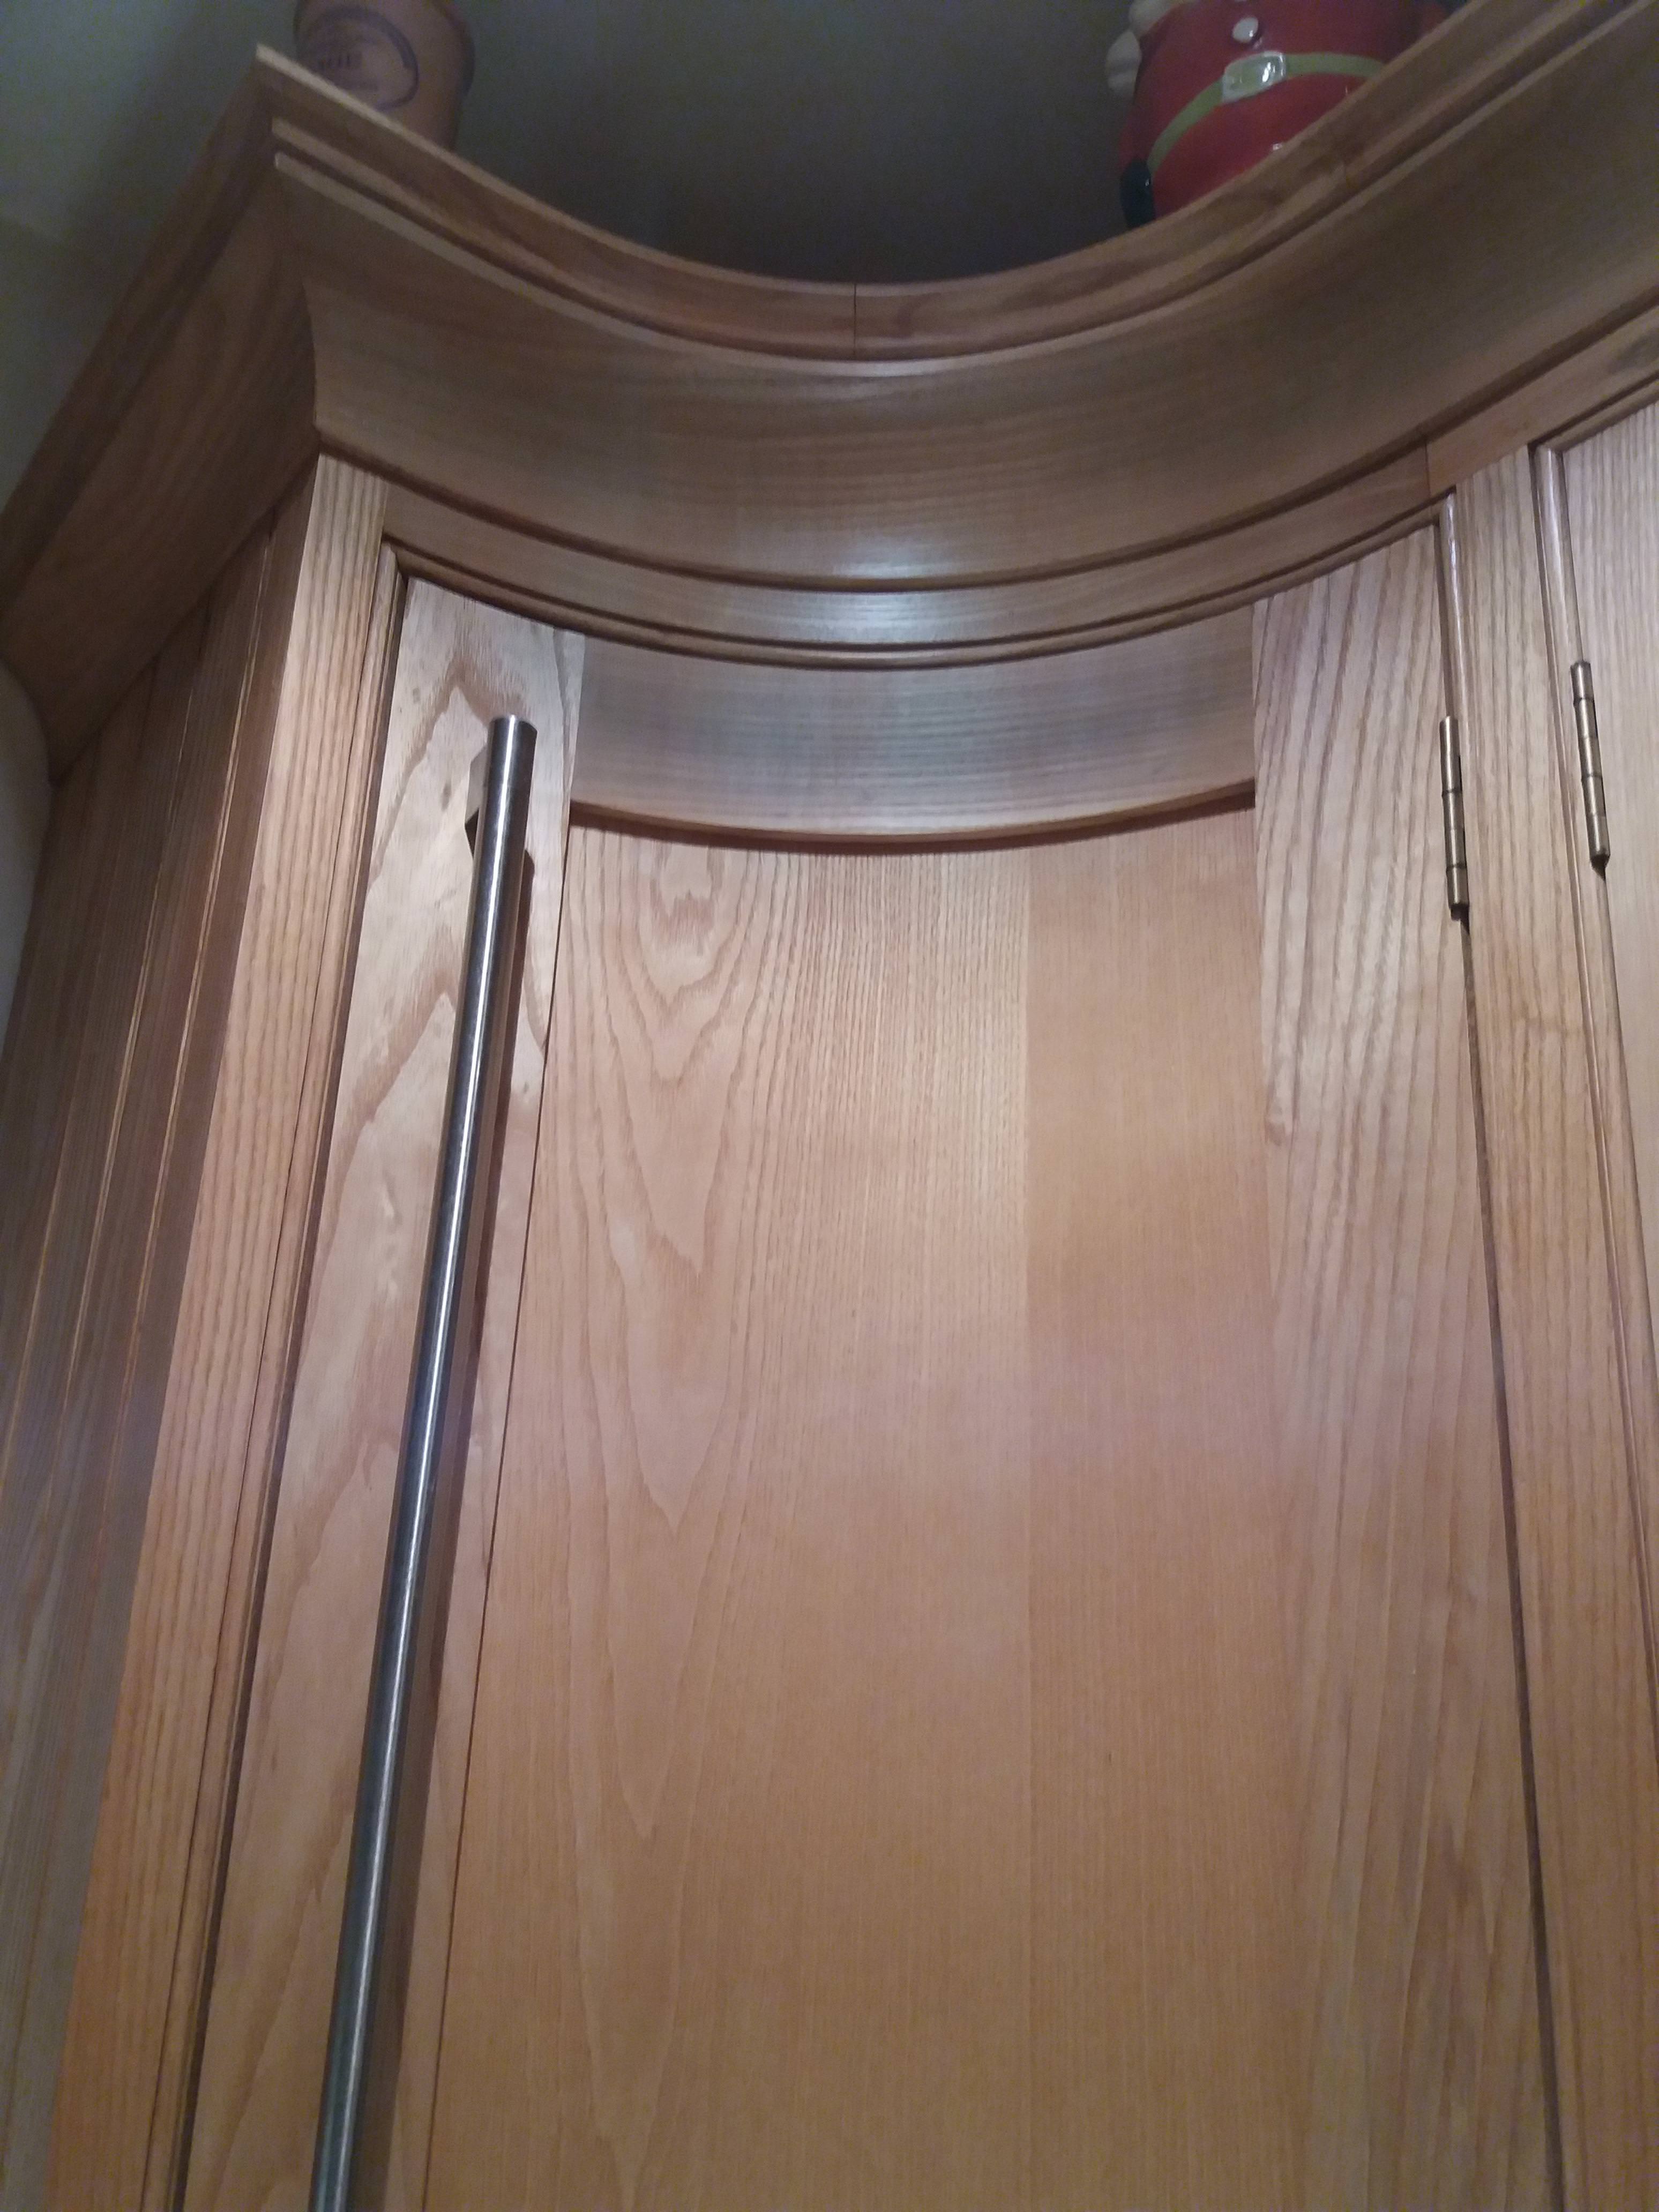
And here you can see the glue lines up close,

Laminations-01.jpg


Including glue lines that are exaggerated by a chamfer,

Laminations-02.jpg


Incidentally, when it comes to the joinery for components like these I generally build a jig that will allow the stiles and, more importantly, the rails, to be held in the correct orientation and then cut mortices for loose tenons. On a typical chair I'll usually make about twenty or more jigs, so one more isn't a problem! The simplest way of doing this in my experience is by incorporating a flat reference base into the jig and just using a Domino machine.

Good luck with your project!
 

Attachments

  • Pear-Chair-1.jpg
    Pear-Chair-1.jpg
    51.5 KB · Views: 139
  • Pear-Chair-2.jpg
    Pear-Chair-2.jpg
    54.5 KB · Views: 139
  • Laminations-01.jpg
    Laminations-01.jpg
    29 KB · Views: 140
  • Laminations-02.jpg
    Laminations-02.jpg
    40.3 KB · Views: 140
Laminations can be hidden, by doing the glue up in 3 parts, make the curved door or item, lip it all round and then veneer the outside, anything is possible it's just down to time and cost really.

xpk10b3.jpg


quS9RYP.jpg
 
I've been reading this with interest and picked up some interesting ideas so i thought i would post my experience of curved doors.

Mine were internal curves which bring up more problems re opening if as mine were set in a frame, overlay doors may not pose the same problems.

These are approx 15 yrs old and as opposed to laminating they were cut from the solid.

I managed to get the cornice, and both top and bottom rail from one piece of 75mm Ash; the stiles were also cut from solid material then shaped with hollows and rounds (more rounds as the backs can obviously be shaped with normal hand planes cutting on the tangent).

The panels are cut from 6mm ash faced MDF, at the time I did not have access to a panel sander so I routed a series of 19mm grooves into one side of the 6mm MDF to a depth of 3mm. the bits remaining between the grooves were removed with a smoothing plane thereby creating 3mm sheets. These were then glued on the rough MDF side, bent over a former and pulled down with ratchet straps, pieces of timber being used to spread the clamping load.

The construction of the doors was basic mortice and tenon and for gluing I cut some 1" softwood to the correct convex curve and used clamp heads forming a curved sash clamp

XiADlIX.jpg


KPnp67x.jpg


YPLxSsI.jpg


pngtq72.jpg


YVw0yJ3.jpg


VTuolFS.jpg


sUMDS3j.jpg
 
Back
Top