Circular walnut mirror need advice

UKworkshop.co.uk

Help Support UKworkshop.co.uk:

This site may earn a commission from merchant affiliate links, including eBay, Amazon, and others.

gasman

Established Member
Joined
14 Nov 2006
Messages
1,005
Reaction score
289
Location
Near Oxford
Tasked to come up with a mirror for a house by the sea - I thought a nautical theme in the form of a 'porthole' would do
I have some walnut which has been planked and drying for a couple of years and thought that would come up nicely...
So first here is the wood together with an 18" circular mirror
3879901559_04004c3f14.jpg

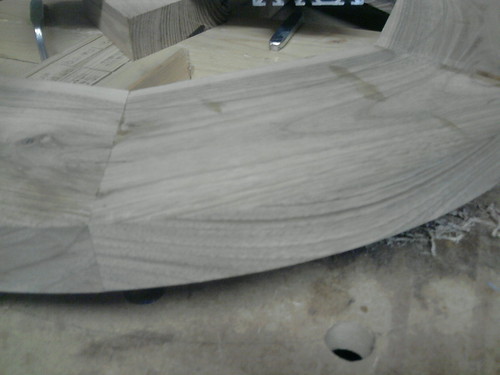
The wood was planed and thicknessed to 32mm, then cut into 8 wedges 10" long and at least 4" wide roughly with a 22.5 degree angle at each end. These were joined together in pairs with a single 10mm domino cut centrally in the ends. Each pair was then joined together to form 'half' a circle.
3880696770_2b2b5283e6.jpg

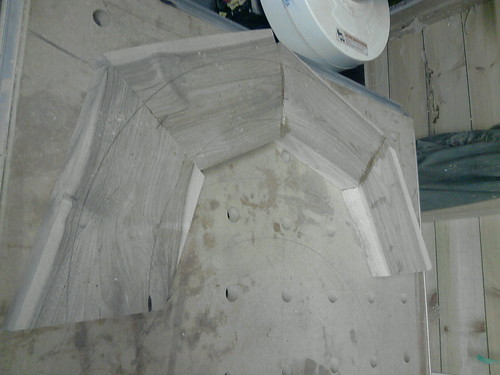
I cut down the edges of the two half circles with a guide-rail-guided saw. The two halves were the dominoed together to form a circle.
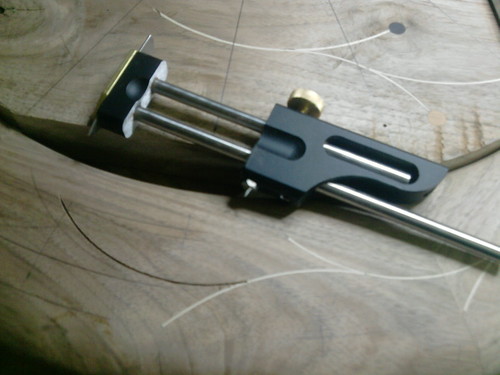
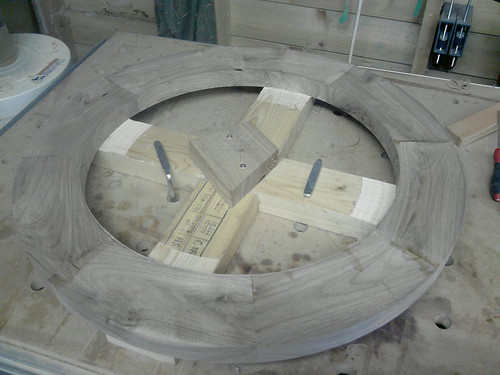
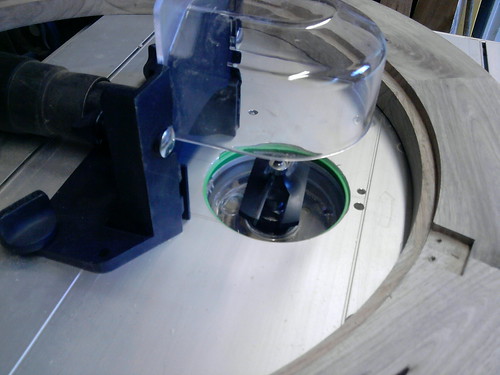
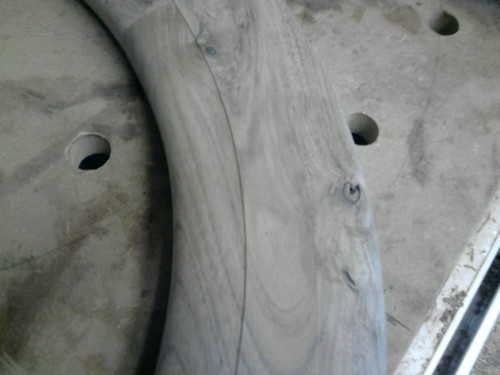
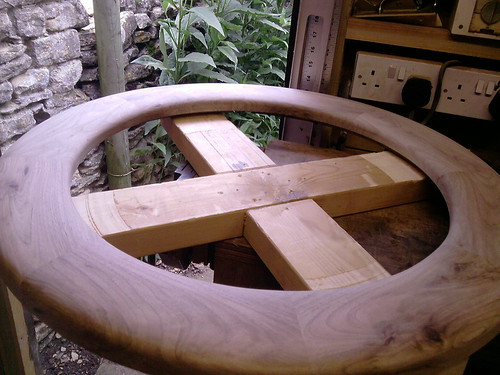
Then I made two 24" lengths of 4x2s into a cross with a central 32 mm piece of wood screwed to the centre and an 8mm hole drilled in the middle. I screwed the rough circle to this through the back of the circle so that the hole was roughly at the centre of the circle. I then used a long straight router cutter in the Trend T11 mounted in the MFS400 festool jig. The pivot of the MFS400 sits in the 8mm hole so that you can swing the whole jig around the pivot point and gradually cut the waste wood away. I carried on doing this until I had just got rid of all the sapwood. In this way the inner and outer circular curves of the mirror were cut leaving me with a circular frame about 3 inches wide.
3879898169_63909cf10e.jpg

3879896705_a9c9a826a6.jpg

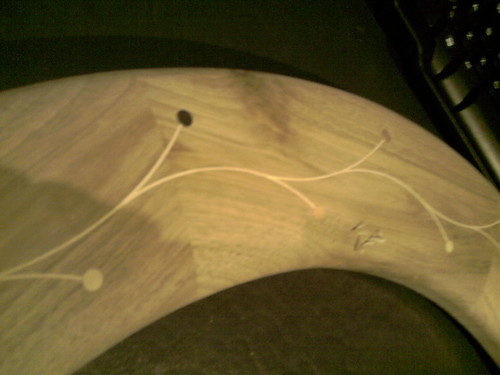
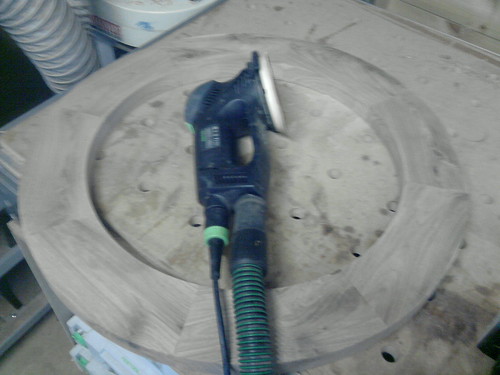
ONce this was done I had my basic circular form
3880692702_360360c0af.jpg

Sanded it to get rid of the glue marks
3880691982_c45bc26096.jpg

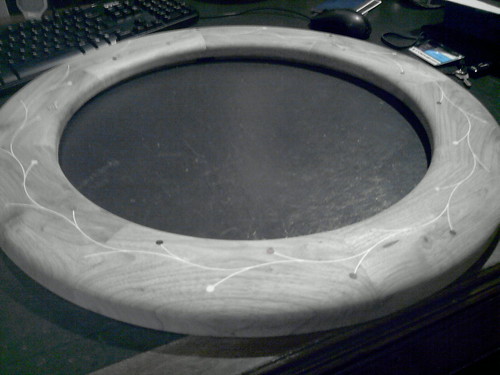
and then put the mirror in to see what it would look like
Then got a bit stuck as I wanted to have a convex front to the mirror. The only way I can think of to do this is either on a lathe and I think it would be very difficult to mount it exactly on the plate with the centre of the circle exactly in the centre - or to use some sort of bearing guided router bit but as the frame is 3" wide, it would have to be a heck of a large thumb moulding bit. Any better ideas?
Thanks for looking and the advice!
 
There are always hand tools like spokeshaves and rasps. If it were me I would make a plywood profile and set about it with a rasp. You would be amazed how quickly a No 6 grain rasp will have that shaped, then follow with 8, 10, 15 and 15 before sanding. Unfortunately that is nearly 300 quids worth of rasps!

Wealdon do a bearing guided thumb profile cutter which you could mount in a router table and profile inside and out but this would leave a significant flat in the middle
 
I would use hand tools as well. You should have seen John Lloyd's demonstration at Westonbirt at the week-end of cutting mouldings using just hand planes 8) There are lots of options including spokeshaves, rasps, scrapers, block and shoulder planes, depending on what you have and how confident you are in using them. Just make sure they are very sharp.

As a last resort you could always sand it to shape..........

Cheers :wink:

Paul
 
Thanks for your prompt replies
I had a look at the wealden thumb moulding cutter and there is a bigger one which cuts 28.5 mm wide and 14mm deep
I mocked this up on paper and it looks a good result - the whole thing is 75mm wide and therefore there will only be 18mm in the middle flat
I can use a sander to round this over.
I like the idea of doing it with hand tools but I do not think I would be good or patient enough - and also do not have 300 quid to spare as I have my eye on another saw
Thanks again
Gasman
 
Hi,

Put it back in your circle jig and cut a series of steps and smooth with a sander/scraper.


Pete
 
A couple of points about the router solution.
1. 18mm may sound like very little but when you are dealing with curves it is a lot. Check you have got rid of all the flats before you finish it as for some reason flat points on a curve stand out like a saw thumb once you apply finish. You might want to over cut the mould so there is a lip of say 1mm so that you can then round the middle over and blend it into the thumb mould.
2. Go very carefully with that cutter. Small amounts at a time and make sure you have a reference pin on your table.

Good luck the frame is looking great!
 
Going with the Festool jig. Lift the centre pivot so that the sole of the router is at the angle you wish to achieve. Organise a foot, or feet, at the extreme end of the jig to support it as it is moved around the mirror frame. Rout gently around the frame with a flat bottomed cutter. Move from the outside to the inside using the previous cut as depth gauge to give a smooth(ish) finish. Or cut radially, this might be easier as the pivot might bind too much for a fluid circular motion.

Either way if you are going to rout a rebate in the back do it while the front is flat.

BE CAREFUL AS ALWAYS.

xy
 
I like all those ideas - especially the last one - hadn't thought of that
I do have a suitable router cutter now and I am going to cut some test pieces tomorrow to see what it all looks like
The rebate on the back for the mirror is already cut and the mirror fits v well
Big step to do the front tho'!
Will report back
 
Personally I'd use a round surform, even the B&Q ones would do the job fine, you can quickly remove a fair amount of waste with a lot of control. Then I'd move to a spokeshave and finally sanding. That's how I did my guitar neck
 
Must admit ... these days I'd go the hand route, Block plane flat-bottomed spokeshave, anything to move timber really. Perhaps a routed line around the outer edge to use as a depth guide.

xy
 
Thanks to all of you for your advice - what a marvelous forum this is where one can get 5 different opinions as to how to proceed...
I got the cutter from Wealden, tried it out on some 4x2 and it looked good - using a card scraper and a sander gave a good finish
So I mounted the cutter in the CMS with the circular guard which comes with the router insert - made me feel very safe
3884047686_5eb0959462.jpg

Then nibbled away at it a mm or 2 at a time doing inside followed by outside at each height until I had cut 0.5 mm too far as PAC suggested
3883254925_6d70132c94.jpg

Then spent a good hour with a card scraper getting rid of the steps, followed by 120, 180, 240 and 320 grade on the fine sander and got to this stage
3884046420_b5ecd85540.jpg

Then used some of the very liquid superglue together with very fine walnut sander dust to fill the knots and sanded them
Happy with the result but I think it needs some decoration... I like inlays so I am toying with the idea of the line and berry inlays which I have done quite a few of similar to those that Steve Latta does on his spice boxes
http://www.mauiguild.com/Meetings/Sept2006Latta.html
What do you think
Thanks for looking as always and for the advice
Gasman
 
Wow, that looks like it was worth the expense of a new cutter! The walnut looks lovely, too. Not a hint of sapwood from what I can see. :)
 
Thanks for the nice comments - I have saved the sapwood for the fire but it is worth just using the heartwood because of the lovely 'purple haze' that English walnut has. The new router cutter is going to be very useful as I do make quite a few things like this and I have struggled before to get a decent curved edge. I have to say the CMS router table makes it so easy tho'.
Have definitely decided on a simple line and berry inlay in holly with single ebony, yew and purpleheart berries which I will do on saturday. I always get very excited about inlay day as there is a lot at stake!
 
Spent quite a few hours today doing the inlay for the walnut mirror.
First spent quite an hour or so working out the angles and radiuses of the curves required for this line and berry inlay. Decided on alternating curves in and out, with 70mm radius for the inner curves and 100mm for the outer. Then divided the circle into 32nds and mounted it very securely on the MFT. Then, using the radius cutter I started cutting the curves very carefully
The stringing is holly, thicknessed to about 2.8 mm, then about 2mm is cut off the sheet, then a card scraper is used to thin this down to the 1.5 mm which is the width of the groove the radius cutter makes.
Here is an inlay cut, with a couple already done and the radius cutter. The piece if wood with an inlay already on it was a trial piece - I am using this clamped inside the circular mirror as a base from which to use the radius cutter
3889979733_d043aedb34.jpg

It took about 3 hours to go round the whole mirror - 32 curves cut in total, then cut 6mm plugs in holly, yew, purpleheart and ebony and drilled 6mm holes into the end of each 'branch'. The plugs are randomly ordered
3889978935_8019f53414.jpg

So here is the whole thing finished, awaiting final sanding and finishing - not certain which finish to use yet - any advice gratefully received
3889978063_33f4c8f9f3.jpg
 
I really like that, especially the inlay :). I admire your skills - and patience!

Boz
 
Back
Top