bench build

UKworkshop.co.uk

Help Support UKworkshop.co.uk:

This site may earn a commission from merchant affiliate links, including eBay, Amazon, and others.

pobo

Established Member
Joined
6 Jun 2007
Messages
84
Reaction score
0
Location
chester cheshire
hi all. just finished bench build thought it would be nice to share some WIP pics.

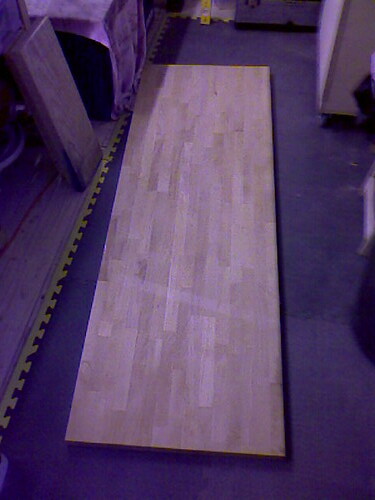
top is made from beech block kitchen worktop and mdf to ad waight and strength, picked it up from b&q from some of their scraps
2431332875_d839506d96.jpg


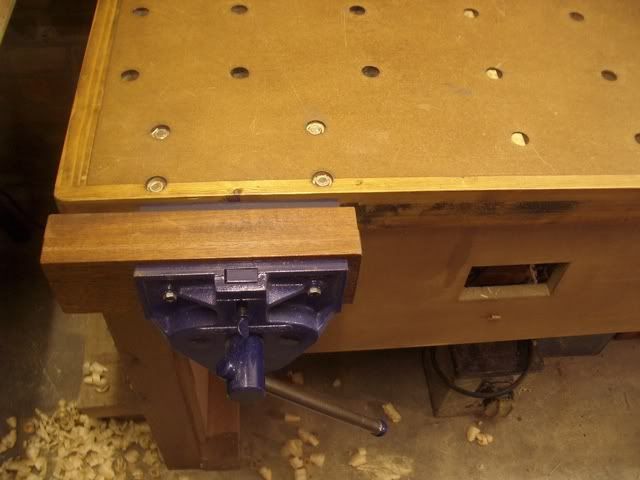
now with new vise from rutland, bargin at £25 each and they work really well
2432149270_b4fb1dfc0a.jpg


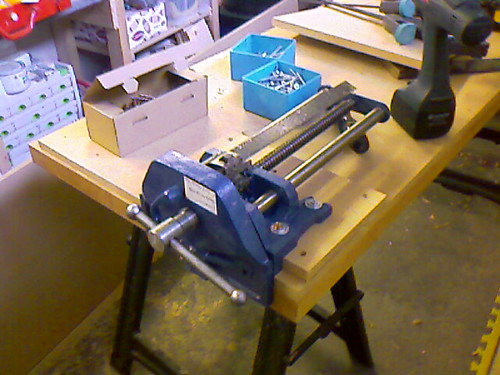
here i'm attaching the vise you can see the beech mdf sandwich (screw were replaced with bolts later.
2431333409_b36d2be09b.jpg


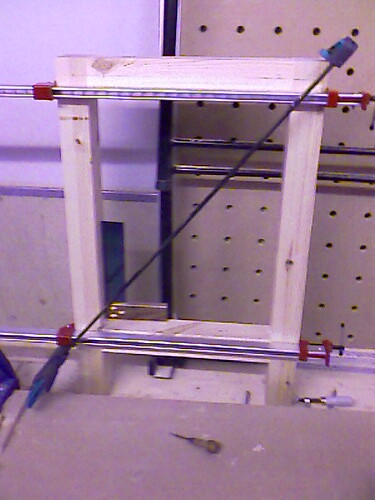
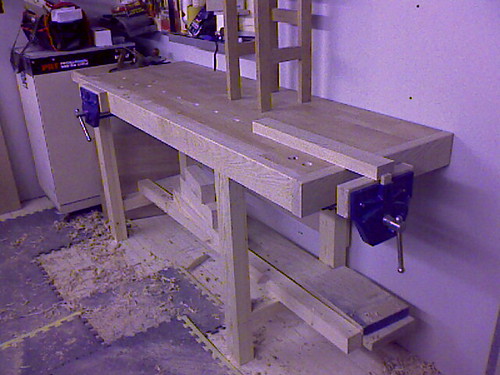
time for the legs, simple made from soft par (redwood i think). no m/t thou cheated and used biscuits
2432149400_ccc91f0746.jpg


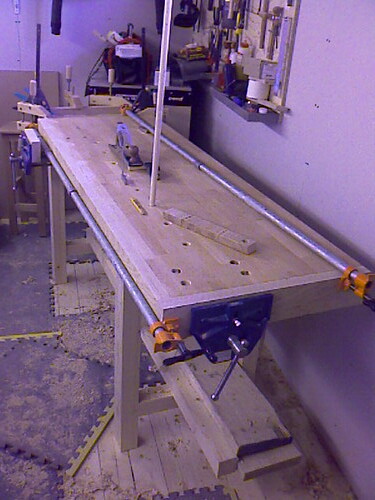
all together now, just want to turn it over
2432149508_05a69bdcbe.jpg


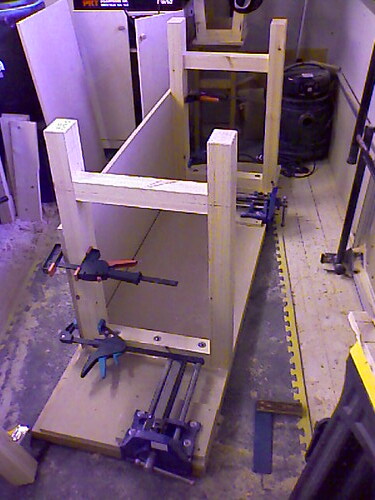
turning it over, hurray i have workbench and i'm luck not to have a bad back, already weights alot.
2431334237_c0140a5ca9.jpg


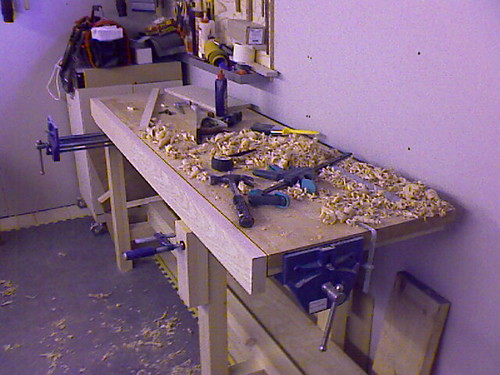
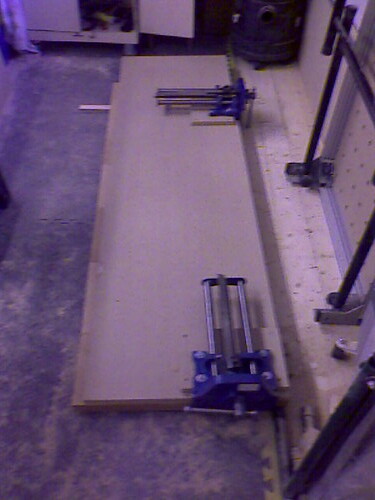
time for glueing up the front edge, glad i have all these clamps
2432150032_0f523ce52d.jpg


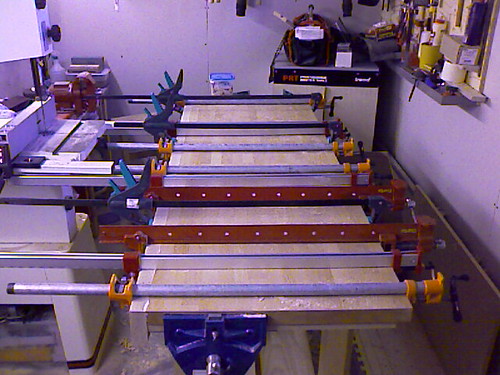
and some more clamping
2431334673_5a385cc6ff.jpg


and now for the final product
2431334821_f93b694a60.jpg


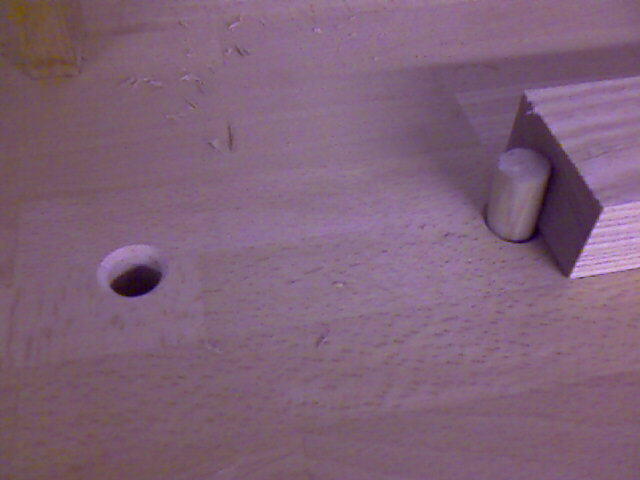
using pine dowls for dogs
2432150708_741f09bc04_o.jpg


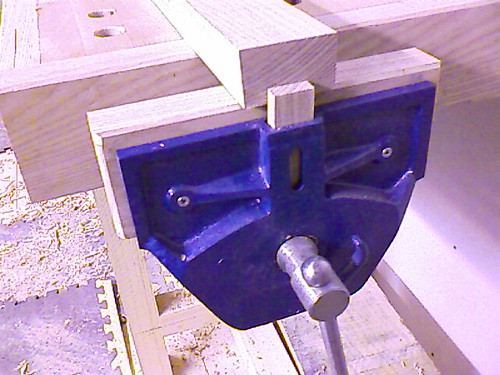
and replaced metal vise dog with wooden one to prevent damaging of wood
2431334963_7c44bc1506.jpg


and built a bay at the end for my mess to collect
2431395017_295897c22a.jpg


so i'm quite happy with the out come. as ever not what i planed.

heres some idea about costing

beech top 6ft x 2 ft x 40mm £10 (off cut from B&Q)
mdf two large scraps £8 (B&Q again)
vise x 2 = £50
ash for edging £22 for 12 foot of 1 1/2" x8" ( still have over haft left)
PAR for legs £30 (think i was ripped a bit on this one)
bolts £8.50 (just 92 spare)

total £128.50

i very happy with how sturdy and solid it is, and the fact it has a 58mm top is good. i have problems with a ache in the back at times so make it 960mm tall( about 100mm tall then the average) and it really works well for my hight(6'3").

i have a question
what do people think would be the best finish

if anyone need a new bench i really recommend building your own, i managed it with only a band saw, router, cordless and hand tool

please let me know your thoughts

ps a thank you to slim for his "how to" with posting flickr pictures.

pete
 
thanks for posting an informative post pete. I am planning to build a workbench in the next month or so and your's gives me a load of ideas. I'll probably do something very similar but with drawers in-built (I'm very tight on space in my shop)


paul
 
hi paul i was think about fitting some kind to draws as well at a later date either one big block attached to bench or a couple of cabinet on wheels that fit under the bench storage is a big problem for me to and i have to fit a p/t and a t/s in when to money is available. space cost more then money alone

pete
 
Nice, as a finish? It all depends on what you tend to to on the bench and how 'clumsy' (nothing intended) you are. An oil might be great (no harm done when you take off a shaving by accident from your bench) or a varnish of some kind as I do because I play a lot with all kinds of liquids and solvents on the bench and my work methods are often meticulous.

One concern tough with your bench. It seems that the ash along the side of the bench is glued also. This will cause problems if the wood not not acclimated or the per year average relative humidity changes.
 
Very nice Pobo, it's people like you that make this forum invaluable, I would never have the woodworking wit to build something like that and so cheaply, now I do.
regards,
Rich.
 
Very nice - I'm surprised you didn't put a beam running across between the legs, though. Helps with racking when planing.
Cheers
Philly :D
 
That's very nice, Pete =D>

Just one small point - I notice you've fitted the wood on the vice jaws with wood screws. Because vice jaws toe-in, the leverage can cause those screws to work loose. I find it better to fit the wooden jaw facings with countersunk machine screws and nuts like this

Workbench3.jpg


In the old days, Record used to make their jaws with threaded screw holes so the wooden jaws could be fitted with machine screws, so you didn't have the problem.

Cheers :wink:

Paul
 
Philly":35px4qcj said:
Very nice - I'm surprised you didn't put a beam running across between the legs, though. Helps with racking when planing.
Cheers
Philly :D

philly, what do you mean by 'helps with racking' ?
 
The bench looks great, well done and a pretty good price too. My only comment would be on the use of biscuits to join the under frame together. It will be interesting to see how well biscuited joints stand up to the forces generated in the bench by hand planing. I like biscuit joints, they are very versatile but I'm not sure that, as little loose tenons, they provide enough glue surface for a high stress joint like a bench frame. The good thing is that trestle legs made with more traditional M&Ts can be substituted later if a problem develops with the biscuit joints.
 
Great looking bench.

George_N":vebz2chr said:
My only comment would be on the use of biscuits to join the under frame together. It will be interesting to see how well biscuited joints stand up to the forces generated in the bench by hand planing. I like biscuit joints, they are very versatile but I'm not sure that, as little loose tenons, they provide enough glue surface for a high stress joint like a bench frame.

I would agree with this. I might be tempted to put some coach screws in to reinforce the joints.
 
pobo, the worktop - i am assuming its not real beech block but the chipboard stuff, is that right ?

if it is real then you got a bargain!
 
Looking good

I love the way your workshop glows TVR Purple ;)
 
Looks like you've got a bargain of a bench there - very well done! :D

I like the idea of using beech-block worktop (or whatever it's called). I'm assuming it is constructed of solid beech, otherwise you wouldn't have been able to plane it! :D :wink:

Most people will add a tool try to the rear of the bench but your idea to stick something on the end of the bench is quite intriguing.

Apparently the Osmo Top Oil can be a good finish for a bench top, according to one of their guys, who I spoke to yesterday. The mix of oils and wax helps to give a durable finish that won't stain as easily as Danish Oil, or so he said. :)
 
thank you all for compliments and constructive advice, i will try and answer as many as possible

Sawdust Producer
Those pony clamps are brilliant for long pieces.
they are one of the best things i've bought and very versatile

tnimble
One concern tough with your bench. It seems that the ash along the side of the bench is glued also. This will cause problems if the wood not not acclimated or the per year average relative humidity changes.
yes this is a worry, I'm pretty new to art of damaging beautiful wood so treating this a trial of materials and part of the learning. what would you recommend to have changed in the design, thanks

philly
Very nice - I'm surprised you didn't put a beam running across between the legs, though. Helps with racking when planing.
this was my plan at first but found with the mdf across the back (can be seen in pic 5) and the weight of the top it is as solid as a rock. and i really mean no noticeable movement. the future i'm planning to build a draw/storage area below and this will at more stability

Paul Chapman
Just one small point - I notice you've fitted the wood on the vice jaws with wood screws. Because vice jaws toe-in, the leverage can cause those screws to work loose. I find it better to fit the wooden jaw facings with countersunk machine screws and nuts like this

Workbench3.jpg
thanks paul i did this later in the build fit bolts ( you just see them in pic 8 ) but did not mention it. also i was going to build my bench in the same style as your own but got a good deal on the top. you recommend it in this post

Slim
Great looking bench.

George_N wrote:
My only comment would be on the use of biscuits to join the under frame together. It will be interesting to see how well biscuited joints stand up to the forces generated in the bench by hand planing. I like biscuit joints, they are very versatile but I'm not sure that, as little loose tenons, they provide enough glue surface for a high stress joint like a bench frame.


I would agree with this. I might be tempted to put some coach screws in to reinforce the joints.
yes this is a worry and only time will tell. i did my best buy putting three biscuits per joint, but i'm happy to replace the legs or fit coach bolts if needed

LarryS
pobo, the worktop - i am assuming its not real beech block but the chipboard stuff, is that right ?

if it is real then you got a bargain!
yes its real, my local b&Q are having a refit and trying to get rid of stuff lying around. they had a 14ft piece of chipboard stuff for £2. you just need to find a board, disheartened member of staff who doesn't care to give you a price(not hard to find one of them :wink: ) but won't start on b&q, may start a new post

WiZeR
I love the way your workshop glows TVR Purple Wink
ive got the purple just need the TVR, any offers :twisted: sorry for the quality of the pic had to use the camera phone wife was away with real camera

OPJ
Most people will add a tool try to the rear of the bench but your idea to stick something on the end of the bench is quite intriguing.
my workshop is not very wide and with a tool try at the rear it would add about 6 inch's that i don't want to give up
plus thanks for the finish advise i will look in to it
 
pobo":2j66cek3 said:
tnimble
One concern tough with your bench. It seems that the ash along the side of the bench is glued also. This will cause problems if the wood not not acclimated or the per year average relative humidity changes.
yes this is a worry, I'm pretty new to art of damaging beautiful wood so treating this a trial of materials and part of the learning. what would you recommend to have changed in the design, thanks
One way would be to route a groove to fit a strip of plywood along the ends of the top and along the length of the ash side cap. The strip will give some strength to the top and aligns thtop and the strip.

To fix the the ash side cap so it does not fell of you can fit it with unglued dovetails (as is done traditionally).

Another way would be to screw it to the front ash apron and at back of the bencht top with non countersink screws. Drill a set of holes a bit larger then the screw. Enlarge the hole for the head of the screw, put in a washer and fit the screws.

Yet another way but less handy for a bench is to use some kind of metal bracket with two screw holes in it, like the ones sometimes used to fasten table tops. But due the tickness difference between the top and the ash parts it would be a bit of a drag to mount them.
 
Paul Chapman":1wu0fwyk said:
That's very nice, Pete =D>

Just one small point - I notice you've fitted the wood on the vice jaws with wood screws. Because vice jaws toe-in, the leverage can cause those screws to work loose. I find it better to fit the wooden jaw facings with countersunk machine screws and nuts like this

Workbench3.jpg


In the old days, Record used to make their jaws with threaded screw holes so the wooden jaws could be fitted with machine screws, so you didn't have the problem.

Cheers :wink:

Paul

I can testify to that effect, my vises are no very loose and wobbly because I screwed them on.
 
Back
Top