Workbench Design Ideas

UKworkshop.co.uk

Help Support UKworkshop.co.uk:

This site may earn a commission from merchant affiliate links, including eBay, Amazon, and others.

paulrockliffe

Established Member
Joined
10 Nov 2014
Messages
381
Reaction score
1
Location
Durham
I'm after some input into a workbench design, quite a different set of priorities to most of the builds on here so not sure exactly how to make the right compromises to get the best bench for my requirements, or where I should try to bend my priorities to reduce design limitations. All thoughts welcome.

Most of my woodwork is machine-based work to an average standard because my priorities at the moment are speed and ease of construction as I have a job list miles long; house renovation, furniture, in house storage, garden, classic car, wife and children. Not necesarilly in that order.

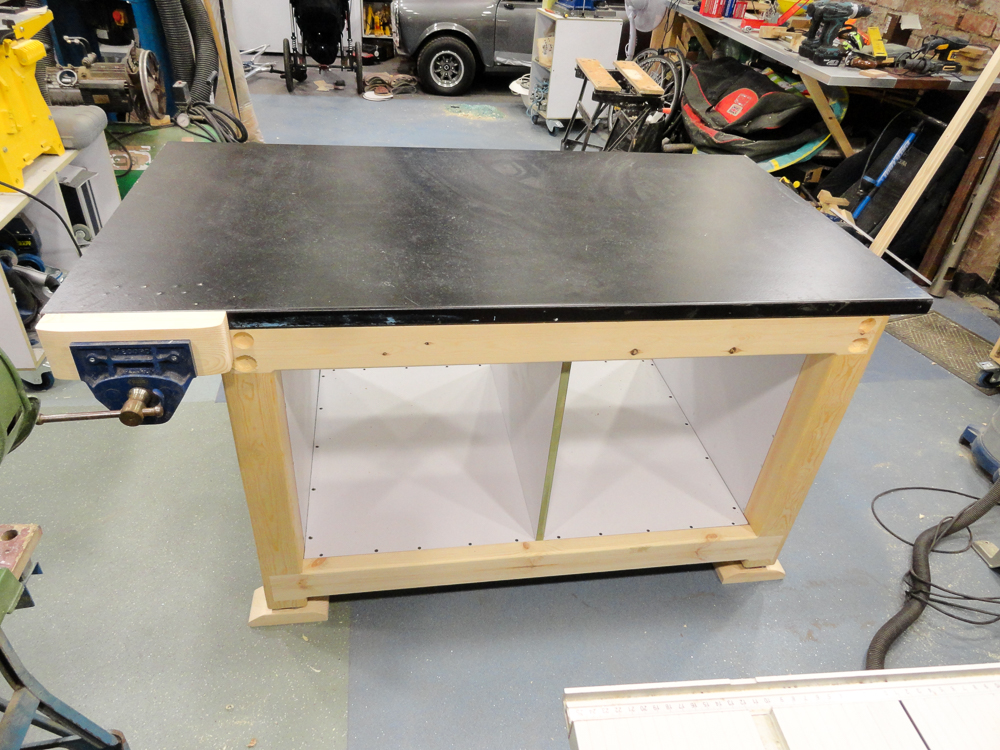
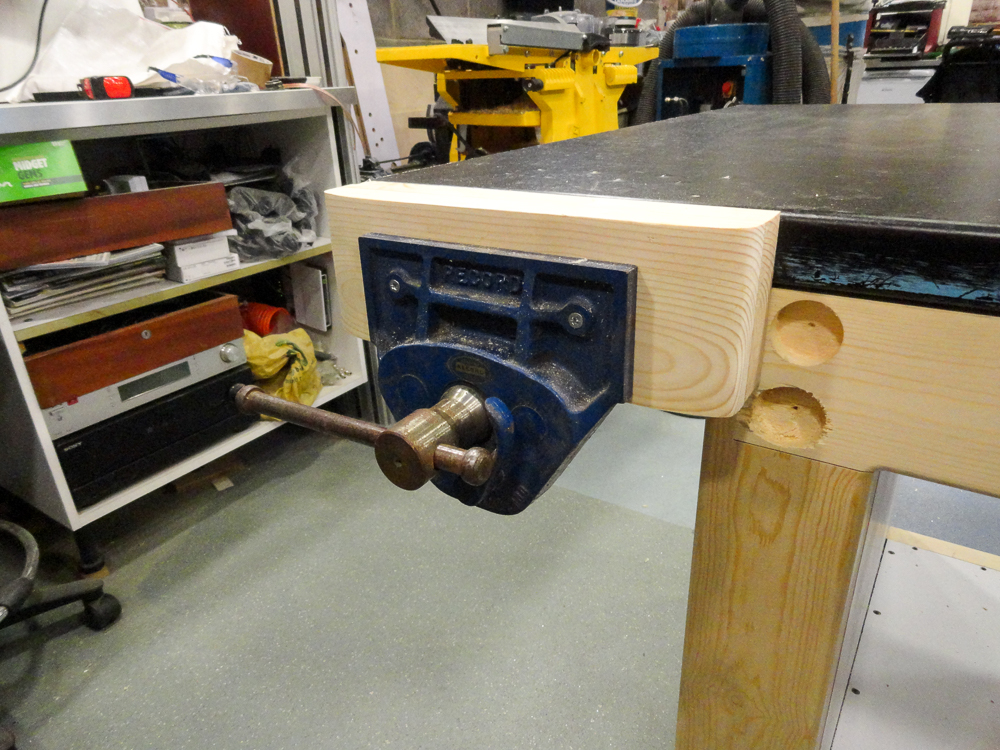
I do some handwork and I want a decent enough bench that I can do some small hand projects on to learn new skills. As with priorities above, it needs to be quick to construct and cheap on materials, but also it's to go into a corner with a wall in front of you and a wall to the right of you. I have two decent vices, so can put one on the front and one on the end.

I don't know if I'd be better with the end vice on the right hand side; I'm right handed? The reason it's that way is that the oposite corner will have a metal working bench in and I can't swap the bench round easily because there is a speaker above the woodwork bench that'll get destroyed by welding spatter. I could swap it by moving the TV and all the other speakers and that might be the best approach, but it really depends on where I *should* have the tail vice?

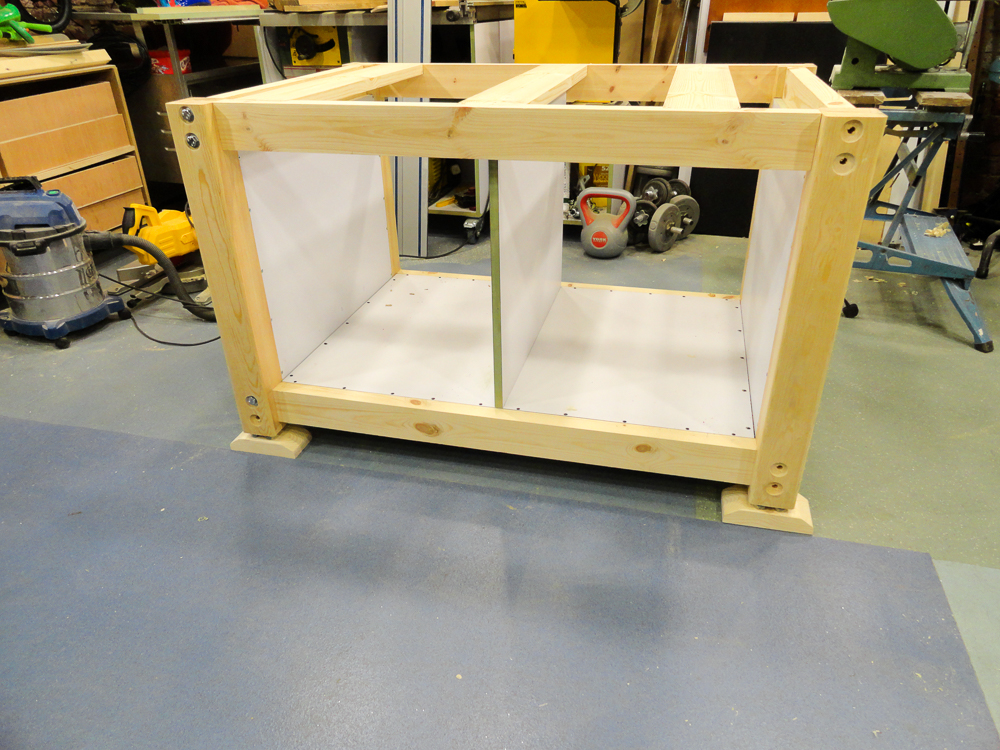
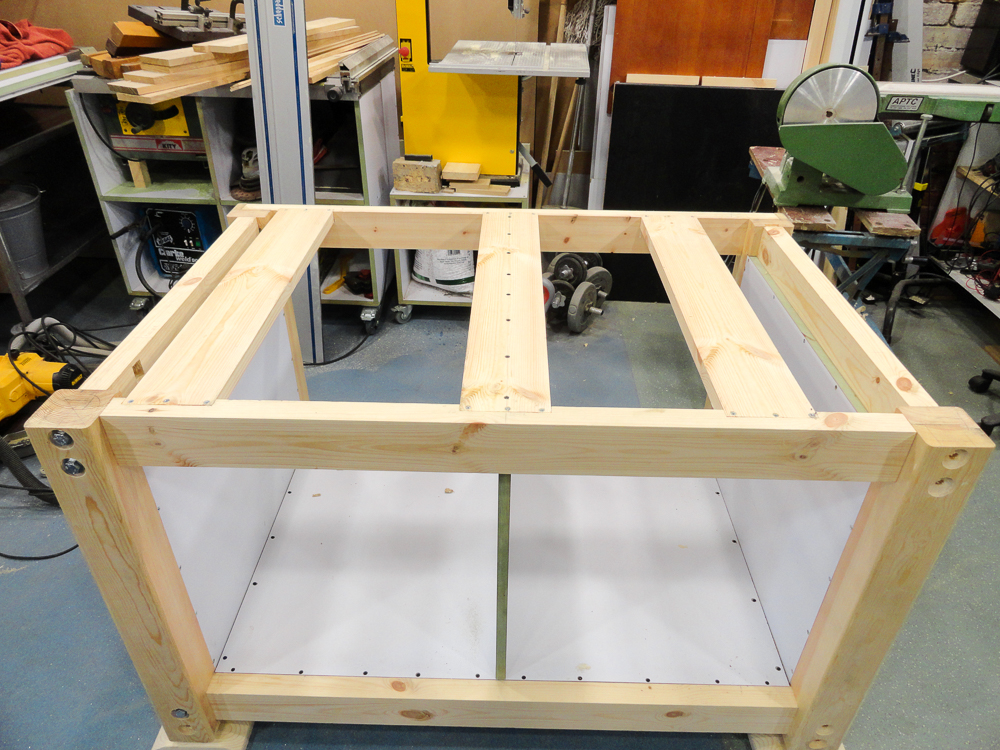
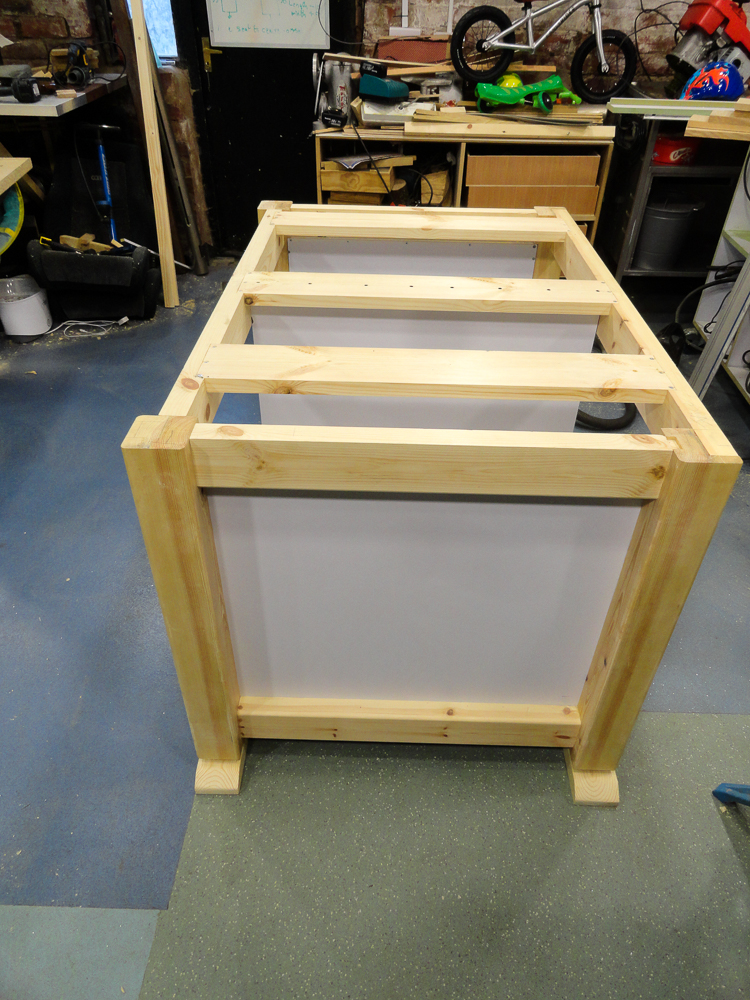
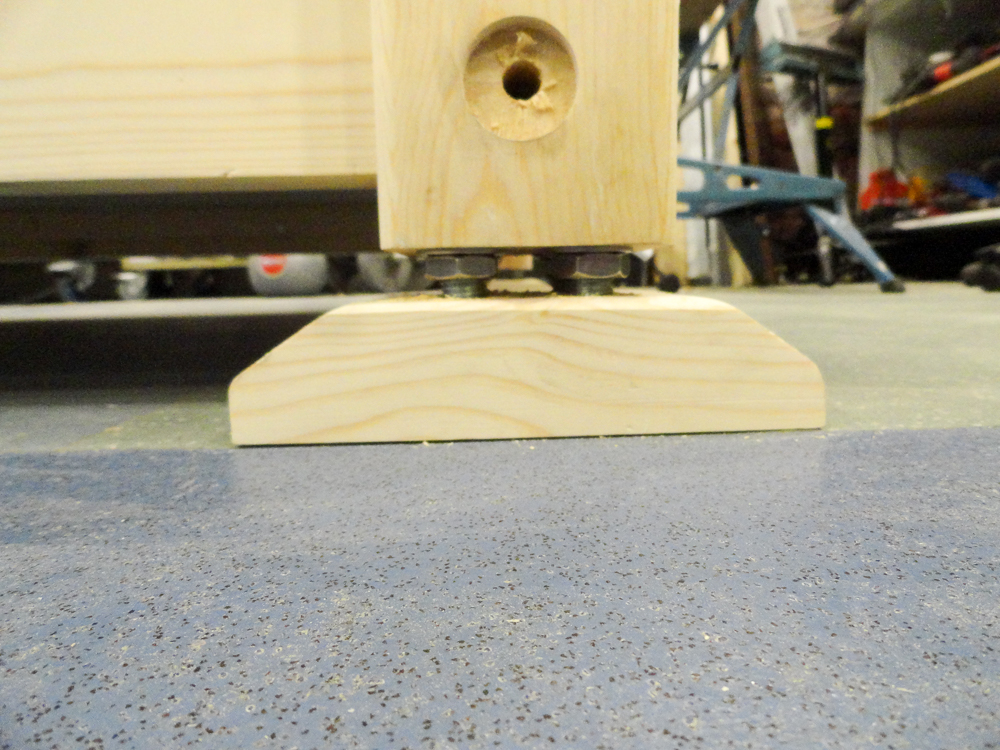
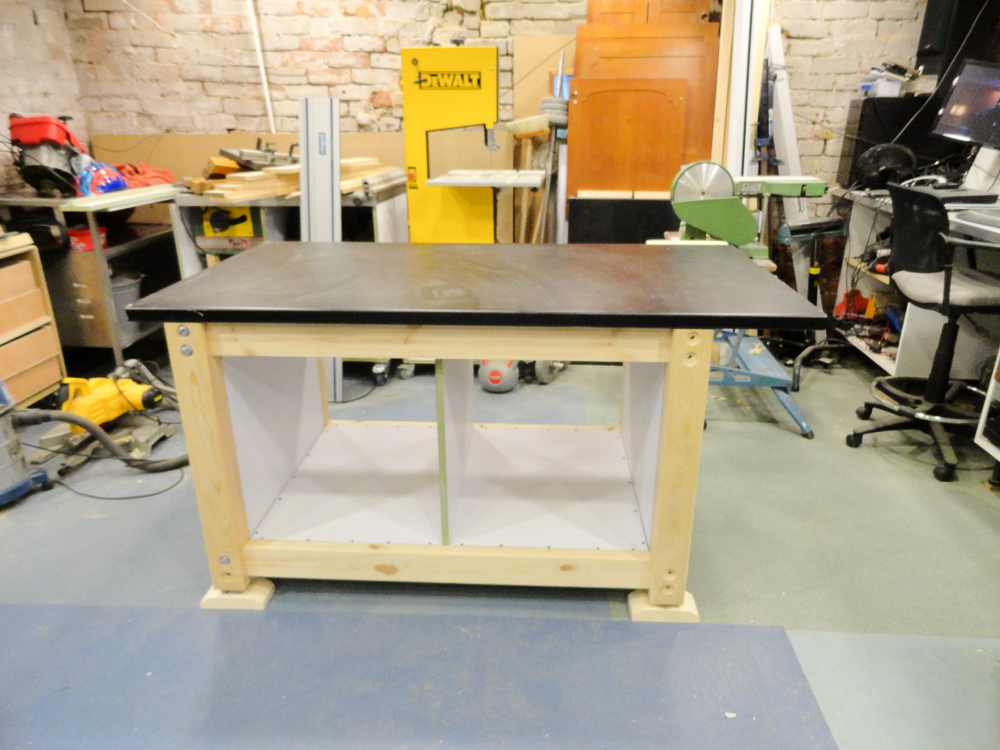
I'm thinking something along the lines of using 1" square steel tubing for the structure and bolted to the walls to ensure it's rock solid. The simplest way to do that is to just add legs at the front and corner to support that side, but making it free-standing would allow me to quickly unbolt and move it out into the workshop if I need more space around the bench. Storage is a premium, so a design that allowed drawers to be fitted would be helpful, though not essential.

Top I was thinking about a couple of MDF sheets to add mass and some depth around the vice, with something more resiliant on top, but not really very sure about that.

So general thoughts? And what are the limitations that I'd be left with with the above approach?

Thanks!
 
I'm rather inclined to the view that workbench 'design' is often over-thought. After all, it's a workhorse, not a showpiece. Just go for flat and level top (tool well if you fancy one), solid support, lots of rigidity, preferably heavy so it stays where it should be, and whatever workholding methods float your boat - a face vice at the left-hand end is probably as near to indispensable for most people. Other than that, just use whatever materials are to hand or easily available, and bang it together quickly (nails, screws, bolts - whatever) to get it into service as soon as possible and use it to tackle other items on the project list. Later on, if it has real shortcomings, you'll know far better what you DO want than any of us can tell you, and can rebuild accordingly.

Over the years, I've seen some really fancy benches with all sorts of clever and complicated vices and devices, but gradually came to the conclusion that spending two years or more making the world's most beautiful bench is time completely wasted. It's a way to get work off the floor and nearer a more comfortable height, that's all.
 
I built a nicholson style workbench at the end of last year workbench-build-aka-paul-sellers-style-t100869.html, it's made from redwood pine PAR timber, I just copied a design by paul sellers, similar to this https://www.youtube.com/watch?v=ru2ZiNs ... 332C7FB168

it took quite a while, probably 4-6 weeks, but not full-time, and I needed a lot of clamps and already had some sawhorses, it measures 6 feet long and is 38 inches high, fitted with a 9 inch wide vice, I am almost 6 foot tall, so 38 inches seemed just right.

If I did it again, I'd make the main worktop a little bit wider, and I'd use a record 53 vice with an even wider open depth, I am about to install some dogs soon parallel to the main vice, from a lot of useage now, I need some, and I plan on making drawers on each side for my most needed tools, which will add a lot more mass, my main problem is lack of space, but otherwise the bench has been rock solid.
 
I agree CheshireChappie - keep it simple - my suggestions

My simple bench I have used for the last 25 years - and it does not move
- 150x38 PAR planks for the top - fixed with deeply countersunk screws, to a heavy underframe of 75x50 sawn timber which is bolted to the legs
planks not glued together - planks overhang the underframe by about 40mm all round - allowing Gcramps to be used on three sides to fix work down o to fix stops (I don't currently have a tail vice or dog holes)
- legs 100x100 - made from two pieces of 100x50 nailed together
- bottom frame about 100mm above the floor - with a piece of chipboard on it, and and then put toolboxes on the shelf - close at hand and stop it moving
- See no reason to bolt it to floor or wall - unless you are superman I cannot see why it would move if you load the undershelf (unless you have a polished wooden floor in the workshop)
- no apron & no tool well - keep it simple

Good luck
 
You'll not go far wrong with your ideas for the top, most of my working surfaces are double thickness of 25mm mdf or osb with a sacrificial sheet of ply on the top. The mass gives the stability as you rightly said and that in itself makes it all work better.
Thats just my take on it, to each his own as they say.
 
Thanks all that's really useful. I had a bit of a lightbulb moment last night and managed to remove some of my design constraints so I've a bit more freedom on design now.

I have a 2.4m x 0.9m bench that takes up too much room in the middle of my workshop at the moment, it's a 40mm kitchen worktop sat on kitchen cabinets and I was planning to make it smaller and mobile. I realised if I put the two end cabinets (800 x 600) where the wood work bench was going to go, put a 1.8m kitchen worktop that I have spare on those and the 600 cabinets under my sink bench, I can put the 2.4m x 0.9m worktop on hooks on the wall where it can be dropped onto a pair of workhorses if I need a large assembly table and I'm left with nothing of that bench in the middle space.

So I can build a medium sized woodwork bench to sit in the middle of the space, something around 5' x 4' with vices, on a metal frame with wheels. I'm wondering if I can design some sort of mechanism that uses a bottle jack to drop some decent feet down, so it's easy to move around, but I think the design itself becomes much easier without it going into the corner.

So I'm left with the same amount of bench space, but it's in better places and can be a bit better proportioned to the room and it gives me better separation of tools and projects, metalwork bench, woodwork bench, the sink bench wraps around my toy car and I've then got a spare bench for hobbies and fixing bikes etc. So I can mess around with several things at once without having to tidy up all the time. I can easily rearrange benches and drop an extra big bench in for projects that need it and without the big bench I can move the car into the middle of the workshop to work on a bit easier and I have space for a temporary spray booth too hung from the purlins. I love it when a plan comes together!

I spent last night doing as much rearranging as I could and ended up with more space and a big pile of rubbish to stick on Gumtree, so clearing that's the next job, then I should probably do some of the house jobs to keep the missus happy, while I design some knock-down saw horses and another bench....
 
One of my benches is about 6-10 cut-down sheets of MDF on top of saw horses, wedged against a wall. Works just fine, and is a handy place to store the sheets.
 
Ha ha, that's a great idea! I'm not gong to steal it as one of my priorities is clean and tidy and as little clutter as possible, so I have a second space for untidy stuff, but it made me think I can make the temporary bench with the top hinged off the wall so it folds out of the way in seconds. Perfect.
 
Sounds like you've got it sorted Paul.

let us see it when your done, sounds like my sort of workshop!
 
paulrockliffe":38st0zm7 said:
Top I was thinking about a couple of MDF sheets to add mass and some depth around the vice, with something more resiliant on top, but not really very sure about that.
MDF can be robust enough by itself for a bench surface. I've read numerous comments from builders who have MDF-topped benches, or just an MDF surface on a sandwich top, who are a few years down the line and report (often with surprise, especially the guys doing engine work and other heavy-duty stuff) that the top is holding up just fine.

A thinner top layer could be installed as a sacrificial surface if you really think it's needed. Tempered hardboard is often chosen for this in the US but MDF with a couple of thin coats of Danish oil or dilute varnish could be substituted if necessary. IIRC 1/4" (6mm) stuff is usually used but I've trialled a 3mm insert and so far I don't think I'd need anything thicker in practice.

paulrockliffe":38st0zm7 said:
something around 5' x 4' with vices...
FWIW it's rare to have a bench (a workbench, not an assembly table) where you can't reach, easily reach, the opposite edge from the front. Which is why benches are rarely more than 26" across and almost never deeper than 3'.

Length on the other hand, it's often advised is to make the bench as long as you reasonably have room for (an opinion shared by Chris Schwarz if that matters).

paulrockliffe":38st0zm7 said:
I'm wondering if I can design some sort of mechanism that uses a bottle jack to drop some decent feet down, so it's easy to move around, but I think the design itself becomes much easier without it going into the corner.
There are a few designs online with fold-down or drop-down wheels, I can hunt down a few links for you later if you can't find anything yourself.

Re. the proposed metal underpinnings, would that be something you can speedily knock together? If speed of build is any concern a very basic timber construction using overlap joints will still yield you a rack-free bench, particularly if you throw in some plywood or chipboard panels.
 
Thanks, that's all useful too. What's the reason for needing to be able to reach the far edge of the bench? I know along and narrow bench might be better, but shorter and wider would be more flexible in my space. It would need to be short enough to comfortably sit between two other benches , so that it can be tucked up to the wall if I need the space in the middle, but also so that it can sit in an intermediate position away from the wall but still between benches without being in the way, so I guess I'm length limited and depth then gives me more space to shove things out of the way. It would also look better proportioned to the space.

I think both metal and wood would be about the same sort of time construction-wise. Metal maybe quicker as if I order the tubing it'll come cut to exact lengths, whereas wood will need measuring and cutting. I'm not wedded to either, I'll have to have a think.

I managed to earn some good brownie points yesterday so i'll be able to do a bit more on this now without having to divert my attention to , "More important projects." I realised if I swapped some worktops round, I could go for a 2.4m worktop over my 2 x 800 cabinets, leaving an 800 gap between to roll my chair under, so I could move my computer off the landing, get rid of that desk and it's clutter and keep a set of drawers that were destined for the tip due to lack of space so the boss has the extra storage that was further down my work list.

The plan is to build a cupboard above the workbench that'll have a false back and all the IT kit hidden behind (away from the dust) and have the monitors drop down for use. It's a bit over the top for the workshop, but I only occasionally need to use the PC over my laptop in the house, so it'll get more use there. It should be useful to have design facilities on-hand, when I realise I've not got any x left I can get it ordered straightaway and not forget and when I get stuck there's YouTube!

After proposing this solution I realised that over time more and more of my stuff is being ejected from the house.....
 
Made this workbench just last week, might be of interest if 'shorter and wider' is what you're after.

Main construction: Corner posts are 3x3 'skids' from local timber merchant, rails are 4x1.5" pallet wood (All M&T'ed), top is two sheets (8'x2') of Egger Protect Laminated chipboard flooring (22mm) donated by my next door neighbour when he moved just before Christmas, under the top are 3 more lengths of 3x2 pallet wood for extra support. Also sundry pse for lipping and the two planks the castors are sat on.


Front view with the bench sat on the floor.


R/H side view, castors down.


L/H view with two 'cam sticks' to counter the twist in the castor planks from all that weight on it. They aren't totally necessary atm, the bench lifts just fine with the main lift, in fact it will raise using one finger.

(All credit for the castor lift goes to Carl Holmgren)
 
So I've made a start on this project, I had 4 weeks off work due to the birth of Bear number 2, so day 2 I went to Travis Perkins, bought some wood and have been pottering when opportunity has allowed. I started off by building a couple of triangle frames and hinging them off a wall, then hinging a 900 x 2400 worktop off the wall to give me a large workspace to pile rubbish underneath and on top of. Eventually I'll have cleared all the clutter and I'll be able to drop the bench flat out of the way.

Next u was a proper bench, I had a rough design that I've refined as I've gone along and I've now got the frame all morticed and tenoned and ready to fix together. I decided to learn something new and cut all the joints with an auger drill and a chisel, so I learned how to sharpen my chisel and I learned how to use it. I've added two melamine faced MDF side panels and I need to add a central divide so I can add drawers and get my shed tidied, then it's ready to screw and glue together.

This has taken far too long already and I'm now under pressure to do some proper jobs, so I'm going to lash up a top with a pair of vices from an old worktop and sort a proper top later.

Because my floor isn't quite flat, the bench is sitting on adjustable feet, these are connected to each leg by 4 short lengths of M16 threaded rod, with nuts and washers adjusting the leg lengths to accommodate the variation in leg length required. I could do with some thoughts with this bit and I've added another thread for advice on drilling some holes.

I also had a question about dogs and clamps; has anyone tried tapping the work top and using machine screws to fix dogs and clamps in position? I have some M16 machine screws somewhere, an M16 tap. This should allow me much more flexibility with only needing access to the top of the worktop and would let me make my own clamps very easily. With something like a 4" top the holes wouldn't be distorted in use I wouldn't think. Any thoughts?

I'll add some pics when I get a chance....
 
Right, just about got it all done for now, assembled, levelled, top on and vice fitted. Just got some lag screws to add to the cross braces when a long auger bit arrives and a couple of bits of trim to the edges of my drawer divider and onto the legs to act as drawer stops. Needs a coat of something, then the rest can wait for a while; proper top to make and drawers to build and fit. Rough Dimensions are 1.5m x 1m, I think I can work around the bench being too deep for some things and it'll be more useful to have the extra depth so I can setup my Mitre saw and smaller power machines on the back edge without getting in the way of the vice etc.

Anyway, some pics:

Main frame construction, 4" x 4" legs, with $"x 2" stretchers. The long stretchers are morticed and tennoned into the legs, the shorter stretchers have short tennons and will have coach bolts through. All glued together with cascemite. Melamine faced MDF panels are added bottom and sides to stiffen it all up a bit, with a divider in the middle as the space is going to be filled with drawers and three stretchers on top. Massively over-strong I think, but I'm only building it once and didn't want any weak spots!
20170513 - DSC01238 - untitled.jpg by Paul Rockliffe, on Flickr

The right hand stretcher is off-set to allow the vice mechanics to be fitted in that space when the proper top goes on:
20170513 - DSC01239 - untitled.jpg by Paul Rockliffe, on Flickr

20170513 - DSC01237 - untitled.jpg by Paul Rockliffe, on Flickr

Foot detail; 4x M16 threaded rods to allow the feet to level the bench and adjust for rocking:
20170513 - DSC01240 - untitled.jpg by Paul Rockliffe, on Flickr

Temporary top is added. Will probably be ages before I put a proper top on, this will do for a while:
20170513 - DSC01241 - untitled.jpg by Paul Rockliffe, on Flickr

Vice fitted:
20170513 - DSC01243 - untitled.jpg by Paul Rockliffe, on Flickr

The vice is a Record 5 1/2 that I picked up on Gumtree a couple of years ago, I have a second that I'll used as a tail-vice, though I might hang it off this top ont he otherside in the short term, jsut to get it out of the way:
20170513 - DSC01242 - untitled.jpg by Paul Rockliffe, on Flickr

Yes that is a 2kg box of Midget Gems you can see in the background!

Questions:

* Anything in particular I should use to finish the pine with?
* How far to the left should the vice be, ie how much bench should stick past the vice?

All feedback gratefully received, if there anything obviously wrong etc please let me know, I've pretty much made this up as I went from whatever wood Travis Perkins had in stock, so I doubt it's close to perfect!

Thanks!
 
Back
Top