Yet another router table build - WIP - FINISHED

UKworkshop.co.uk

Help Support UKworkshop.co.uk:

This site may earn a commission from merchant affiliate links, including eBay, Amazon, and others.

Sawdust

Established Member
Joined
1 Nov 2005
Messages
470
Reaction score
0
Location
East Yorkshire
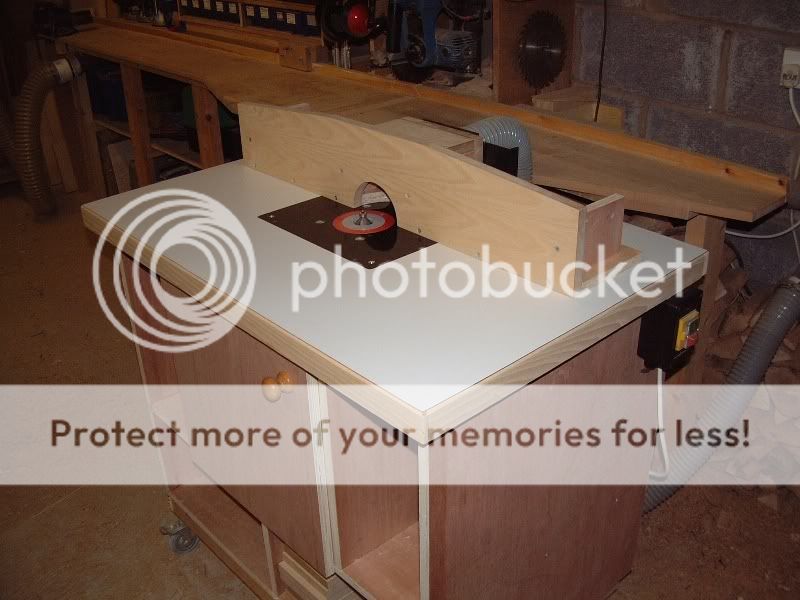
Just in case you haven't seen enough router tables under construction - here's mine to add to the list!

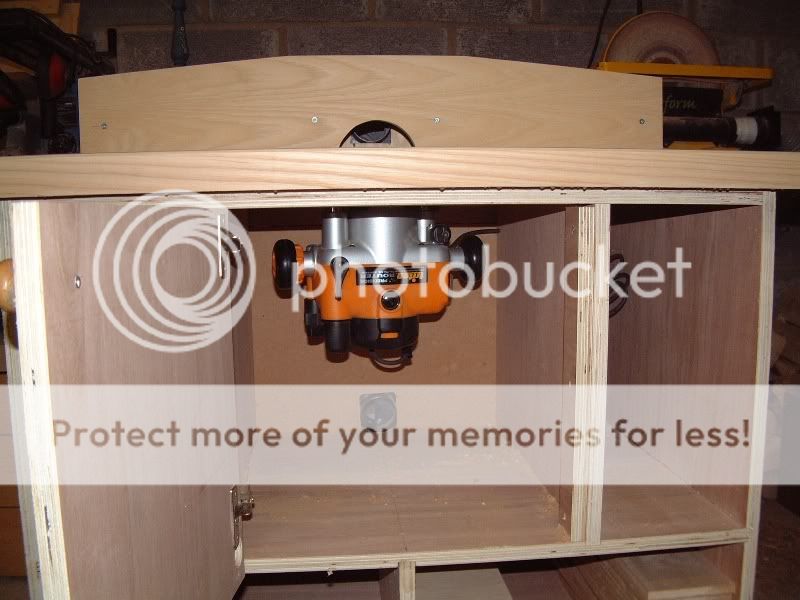
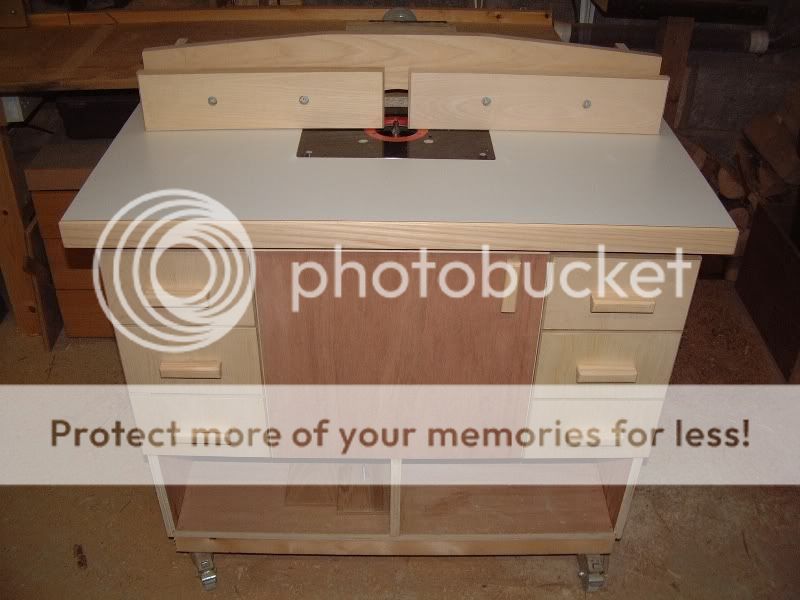
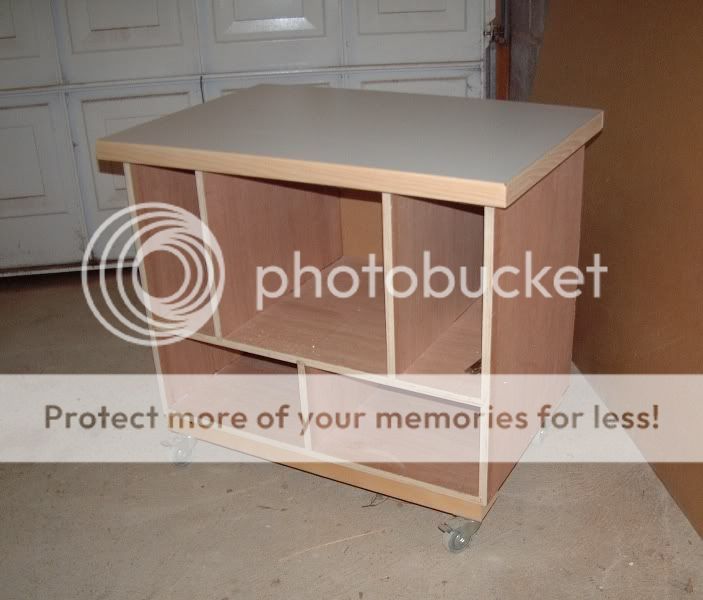
I build the cabinet over the weekend, it's all 3/4 inch ply, simply glued and screwed. The top is three sheets of 1/2 MDF glued together, edged with some ash left over from a previous project and laminated with white formica.

I was a bit worried about the wheels having tried them on my planer but I think that having a wider and deeper base makes the router table much more stable. It moves easily but is nice and solid when the wheels are locked.

pic1.jpg


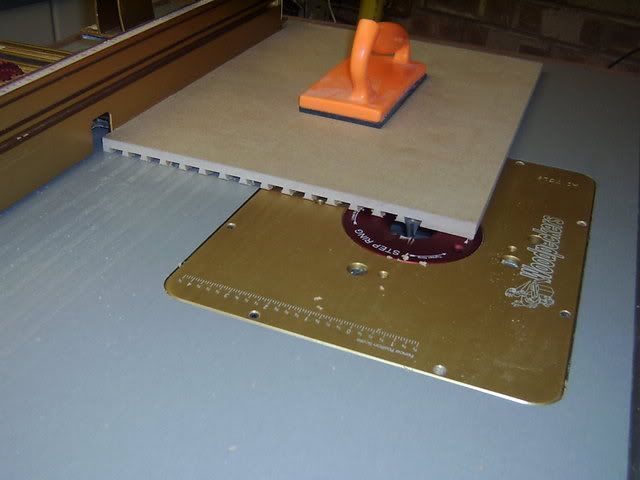
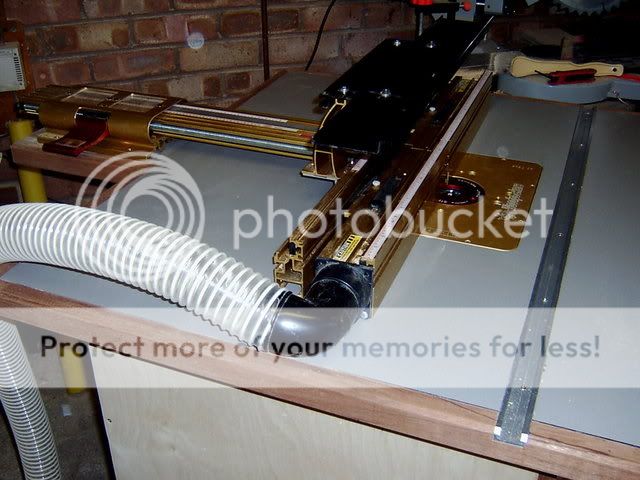
The plate and a few other bits and pieces are on order and I will post some pics when I get them fitted.

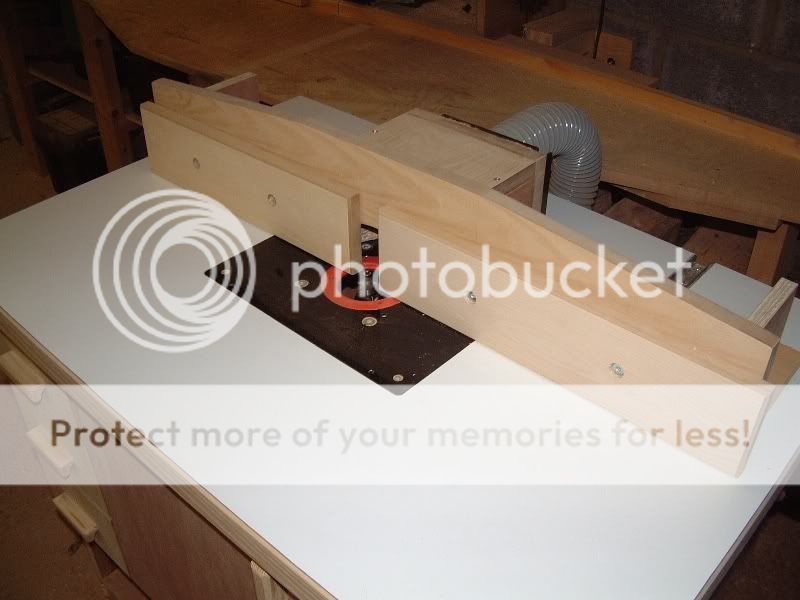
Tomorrow I will probably start on the fence.

Cheers
Mike
 
Looking good, Mike.
router tables certainly are flavour of the month - I've just come in from my workshop where I've been doing a bit of work on a replacement wing for my table saw for a router to live in...
Look forward to the next pictures.
 
Good to see another router table being made, its a lot more fun when you make your own. Keep us up to date with the pic's Mike.
 
Mike, did you buy the Formica or was it a spare piece, as its difficult to get in small pieces. Where did you get the wheels from and how much. I know nosy b***er :lol:
 
Shultzy":14auwset said:
Mike, did you buy the Formica or was it a spare piece, as its difficult to get in small pieces. Where did you get the wheels from and how much. I know nosy b***er :lol:

I bought a full sheet of Formica - 10feet by 4feet! I'm sure I will find a use for the rest of it in years to come. It's shame you're not closer or you could have had some.

I've had the wheels for ages and i think they came from screwfix.

These http://www.screwfix.com/prods/35451/Iro ... -40kg-50mm are about as close as I can find now although the brake on mine is a bit different.

Cheers
Mike
 
Sawdust":3odq2bkp said:
Shultzy":3odq2bkp said:
Mike, did you buy the Formica or was it a spare piece, as its difficult to get in small pieces. Where did you get the wheels from and how much. I know nosy b***er :lol:

I bought a full sheet of Formica - 10feet by 4feet! I'm sure I will find a use for the rest of it in years to come. It's shame you're not closer or you could have had some.

I've had the wheels for ages and i think they came from screwfix.

These http://www.screwfix.com/prods/35451/Iro ... -40kg-50mm are about as close as I can find now although the brake on mine is a bit different.

Cheers
Mike

Mike,

Where did you get it from ? I may need some for my table build as the kitchen top I've bought seems to be slightly dished

cheers

paul
 
Mighty_Genghis":1vmwmuqo said:
Sawdust":1vmwmuqo said:
Shultzy":1vmwmuqo said:
Mike, did you buy the Formica or was it a spare piece, as its difficult to get in small pieces. Where did you get the wheels from and how much. I know nosy b***er :lol:

I bought a full sheet of Formica - 10feet by 4feet! I'm sure I will find a use for the rest of it in years to come. It's shame you're not closer or you could have had some.

I've had the wheels for ages and i think they came from screwfix.

These http://www.screwfix.com/prods/35451/Iro ... -40kg-50mm are about as close as I can find now although the brake on mine is a bit different.

Cheers
Mike

Mike,

Where did you get it from ? I may need some for my table build as the kitchen top I've bought seems to be slightly dished

cheers

paul

I get all my sheet material from a local timber supplier in Driffield but I think they get it from Arnold Laver in Hull.

I think Arnold Laver have places all over so they may be able to help.

Cheers
Mike
 
stewart":ve48qsax said:
...router tables certainly are flavour of the month...

They certainly are. A woodworker's "rite of passage" project used to be a workbench but it seems that it's now a router table. Must be a sign of the times.

Mike
 
This seems to be catching on like the box-making or plane-buying addiction - watch ou for that slope! :)

Must be something to do with B&Q and the Triton router - I bet you've got one, haven't you! :wink:

It's coming along very nicely. Pleased to see you used layers of MDF for the top to prevent cupping or distortion.
 
OPJ":4rx3lip3 said:
Must be something to do with B&Q and the Triton router - I bet you've got one, haven't you! :wink:.

Yes, I picked one up for £98 a couple of weeks ago

Cheers
Mike
 
I've got a bit further with it so here are a couple more pics

pic2.jpg


Router plate fitted and the fence in position. The wiring is done and the dust extraction is in place. Next to do is fit the track for the fence to run in. Hopefully I will get that done tomorrow night.

pic3.jpg


The router inside its box. Please excuse the glue drips, I hadn't noticed them but the flash has really picked them out. Also the top isn't really bowed - my camera is rubbish at wide angle shots.

With the door closed it's amazing how much quieter the router is.

Any comments are welcome and I will post more pics when I get a bit further on.

Cheers
Mike
 
Good progress

Just a comment on dust extraction. You say quite rightly your machine is quieter because it's in a fairly air tight box so you may need to be aware of overheating the router.
One of the ways to improve airflow is to put holes in the door at low/high level to create airflow across the floor and so carry the dust coming down away. I also welcome others experience on this.

Alan
 
I like the fence and the design overall. I would also consider adding some 'air holes' in there somewhere, just incase. Not that I can recall seeing too many others do it though...?

With regards to the smaller hose inside the cabinet, great idea but, another tip I've picked up from various sources is to deign the base so that it slopes back towards the extraction hose, improving efficiency of the dust clearence. It might be a little late for you to try that now, but you could try making a removal piece - say, a piece of ply with several firring fixed pieces below?

You could also try bevelling the sides (more firrings) so that it runs centrally down to the shute and doesn't get stuck down the sides. :)
 
This is how I done mine

incra018.jpg


Takes away the dust fine, having said that I only use that extraction port when I cut dado's/grooves and dovetails or box joints, like this

cup002.jpg


If I am shaping or planing I use the fence extraction

incra019.jpg


Never had any problems with overheating
 
Hi Mike,

That's looking good. I have just been sorting the rear extraction port on my table tonight. I'm yet to try it out as the door isn't made yet. One thing I have thinking about is whether to remove the existing perspex guard/ dust extraction port. I did wonder if the best solution would be to pipe direct. However, when using it freehand I decided it wasn't that effective. Have others removed the perspex - I figure if it's left there it may build chips/dust up on the ledges?

Cheers
David
 
DavidE":xno95sqj said:
. Have others removed the perspex - I figure if it's left there it may build chips/dust up on the ledges?

Cheers
David
Hi David, I have removed the perspex and it doesn't seem to affect the extraction, I removed it to make it easier to fix some clamps to clamp it all to the Table top.
 
Thanks for the points about ventilation, I was planning to put a hole in the door at some stage and I'm also going to build a funnel type arrangement inside to help guide the chips towards the port.

As for the built in perspex dust extraction port and guards - I removed them all as when the machine was upside down they look like a good way of catching all the bits that fall down.

I never intend to take the router out of the table, partly because I have other routers (4 in total - Does that make me a collector? :oops: ) and partly because I didn't like the Triton all that much hand held as it felt a bit top heavy. In the table it's great so that is where it will stay.

I didn't get anything done tonight as I had other things to do but will get the fence rails fitted over the weekend and post some more pics.

Cheers
Mike
 
I got it finished over the wekend so here are a couple more pics.

Any comments or questions welcome.

The first pic shows it with all the drawers fitted; the top two are bit trays and the others just drawers. I can't see me needing more than two bit trays but if I do I will convert the drawers.

pic4.jpg


The next pic shows the fence. I used T-track to allow it to slide and also made the two fence faces (if that's the right word) adjustable to accomodate various bit diameters..

pic5.jpg


I used the table to make the drawers and drawer handles and it is a dream to use.

Thanks for looking
Cheers
Mike
 
Very nice work. You might consider cutting 45 deg. angles to the ends of the adjustable fences to allow closer settings to the bit. With a nice flat surface of a router table, it can become an assy table with the use of a sheet of hardboard placed to protect the surface of the table. A little more table top overhang provides a good area for clamps to hold featherboards. In my own case, drawers for bit storage was a source of frustration for me when trying to find a specific bit so I attached a end cupboard with a piano hinge to the end of my router table with the rows of bits set at an angle for ease of removal & replacement.

Lee

Bit_Storage.jpg
[/img]
 
Back
Top