WIP Understairs Pull Out Drawers

UKworkshop.co.uk

Help Support UKworkshop.co.uk:

This site may earn a commission from merchant affiliate links, including eBay, Amazon, and others.

Sharpy86

Member
Joined
23 Apr 2014
Messages
12
Reaction score
0
Location
Essex
Hi all,

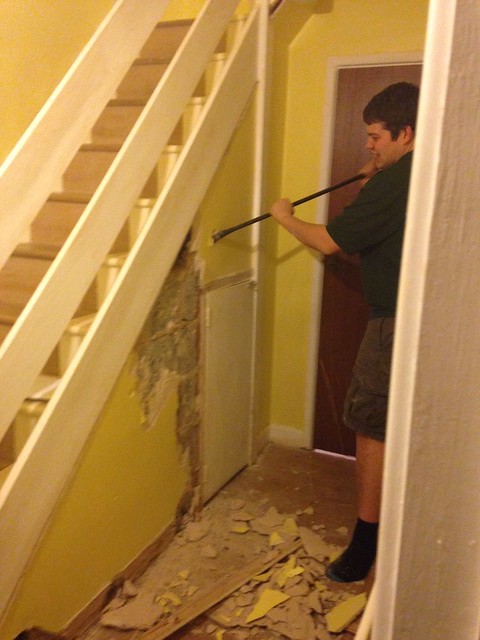
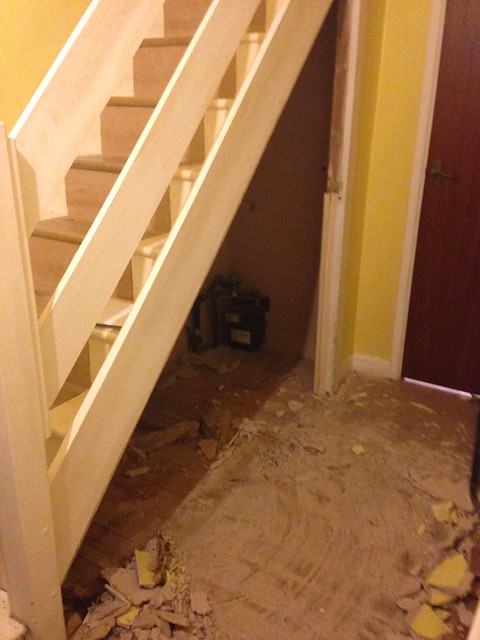
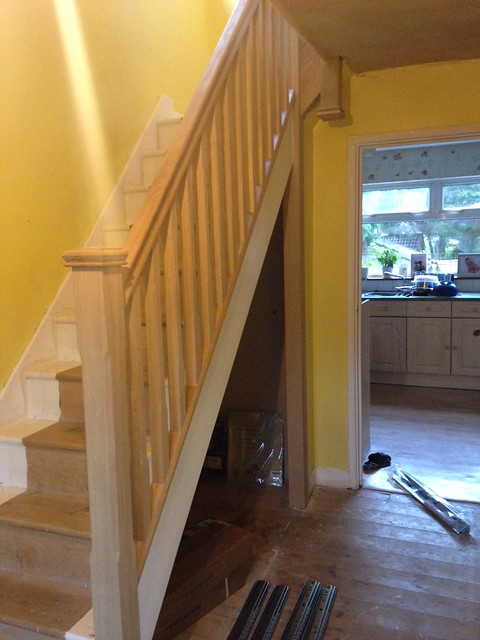
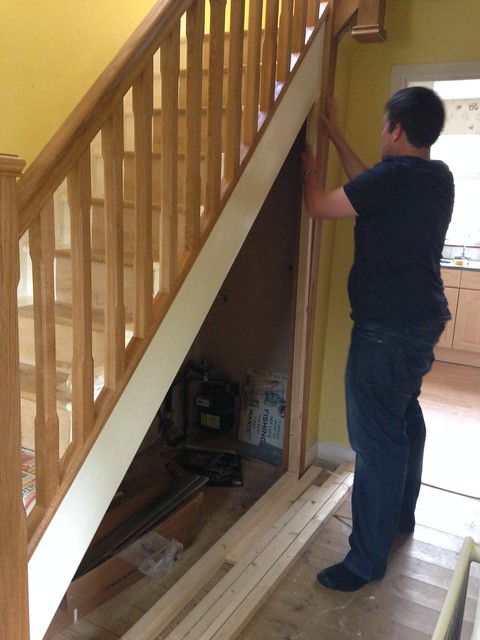
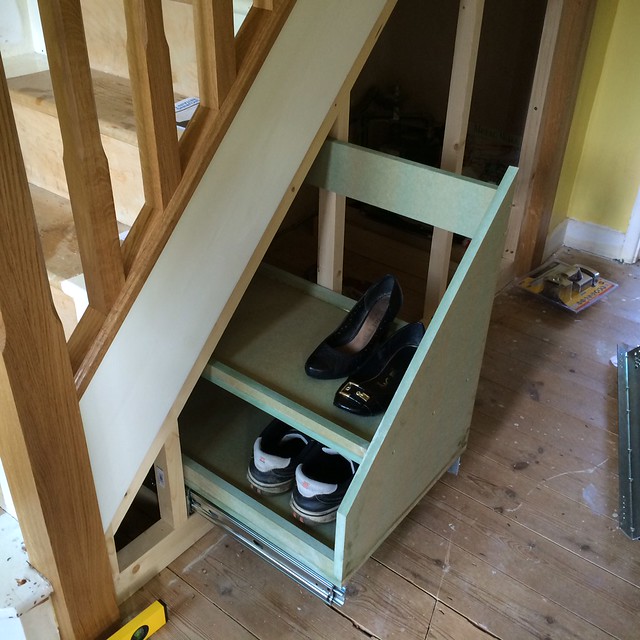
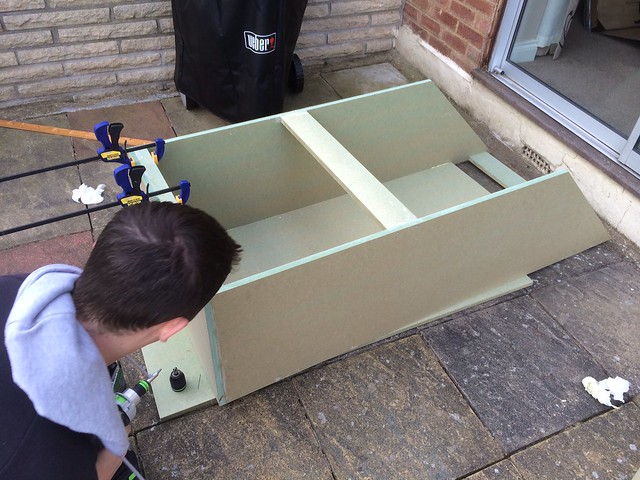
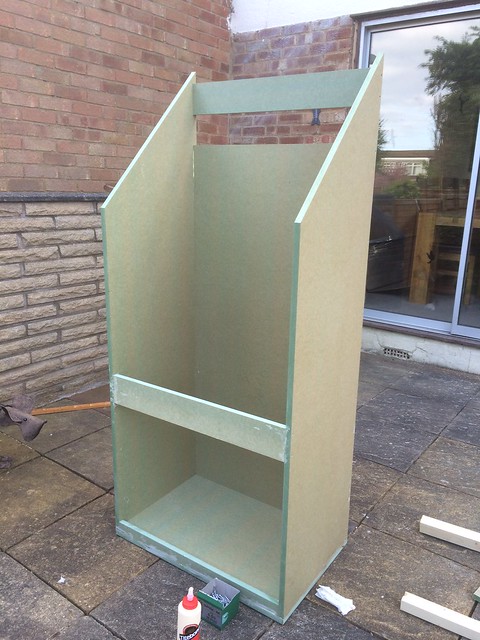
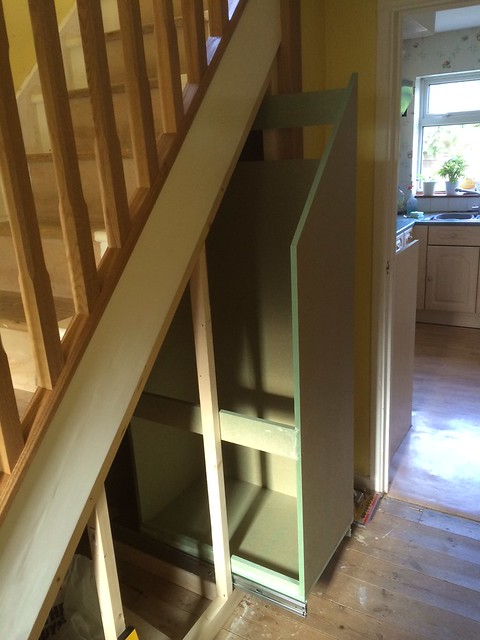
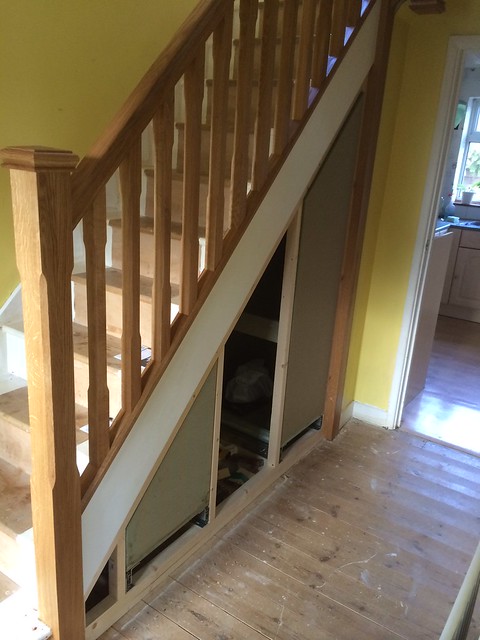
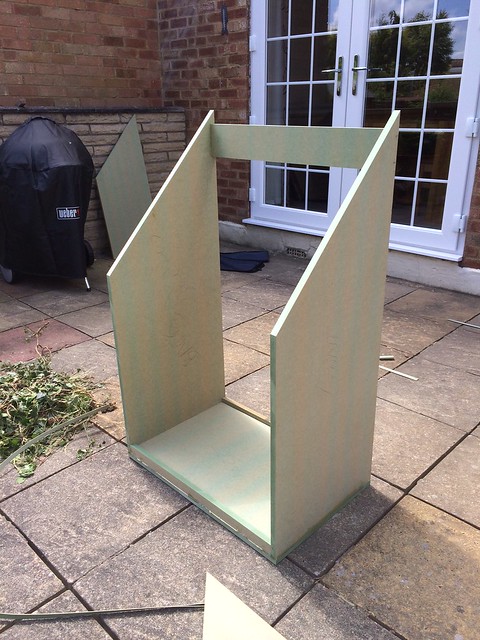
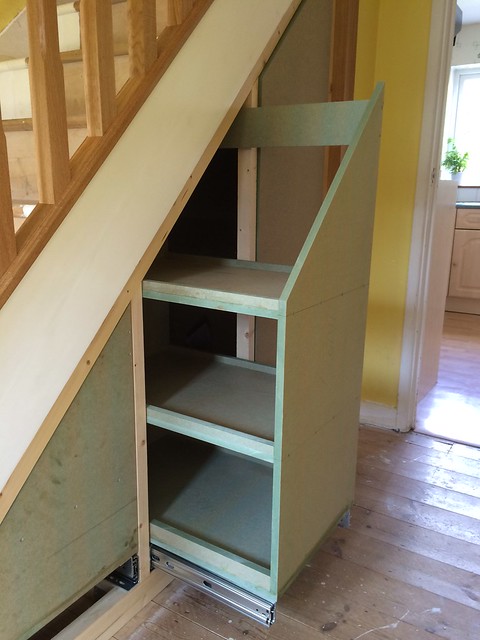
I've been working on this storage for about a month now, on and off, and thought I would share a mini blog on its progress so far. I've enjoyed reading others, and am always amazed at the quality of what I see. Hopefully by sharing this, I can learn new ways and methods from some of your replies.

Woodworking Background
I studied 'Restistant Materials' at School - which is basically woodwork with a little bit of plastic work thrown in also. My GCSE project was a disaster, and ended up as a pile of scrapwood in a tray - somehow I still managed to get a 'B'.

I don't think I ever really touched a piece of wood again until 2012 when my wife and I purchased our first home. The house was (is) in a big mess, and needed a lot of work. Our first task was to replace the bathroom - which was leaking into the kitchen. With the encouragement and (massive amounts of) help of my brothers, and a friend that could tile we did everything from moving pipes, installing a new shower, new suite etc. It was at this point that my confidence in DIY grew, and I realised that certain tasks I could do myself, and enjoy, rather than bringing in the professionals.

The next room to tackle was the lounge diner - spending all evening cooped up in the bedroom, eating, watching TV soon grew tiresome, so we needed somewhere to spend some time and chill out. After removing the old wall paper, it was clear that the walls werent in the best of condition. and would need a skim. So after removing the old skirting, architrave and coving, the plasterer was in. Fitting the new (mdf) skirting / architrave was my first attempt at anything to do with wood. After careful planning and research it managed to go pretty well, and i'm still very pleased with how it looks. The Evolution mitre saw, whilst not entirely accurate really helped me get the results I was looking for.

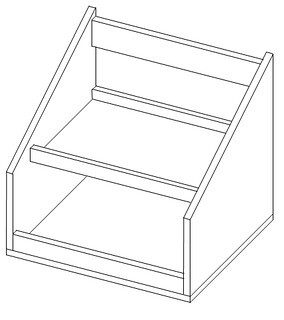
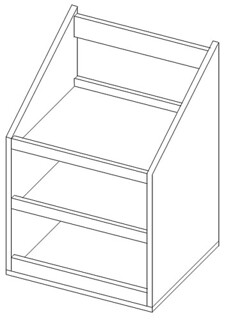
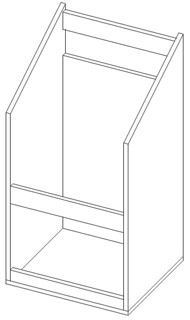
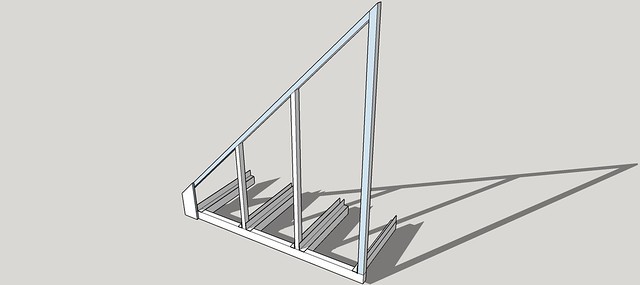
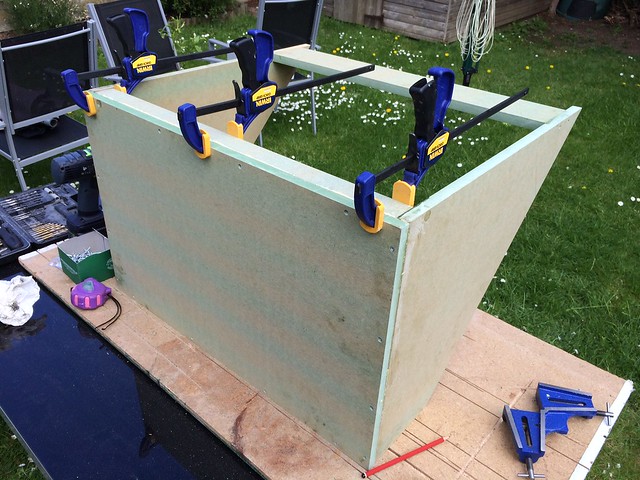
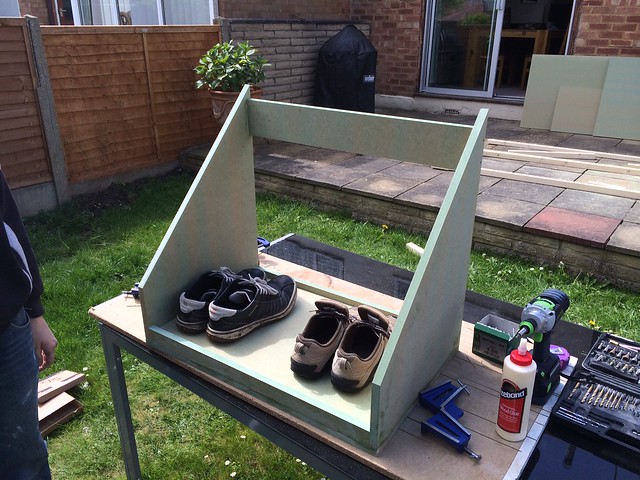
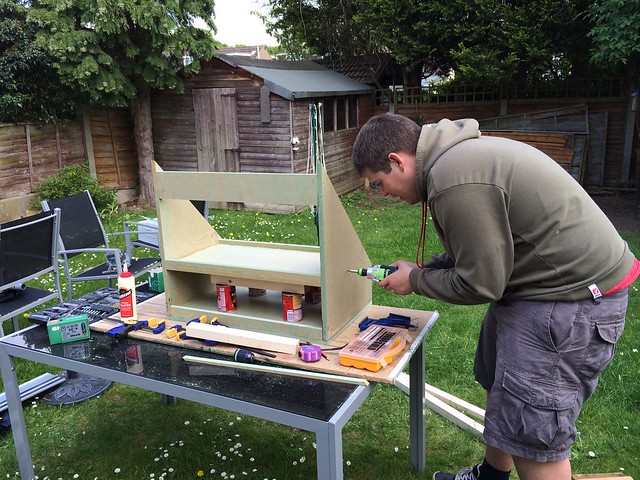
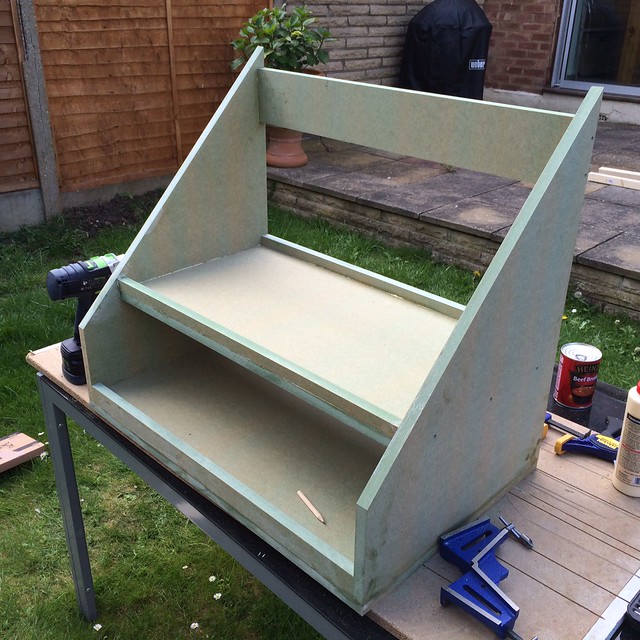
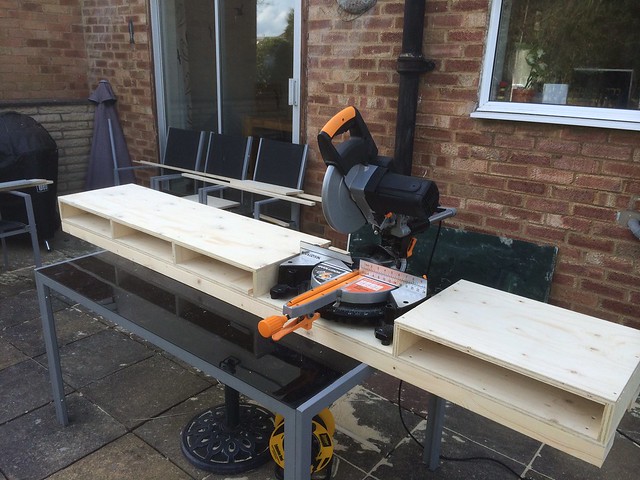
After doing the same procedure in the bedroom, the next project I undertook was creating a table for the mitre saw - just to make it that much more easier to use. I don't have a lot of pictures, but here is the finished result:
14300929531_6c605711c0_z_d.jpg


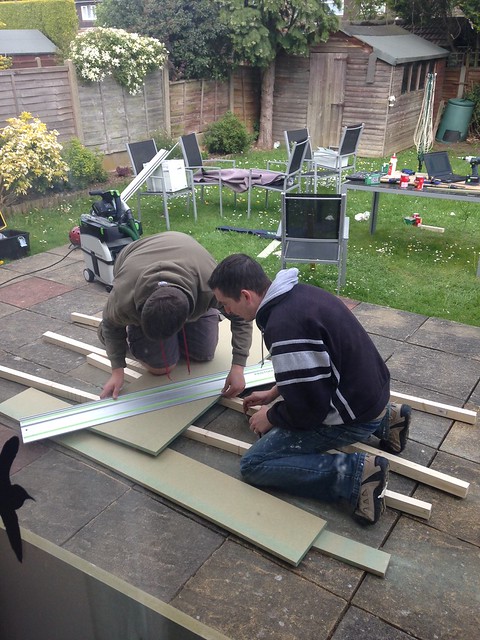
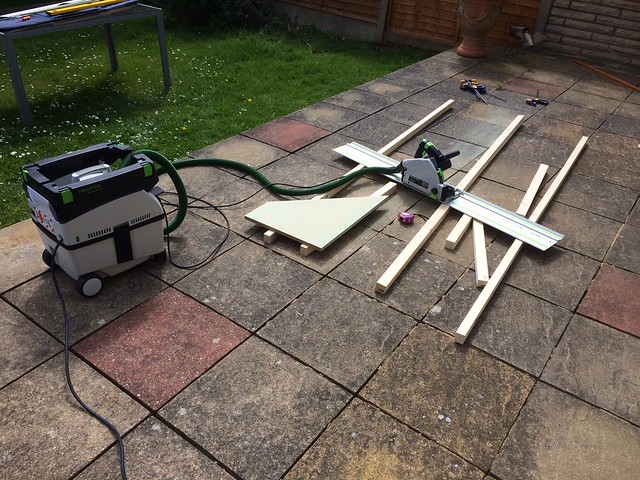
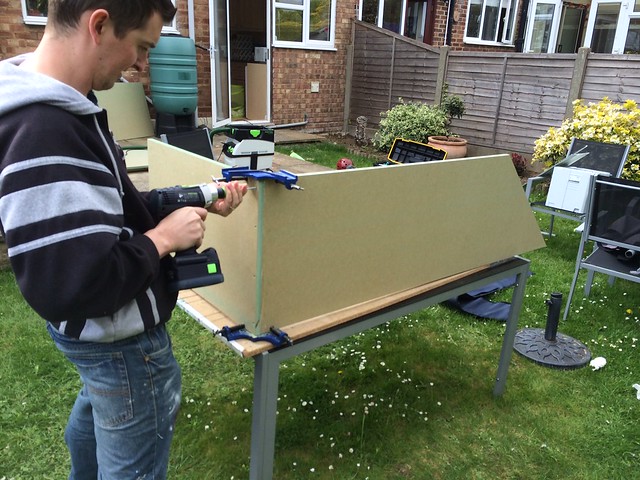
My real project that I am working towards is a Cedar Strip Canoe - i've done a lot of research on it so far, and other than having the time, or space in the garage to do it, i'm pretty much ready to start. In preparation for the Canoe, I have been buying a few powertools over the last year - a Jigsaw and a RO Sander were one of the first purchases. Having a very understanding wife, and a very strong philosophy of buying once, buying right, I decided to head down the festool route. My other really bad habbit (OCD?) is that I like to have things matching. So once I had got the Festool ETS 150 and the Carvex 420, I couldn't choose any other brand for my replacement drill, circular saw and extractor. I know they are all massively OTT for my needs, but I enjoy using them, and will hopefully last me for a lifetime.
 
Planning / Preparation / Research
One of my real talents (?) is that before I do, buy or make anything, I like to do as much research on it before starting - and making the under stairs storage was no exception.

After initially planning on making a large cupboard with double opening doors, I thought it would be really good to have some sort of pull out shoe rack in the bottom corner under the stairs, which usually collects stuff that is never seen again. I set out to see what I could find on the internet that was already out there. One of the first websites I came across, and where my inspiration for the whole project has since come from is Avar Furniture. I decided that the best use of space, was to create 3 seaparate drawers, one for shoes, one for general storage, and one for hanging coats.

One of the first challenges I had come across was the fact that my fuse box, electric and gas meters are all under the stairs. So whatever I made, had to still give me access to all 3 easily. In the pictures I saw on Avar Furniture, I could see that each drawer was inside it's own carcase. This wasn't going to be possible in my project, as it would cut off access to said meters / fuse box. I would therefore need to mount what ever runners i bought, from beneath, and all 3 would need to be able to disconnect so I could remove the drawers themself to gain access behind. I decided to go with the Accuride 7957 slides, along with the 634xx optional brackets to mount the drawers how I needed. They have a maximum load rating of 160kg fully extended, so perfect for the heavy drawers which I decided would be made from 18mm MR MDF. The also have a front disconnect feature, which means that the drawers could be removed easily when needed.

My first task was to plan how the drawers would be fitted together, so with nothing else at my finger tips, I came up with the following using MS Powerpoint:

Small
14304458705_2f3357aca4_n_d.jpg


Medium
14301122291_cef95fe6fe_n_d.jpg


Large
14117841460_e589ce976a_n_d.jpg


I would be fixing with PVA (Titebond Original) and SPAX MDF Screws.

My next task was to plan what the framework would look like. I decided that I needed something for each drawer to close up to. At this point I had discovered sketch-up, and with a bit of playing around, I came up with this:
14118149219_c626a024a2_z_d.jpg


I think I had done everything I could at this point, so next up was cutting the MDF panels
 
Further Prep I forgot about
Before I could start anything, I had to remove what was there before. A block wall, with a small door giving access under the stairs
You can probably see what's wrong with the storage offering before:
14301707991_c2433e95bb_z_d.jpg


All out, note the white planked staircase
14118428410_1ea1d4d36c_z_d.jpg


I had a carpenter in to replace all the stairbalustrade with Oak Stop chamfered - I'm certainly not confident enough to do this myself - something's are left to the professionals!
14305053625_fd8e3a027b_z_d.jpg


Friday 18th April
Today was the day that I made the framework.
With the use of my new bevel gauge and the new Mitre saw table, I was able to put something together pretty well. One of the uprights is not completely vertical - when skew screwing, it pulled the bottom in a little, and out of square. However, I planned to have enough tolerances in the drawers that it wouldn't affect anything. I hope!

14304484094_18f360f14f_z_d.jpg


14118519137_3e6d47da0d_z_d.jpg


14118423740_784d7924dc_z_d.jpg


I also made a start on the slides. Cutting 6 pieces (well 12) of softwood to the same length using my mitre saw stand was easy.
The reason for twice the amount was because of the size of the wood I picked up from one of the sheds. I wanted the bottom of the drawer to be at least 70mm off the floor. This would allow enough room for at least a 50mm plinth at the bottom, plus thickness of the wooden floor I will be laying after everything else is finished. It worked out cheaper for me to pick up packs of 6 of 44mm and 35mm.

After gluing the pieces together, to make something that was 79mm thick, I offered a pair up, with the slides resting on top. Note, you can probably see how the 634xx brackets have been used - 2 on each slide, so that I can bottom mount each drawer.
14118369379_222ae2a3e3_z_d.jpg


I decided that I wouldn't fix the slides down until the drawers were made. I was concerned that they wouldn't line up properly if I screwed down too early! I could then make the drawers, and adjust the wooden supports until the drawers fit flush with the framework.
 
Saturday 3rd May
Today was when I started work on the drawers.
My friend had borrowed a van from his work, so that we could pick up the MDF - 3 sheets of 18mm, 1 sheet of 12mm, 1 sheet of 6mm.

The 3 sheets of 18 was for the construction of the drawers.
The 12mm is for the front of each drawer - a bit like how a kitchen drawer has a front on.
The 6mm will be used to create the appearance of shaker style floating panel - Yes I know its cheating!!

Here is the cutting list I knocked up in Sketchup. Note the dimensions were estimates only. I took measurements before each cut.
14118855018_d99747fdff_z_d.jpg


I decided that it would be best to start with the smallest drawer - if anything goes wrong, I haven't wasted more than I needed to

We cut the base of the smallest drawer first, and put it in place
14118400309_58f9a45703_z_d.jpg


After measuring the height of both verticals, cut the front piece of the drawer
14118402369_be7a2cd6b1_z_d.jpg


14118398189_bd892d795a_z_d.jpg


Once cut, we offered it up, and if needed make an adjustment. Thankfully we measured pretty well and along with the accuracy of the TS55 and guide rail, it fitted perfectly, with a 5mm gap around the edges. Note that the rails are not level, and the left hand one would need lifting slightly. This bought the front in square to the framework.
14281939536_41aa08aed7_z_d.jpg


After cutting the back to the same specification, and the support bar along the top, we fitted together and offered it up - looks good so far! I used some right angle clamps to hold the front and back in place with the base, predrilled 4 holes on each, glued and screwed. You can see the clamps in use later.

14325260853_4e292de120_z_d.jpg


I then fitted the bottom edge strip's to the sides of the drawer. After considering how I would fix the drawer to the slide brackets, I decided that the 18mm thickness wouldn't be enough to hold the heavy drawers in place. So would cut an 'insert' piece that would drop in place on the bottom to effectively double the thickness to 36mm. This meant that the bottom edge strips would need to be an additional 18mm deep to allow a consistent edge internally.
14118421288_da435235d7_z_d.jpg


After both edge strips were fitted, a test run with our shoes was required :p
14118448990_1aca822ed7_z_d.jpg


Next up was to make the shelf. I wanted just enough room on the bottom to get shoes in/out easily, but to allow for the widest shelf I could get. It turned out that the height of the shelf should be exactly the same height as a tin of soup and a piece of leftover wood.
14118447160_8ea2d98823_z_d.jpg


First drawer completed, it has gone swimmingly well so far, and both of us are very impressed with our fine efforts!
14118389039_4c8c85a71d_z_d.jpg


Offered up in place on the runners (Nothing secure yet). Brilliant!! It fits, and it holds shoes!
14118387749_804ee88e94_z_d.jpg
 
Saturday 3rd May - Cont
After celebrating the success of the first drawer with a spot of lunch (it was about 3pm by this point though!) and some tea, we set out with our new found confidence to make the largest of the 3 drawers, which will ultimately hold coats by means of hooks.

With time running out, the largest drawer required less cutting, and fiddling around with than the middle one. I don't have a whole lot of photos of this one, but here are a few. Note the use of the right angled clamps - they were really handy to hold everything square when drilling and screwing.
14325251343_e300b846fa_z_d.jpg


Almost done, just fitting the bottom edge.
14303156112_45902a176f_z_d.jpg


2nd drawer completed
14118524487_1a8d6fdf8b_z_d.jpg


Offered up in place
14118405678_75e611ba5c_z_d.jpg


A good days work
14118377989_229118a001_z_d.jpg
 
Saturday 24th May
With my friend back over, our aim of the day was to make the middle drawer. However, heavy rain put a stop to building anything outside, so we decided to try and get the smallest drawer secured and level.

The floor under the stairs slopped in from the wall, which meant that we would need to plane off around 4mm off the back of each supporting piece of wood. After a few attempts, we slowly took off enough wood to get each piece level front to back.

The next step was to get each level horizontally. The left bracket was about 2-3mm lower than the one on the right, so I needed something hard that wouldn't compress - like a scrap peice of metal. 2 pence peices worked a treat. I would need to raise the height of the left by 2 x 2p's. So I superglued pairs together, and then glued a number to the bottom of the wood.

After making sure that each bracket was square with the front of the frame, and parallel with each other (which took a number of attempts), I fixed down each piece of wood with L brackets to the floor. The slides were then fixed down, parallel with each other to the tops of each peice of wood.

Hopefully this video works, and shows the action of the drawer. Very pleased.
http://www.youtube.com/watch?v=xSfy2cyb ... e=youtu.be
 
Niceloking job :) Just one quick question, how do you inted to get to the gas valve quickly if neededwhen the end draw unit is full of stuff?
 
Can you actually still operate the Emergency control valve to its fully off position ???
 
Good work! We've got exactly the same thing here except with no under stairs storage at all! Just solid brick under the stairs. That's surely a project for this winter...
 
riclepp":2uluyztd said:
Niceloking job :) Just one quick question, how do you inted to get to the gas valve quickly if neededwhen the end draw unit is full of stuff?


+1 :?:

Also, the meter reader is going to love you :lol:
 
MMUK":2274gv3m said:
riclepp":2274gv3m said:
Niceloking job :) Just one quick question, how do you inted to get to the gas valve quickly if neededwhen the end draw unit is full of stuff?


+1 :?:

Also, the meter reader is going to love you :lol:


Never mind the meter reader what about the poor tech that has to change the meter (me for instance)
 
Hi Sharpy, read your posts with interest I think you are doing well on your under stair project. Workmanship looks OK and you have obviously given the project a lot of thought. Keep up the good work.

Regards Mike B
 
MMUK":2ertncad said:
riclepp":2ertncad said:
Niceloking job :) Just one quick question, how do you inted to get to the gas valve quickly if neededwhen the end draw unit is full of stuff?


+1 :?:

Also, the meter reader is going to love you :lol:

He does mention earlier in the thread that the slides he chose have a quick release at the front so the drawers are easily removable. I would think the meter access is probably easier than through that little door he had previously...
 
Thanks for the comments all, its turning out better than I ever expected! Let's hope I can finish it well.

As for the gas valve, I will ensure that it is still able to be turned fully off when I fit the rails for the largest drawer.

If I needed to get to the valve in an emergency, I plan to access by removing the middle drawer (its a couple of levers to disconnect the drawer), and then pulling the largest drawer out to its full extent.
The largest drawer is going to be too heavy / big / awkward to remove in a hurry. Since I'm also planning to purchase plastic storage boxes (which can be removed quickly) for storage on the shelves of the middle drawer, I don't think that the time to access the valve would be much longer than via a small cupboard door, with a disorganised mess of old hoovers / boxes of junk that most people use their understairs cupboards for.

However, I also don't know when I would ever use the emergency gas valve? The gas is only used on the boiler which is upstairs. And if i ever thought there was something seriously wrong with the boilier, i'd be getting my wife and I out the house rather than turning the gas off!
 
Here are a couple of photos of the middle drawer that I made last week

14313698006_5b097ff268_z_d.jpg


14150338397_f70eba5e57_z_d.jpg


Still need to fix down and level the middle and largest drawer, make and fit the drawer fronts, and paint.

I was planning to use Sikkens Rubbol BL Primer and BL Satura paint for finishing, painted by hand. I would love to get them sprayed for a perfect, but can't really justify spending any more - the slides and brackets alone cost me £350.

Does anyone have any other suggestions for finishing? I've painted the skirting / architrave around the house in white satinwood, so want these to match.
 
sounds fine to me! really looking forward to the finished pictures, this is basically exactly what i want to do at my house, except i may make the last draw an actual door to hide all my av equipment such as amp blueray player and media PC. your above post also clears up how i will access the back of all the equipment, I can remove the middle draw and use it for access
 
also one useful feature you could put into one of the draws is a wine rack, under stairs spaces are usually quite good for keeping bottles cool and easy access from the kitchen
 
Back
Top