I've had a few bottles of Titebond liquid hide glue. The first one had no date on and lasted several years. Later bottles have had dates on, but the glue has been fine long after the expiry date. I've read that a good test is just to put some between finger and thumb and see how sticky it gets. I reckon a better test would be to glue two bits of scrap together and wait 24 hours. If it works, it's good.
You are using an out of date browser. It may not display this or other websites correctly.
You should upgrade or use an alternative browser.
You should upgrade or use an alternative browser.
WIP: a Smoker's bow
- Thread starter Sheffield Tony
- Start date


Help Support UKworkshop.co.uk:
This site may earn a commission from merchant affiliate
links, including eBay, Amazon, and others.
StarGazer
Established Member
Good to see an update, interesting to see you working on the top before fixing up the legs and stretchers.
disco_monkey79
Established Member
- Joined
- 5 Oct 2009
- Messages
- 677
- Reaction score
- 42
That's coming along lovely.
Sheffield Tony
Ghost of the disenchanted
Got a chance to do a bit more on Saturday. Stargazer spotted that it is unusual to be working on the top part of the chair before sorting out the undercarriage. I think I mentioned part of the reason earlier, which is that I wanted to do all the drilling in the seat and arm bow before shaping them, so I had a nice flat surface for sight lines and to stand my square / sliding bevel on for checking the angles. But what I forgot to mention is that I did drill the leg sockets in the underside of the seat at the same time as I did the holes in the top side for the back spindles. The method is just the same though, with brace and bit and sightlines for alignment.
What I hadn't done is drilling for the stretchers. Again Jack Hill's book gives partial information about these angles, and I didn't want to trust them blindly, so I checked them in two ways. First by a fair bit of trigonometry; knowing the orientation of the sight lines for the legs, and the angle and position of the leg sockets in the seat, it is not too complicated to work out the lengths of the stretchers and the required angles. But I didn't trust my maths completely ... so I found a simple way. Assemble the seat and the legs, mark on the legs the height where the stretchers will go. Then place a large elastic band around the legs at that height, measuring the angles between the centreline of each leg, and the rubber band using a combination square. Amazingly this all agreed, so we can start drilling !
One more useful tool is a Mike Abbott style centre finder:

By sitting the bird's mouth over a spindle, the nail can be stuck lightly to make a starting centre for the drill nicely in the middle of the leg.
Here I let my purist approach slip. Although sharp, the augur was just too brutal for boring into the legs. The combination of the angle of the hole and the convex shape of the leg meant that the spur didn't scribe a nice circle, and the risk of splintering around the entry of the hole was too great. A forstner bit makes a much cleaner hole, and the cordless drill was to hand. I still regret it a bit though. It is the only point at which I've reached for a power tool, and I could have used a breast drill maybe. Oh well, it's done now. A couple of V blocks help to hold the leg down, whilst again using the pair of squares to judge alignment:

Another trial fitting, and measuring to check the drilling angles for the lateral stretchers, then the final trial fitting:

You'll spot that in the intervening time I've scooped out the seat a bit, using the outline of my backside I drew on earlier in white pencil. Jack Hill says "by any safe method", I was going to rough out some of the waste with a really heavy Henry Taylor sculpure gouge, but it seemed a very noisy and energetic process, so I used my homemade travisher again. The travisher is a somehow very theraputic tool to use. At the same time I rounded and lightened up the arm bow with spokeshaves, Iwasaki rasp and card scrapers.
Now comes the stage I really love. The assembly. After days (months more like) of shaping parts, in the space of an hour it becomes a chair ! This particular assembly was a novelty for me, because glue was involved. My previous 2 chairs were made from green wood, and needed no glue, just the drying shrinkage to hold them together. In this case I had planned to use Titebond liquid hide glue for the longer open time. Andy's suggestion of testing if my open bottle was still OK by gluing a couple of bits of scrap together seemed like a good idea, but my glue failed an even simpler test - is it still liquid ? So I used Titebond 3 instead. This made for a frantic hour. Assembling the seat/arm bow/back spindles very nearly caught me out; the joints were a good snug fit, but after applying water based glue to all 32 surfaces, the spindles began to swell, and it was more than snug ! A good bit of wrestling and persuasion with a big mallet was needed, but here's where I'm at now:

It's a shame about the fuzzy picture, but it had gone dark by now. The old blanket, incidentally, was to allow me to work on the floor without getting scratches from grit all over the seat whilst assembling the legs and stretchers. Learned the hard way on a previous job.
What I hadn't done is drilling for the stretchers. Again Jack Hill's book gives partial information about these angles, and I didn't want to trust them blindly, so I checked them in two ways. First by a fair bit of trigonometry; knowing the orientation of the sight lines for the legs, and the angle and position of the leg sockets in the seat, it is not too complicated to work out the lengths of the stretchers and the required angles. But I didn't trust my maths completely ... so I found a simple way. Assemble the seat and the legs, mark on the legs the height where the stretchers will go. Then place a large elastic band around the legs at that height, measuring the angles between the centreline of each leg, and the rubber band using a combination square. Amazingly this all agreed, so we can start drilling !
One more useful tool is a Mike Abbott style centre finder:
By sitting the bird's mouth over a spindle, the nail can be stuck lightly to make a starting centre for the drill nicely in the middle of the leg.
Here I let my purist approach slip. Although sharp, the augur was just too brutal for boring into the legs. The combination of the angle of the hole and the convex shape of the leg meant that the spur didn't scribe a nice circle, and the risk of splintering around the entry of the hole was too great. A forstner bit makes a much cleaner hole, and the cordless drill was to hand. I still regret it a bit though. It is the only point at which I've reached for a power tool, and I could have used a breast drill maybe. Oh well, it's done now. A couple of V blocks help to hold the leg down, whilst again using the pair of squares to judge alignment:
Another trial fitting, and measuring to check the drilling angles for the lateral stretchers, then the final trial fitting:
You'll spot that in the intervening time I've scooped out the seat a bit, using the outline of my backside I drew on earlier in white pencil. Jack Hill says "by any safe method", I was going to rough out some of the waste with a really heavy Henry Taylor sculpure gouge, but it seemed a very noisy and energetic process, so I used my homemade travisher again. The travisher is a somehow very theraputic tool to use. At the same time I rounded and lightened up the arm bow with spokeshaves, Iwasaki rasp and card scrapers.
Now comes the stage I really love. The assembly. After days (months more like) of shaping parts, in the space of an hour it becomes a chair ! This particular assembly was a novelty for me, because glue was involved. My previous 2 chairs were made from green wood, and needed no glue, just the drying shrinkage to hold them together. In this case I had planned to use Titebond liquid hide glue for the longer open time. Andy's suggestion of testing if my open bottle was still OK by gluing a couple of bits of scrap together seemed like a good idea, but my glue failed an even simpler test - is it still liquid ? So I used Titebond 3 instead. This made for a frantic hour. Assembling the seat/arm bow/back spindles very nearly caught me out; the joints were a good snug fit, but after applying water based glue to all 32 surfaces, the spindles began to swell, and it was more than snug ! A good bit of wrestling and persuasion with a big mallet was needed, but here's where I'm at now:
It's a shame about the fuzzy picture, but it had gone dark by now. The old blanket, incidentally, was to allow me to work on the floor without getting scratches from grit all over the seat whilst assembling the legs and stretchers. Learned the hard way on a previous job.
Attachments
xy mosian
Established Member
Wonderful. I'll bet you got a fantastic fealing the first time you sat in it. Suddenly all the time and effort involved so far makes sense and the remaining tasks seem, for the moment , trivial. Great job.
xe
xe
custard
Established Member
Sheffield Tony":sdch7eoo said:Now comes the stage I really love. The assembly. After days (months more like) of shaping parts, in the space of an hour it becomes a chair !
Excellent job, you must be delighted with that (I know I would be).
=D>
Racers
Established Member
- Joined
- 22 Apr 2005
- Messages
- 9,172
- Reaction score
- 132
Cracking job Tony!
I did the elastic band trick for the stretcher angles when making my oak stools it works very well.
 21st March by Racers, on Flickr
Pete
I did the elastic band trick for the stretcher angles when making my oak stools it works very well.
21st March by Racers, on FlickrPete
That's looking fantastic, Tony.
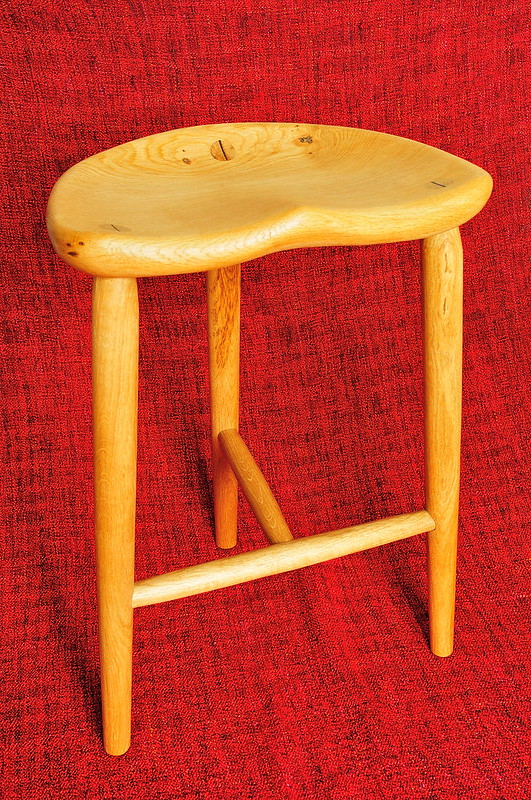
This picture

reminded me of this old bit-of-a-chair in our basement. I pulled it out of a skip years ago - it's worm eaten, abused and has been ham-fistedly stripped by someone with some very coarse sandpaper and little skill. I've not done anything with it - it just gets used to stand on. That aside, I think it's evidence that your chair is a) firmly in the tradition and b) more elegantly and decoratively made.

I sympathise about the forstner bit - did you manage to get any of the Clifton chairmaker's spoon bits before they disappeared from the market?
This picture
reminded me of this old bit-of-a-chair in our basement. I pulled it out of a skip years ago - it's worm eaten, abused and has been ham-fistedly stripped by someone with some very coarse sandpaper and little skill. I've not done anything with it - it just gets used to stand on. That aside, I think it's evidence that your chair is a) firmly in the tradition and b) more elegantly and decoratively made.
I sympathise about the forstner bit - did you manage to get any of the Clifton chairmaker's spoon bits before they disappeared from the market?
Sheffield Tony
Ghost of the disenchanted
Thanks folks. I am very much looking forward to seeing how the walnut looks with oil. This is where I usually rush the finishing and regret it. I was planning to use Danish oil, then homebrewed beeswax polish (FIL is a beekeper). Although the walnut I've played with before takes a nicer deep colour with linseed. But the legs would go alarmingly yellow, so would need to avoid them. I think I'll experiment with some offcuts. And yes xy, I did enjoy settling down into it. I find it very comfy, but as I made it to fit my bottom I suppose that is not surprising !
I thought for a moment I had invented that elastic band trick Pete. There's no such thing as a new idea, is there ?
That chair does look pretty similar Andy; it looks to me like the top parts might have been different though, the rectangular holes at the back of the seat suggest a lath back of sorts. I started making laths for the back of chair #4 the weekend before last ... it will be an ash lath back, in a more craft / greenwood style though.
The chairmaker's spoon bits can still be found if you know where to look. I've never tried one, maybe I should snap some up whilst I can still find them. Lee Valley do make a set too, but I don't know how easy it is to get them over here. But the cordless drill is pretty widely used amongst modern day "bodgers"; Mike Abbott has popularised using the Veritas tenon cutters in a cordless drill for his chair designs made with riven/shaved spindles.
Sheffield Tony
Ghost of the disenchanted
Last weekend I finished off this chair. 3 coats of Rustins Danish oil applied by cloth, then a couple of applications of the homemade beeswax polish - 2:2:1 beeswax, natural turpentine and linseed oil.
The aroma of turpentine has now faded enough for it to be allowed in the house !

The MAC Timbers walnut is brought back to life a bit by the oil and wax. One little niggle that will annoy me forever is the slight sticker stain on the seat. The slab of walnut was not thick enough to plane a lot away, and I had expected the seat shaping to remove most of it. And it did remove most, but not all of it. Non woodworkers don't seem to notice though.

In this light, some ripples still show on the seat from the travisher. I had thought I have spent enough time with the scraper to have removed them all, but I think I'll regard them as a feature, an indication of hand making :wink: In fact, I often grapple with the dilemma of how to finish things. Here I have deliberately NOT sanded the turned parts at all, they are a tooled finish straight from the pole lathe, burnished wih shavings, so as to keep a bit of the "greenwood" look, though you can't really see it here. I've also tried to keep a crisp edge to the seat hollowing which I like, so only limited sanding with abranet there.

Here it is in its new home. This is DS's "library corner"; he likes to sit here to read next to his books and with the good light from the conservatory. Should be more comfortable than the footstool he was using before !
So that's all. Well not quite all. AndyT has tempted me into buying some old stock Clico chairmaker's spoon bits. I now have them sitting on my bench, waiting to be tried out. And I also have the beginnings of Chair #4 - which will be a lath back chair - to try them out on. Coming soon ... ish :lol:
The aroma of turpentine has now faded enough for it to be allowed in the house !
The MAC Timbers walnut is brought back to life a bit by the oil and wax. One little niggle that will annoy me forever is the slight sticker stain on the seat. The slab of walnut was not thick enough to plane a lot away, and I had expected the seat shaping to remove most of it. And it did remove most, but not all of it. Non woodworkers don't seem to notice though.
In this light, some ripples still show on the seat from the travisher. I had thought I have spent enough time with the scraper to have removed them all, but I think I'll regard them as a feature, an indication of hand making :wink: In fact, I often grapple with the dilemma of how to finish things. Here I have deliberately NOT sanded the turned parts at all, they are a tooled finish straight from the pole lathe, burnished wih shavings, so as to keep a bit of the "greenwood" look, though you can't really see it here. I've also tried to keep a crisp edge to the seat hollowing which I like, so only limited sanding with abranet there.
Here it is in its new home. This is DS's "library corner"; he likes to sit here to read next to his books and with the good light from the conservatory. Should be more comfortable than the footstool he was using before !
So that's all. Well not quite all. AndyT has tempted me into buying some old stock Clico chairmaker's spoon bits. I now have them sitting on my bench, waiting to be tried out. And I also have the beginnings of Chair #4 - which will be a lath back chair - to try them out on. Coming soon ... ish :lol:
Attachments
Wow, that looks really lovely.
Sturdy, comfortable, beautiful. You should be very proud of that.
I especially like the symmetrical grain patterns on the ends of the arms.
=D> =D> =D>
And now you've spent out for the spoon bits, you'll HAVE to make some more chairs.
Sturdy, comfortable, beautiful. You should be very proud of that.
I especially like the symmetrical grain patterns on the ends of the arms.
=D> =D> =D>
And now you've spent out for the spoon bits, you'll HAVE to make some more chairs.
xy mosian
Established Member
Beautiful, splendid work.
xy
xy
More patience than me, Gunga Din. Beautiful. When you next make up some polish, although I know you like to keep things trad. get hold of some microcrystalline and some carnauba instead of beeswax. I've used beeswax for years, but find a mix of these two much better as it is harder and has a much higher melting point so doesn't mark so easily when handled.
Similar threads
- Replies
- 44
- Views
- 3K
- Replies
- 11
- Views
- 761
- Replies
- 2
- Views
- 481