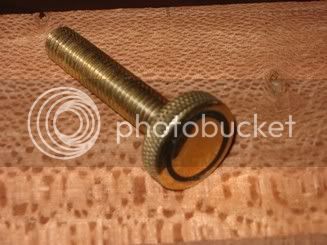
Where can I find knurled screws ?

UKworkshop.co.uk

Help Support UKworkshop.co.uk:

This site may earn a commission from merchant affiliate links, including eBay, Amazon, and others.

Amateurrestorer

Established Member
Joined
19 Jan 2007
Messages
82
Reaction score
0
Location
Fishlake Doncaster
Do any of you people out there have a source for knurled screws?I am refurbishing a plane and want to use a knurled screw to act as the locking system on the lever cap a la the new record planes 91/2 and 4 .I have searched the net but perhaps my terminology is wrong.There must be an engineering type out there who knows what I am after.Many thanks in anticipation. John :?
 
John,
Best bet is to either make them yourself, or find someone who has a lathe who will do it for you. Offerings are very meager these days. With the proper equipment, it is a 20 minute job to make one.
-Wayne Anderson
 
Hello John,

This may help....Don't know about the UK, but in the US, what you want are marketed as 'thumb screws'. Then within 'thumb screws', there are 'knurled' and other kinds such as those ubiquitous plastic knobs.

For example, here is a link to McMaster-Carr, one of the US hardware suppliers:

http://www.mcmaster.com/

Look at their menu under 'Fastening and Sealing', and find 'thumb screws'. [You might also note 'threaded inserts' while you're there]. Click on thumb screws, and you will see the variety they come in. Once you go to 'knurled', you'll see steel or brass, shouldered or plain, etc. You have to know the thread pitch if you want to fasten into an existing female thread. For a new installation you're making, you can buy matched pairs of threaded inserts and thumb screws.

Often, the toughest part of what you're trying to do is to match the existing thread pitch on a vintage plane. Stanley, for example, had some that range from extremely difficult to impossible to find nowadays. I believe the lever cap screw is one of the difficult ones.

Wiley
 
Screws like this can be found. (I didn't check to see what the minimum order is).
http://www.accuratescrew.com/CatalogPage.aspx?ProdCat=STHMKNSH
I have a habit of stripping off all possibly usable hardware from discarded items before I toss them in the bin, especially thumbscrews. They are just too tough to find when you need them. Good habit to get into. I have a small drawer full of those things. -Wayne
 
Thanks for the advice everyone. I managed to get by using some old brass knobs I found in the workshop. They are quite small and ornate and when sawn in half around the waist,drilled and tapped made very nice fasteners. All I've got to do now is to work out how to knurl them. I should really know but I must have been playing truant the day the day it was covered in school ( only kidding I would have been murdered if I missed a day at the Catholic school I attended) and I did'nt do metalwork ,it was a choice of wood or metal take it or leave it.
 
basically to knurl nuts, you need to find a knurling tool which is like two
wheels with an angled cutting face. and you need to do it in a lathe.

why do you need them to be knurled, how about making them in to
key shapes or similar??

paul :wink:
 
John

Here is an alternative - it involves making your own knurled lever cap screw out of ... wait for it ... gardening parts.

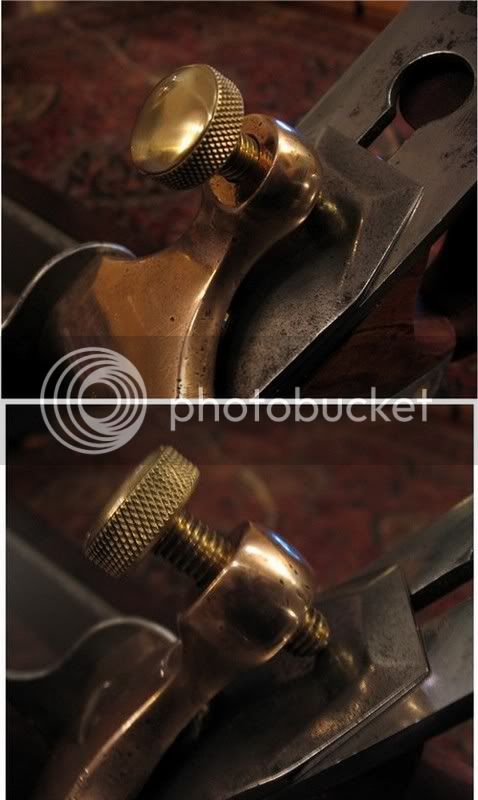
Here is an example of one I made (for a Spier infill):

Levercapscrew1.jpg


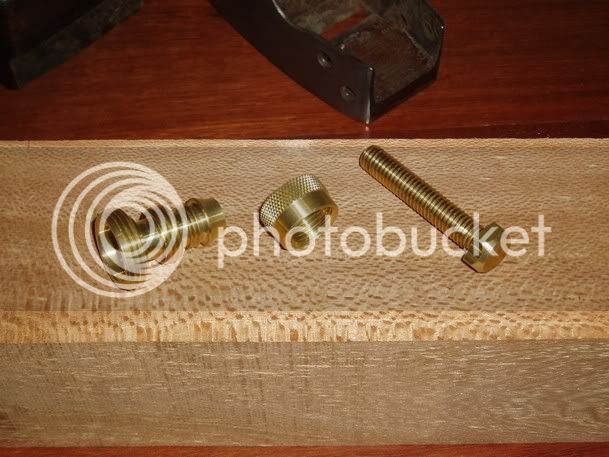
It began life like this:'

Levercapscrewparts.jpg


The two brass pieces on the left are a parts for a hose connector, the brass bolt on the right was purchased separately. The procedure involves cutting down the knurled section and epoxying it to the bolt.

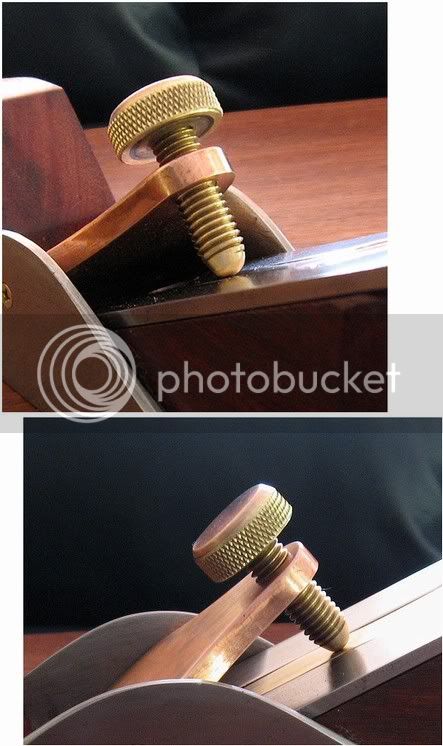
You can "cap" the top with anything you choose. In the first picture I used an Aussie $2 coin. In the following picture I used a copper 2c coin (so that it matched the pink brass of the #3-based infill I recently constructed:

Levercapscrew2.jpg


You can even use a wood infill:

levercapscrewwoodinfill.jpg


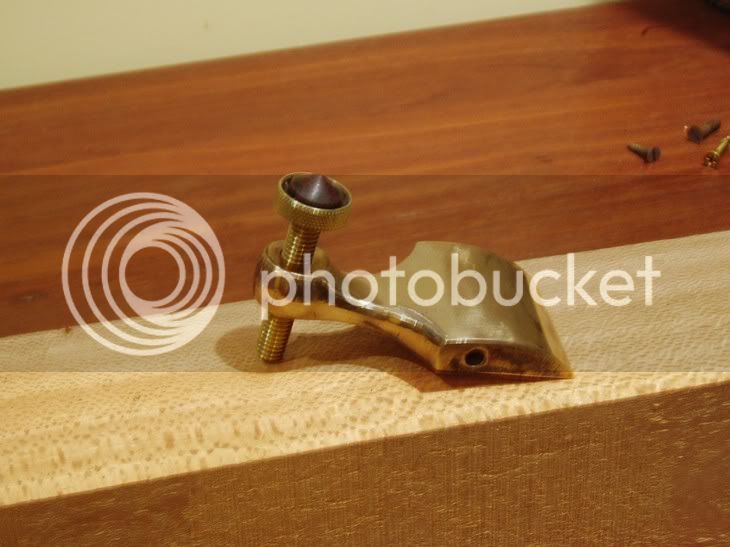
... or make something modern:

IMG_0011.jpg


Regards from Perth

Derek
 
Uggh! I had the need for one of these the other day and scoured the plumbing section for something/anything knurled and only found a tiny little cap. I hadn't even thought about gardening. Thanks Derek for the great tip!
 
engineer one":3lgqma5b said:
basically to knurl nuts, you need to find a knurling tool which is like two
wheels with an angled cutting face. and you need to do it in a lathe.

why do you need them to be knurled, how about making them in to
key shapes or similar??

paul :wink:

Hi Paul,
I have a small Myford, Model-makers' lathe, from the 1940's. The 'ways' on the bed need grinding flat again. Any ideas please Paul?

Obliged
John :D
 
john, at the risk of opening cans of worms with others who might not like my ideas, i will have a go.

if memory serves properly, the ways are have a flat section and then a vee shaped raised piece. so if that is true, the next question is where are they worn, and are they worn evenly.

most tailstock assemblies have some adjustment facilites built in to the base, but it really depends upon what happens when you move it, and what happens when your tool post moves up and down the bed. the base of this should also include some adjustment.
are you experiencing a rocking when you use the tool post, or the tailstock?

first thing is to remove the toolpost item, and then put engineers blue all along the ways, and then move the tailstock up and down, that will tell you where the biggest hollows and bumps are. do the same with the tool post. check whether they are the same places. might be worth taking a photo.

frankly old practice was not to grind, but rather use the engineers scraper to remove the high spots, because normally the wear is not even, rather it is spread over in odd places, for instance if the tailstock was left in one place and some rust appeared. scrapers are still available, from at least tilgear and maybe others. i would go for a triangular one about 12 inches long. strangely they often come with wooden handles :lol:


things is the wear is probably not a lot in the order of a couple of thou, but if it is odd, then obviously the rocking motion will seem enormous.

thing about grinding is that you would have to dismantle the whole lathe etc. which may be more aggro than buying a new one.

the fact is that the toolpost does not go all the way down the ways, so you can measure the movement, and then ignore the bit under the chuck.

next step is to take the tailstock base apart and see what the adjustment is you may only need to add or remove shims, or screw the adjusters. make sure that they are clean of rust etc.

does all that make sense?? if not i will try more. :roll:

but basically no grinding, just fettling, and checking the adjusters, which need to be clear of rust etc.

paul :wink:
 

Latest posts

Back
Top