


lucky9cat
Established Member
We needed more storage in the study and I wanted to try a few new techniques. Most of my previous projects have used oak but I also didn’t want this to cost the earth in timber. The result was this wall cupboard to go above the pine floor-standing cupboard we bought eons ago. A looked through a few magazines for ideas came up with the basis of a plan. The idea was to have a dovetailed carcass for strength, with the dovetails hidden by coving, and raised panel doors with a profiled edge holding the panels in place. There would be no back as I wanted to use the full depth and I didn’t want the cupboard to be too wide. The raised panels, and mitred profile corners where the rails meet the stiles are things I’ve never tackled before.
The plan I was working to was pretty loose. I’ve just checked my SketchUp drawing and I only got as far as drawing a box!
I purchased the wood from Goodwillies, a supplier near Portsmouth. Previously, I’d only ever bought hardwood from them, but the pine I picked up was virtually knot free. In fact, it is totally knot free and I feel now that a few would have been nice to add character. What I like about Goodwillies is that they let you sort through the wood and don’t hang around in the background! When choosing oak I’ve been known to spend two or three hours in one session sorting through to find the best quarter sawn boards.
I’ve taken a few WIP pics but not nearly enough.
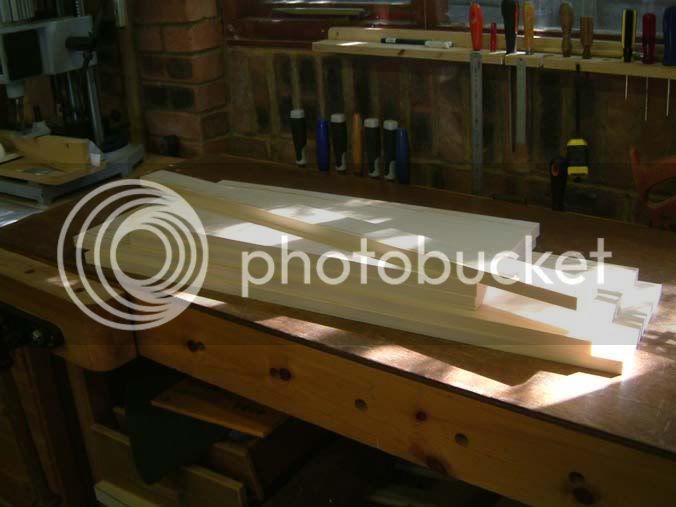
I began by preparing the wood for the carcass and the wall hanging cleat.
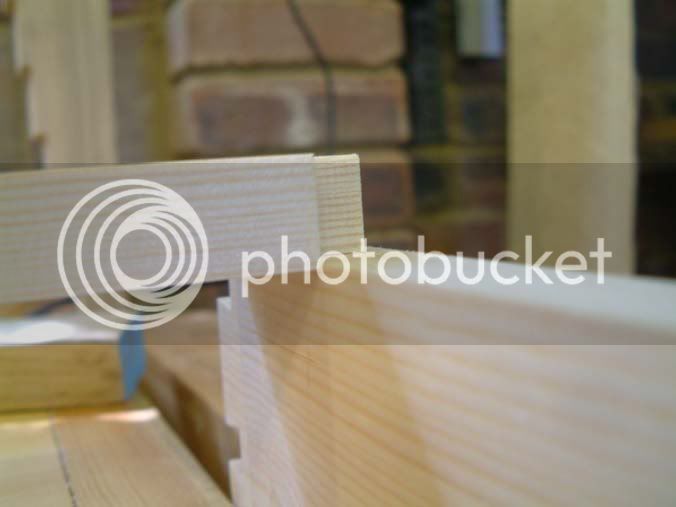
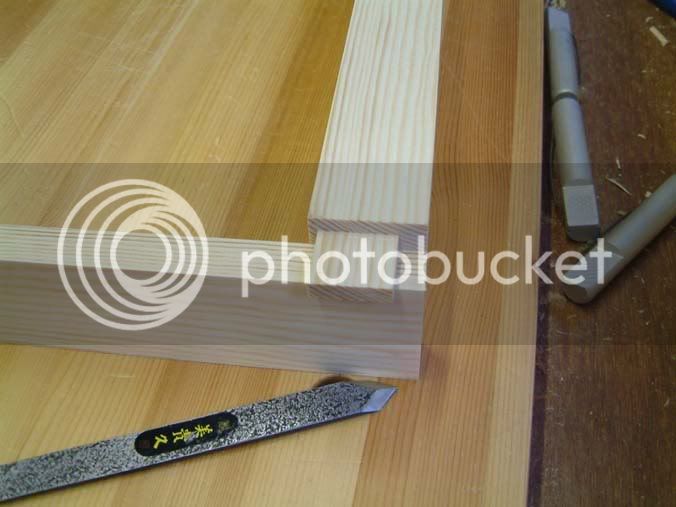
After cutting the carcass dovetails the cleat was dovetailed to the sides. In this pic showing the edge of the cleat, the dovetail is already cut and being used to transfer the markings to the case sides. I always cut the tails first as the first cuts are not so critical. I also cut a small rebate on the inside face of the tail board as this aids positioning the piece when transferring the markings to the pin board. I hope this is clear from the pic but to be honest the picture isn’t clear. It took me a while to work out what I’d taken this particular pic for!!
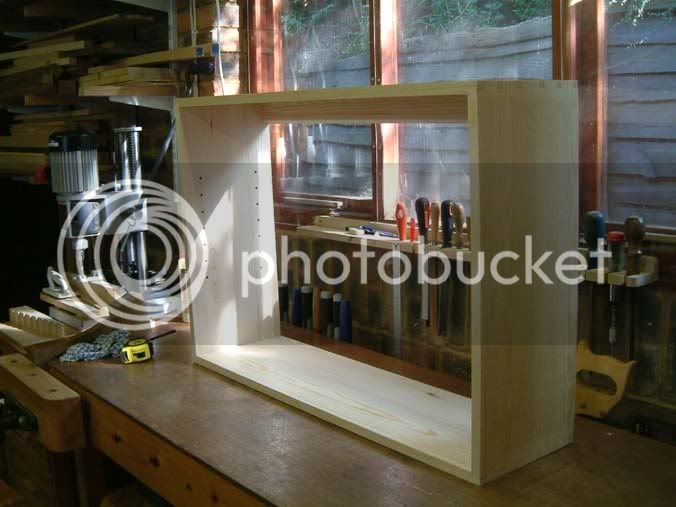
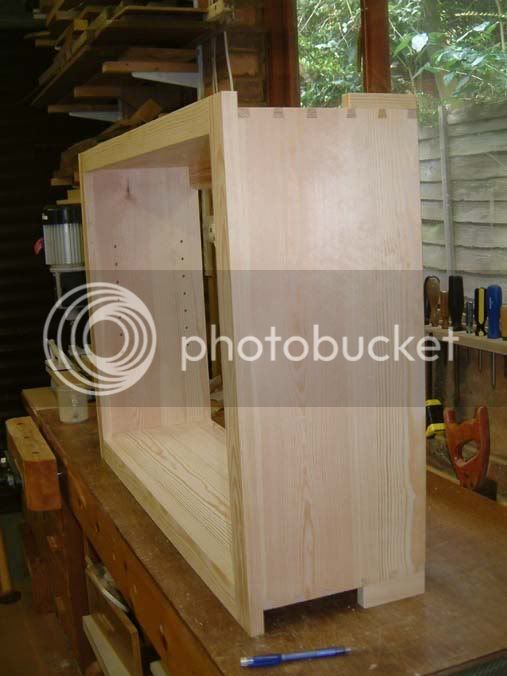
I drilled holes to allow for an adjustable shelf and then glued up. You can just make out the bevelled edge on the cleat to stop it falling off the wall.
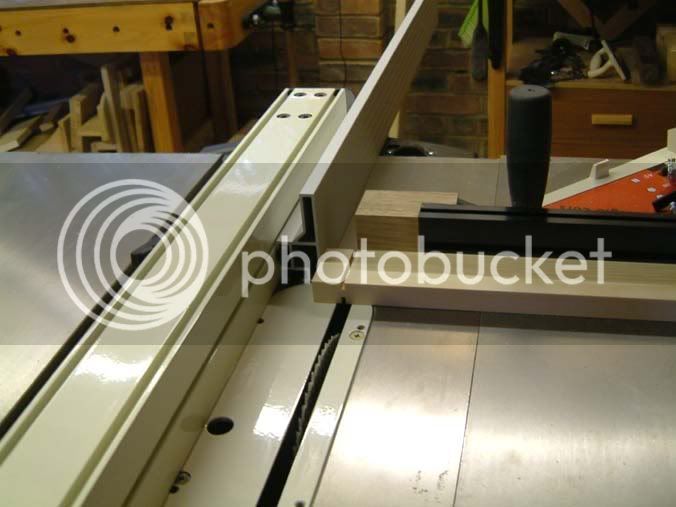
Next step was the face frame. I always cut tenon shoulders on the table saw; it’s so simple, quick and accurate.
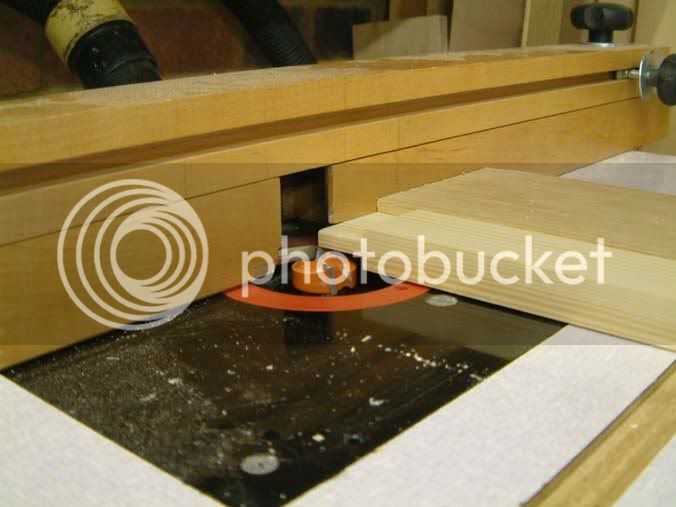
The face of the tenon was removed on the router table; again simple and quick but I always leave it a touch oversize and fit it by hand. I have cut many tenons by hand but that was years ago at school. It’s probably the next area to expand my handwork (back) into. I’m finding that once I’ve satisfied myself that I can do the job efficiently by machine, I feel ready to tackle it by hand. Sounds totally illogical but that’s the way it seems to be now.
The mortice lengths were marked from the tenons. Looks like I got carried away with the table saw and didn’t change the settings when it came to cutting the haunch! The mortices were then cut using my dedicated hollow chisel morticer.
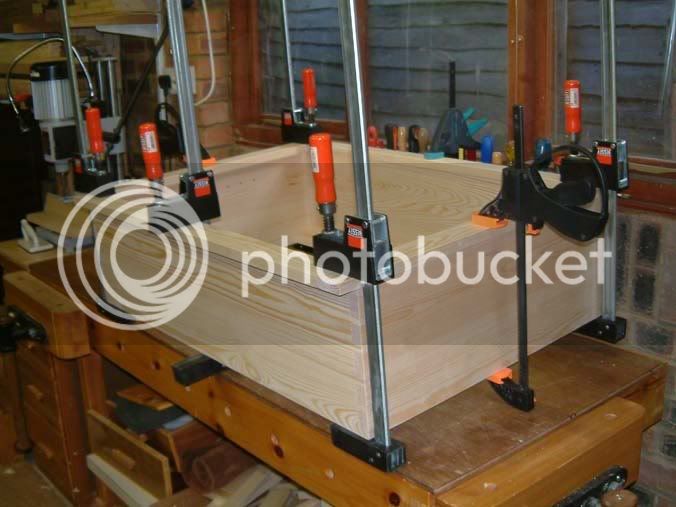
After gluing up the face frame, it was glued to the carcass. No biscuits or joints were used.
I glued blocks of wood to the rear corners to stabilise it and also give more support to the coving.
Now comes the mystery bit where I’ve got no WIP pics. The doors. I think that as the processes were new my concentration was at it’s height and I just clean forgot.
As I remember, I first cut the slots in the rails and stiles to accept the panel using my table saw – one push through in each direction centres the slot.
I then cut the tenons followed by the mortices.
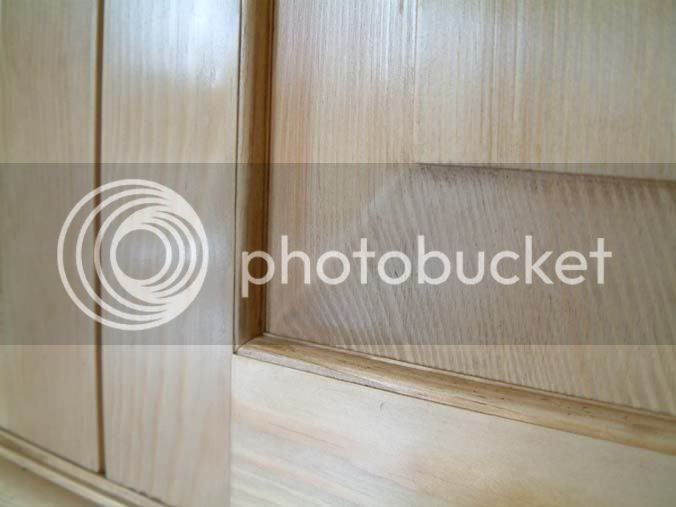
Next came the profiles which were cut on the router table using a 3/16” cove cutter.
I cut the mitre in the stile profiles with the table saw set to 45 degrees and then cut back the profiles by hand.
I think I probably cut the mitre in the rail profiles using the table saw as well.
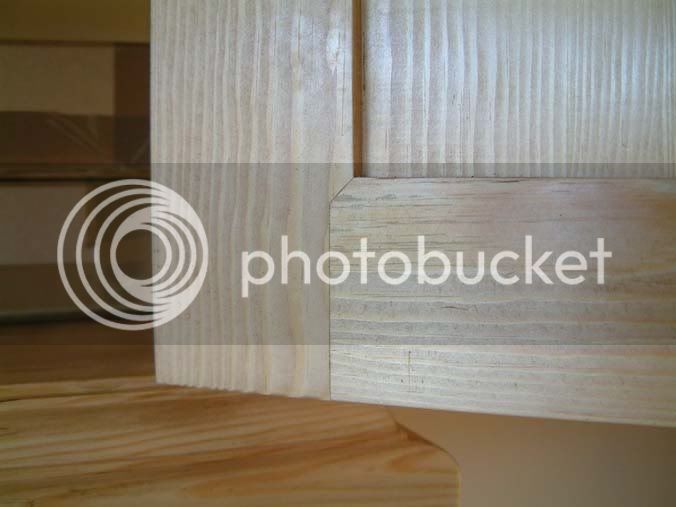
I hope the pic of the back of the door makes it clearer as to what I’m on about.
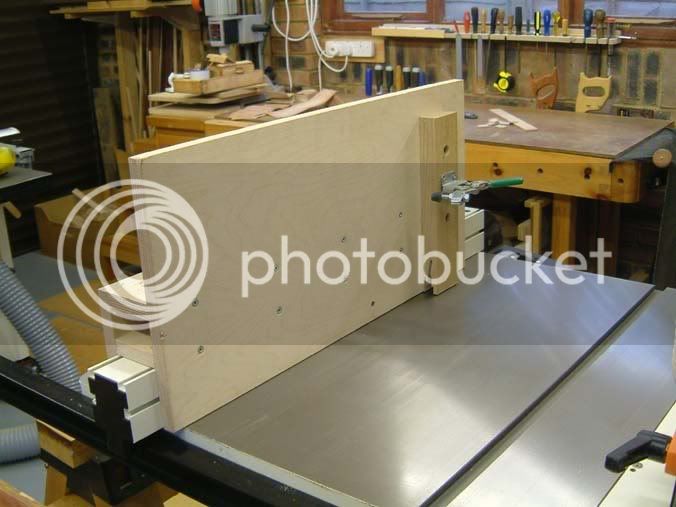
I built this jig to carry the panel through the table saw to raise the panel. It worked very well but I don’t like operating the table saw with the blade raised that high with no guard. Still, I guess that fear brings respect. Good jig though – should be able to use it for tenon cheeks.
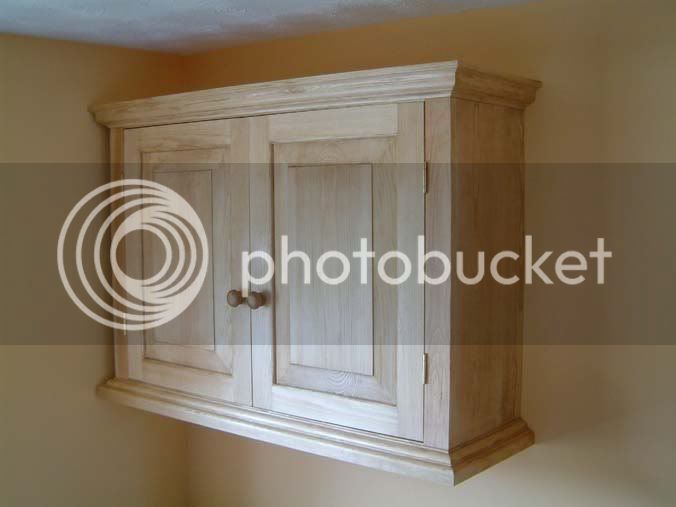
The covings were built up from shapes prepared on the router table and glued together. The top one is three pieces and the bottom two. I glued them to the carcass taking care to only use a bit of glue at the back and the front of the side covings to allow for wood movement. Norm always uses pins and then filler in building the coving and attaching it. I don’t like to use filler so I avoid using pins. Perhaps I should have used pins to attach the side covings at the back. It may help with wood movement – time will tell if I needed to!
I finished it with a couple of coats of Briwax to match the lower unit.
My conclusions: definitely worth making and I liked tackling the doors, good to attempt something like this using one of the cheaper woods, and of course a useful addition to the study. I really should have took more pics as I was going through and should have also written the project up sooner whilst I remembered how I tackled things!!
Happy to clarify things if I can remember!
Cheers, Ted
The plan I was working to was pretty loose. I’ve just checked my SketchUp drawing and I only got as far as drawing a box!
I purchased the wood from Goodwillies, a supplier near Portsmouth. Previously, I’d only ever bought hardwood from them, but the pine I picked up was virtually knot free. In fact, it is totally knot free and I feel now that a few would have been nice to add character. What I like about Goodwillies is that they let you sort through the wood and don’t hang around in the background! When choosing oak I’ve been known to spend two or three hours in one session sorting through to find the best quarter sawn boards.
I’ve taken a few WIP pics but not nearly enough.
I began by preparing the wood for the carcass and the wall hanging cleat.
After cutting the carcass dovetails the cleat was dovetailed to the sides. In this pic showing the edge of the cleat, the dovetail is already cut and being used to transfer the markings to the case sides. I always cut the tails first as the first cuts are not so critical. I also cut a small rebate on the inside face of the tail board as this aids positioning the piece when transferring the markings to the pin board. I hope this is clear from the pic but to be honest the picture isn’t clear. It took me a while to work out what I’d taken this particular pic for!!
I drilled holes to allow for an adjustable shelf and then glued up. You can just make out the bevelled edge on the cleat to stop it falling off the wall.
Next step was the face frame. I always cut tenon shoulders on the table saw; it’s so simple, quick and accurate.
The face of the tenon was removed on the router table; again simple and quick but I always leave it a touch oversize and fit it by hand. I have cut many tenons by hand but that was years ago at school. It’s probably the next area to expand my handwork (back) into. I’m finding that once I’ve satisfied myself that I can do the job efficiently by machine, I feel ready to tackle it by hand. Sounds totally illogical but that’s the way it seems to be now.
The mortice lengths were marked from the tenons. Looks like I got carried away with the table saw and didn’t change the settings when it came to cutting the haunch! The mortices were then cut using my dedicated hollow chisel morticer.
After gluing up the face frame, it was glued to the carcass. No biscuits or joints were used.
I glued blocks of wood to the rear corners to stabilise it and also give more support to the coving.
Now comes the mystery bit where I’ve got no WIP pics. The doors. I think that as the processes were new my concentration was at it’s height and I just clean forgot.
As I remember, I first cut the slots in the rails and stiles to accept the panel using my table saw – one push through in each direction centres the slot.
I then cut the tenons followed by the mortices.
Next came the profiles which were cut on the router table using a 3/16” cove cutter.
I cut the mitre in the stile profiles with the table saw set to 45 degrees and then cut back the profiles by hand.
I think I probably cut the mitre in the rail profiles using the table saw as well.
I hope the pic of the back of the door makes it clearer as to what I’m on about.
I built this jig to carry the panel through the table saw to raise the panel. It worked very well but I don’t like operating the table saw with the blade raised that high with no guard. Still, I guess that fear brings respect. Good jig though – should be able to use it for tenon cheeks.
The covings were built up from shapes prepared on the router table and glued together. The top one is three pieces and the bottom two. I glued them to the carcass taking care to only use a bit of glue at the back and the front of the side covings to allow for wood movement. Norm always uses pins and then filler in building the coving and attaching it. I don’t like to use filler so I avoid using pins. Perhaps I should have used pins to attach the side covings at the back. It may help with wood movement – time will tell if I needed to!
I finished it with a couple of coats of Briwax to match the lower unit.
My conclusions: definitely worth making and I liked tackling the doors, good to attempt something like this using one of the cheaper woods, and of course a useful addition to the study. I really should have took more pics as I was going through and should have also written the project up sooner whilst I remembered how I tackled things!!
Happy to clarify things if I can remember!
Cheers, Ted
