Victorian drum table

UKworkshop.co.uk

Help Support UKworkshop.co.uk:

This site may earn a commission from merchant affiliate links, including eBay, Amazon, and others.
Good progress Mark!!(how long have you been doing woodwork Btw?), first off.... you are not being thick. If you do not know, you do not know.


fluerdelys.jpg


These are some examples of the Fluer De Lys, we would file this design onto the ends of our spider brackets. Sometimes we would have maybe 1(a real one) a month to restore, the others we would make ourselves. These new tri-pod tables were made traditionally/copied with the tapered sliding dovetailed joints. None of these tables(old or new) left the workshop without the bracket fitted.
 
Another hour or so last night
Unclamped the drawer and cleaned up the dovetails with a low angle plane
Dry fitted it and it is quite a good fit. Once it is sanded / scraped / sealed / waxed it should be fine
5438041056_2f18252c57.jpg

5437434095_ba78ac24f7.jpg

Then did a bit of wailing and self-flagellation as I snapped a japanese dovetail chisel by levering too hard:You can just about see the fracture line in the polished hard steel of the bottom layer just next to the dimple underneath
Not sure what to do about this except buy another chisel. It certainly showed the difference between the brittle hard steel of the bottom lamination and the softer metal of the top which is still fine
5437434283_899c271ea2.jpg

Then started thinking about the table top and I don't have enough mahogany left to do the whole thing. So, because the centre is going to be leather inlay, I cut a hexagonal piece of 18mm MDF so that the leather will just cover the corners.
5438040938_3d3e93d4ee.jpg
Then I cut and exactly shaped the 6 side pieces (these will be domino'd to the MDF)
5437480209_05478f09b4.jpg

And dry-fitted it all together:
5438086292_e5ea579655.jpg

So I will use a router on a trammel from the centre to rout out the circular recess when it is all glued and dominod
Finally I have looked at the awful brackets again and countersunk the screws better. I have an idea I will be able to cover it and made a circular piece to see if it would be worthwhile:
5437480763_ff184fcb06.jpg

I will think some more about this tomorrow. Thanks MTR1 for the fleur de lys details - so this would be engraved in the metal bracket or have I still got the wrong end of the stick?
Nothing today as I am out all day - hopefully should get the top finished tomorrow
Cheers
Mark
 
I assembled the table top today
First I marked both the hexagonal MDF and the 6 side pieces where the dominos would go - I planned 6 for each side and 1 between adjacent side pieces.
The MDF is 18mm thick but the side pieces are 22.7mm thick. I wanted the side pieces to be 2.5 mm proud of the MDF to allow for the leather inlay, so first I cut all the MDF domino slots on a 9mm depth setting, then changed this to 11.5 mm to do all the side pieces - which should give me the required 2.5mm difference.
5442984758_0abcefbaca.jpg

I glued up 2 side pieces at a time using TB3 and then left them for a couple of hours clamped before doing the next 2. The last one was a bit tricky to insert the dominos joining the 2 side pieces.
5442986202_b5949fb3bb.jpg

I thought I would get more done today but at least the table top is all together.
Studders if I snapped the chisel off I would have to grind the back down considerably as the crack goes through the hollowed out back that jap chisels have - I think it is rogered TBH!
I also nearly finished covering up the metal brackets and I will post more photos of this repair later this week
Thanks for looking
Mark
 
gasman":19y8jrf9 said:
Studders if I snapped the chisel off I would have to grind the back down considerably as the crack goes through the hollowed out back that jap chisels have - I think it is rogered TBH!
Mark

That's a bit of a gutter. I've thought about buying some but that's put me right off the idea now.
 
I don't think you would regret buying them - they are awesome chisels and, provided you don;t use them for the wrong purpose :oops: will last a lifetime
 
I tend to fall into the 'Heavy Handed' category. OK with a £10 Chisel but..... then again it might 'make' me be more 'Genteel' in my work? Might still get one to see how I get on with it.
 
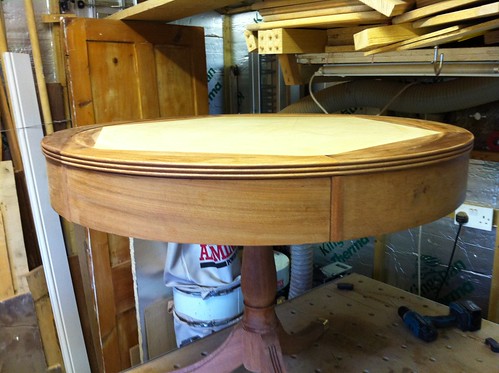
Getting close to completion with one major tricky job left to do.
I am off work all week due to having a plate removed from my arm yesterday and having a steroid injection into a facet joint today - so I am taking it very slowly but tonight have no back pain for the first time in months - a fantastic feeling
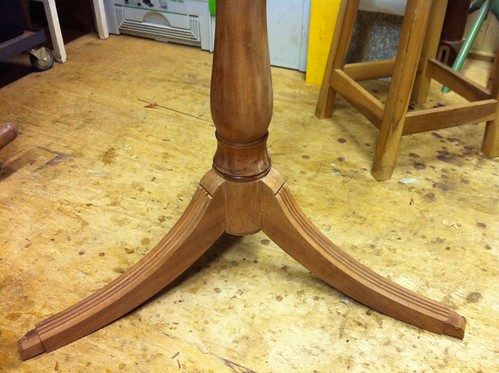
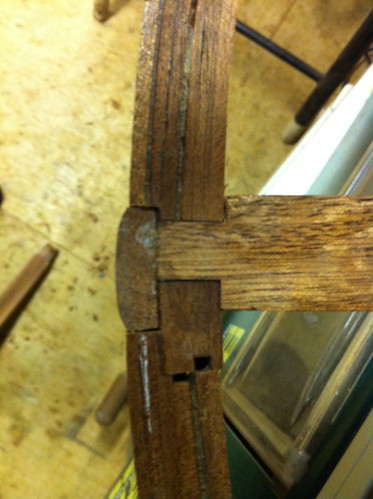
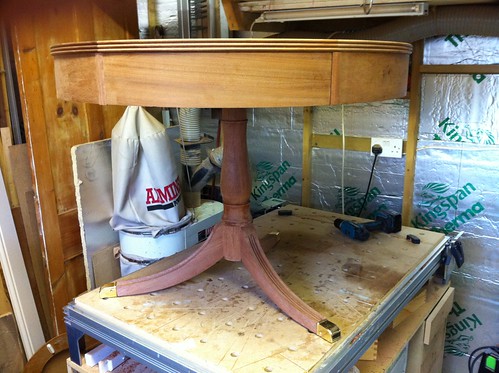
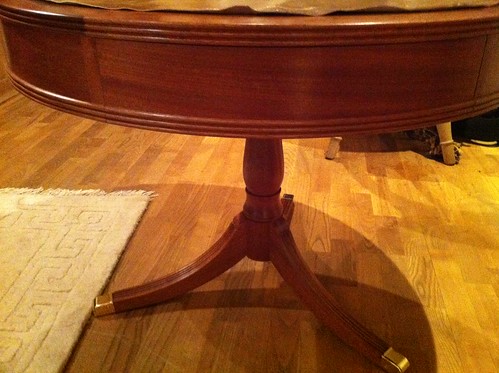
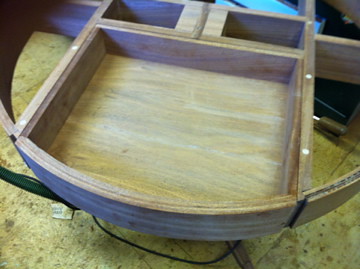
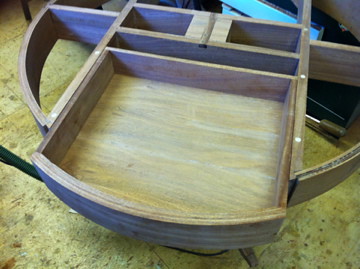
So first today I very gently completed covering up the awful metal brackets on the bottom and I think I am happier with it
5448872260_4714509aa4.jpg

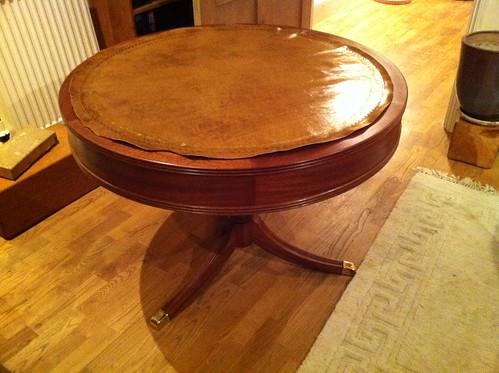
You cannot really see it at all when the table is upright which I guess is the acid test.
5448256335_d0e59f2492.jpg

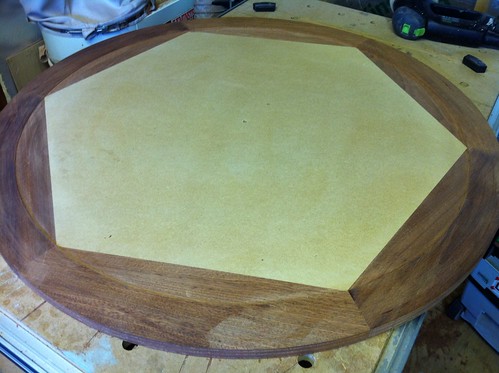
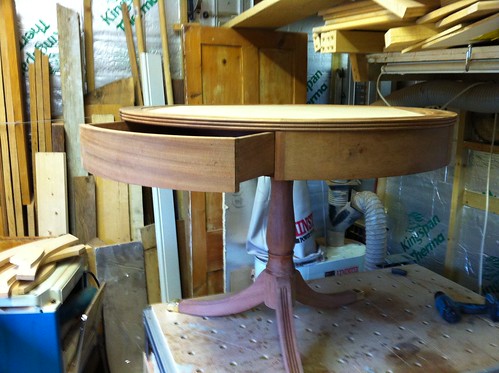
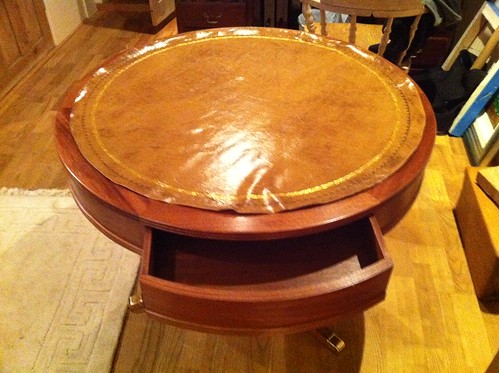
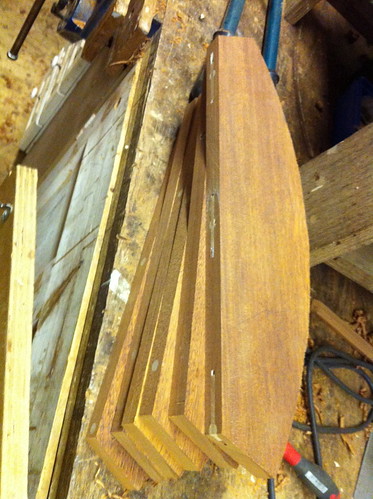
Then I glued in the small vertical pieces into the gaps between adjacent curved pieces
5448873366_4acf34d71a.jpg

The vertical pieces also have a slight curve in them to add interest. I debated long and hard with myself about putting an inlay into each of the 6 large curved side pieces but (my wife) decided against it!
5448262253_a3c8293fc1.jpg

So onto my last tricky problem...
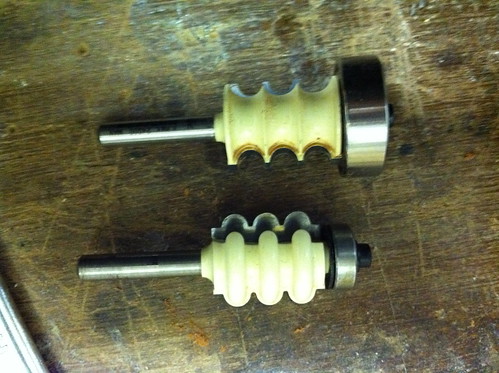
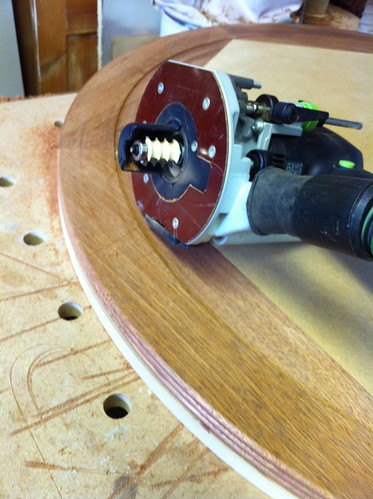
I have got this Axi beading router bit to complement the fluting one which I did the legs with.
5448266891_c1e30afcce.jpg

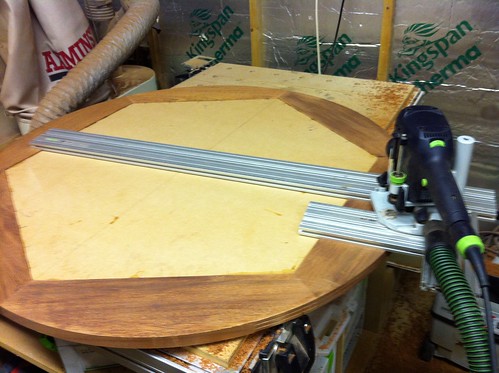
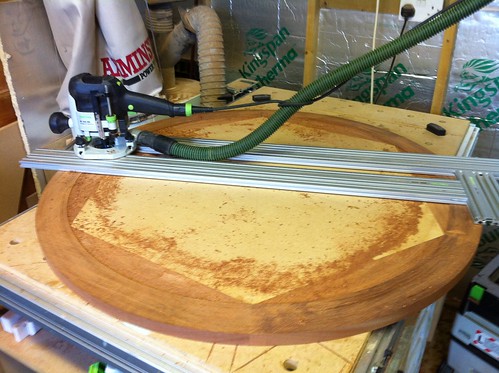
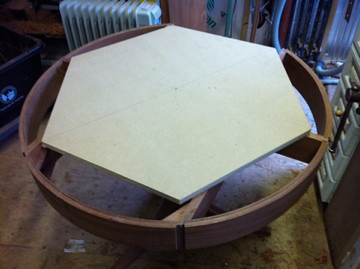
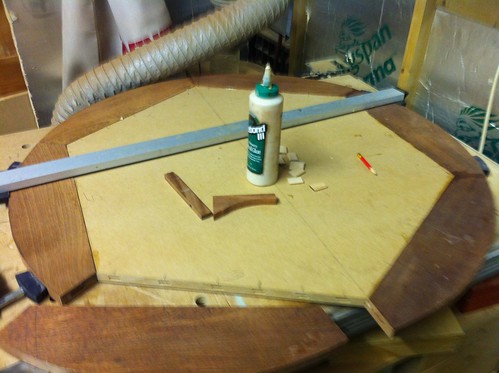
My original plan was to use the Festool MFS system I have to use as a circular jig to do the outside of the table edge with. So I drilled an 8mm hole in the centre of the MDF and attached the pivot pin underneath the 1000mm MFS piece so that it acted as a trammel arm
5448870066_83253d0284.jpg

Then using the rest of the MFS to balance the router I attached the router and tried it out.
5448257423_745d13b005.jpg
.
At the moment the diameter of the circular base is 920 whereas the diameter of the rough sawn table top is about 950 so I have plenty of room to play with to get this right. Eventually it wants to be about 6mm proud all the way round so the beading sticks out from the sides - ie a final diameter of 932
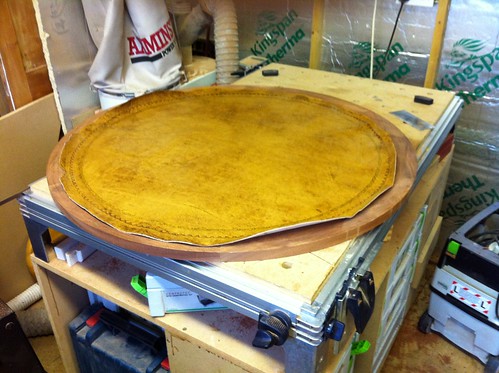
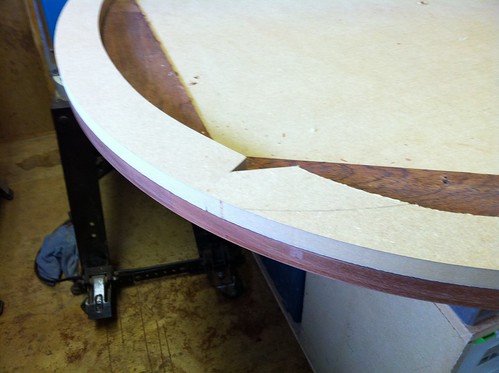
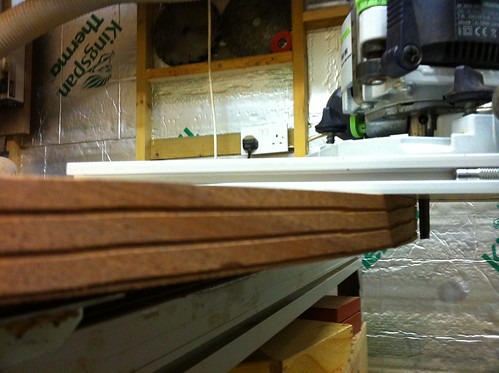
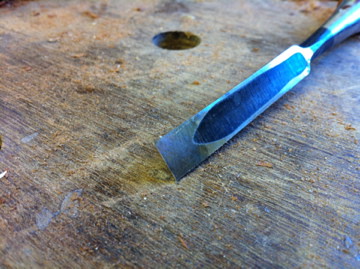
The problem was keeping the router in exactly the same horizontal plane - it kept wandering up by a mm or 2 and therefore the beading looked a mess... so I put a straight bit in and went round the whole table to bring it down to about 935mm - still big enough not to worry too much - yet! You can just about see in this photo where the attempted beading wandered - only a mm or so but enough to make it look awful.
5448260075_d0fb2560ac.jpg

So, I think I have 2 options tomorrow - either mount the beading bit again and repeat but this time go very very carefull and hope like hell it works. Alternatively, and this is my favoured option at present, attach the top to the curved base securely, then use the larger diameter bearing I have attached, and use that bearing against the curved sides to cut the beading. There will be a slight problem as I go over the curved vertical pieces but I could move it round a bit to do them? I guess a third option would be to get the Veritas beading tool. Does anyone have any better ideas or suggestions?
Thanks for looking
Mark
 
The trouble with using routers for this type of job is that if it goes wrong it really makes a mess of things, as you've found. Unless you can be sure that you can guide the router in a way that will work, I'd be inclined to use a scratch stock.

Easy enough to make a scratch stock - there's a good video clip by Garrett Hack here http://www.finewoodworking.com/SkillsAn ... x?id=31290

Hope it goes well, Mark, whatever you decide. You're making an excellent job of it so far.

Cheers :wink:

Paul
 
Had a really good day today and solved my last remaining big problem...
First I used my circular mounted router to rout out the circular area where the leather inlay will be
5451177455_66c1008d2a.jpg

Then after a good clean up with a sander followed by a card scraper it looked OK
5451178385_fe8677dd84.jpg

I had a look at what the leather would look like - and I was not certain about the colour but I think when the mahogany is alot darker it will offset the rich brown well
5451179385_e6fa52ce14.jpg

Then I thought about the table top edge again and how to sort out the triple-beading. First I used the trammel-guided router to take another 2 mm off the outside of the table top
Then, instead of the options I discussed earlier, I ended up using the offcuts of MDF from the table top construction which I glued to the underside of the table top with hot-melt glue.
Then I used a bearing-guided flush trim bit with the bearing running on the mahogany table to cut the MDF to the same size as the table top
5451796414_f8769441a1.jpg

Once this was smooth, it was easy to use the bearing guided triple-beading router bit with the bearing running now on the MDF to produce the desired effect without the worry of the router bit 'climbing' because of the workpiece being constrained between the router and the fixed pivot point.
5451187739_4588826545.jpg

Just got to put it all together and do the finish
Thanks for looking
Mark
 
So after putting it all together I am happy with what is done so far but am not certain I am happy with the overall appearance. I think maybe it needs another row of the triple beading at the bottom of the side as well? And the small vertical pieces look wrong to me - maybe they could be the triple beading as well?
I think it needs some more 'wow' factor and maybe an inlay or two would look good.... we are away for a week to Egypt so will have a fresh look when I get back
Thanks for looking
5453297999_31692c523c.jpg


5453298787_e451b58972.jpg


5453911482_4aa8a42066.jpg
 
Mark,

Looks really good.

Without wishing to sound impolite I'd be worried out the join between the legs and pedestal even with those brackets. I made a much smaller pedestal table (pedestal-table-wip-finished-t39114.html) and had quite deep mortices.

Your table is much bigger and heavier and I'd have thought that a likely place for future failure.

Great to be using your Dad's old table and recycling it into something you can have for years to come.
 
Have been away in Egypt for a week's holiday - interesting with a 1000+ room hotel in Hurghada running at 3% occupancy during half term week! Very quiet but good food
Anyway thanks to those of you who commented about the beading etc - but I am afraid I was swayed by one of the original photos of a drum table I liked which had a triple beading top and bottom - and also the client a.k.a. my wife said she wanted it like that! I glued on the triple beading in 3 pieces using lots of clamps and taking lots of time to let each bit dry before cleaning it up and then moving on to the next place
So, it is all finished tonight - I just have to glue in the leather tomorrow night
5486826182_43c77c97d8.jpg

Here's the drawer - haven't decided yet whether to add some hardware - ie a handle for it
5486828338_a49bb558b1.jpg

Details of the legs
5486829346_5793895365.jpg

I do have some worries about the strength of the legs but I do not think there is much else I could do. In retrospect I think Miller dowels from the bottom would have been a good idea but the metal brackets seem to make it very sturdy and I can't see them now which makes me happy
Thanks for looking
Mark
 

Latest posts

Back
Top