ScouseKev
Established Member
As much as i like my T/S, its a Deft T30 , the dust collection from the cabinet below is next to useless.
So in keeping with the rest the extraction changes i'm trying to implement, i decided it had to change.
Currently its just a 100mm port at the wrong side of the cabinet.
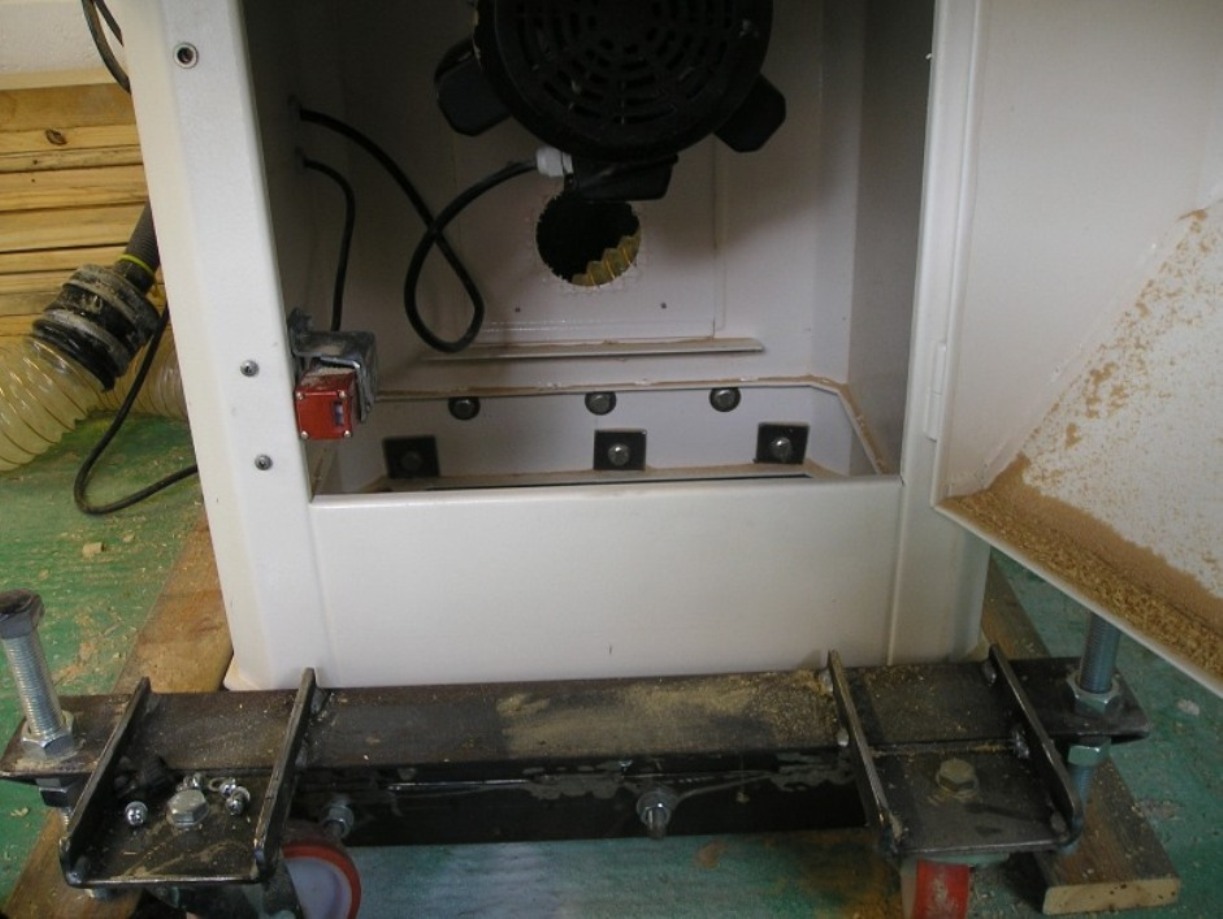

Watching where the dust and chippings landed made it obvious that any extraction had to be from directly below as the side port was just too far away.
But with limited space beneath the motor it needed to be a shallow fitting. After a trip down to the local builders merchants, i decided on this.
Its a 270 x 200mm Drain hopper / Grid, attached to a 110mm soil pipe fitting called a "P" trap
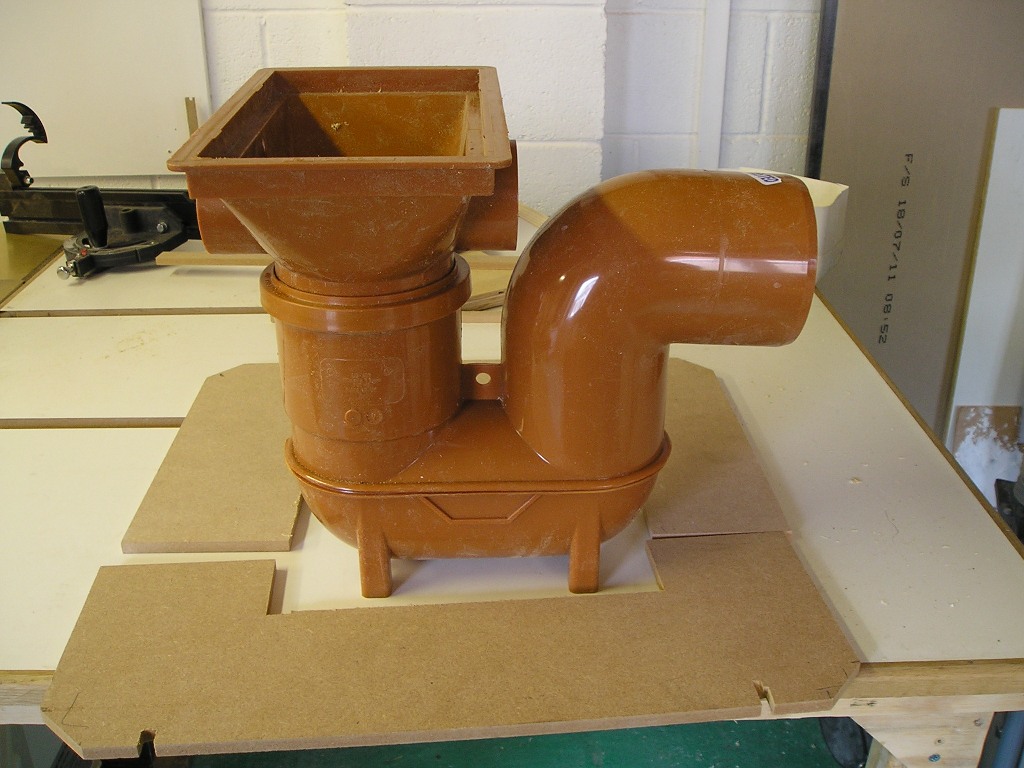
A split 12mm MDF shelf supports the hopper. The height of the P trap was just right for fitting through the existing port in the cabinet side

Now for what turned out to be the start of the tricky parts, assembling it inside.
Even left as it is in the photo below, it still extracted about 70% of the dust, which is 70% more than it previously did.
All the dust that was missed was located forward of the hopper, nothing at all was left on the shelf on the far side.

Next the walls of the cabinet had to mirror the walls of the hopper and slope inwards to channel the dust down, so i came up with this.

And assembling it inside was a bit of a nightmare.
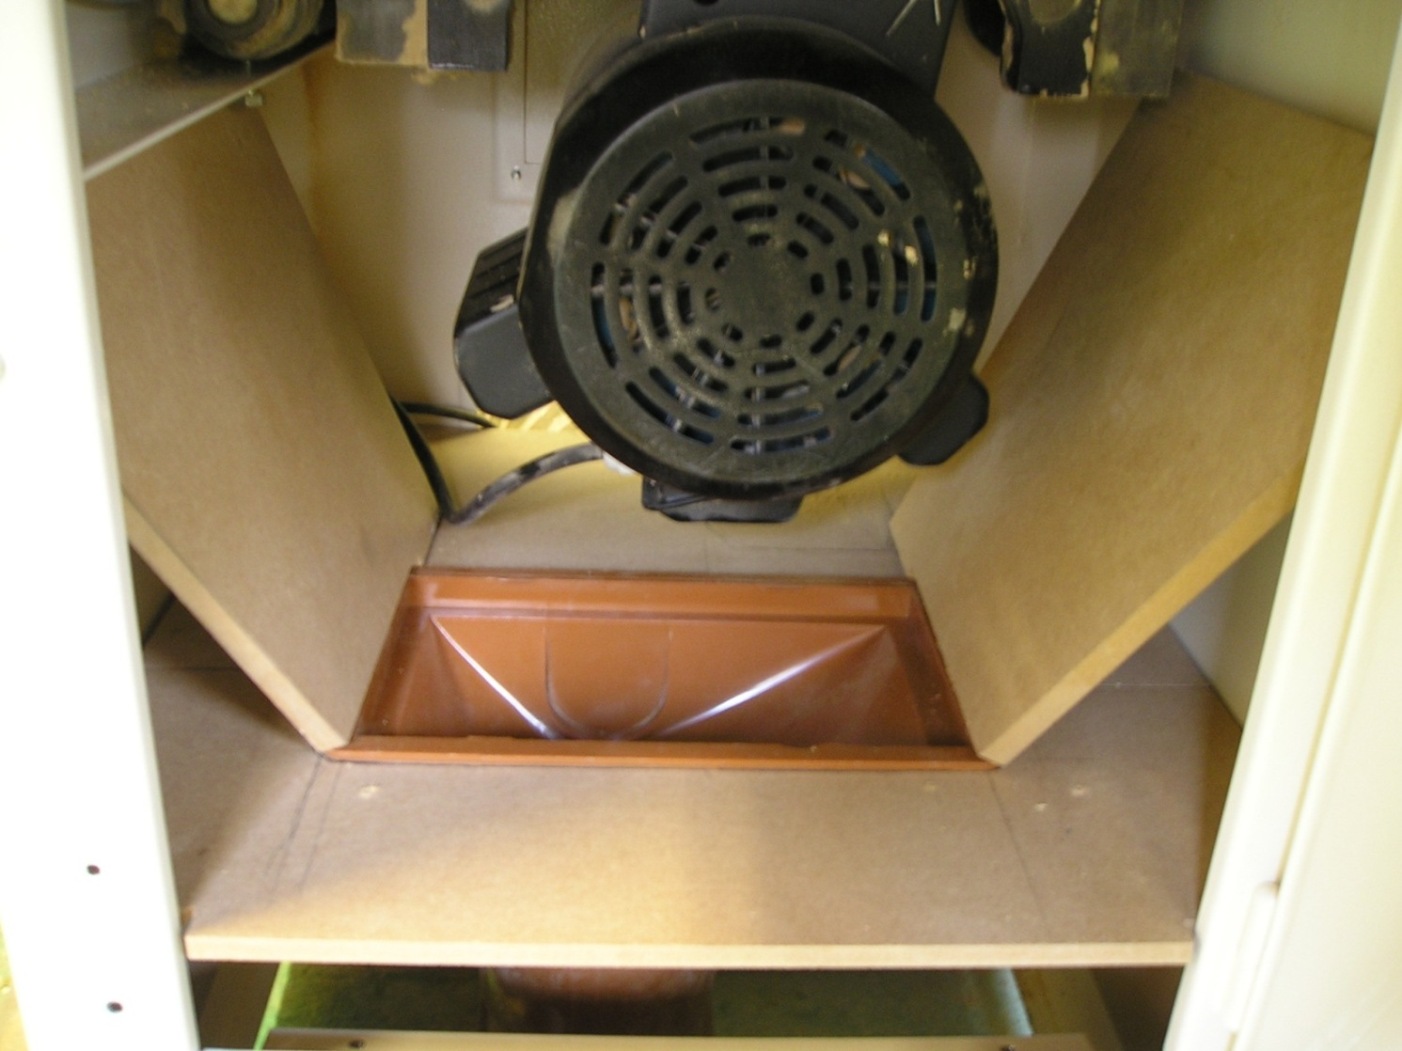
The right and left hand sides went in ok... but the motor prevented the 3rd side from being the same height, due to it moving when you want to tilt the blade . So it had to be lowered by 3" from the photo below.
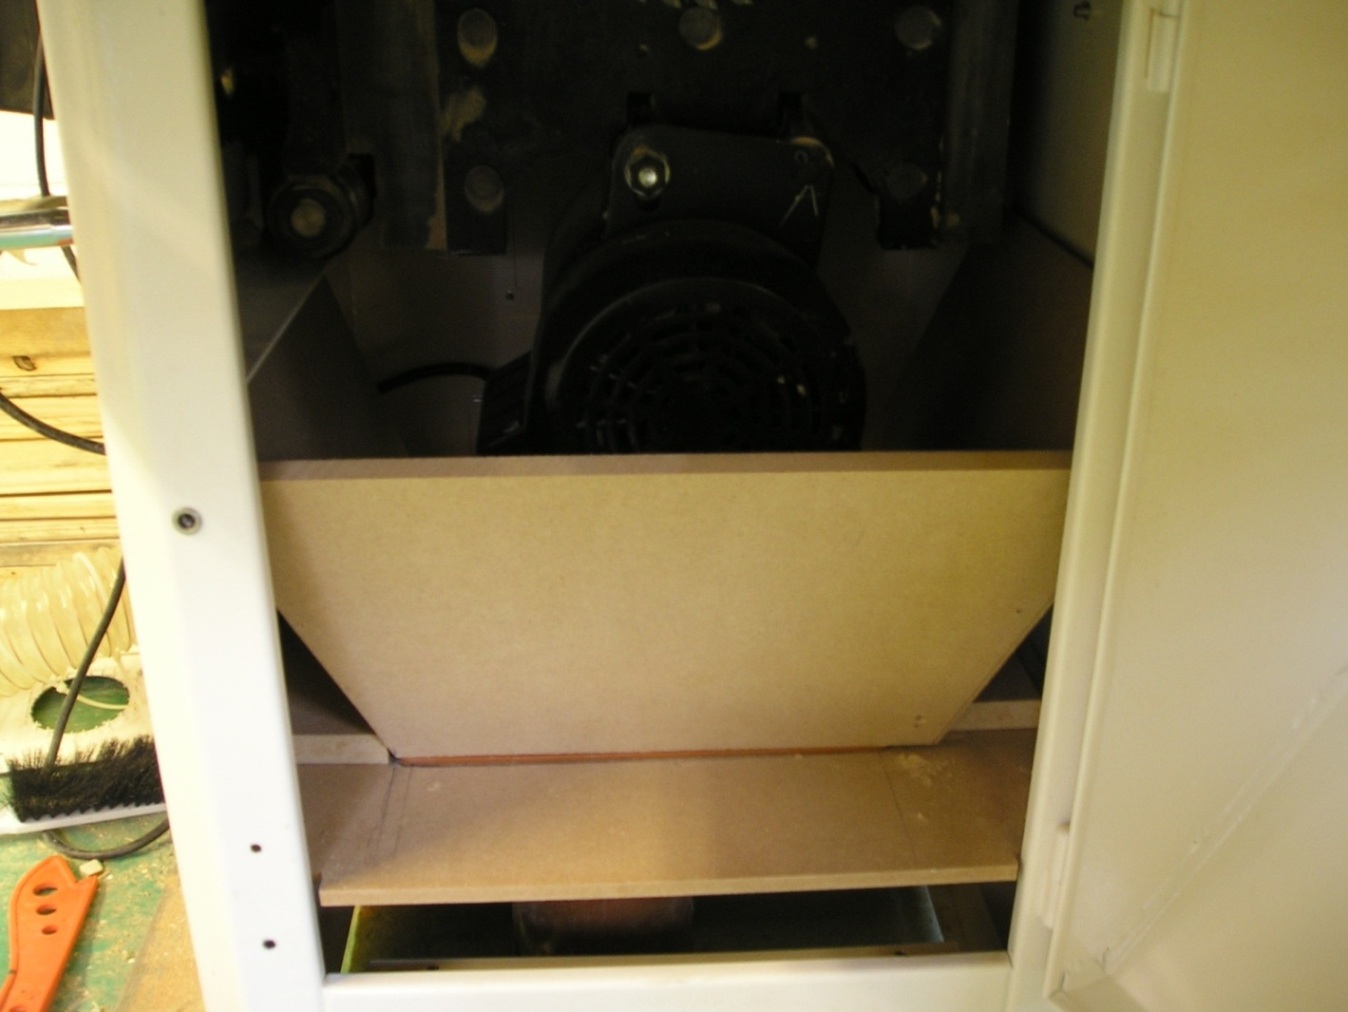
At this point about 95% of the dust was being captured.
A flexible sheet was needed to be suspended from the inside top of the cabinet allowing the motor to move freely to 45-deg.
A quick look around the kitchen revealed the lightly candidates, my wifes chopping boards.
With some friendly negotiation she conceded 2 of her 4 boards with the promise of replacements.
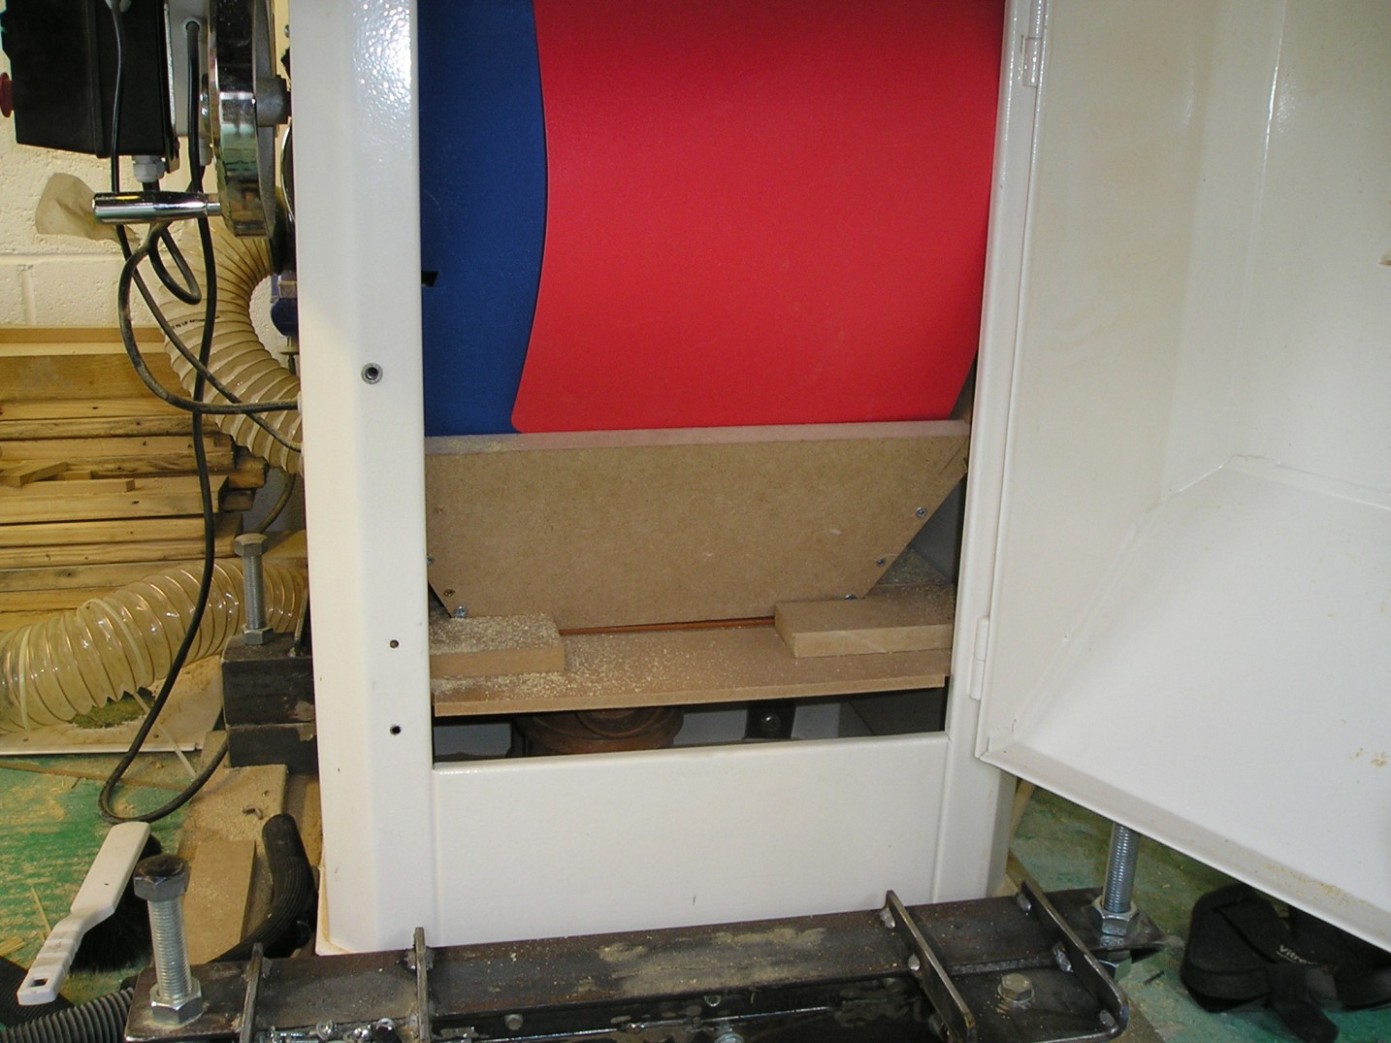
The chopping boards worked a treat with all but the very finest particles going into the extractor.
Removing the blade insert from the table top and blowing it all out with an air line sorted that out.
Quite a basic little job but it's made a big difference.
I hope it helps a few of you.
thanks Kev
So in keeping with the rest the extraction changes i'm trying to implement, i decided it had to change.
Currently its just a 100mm port at the wrong side of the cabinet.


Watching where the dust and chippings landed made it obvious that any extraction had to be from directly below as the side port was just too far away.
But with limited space beneath the motor it needed to be a shallow fitting. After a trip down to the local builders merchants, i decided on this.
Its a 270 x 200mm Drain hopper / Grid, attached to a 110mm soil pipe fitting called a "P" trap

A split 12mm MDF shelf supports the hopper. The height of the P trap was just right for fitting through the existing port in the cabinet side

Now for what turned out to be the start of the tricky parts, assembling it inside.
Even left as it is in the photo below, it still extracted about 70% of the dust, which is 70% more than it previously did.
All the dust that was missed was located forward of the hopper, nothing at all was left on the shelf on the far side.

Next the walls of the cabinet had to mirror the walls of the hopper and slope inwards to channel the dust down, so i came up with this.

And assembling it inside was a bit of a nightmare.

The right and left hand sides went in ok... but the motor prevented the 3rd side from being the same height, due to it moving when you want to tilt the blade . So it had to be lowered by 3" from the photo below.

At this point about 95% of the dust was being captured.
A flexible sheet was needed to be suspended from the inside top of the cabinet allowing the motor to move freely to 45-deg.
A quick look around the kitchen revealed the lightly candidates, my wifes chopping boards.
With some friendly negotiation she conceded 2 of her 4 boards with the promise of replacements.

The chopping boards worked a treat with all but the very finest particles going into the extractor.
Removing the blade insert from the table top and blowing it all out with an air line sorted that out.
Quite a basic little job but it's made a big difference.
I hope it helps a few of you.
thanks Kev


