Unseizing cast iron wheels

UKworkshop.co.uk

Help Support UKworkshop.co.uk:

This site may earn a commission from merchant affiliate links, including eBay, Amazon, and others.

ColeyS1

Established Member
Joined
2 Nov 2009
Messages
4,245
Reaction score
39
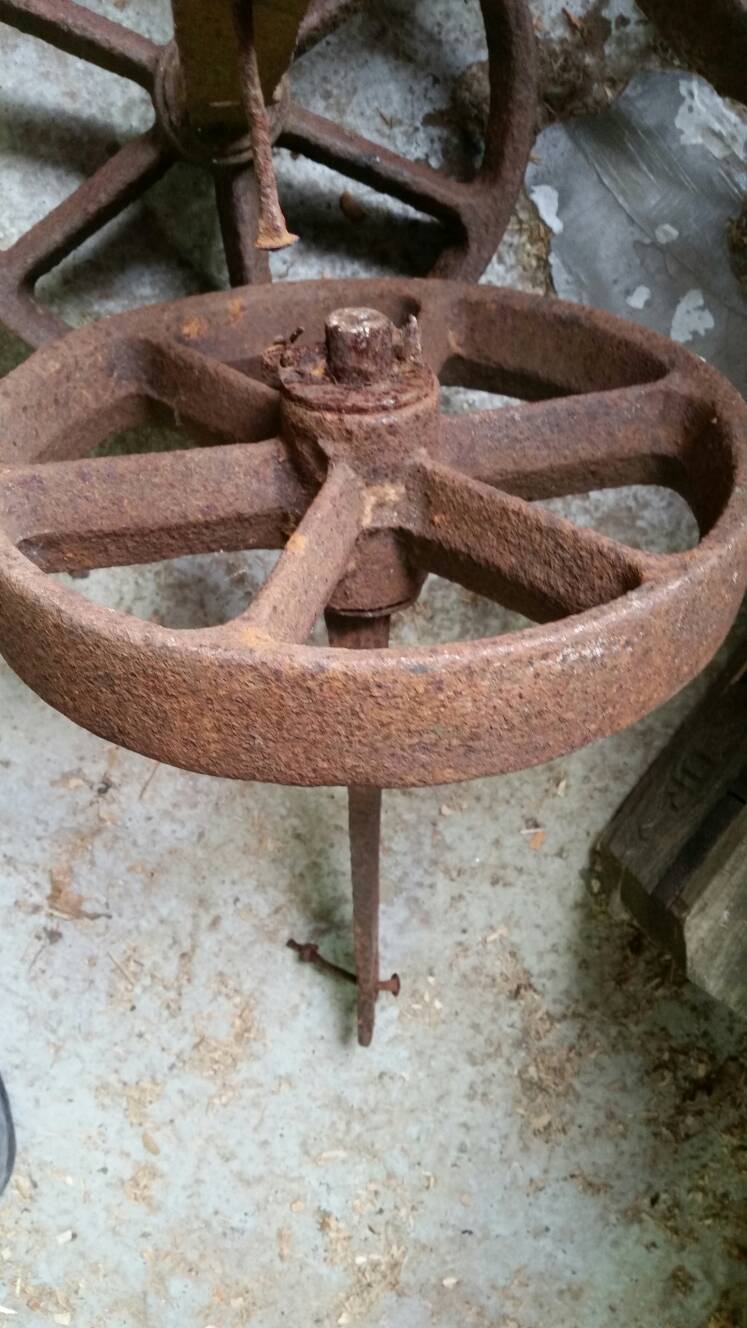
Does anybody have any tips for unseizing cast iron wheels ? I've been after some for a while and managed to get some cheap, thing is there seized.
5bde3db06e4abd5e642cef09c981e1b6.jpg

They are like to be only used for decoration, so dont necessarily need to turn. I'd still quite like it if I could free them up and then cure/treat the rust.
Googling suggests the safest way is to soak in oil. I'm impatient and wondered if there was a quicker/safer method.
Cheers

Coley
 
That Mathias Berger guy who has been restoring some lovely old woodworking machinery had a problem with seized parts, and I believe he soaked the parts with wd40 to unseize
 
Diesel Soak is good for penitrating,

Heat with blowlamp see if expansion will break oxide bond, whatever you do don't hit with big hammer that cast could be very brittle and already have old stress cracks in it.

I freed up a smaller 6" wheel off an old field hayrack by electrolysis in a bucket, eat away at the rust enough to be able to push the axle out.
 
You will need to be careful using heat as the axle can expand quicker than the surrounding wheel and crack the casting that way.
Unless you are in love with the stub axles, get somebody to drill and turn them out if there is no sign of movement.
 
If you go down the blowlamp route, make sure you play the heat on the wheel, not the axle, as noted above. Diesel and patience is probably your best bet. Don't think WD40 works particularly well on existing corrosion, it's intended for dispersing water, not penetrating. Or, as suggested, cut off the stubs as near the wheel as possible then drill them out, again taking care not to heat the stub more than the wheel.
 
Several youtube videos swear by 50-50 mix of Acetone and ATF.

Not tried it myself as I still have some Plus gas left. Certainly WD40 is next to useless as a penetrating fluid.
 
I reckon the best answer for those is electrolysis. It will remove the rust and probably free them up as well. You need a plastic bucket, an old battery charger, some iron and some washing soda. There are loads of YT videos showing how.
 
Heating the hobs of cast iron wheels with straight spokes is usually a recipy for diaster. WD40 does work to loosen seized parts if you spray on more twice a day for 2 or 3 days. Soaking the entire part in diesel fuel for 2 or 3 days is better. There are some even better products on the market but they are hard to come by.

I would soak first and then remove the rust with a coarse wire brush on an angle grinder.
 
Thanks for all your ideas. I've put one in the electrolysis tank to see if it works. No fizzing yet ;) To be honest I didn't think it would penetrate deep enough but I spose the rust might not go right through.....
I'll leave it a few days and then try another of your suggestions if it fails.
Ta very much

Coley
 
For soaking, I would use diesel. Given that the axles aren't precious I would be inclined to put the wheels in a lathe and machine away the axles,
 
Electrolysis, kill 2 birds with 1 stone, it will clean the rust off very nicely and it's the rust that is siezing it up anyway.
 
Went in workshop this morning to find a bucket of fizzing water. Must have only been in the tank for just over 12 hours but there was a fair ol pile of rust in the bottom
da3551f3bb35b232c4312f8302c3aa50.jpg

I thought I'd try my luck and see if it would turn. Maybe tomorrow :lol:
Coley
 
Now the rust is off inspect it for cracks, wheel castings like that were pretty poor from new, often full of air bubbles in the spokes.
I doubt very much if the electrolysis got anywhere near the two bearing surfaces of hub and axle.
 
Hope you don't have the trouble that Keith Rucker had in removing corroded shafts from flat belt pulleys. Not exactly the same but the principals must be similar. One of them took over a week & he was using 30+ tons of pressure on more than one occasion.
Interesting video though. :)

- https://www.youtube.com/watch?v=5pphkRJWjFY
 
1) Measure up the split cotters and make a dimensioned sketch.

2) Hacksaw off the head and tail of the cotter, and file back to level with the shaft.

3) Using a small cold chisel or fox wedge, ease the retaining washer up, and off the shaft.

4) With luck, the wheel should now drop off the shaft - if not, block up the wheel and drift the shaft off with a large hammer and punch.

5) Clean everything up, make a new split cotter from mild steel, grease generously and reassemble.
 
Cheshirechappie":1sn56tji said:
1) Measure up the split cotters and make a dimensioned sketch.

2) Hacksaw off the head and tail of the cotter, and file back to level with the shaft.

3) Using a small cold chisel or fox wedge, ease the retaining washer up, and off the shaft.

4) With luck, the wheel should now drop off the shaft - if not, block up the wheel and drift the shaft off with a large hammer and punch.

5) Clean everything up, make a new split cotter from mild steel, grease generously and reassemble.
I let it sit in the tank for 4 days and did what you suggested ;) it came apart fairly easy once the cotter was out.
fe7b09ae62775e71516e8c45d685e535.jpg

1 down, 3 more to go !
Thanks for your help guys.
Coley
 
Excellent stuff! No broken components, except the cotter - and at least that's pretty well the easiest to remake!
 
Just a few final pics to show them finished.
6ca0898e92efebb2679d831ee81f3227.jpg

I gave them a good smearing of grease before assembly
2cee92e22a96f31d3ae07edf836a117a.jpg

I got lazy and used some split pins instead of remaking the cotter pins. I used new self colour washers on the back of the wheels to reduce the hole from where the cotter pins originally were. Brushed on some rust curer so hopefully they'll last a bit longer before they seize again.

Coley

Sent from my SM-G900F using Tapatalk
 
I do like the idea that even a garden ornament should be in working order. :wink:
 
Back
Top