Twin Guitar Projects (Solid Body Electric)

UKworkshop.co.uk

Help Support UKworkshop.co.uk:

This site may earn a commission from merchant affiliate links, including eBay, Amazon, and others.

ByronBlack

Established Member
Joined
4 Sep 2005
Messages
4,117
Reaction score
1
Location
Thurrock, Essex
New year, new project (or three) :)

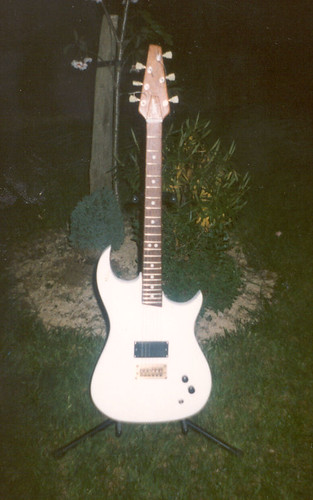
Here's a couple of pics of my latest project. The walnut explorer shape body was premade and purchased from ebay, I'm going to be making the neck for this one. The other guitar is one of my own designs, the body is made from english yew and topped with some lovely figured maple, I've ordered a pre-made neck for this one.

The reason for the pre-made components is two fold. The first being I need the guitars quite quickly, as one is a for a mate who gigs regularly and has some recording due in about a months time, and I also need a new guitar quite quickly. Secondly, the parts were cheaper than I could make them and represented a great bargain.

The third guitar project which I'm currently preparing the timber for will all be completed myself bar the pre-slotted fingerboard.

Both guitars are for rock/metal and will feature humbuckers and maybe some on-board effects such as compression and distortion.

The other picture shows some walnut laminates which will be the neck for the explorer. I've clamped them together dry and left them indoors for a couple of weeks to settle. I'll then glue together and square up and leave to settle for another week or so before attaching the fingerboard and carving the neck profile ('59 les paul for those interested).

Hopefully it won't be too long before I can show some more progress, but i'm hamstrung at the moment while I wait for parts and materials.

Neck laminates
2158293727_67049f75cf_m.jpg


Walnut Explorer
2158293387_585019076a.jpg


Elm & Maple Custom
2159091830_398e10131b.jpg


Ditto
2159091274_dc0c770d70.jpg


Another shot of the explorer body
2158292855_5d8f63c9d5.jpg
 
Wow! Going to be some pretty guitars! You leaving the explorer natural? The walnut looks tasty.
I'm awaiting some flame maple I ordered from Canada to arrive - then I'll be having a go at another guitar.
Cheers
Philly :D
 
Superb, hope you will keep this thread updated with plenty of photo's. That explorer is going to rock!

I made one guitar and have been wanting to make more ever since.

This is the guitar I made. Now it bits in the garage.
536866624_fde8a9eb5d.jpg
 
philly - aye, the explorer is going to be a tung-oil finish, it's just going to be a bedroom and studio guitar so it doesn't need anything to tough, whereas the maple custom is for a mate so i'll be using rustins plastic coating for that one as his gigs can get a little roudy and will probably need a strong finish (which is also the reason for the bolt-on neck, a lot easier to replace if and when he breaks it! :)

Nola - I like the look of that, seems to be a real rocker!
 
Green - The walnut explorer body cost me about £40 or so, from ebay.

Update

Made some decent progress this week. It took me a few days to gather the various hardware parts needed and I had to wait for some stuff from america (Stew Macs) and various odds and ends that were needed to get going.

Anyways here are the pics of the current neck building proceadure:

Neck lamination being thicknessed (to 20mm)
2169491934_1280098982.jpg


Working out headstock angle and scarf-joint location
2168692331_2575724f08.jpg


12 degree angle marked on neck blank as well as various 'stop' points (fingerboard, nut etc.)
2168697333_481243e797.jpg


Cutting scarf angle with Incra and tablesaw
2168696961_ceaf119179.jpg


Nice smooth result
2168696495_0e89de15b3.jpg


Using my lovely 'Philly Plane' special baby coffin smoother
2169489490_45b01d1192.jpg


Taping of scarf joint similar to how I do mitre joints
2168695601_db8d4ede55.jpg


Glue the joint
2169488722_f3b53bb92c.jpg


Clamping of the scarf joint
2168694789_bff34a5540.jpg


Actual size fingerboard drawn onto 6mm ply and cut out as a master template
2168693957_f6b49f37b6.jpg


Headstock bandsawn and rasped to shape - it's designed in such a way that the strings pass directly into the path of the machinehead so they don't have to angle away and create tension on the nut, it took a number of hours to get this design correct
2169486274_9c78958e5a.jpg
 
Looking good BB. Don't show me up though by finishing these too quickly. :oops: :wink:
 
Hi Simon,

I doubt i'll be showing you up, your LP project is a lot more involved than this one, no body to make or carve etc.. although I would like to try my hand at something similar after these ones.

Some more good progress today, despite the cold I managed to get the neck about 80% complete.

On to the pics:

Truss rod installed on my lo-fi router table setup :)
2171758631_db91e6e877.jpg


Neck shape drawn on and taper cut on bandsaw (oversize ready to trim to a template)
2172547108_a86b03fc8b.jpg


Actually starting to look like a neck
2172546656_50d66deaea.jpg


Headstock thicknessed and volute 'roughed' out ready for smoothing
2172545786_74395b68df.jpg


Smoothed out with rasps and sandpaper
2171755841_e131c5899a.jpg


Making veneers from spalted maple for the 'backstrap' of the headstock, I'll also have one on the front.
2171755453_2aa521c549.jpg


1.5mm Veneers cut and smoothed ready for gluing
2171755091_41dea911b7.jpg


Backstrap veneer glued onto the rear of headstock. I've used a dowel to ensure that the veneer follows the curve of the volute.
2172542602_3505037254.jpg


Truss rod installed, fingerboard aligned and glued on
2171753075_29876186b0.jpg


Today has gone surprisingly well. It's always a little nerve racking cutting into a blank that has taken sometime to laminte, thickness, square etc.. but luckily it's all come out quite nice.

I had to get a little creative with the bending of the veneer, I didn't have any facility to 'steam' it so I dampened it with a sponge and a little water, wrapped it in tin-foil and heated it under the grill for about 8minutes, this made it very pliable and able to follow the curve perfectly using a large dowel as a 'former'.

Tomorrow should see the final piece of veneer glued on for the front of the headstock, the shape cut and the neck itself trimmed to the template with a pattern bit.

Then it's the nerve wracking prospect of fretting the neck!
 
Very interesting thread.

I wouldn't even attempt to fret a fingerboard. Hats off.
 
Great build Colin very interesting especially for me. Can I ask where you get your specialist items like the Truss rod etc. Have you made your own fret board? If so how? If not, where did you get it? Where will you be getting pick ups etc.

Many Thanks
 
BB, looking great, my lad is following this thread with great interest, he's got 7 G's of his own, one of which he built himself from a kit, got him a gibson for xmas, keep the pics coming, he cant wait to see your finished product.
Cheers, Rich.
 
Hi all, thanks for the nice comments!

Dom: I ordered all my 'technical' gear such as truss-rod, pre-slotted fingerboard (it also comes pre-radiused), fretwire, graphite nut and the radius sanding block from 'Stewmacs': http://www.stewmac.com/

The rest of the hardware such as the tune-o-matic bridge and the machineheads I got from various sellers on ebay. At the end of the project I'l post a full costing of the project. It's cost me about £158 so far including all the postage. It's worth noting that the stuff from stewmacs arrived quicker than an axminster delivery (2 days from when I ordered it) and so far I've not been invoived for the duty or handling.

If you prefer to get your gear in this country including tonewood, I can highly recommend David Dyke at http://www.luthierssupplies.co.uk/ - very friednly and helpful.

As for pickups, I'll most probably be using some hand-wound custom humbuckers from a UK company called 'Bare Knuckle Pickups' http://www.bareknucklepickups.co.uk/

Back to the fretboard; it's more than possible to make your own. I actually have a number of rosewood fretboard blanks ready for slotting and radiusing, the reason why I chose to go for a pre-slotted and pre-raduised fretboard was mainly due to speed, but secondly because I didn't have the costly tools to do the job reliably, you really have to perfect with the spacings otherwise the intonation can easily be out, but if I start to make more, then I'll probably invest in these tools.

If you have any further questions, then feel free to ask, my head is currently full to bursting with luthiery information!! :)
 
Another update, things are starting to move quite quickly now which is good, all the tricky stuff is out of the way, here's the pics from today's work:


This is how it looks out of the clamps, pretty rough, but ready for trimming to the master template.
2175069075_f5c739a837.jpg


Template attached to the fingerboard, and trimmed with pattern bit (note: guard was not in the photo but was used for the actual routing)
2175068405_54d2c77b24.jpg


Neck trimmed, and amazingly, it fits perfectly:
2175857560_4313f144d0.jpg


Glueing a couple of blocks to accept the extended 'horns' of the headstock
2175066041_0909ae7ca7.jpg


Headstock trimmed to template
2175856050_1d62bed493.jpg


Rear of neck showing of the backstrap veneer
2175855706_fa33f546db.jpg


Starting to come together
2175855288_cc173ff9bd.jpg


Tomorrow will see me starting the first process of carving the profile of the neck. I'll also most probably add the front-veneer, although I'm debating with myself whether the spalted maple would look too out of place on the front, what do you all think?

I've placed another Stew Mac order today for some fretting tools (cutters, benders and files) when that arrives I can stuck into the fretting.

In the meantime while I wait for that stuff to arrive, I'll be fitting the pre-made neck to the maple custom body as that arrived today, I'll also be making a new template for the explorer body as I want to modify the shape a little, at the moment it's a little to 'round' and soft, I'll be making the angle and edges a wee bit sharper and straighter.

My budget for these projects has now reached £221, the fretting tools and other bits and bobs from todays orders bumped it up a bit. The fretting tools are quite expensive, but I'd rather do the job well with the correct tools than hash it up with inadequate tools.

I'll have to wait until next month to get the electrics, pickups and finishing supplies, but it's really starting to come together.
 
Again very nice Colin. Was the template for the neck your own design or bought? How did you attach the template to the finger board without screwing into it? Order numbers or part numbers from the Stewmac web site would be nice. Thier web site's a bit bamboozling to the uninitiated.

Cheers
 
Wow! You are the man progress, Colin :lol:
As for the headstock veneer - how about walnut instead? I have some I can send you if you need some?
Just my 2p worth,
Philly :D
 
Dom

Here are the part numbers of the stuff that I ordered from Stew Macs

0020 Stewmac Medium Super Glue 20 Gram
0619 Fret Nippers - $28.98
1696 Fret Bending Pliers - $32.88
1826 Dressing Stick with 8 Belts - $8.95
3357-B Black Neck Screw x 8 - $0.92 ea
5562 Sandpaper Sampler Package - $15.88

And the first order:

0002-G Inlay 5mm Gold Pearl Dot x 10 - $0.60 ea
0150 High Fretwire - 2ft piece x 5 - $5.22 ea
0417 8in Sanding Block with 12in radius - $15.95
0964-G Gold Pearl Inlay Side x 10 - $5.50
0982 2-Way Hot Rod Truss Rod - $15.09
1058-R Rosewood Gibson Scale Fingerboard - $18.36
1869 3/16in Slotted Trem-Nut - $6.53
4895 Fretting Hammer Brass/Plastic - $19.60

Philly - I do have some walnut, and did consider it but it's a bit bland the piece I have - do you have any burr walnut by any chance (If thats not too cheeky to ask)?
 
Looking Excelent BB. Great Progress. I think I know what you mean about the explorer being a bit too rounded.

What about an ebony veneer for the headstock. I bought some for my LP project. It has some nice colour flashes through it. I have loads if you want some.
 

Latest posts

Back
Top