Jamesc
Established Member
I've been posting/lurking here for quite a while and realised that I hadn't actually posted any of my woodworking projects. I think of myself more as a metal worker, but have strong family connections with woodwork.
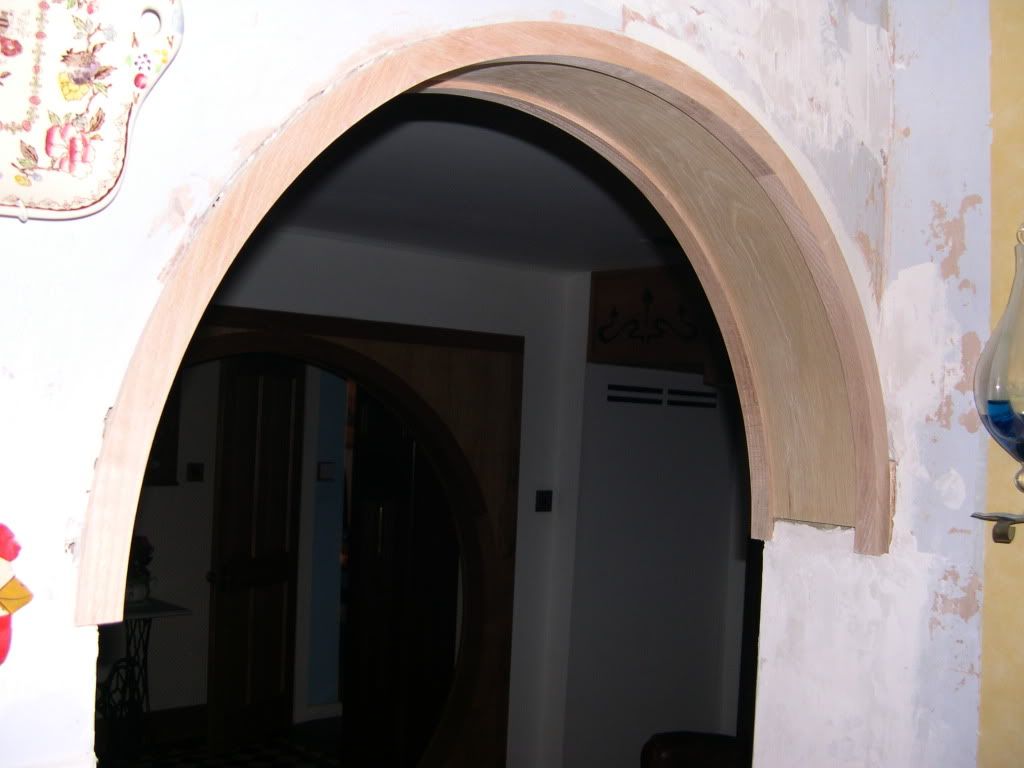
Anyway here is my project. We are slowly redoing all the bodges from the previous owner in out house and converting the house to our own little Arts and Crafts heaven. This project is an arch into the kitchen. There is no room for a door so the arch is there to make it 'look' right.
Here is what I started with, less the wallpaper. Yo can just make out las years project of the arch to join the inner and outer halls. and on the right the edge of my Deco window.

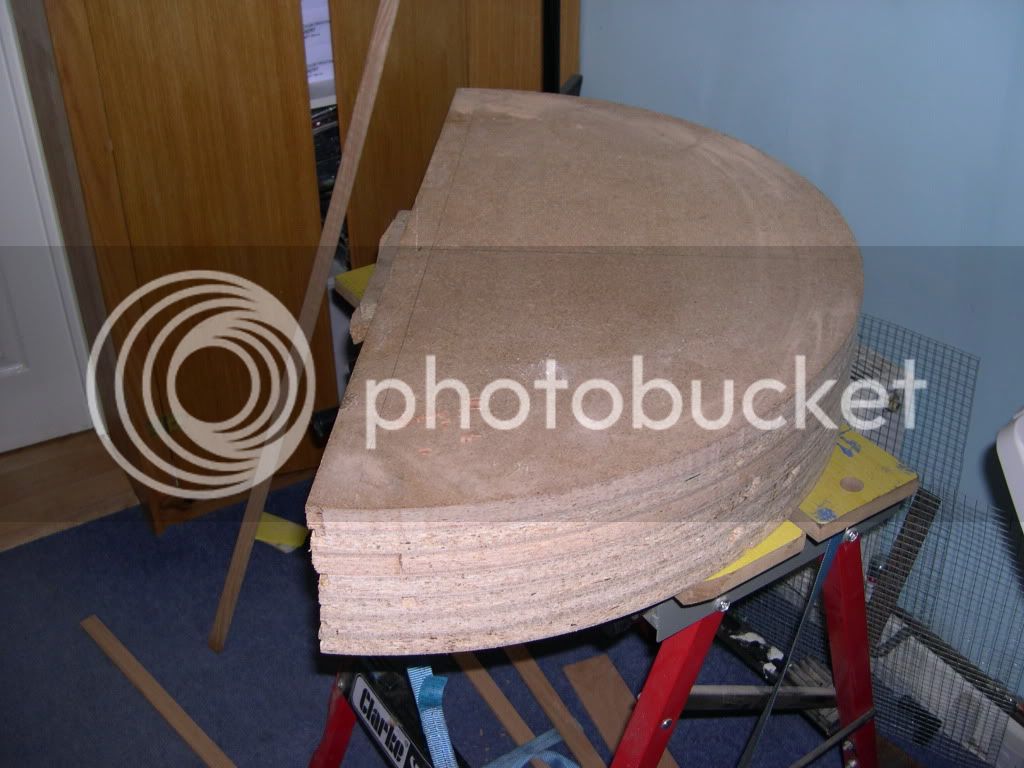
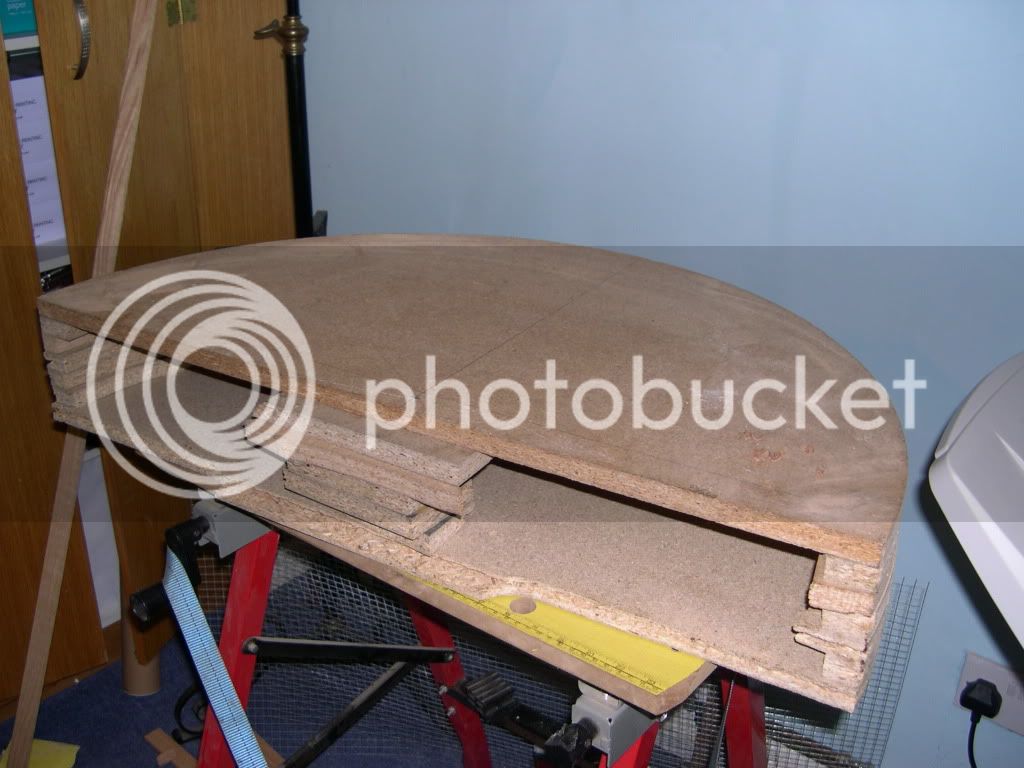
All the projects in the house are in Oak (is there any other wood?). so this was no exception. To match the stairs I needed to make the framing 1" thick. This would be very weak and not able to hold the veneered ply in shape as I had done with the bigger arch. So I first made a former and laminated up three layers of ply to hold the arch in shape. Sorry no WIP photos yet as I got carried away with this bit.
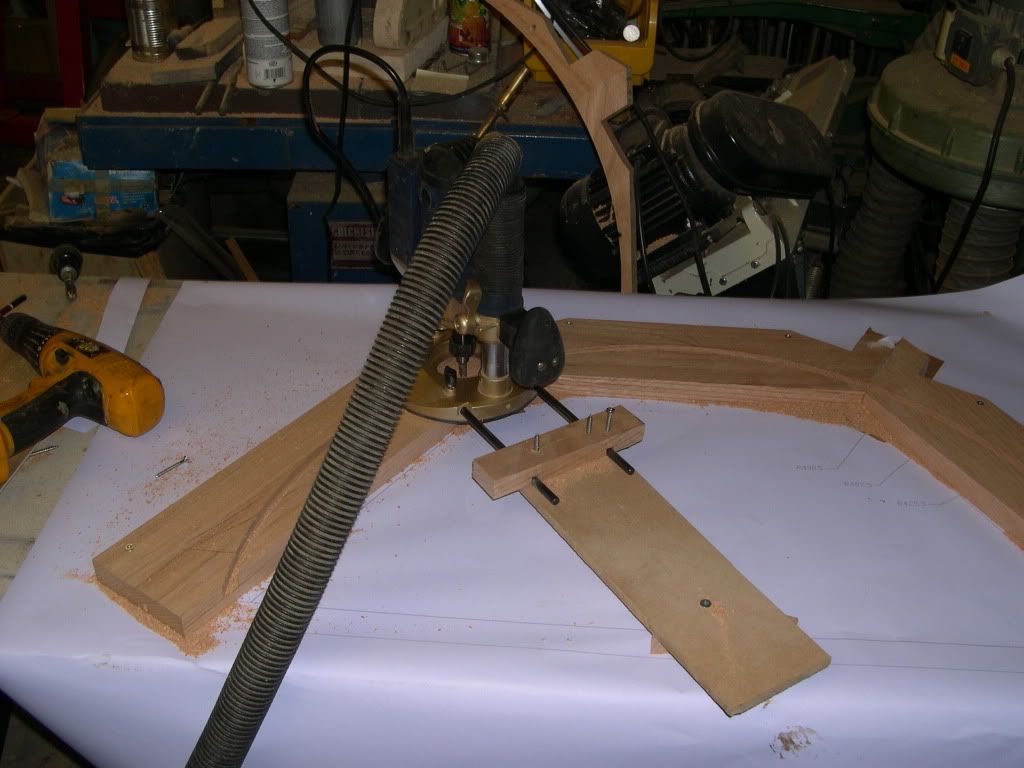
Next to make each frame these are from 3 pieces of 1" x 5" mitered and gled together. The keen eyed will see that I have layed everything out on a full sized drawing. This is a great way of working especially if you have access to a plotter.
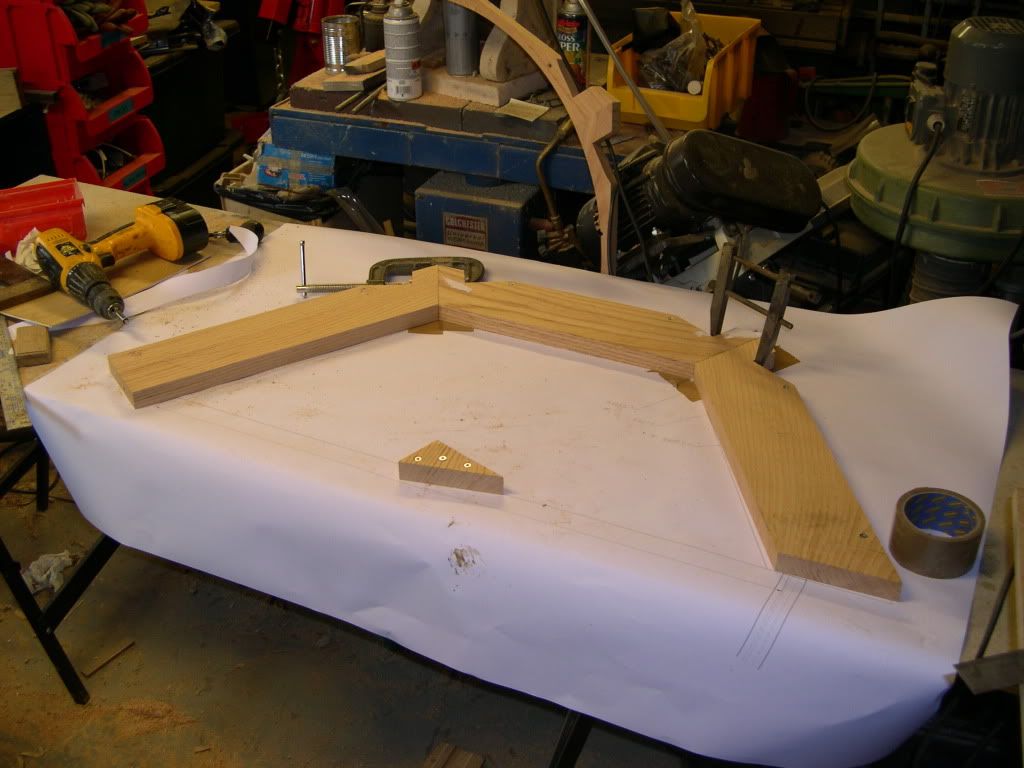
Once glued I used a simple tramel and router to cut to shape. Everything was held firm by screwing it to a base board.
Then it was a case of glue up one side and repeat.
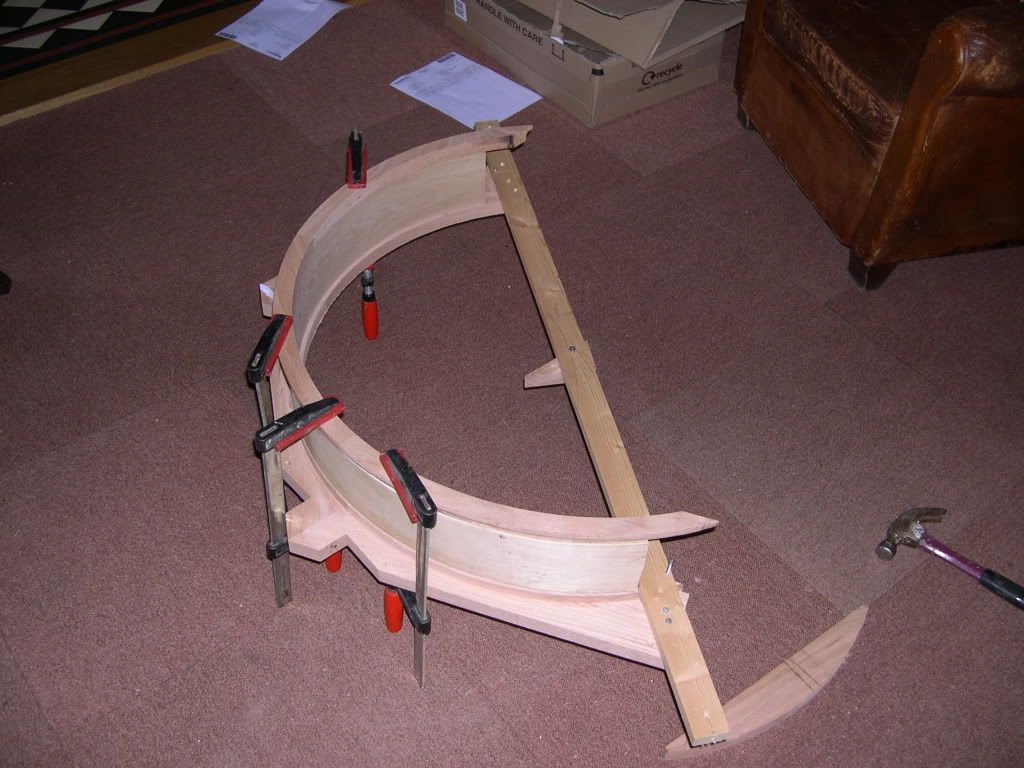
To make sure everything stayed together I left the outer trimming until after the glue had set, using a temporary pivot point (batten)
I'll post some pictures of the ongoing progress (I've started fitting it in place) later.
James
Anyway here is my project. We are slowly redoing all the bodges from the previous owner in out house and converting the house to our own little Arts and Crafts heaven. This project is an arch into the kitchen. There is no room for a door so the arch is there to make it 'look' right.
Here is what I started with, less the wallpaper. Yo can just make out las years project of the arch to join the inner and outer halls. and on the right the edge of my Deco window.
All the projects in the house are in Oak (is there any other wood?). so this was no exception. To match the stairs I needed to make the framing 1" thick. This would be very weak and not able to hold the veneered ply in shape as I had done with the bigger arch. So I first made a former and laminated up three layers of ply to hold the arch in shape. Sorry no WIP photos yet as I got carried away with this bit.
Next to make each frame these are from 3 pieces of 1" x 5" mitered and gled together. The keen eyed will see that I have layed everything out on a full sized drawing. This is a great way of working especially if you have access to a plotter.
Once glued I used a simple tramel and router to cut to shape. Everything was held firm by screwing it to a base board.
Then it was a case of glue up one side and repeat.
To make sure everything stayed together I left the outer trimming until after the glue had set, using a temporary pivot point (batten)
I'll post some pictures of the ongoing progress (I've started fitting it in place) later.
James
 either you don't like my work or are so dumbfounded you have nothing to say about it :?