Stopped grooves?

UKworkshop.co.uk

Help Support UKworkshop.co.uk:

This site may earn a commission from merchant affiliate links, including eBay, Amazon, and others.

Keefaz

Established Member
Joined
18 May 2006
Messages
107
Reaction score
0
I seem to remember a post not so long ago about making stopped grooves using a combination/plow plane, but can't find it. I've given it a go myself, and I can't get my head around it. The plane itself rides on the top of the wood, so I can't see how you make a progressing deeper cut with a plane which is riding at a consistent level.

I'm missing something, obviously! :(
 
Hi Keefazm, I recall the same message.
I have dopne a quick search and this is the post I was thinking of

Byron wrote:
keep seeing the little Stanley 75 Bullnose plane - what exactly is the purpose of this plane?

Small doorstop for a small door or paper weight.

Also, what plane is the one I need to make dado's, grooves and rebates. I used to own a Record combination plane but wasn't that comfortable using it - is there something else I should look at.

One option is a Stanley #45. Another is a #50 with extra blades. A #55 is overkill.

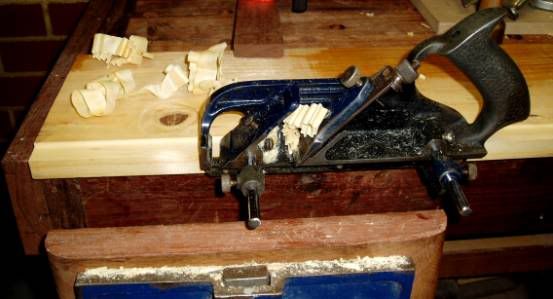
Also, the Record 778 (stanley 7: are these for just creating a rebate on the very edge of a board, or can they be used to create stopped groove/dado?

The #778/78 only has one size blade. Therefore it is only only adjustable for edges.

image016.jpg


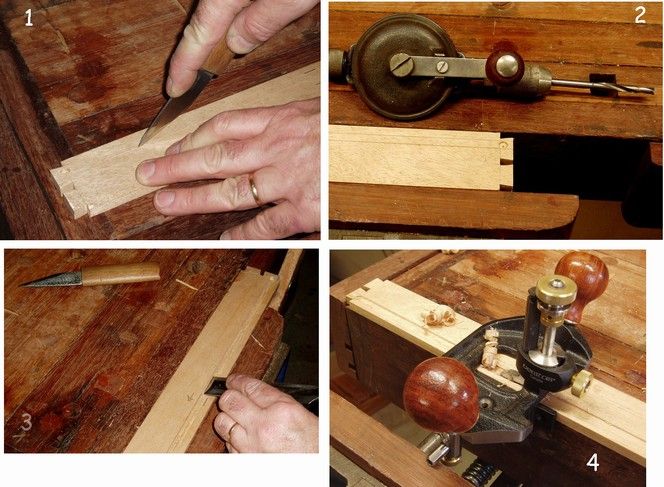
A stoped groove/dado can be made with a routerplane.

Stoppedgroovesequence.jpg

And finally, I see loads and loads of the wooden rebate/shoudler planes about - are these useful and will these allow me to adjust the width of a dado?

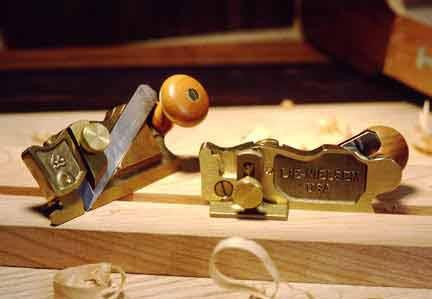
If you wish to adjust the width of a rebate, the planes of choice are the Stanley #79 side rabbet or the Stanley/LN #98/99 combo.

LN98-99.jpg


Regards from Perth

Derek

I dont know if it is the one you were after, but it gives you a rough idea.

Hope this helps
 
Hmmm... Thanks! This does look familiar, but I'm not sure this is the one I was thinking about. I may be getting confused, but I think it showed a stopped groove being made with a combination plane, I think, not a router plane (which I don't have!).

Or maybe my mind is playing tricks on me again. :lol:
 
I think you drop the cutter a bit for each pass AFAIR, without going into the workshop to look at my Stanley something or other number which I very rarely use.

cheers
Jacob
 
bascially jacob is right, you have to lower the blade after every pass.
that's why there is a screw fixing on the top of the blade on my stanley.

paul :wink:
 
Alf":1yuxzgzv said:
The best way to do stopped grooves with a plough/combi is to design them out.

Cheers, Alf

Well, that is a good point. What are the, ahem, olde-fashioned workarounds? I suppose if you're putting a groove in the sides of a draw you could mitre the bottom of the dovetails to hide the groove?
 
'zactly the sort of thing, but good old traditional drawer construction just doesn't need a stopped groove or mitres. Erm... Not the clearest example but this'll do.

Cheers, Alf
 
The work-around is to not groove the sides of a drawer. It's not a good detail anyway and is usually only done on cheap stuff. It weakens the wearing edge of the drawer side. Better is to add drawer thingies (slips?) to each side.

cheers
Jacob
 
engineer one":1cp5zui4 said:
bascially jacob is right, you have to lower the blade after every pass.
that's why there is a screw fixing on the top of the blade on my stanley.

paul :wink:

Not so; from the manual here
http://www.tooltrip.com/tooltrip9/stanl ... anmisc.htm

we have:

stanley manual":1cp5zui4 said:
DEPTH GAUGE ROD: This rod (A) fastened by means of thumb screw (O) may be used to control the depth of each cut, preventing the Cutter from taking an excessive cut which would be inconvenient. For example, a cut 1/16" deep can be cut repeatedly while still allowing the Cutter to be set for the final depth of cut. One end of the Rod is of small diameter for following in a small groove

I'd love to hear from someone who's actually done this though!!

More usually, the sides of the cut are knifed or sawn, and then the bulk of the waste hacked out without chisels or gouges, allowing the router to be used as a final finishing and bottom smoothing tool.

BugBear
 
Off the top of my head and not knowing what you want one for.
I think plough through both ends and then glue a piece(s) of matching wood in the part of the groove you want stopped, and plane level etc.
 

Latest posts

Back
Top