


ok so it's not a new idea but i've just done it and it was relatively easy so hope this might help others:
Buy a cheap router from boot sale £5 - can get them new for £25 if it breaks from B&Q
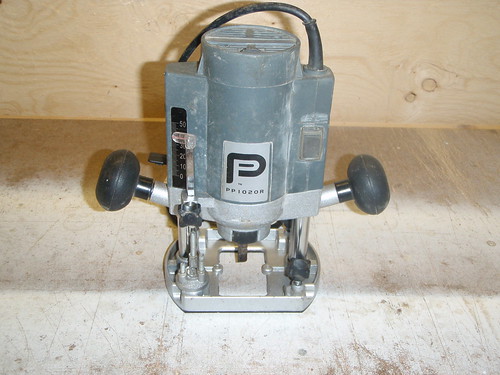
take all the bits off
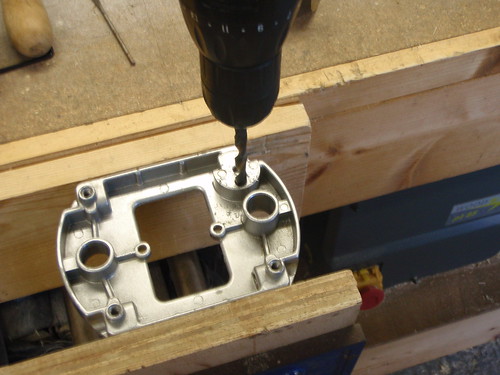
note how depth guage hold and depth stop hole line up
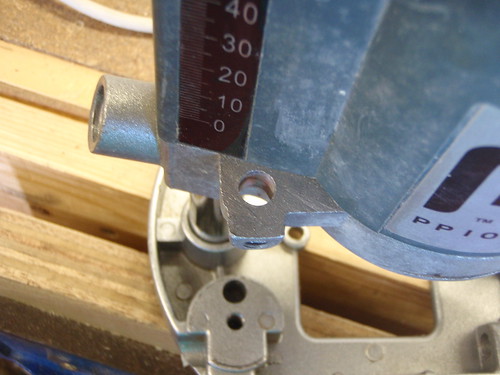
line up perfectly
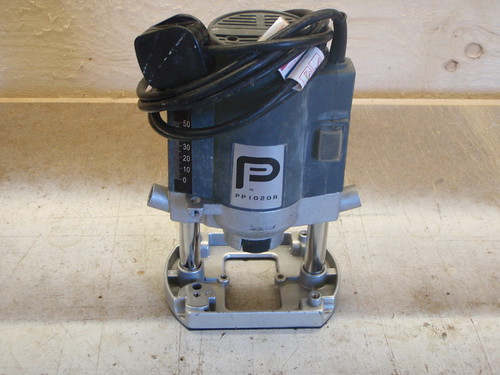
take off legs
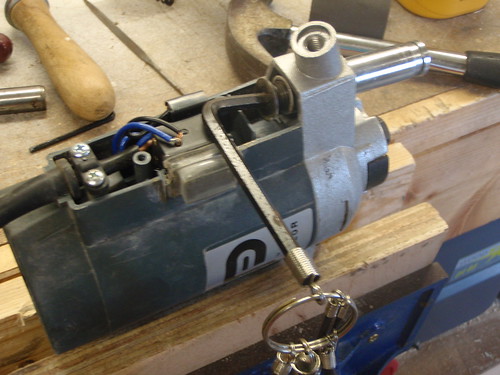
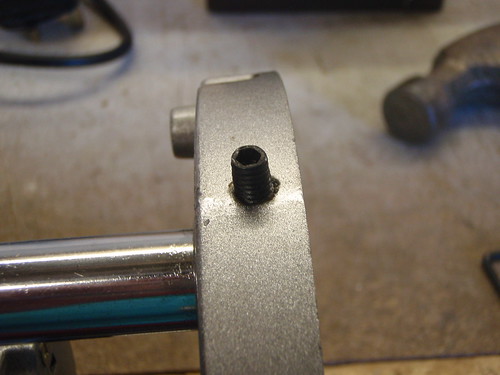
don't forget nasty little grub screw that got stuck requiring purchase of screw extractor kit from screwfix - amazing piece of kit if you've not got one get one - anyway take out grub screw and use drift to knock out legs
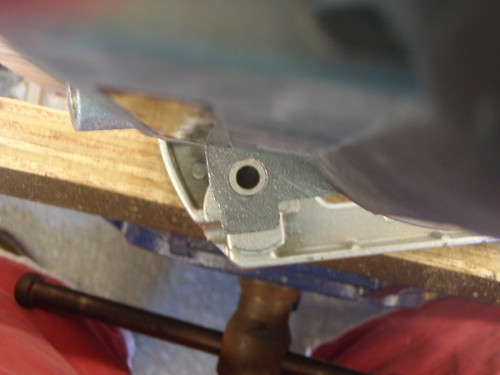
drill hole through base plat using depth stop hole as guide - its exactly the right size - 8mm
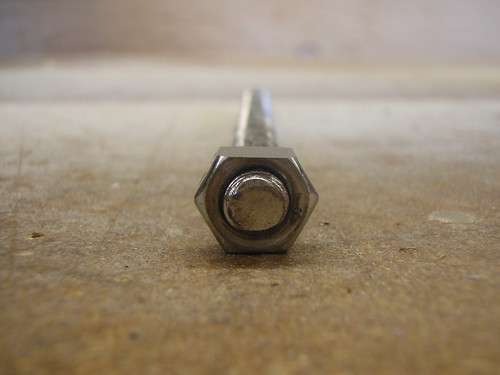
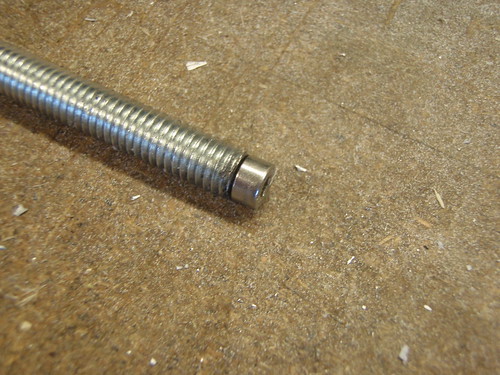
find bit of M8 threaded rod from tin of assorted bits of bolts and stuff flatten one edge of bolt so it sits flush against side of router
drill hole in other end of rod and glue in M4 allen head bolt (tried to thread it but the correct size hole for M4 is 3.3mm drill which I didn't have - and 3mm didn't work as I am cack - there's nothing wrong with Araldite - make sure you put a washer in between the rod and M4 bolt to stop the rod falling out the 8mm hole you drilled earlier
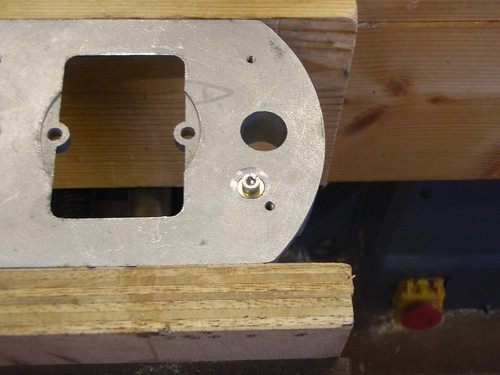
here's how it sits in the base (its a little proud but i reckon itll still be below my router plate surface - if not i can sink it a bit more
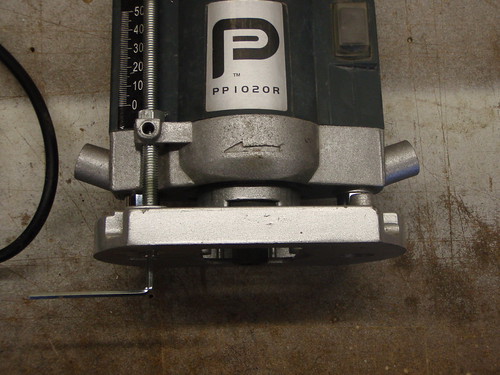
and here it is having just wound the router up - the allen key is sticking out the bottom -I'll have to make some winding handle later. the nut is just visible just below and to the right of the '0' on the depth scale - it's just glued in/on.
That's it - thanks to all for the help on the 'holes for tapping' thread just a bit further down than this one
Sorry to mods if too many photo's - I left out half of them
Cost - £5 and a screw extractor set!
now I just need to build a router table to put it in!!!
Thanks for looking
Pete
Buy a cheap router from boot sale £5 - can get them new for £25 if it breaks from B&Q
take all the bits off
note how depth guage hold and depth stop hole line up
line up perfectly
take off legs
don't forget nasty little grub screw that got stuck requiring purchase of screw extractor kit from screwfix - amazing piece of kit if you've not got one get one - anyway take out grub screw and use drift to knock out legs
drill hole through base plat using depth stop hole as guide - its exactly the right size - 8mm
find bit of M8 threaded rod from tin of assorted bits of bolts and stuff flatten one edge of bolt so it sits flush against side of router
drill hole in other end of rod and glue in M4 allen head bolt (tried to thread it but the correct size hole for M4 is 3.3mm drill which I didn't have - and 3mm didn't work as I am cack - there's nothing wrong with Araldite - make sure you put a washer in between the rod and M4 bolt to stop the rod falling out the 8mm hole you drilled earlier
here's how it sits in the base (its a little proud but i reckon itll still be below my router plate surface - if not i can sink it a bit more
and here it is having just wound the router up - the allen key is sticking out the bottom -I'll have to make some winding handle later. the nut is just visible just below and to the right of the '0' on the depth scale - it's just glued in/on.
That's it - thanks to all for the help on the 'holes for tapping' thread just a bit further down than this one
Sorry to mods if too many photo's - I left out half of them
Cost - £5 and a screw extractor set!
now I just need to build a router table to put it in!!!
Thanks for looking
Pete
")