Sound Desk (work in progress)

UKworkshop.co.uk

Help Support UKworkshop.co.uk:

This site may earn a commission from merchant affiliate links, including eBay, Amazon, and others.

DavidE

Established Member
Joined
23 Jan 2007
Messages
251
Reaction score
0
Location
Lancashire
Hi there,

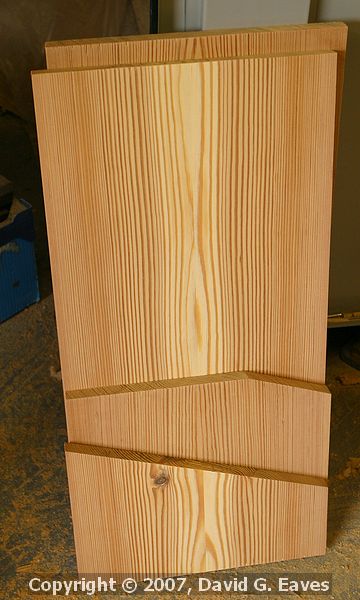
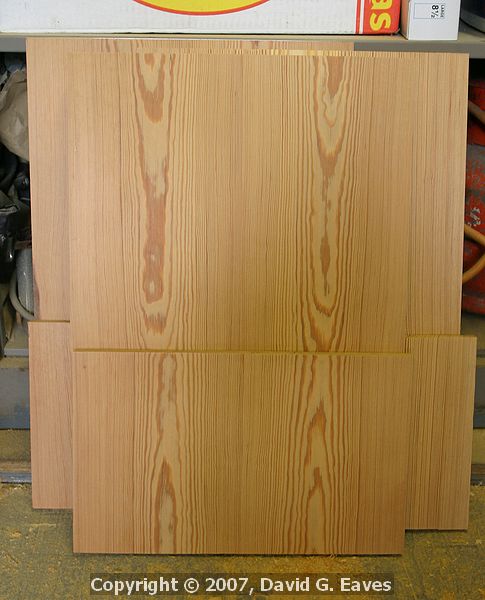
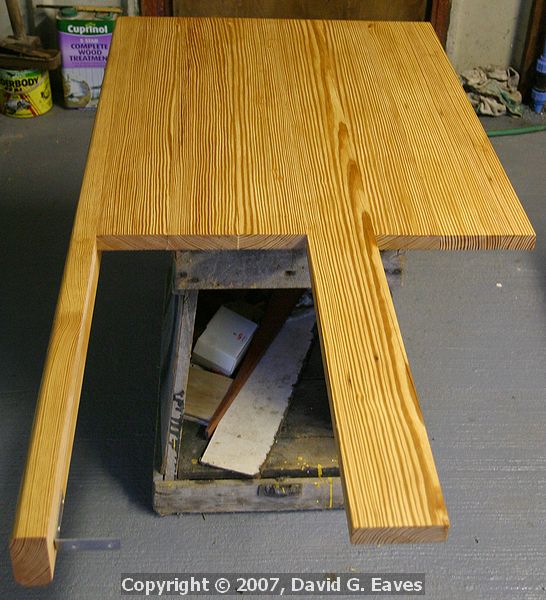
This weekend has been spent processing wood (resawing then thicknessing)... then making a frame. It's for a sound desk in a church, and is made from recycled pitch pine pew. It was the subject of a question a while back when I was having a dilemma over how to make a lid. In the end I have decided to go for a piano style lid. I appreciated the various thoughts people had on that as I was in a quandary.

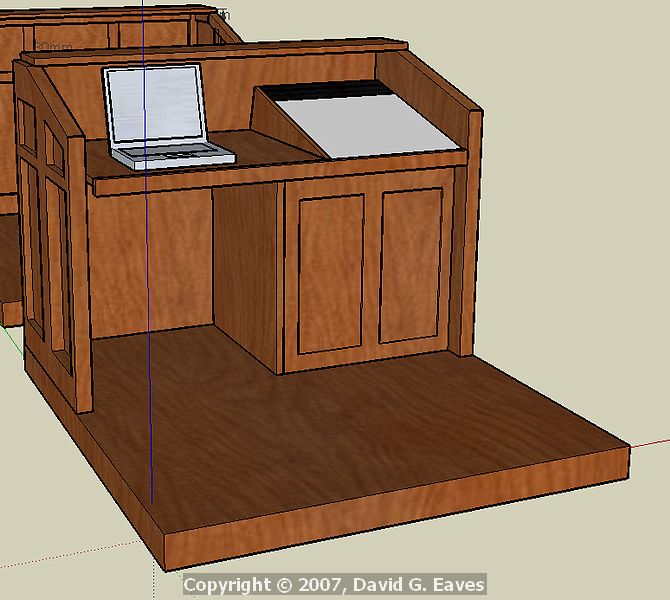
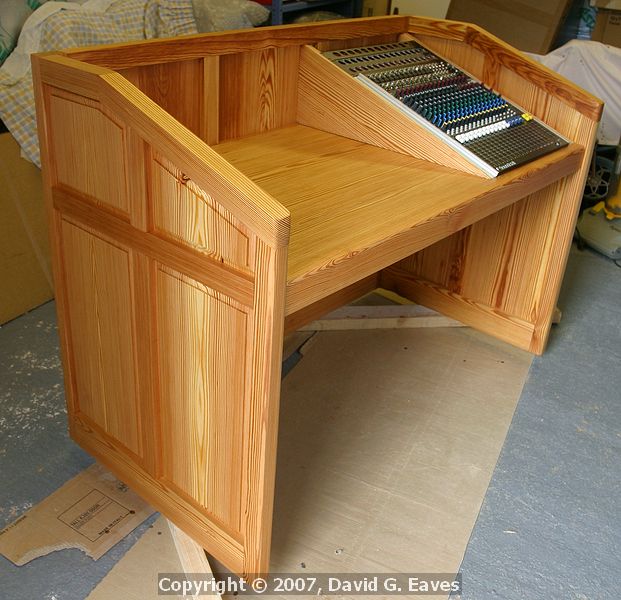
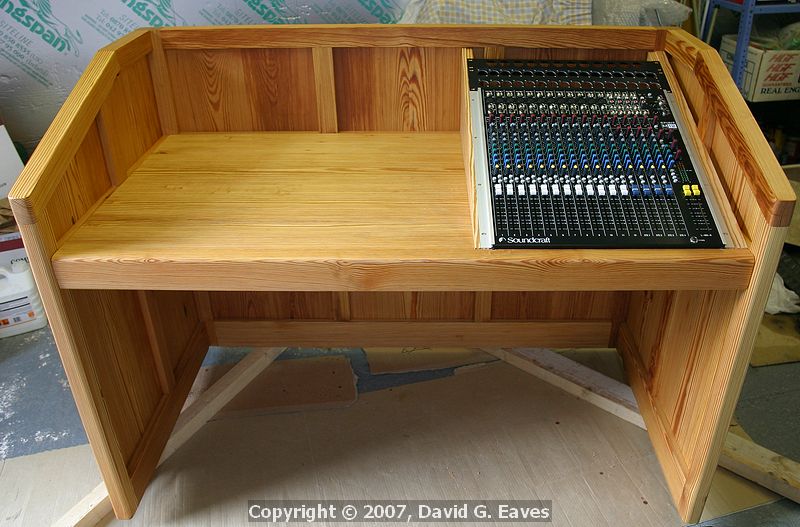
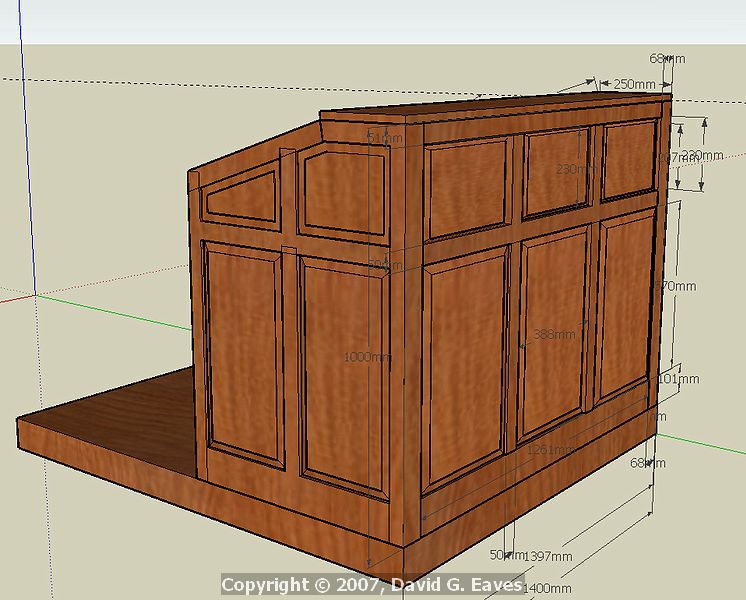
Here's a sketch of the final product. (I have been working from SketchUp drawings and it has worked out spot on which was very pleasing. Is there an easy way of turning off the dimensions in SketchUp?
desk%20sketch_std.jpg


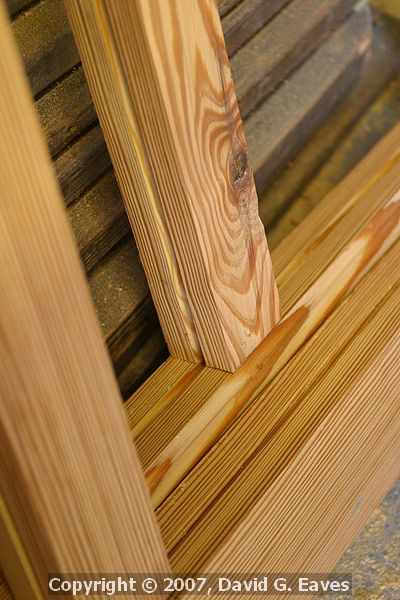
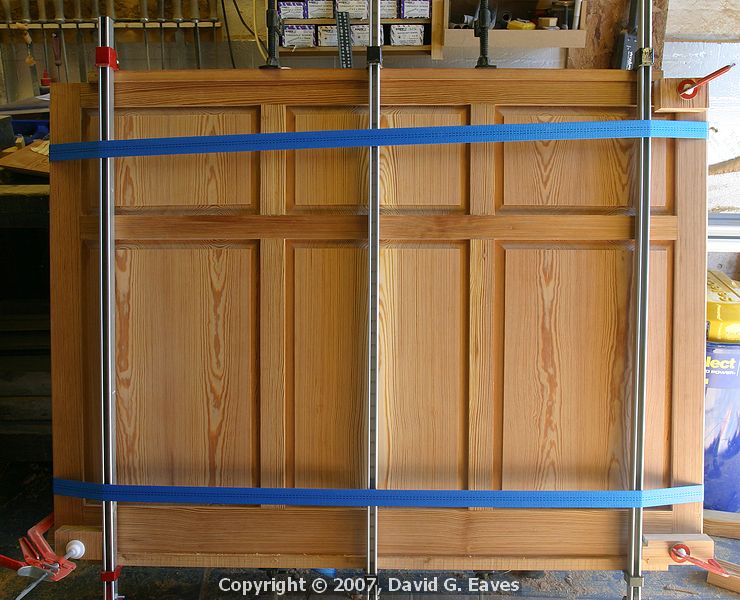
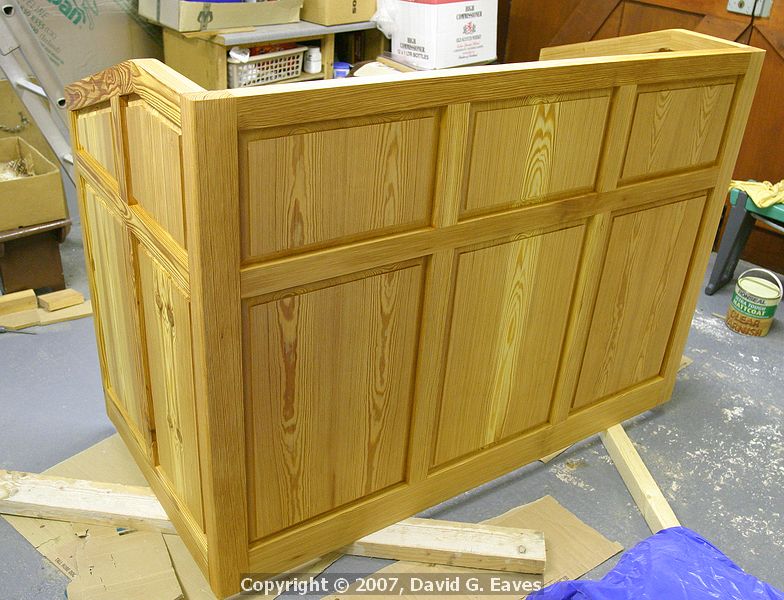
This is the frame tonight, it is constructed with mortice and tenons. with the exception of the top mitred joint (which is out of line as it is not clamped up - hopefully on the final glue up the panels will help keep things in line)
crw_18994_std.jpg


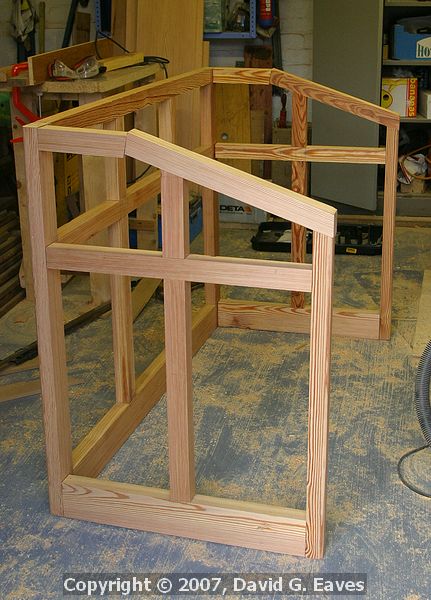
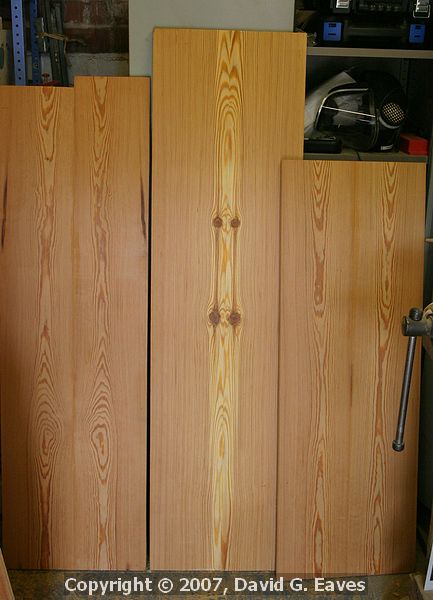
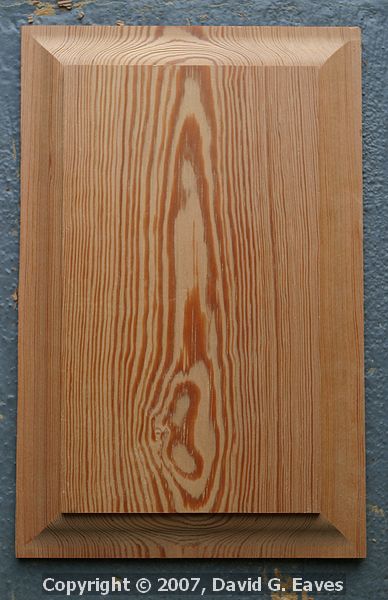
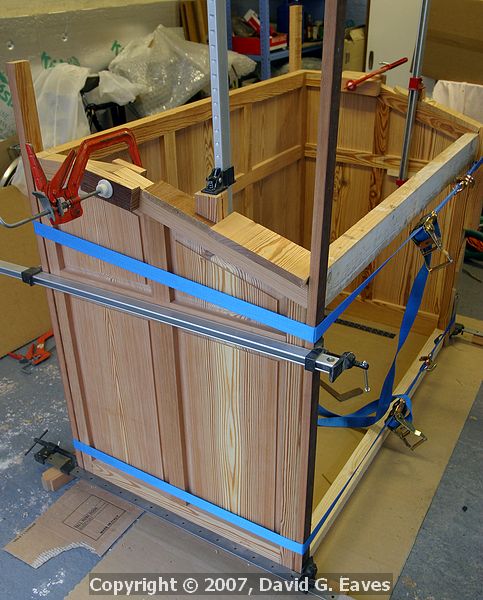
The next job is making the slots then raising the panels (which can be seen all glued up in the background). I shall add more photos as progress continues.

David
 
Looks good :D
Like the idea of making it from a recycled pew,seems very appropriate.

Andrew (looking forward to the next installment :D )
 
David,
your post caught my eye as we have a very similar sound desk cabinet built in the church I go to (I get to operate the sound desk).

Your's looks like it is coming on nicely, and using the pitch pine is great.

Have you considered the issue of heat? The sound desks can get very hot (as they often contain power amplifiers), and have fans built in. These tend to try and suck the air in the front and blow the air out the back, and can be quite loud, especially as the PA desk works a bit like a sound box. To avoid the fans operating too much (which can be disturbing in a church) you need good air flow.

Looking at your design, there is very little room for air flow. For ours, we ended up replacing the solid back panels with metal mesh (gold coloured) which looks very nice and allows a good flow of air.

Have you also considered cabling etc? We made several holes from top to bottom through the shelves inside the desk so that audio cables from CD players etc could just be passed up the back and into the mixing desk. Having several holes also means you can route the power cables away from the audio cables. I presume you've also considered how to get the main power cables and audio cables in and the speaker cables out. The holes in our cabinet are just big enough to manoeuver a 3-prong plug through.

Finally, one thing we didn't consider sufficiently when building ours was the height between the top of the mixing desk and the top of the cabinet. On our desk the audio connectors (XLR and jack) are inserted vertically, so you have to add the height of the longest connector (not forgetting adaptors) to the height of the desk, plus a bit more to allow the cable to bend down, for the height of the top of the desk.

You may well have considered all this stuff already, in which case apologies for egg-sucking lessons, but otherwise I hope I might have saved some frustration in the long run.

Anyway, it is nice to make a feature out of the sound desk cabinet, and your's looks like it will fit in well. All the best.

Regards,
Fingerless
 
Thanks for all the nice comments. I had a day off work today so it has been progressing (slots done, panels cut and I've started to sand them prior to routing - also made a test raised panel which looks good). I will add the detail in a few days as I have run out of steam today and work beckons in the morrow! :(

Fingerless - you make some excellent points, hopefully my design covers them all. I'll add some more detail on the next update to show how it all works. The sketchup drawings are very basic and were more so I could get the outer shell built.

Thanks, David
 
Hi there,

Okay I had a night off tonight as I was worn out after work today. Here's some photos and a reply to fingerless's excellent points.

The slots are now all machined - 6mm deep on the base of the panels and all others 9mm. I wanted to make sure the panels all sat at the same height hence the tighter constraint on the base. (looking from the back showing the rough knot that will be hidden when finished!)

crw_18996_std.jpg


Some book matched boards before cutting.

crw_19006_std.jpg


The test panel from a bit of scrap

crw_19013_2_std.jpg


Some boards after cutting to size and sanding

crw_19016_std.jpg

crw_19017_std.jpg


Fingerless,

I’ve included my sketch of the desk from the operator side, to pick up on your points.

desk%20view%202_std.jpg


Heat – the amp I am using is a 400W amp with no fans – just massive heat sinks. It doesn’t get too hot in normal (ie just speech levels) use as it is a very good quality design. This gets away from the noise issue too. I will be having some vents built into the area to get some airflow into the 19” rack where all the equipment sits. I will be putting a closable vent in the floor where the wires come through as there is good airflow up through there too. The other advantage is the church is never that warm. It just about manages for three months a year to get to about 16-20 degrees! :) I may put a temperature indicator somewhere for a while/permanently just to monitor the system.

Most of the cables will be hidden as they come up out of the floor into various termination panels and jackfields. I will be adding some holes at the back of the desk part to allow for computer cables etc. The mixer will be screwed into the right hand side of the desk with the jackfield above. If I have got my calcs right there should be plenty of clearance to still have the lid down with cables in. The cables will be running up trays and I will endeavour to keep the mains and audio apart and certainly avoid parallel runs.

Thanks for your thoughtful reply it was good to go through the design philosophy in my head again.

No workshop time due now till the weekend - some more panel sanding needed then routing time on the panels.

David
 
DavidE":17e52ppl said:
... Is there an easy way of turning off the dimensions in SketchUp?

I always move my dimensions to a separate layer, well two or three layers actually, Dimensions Front, Dimensions Side and Dimensions Plan. Turning them on and off is then dead easy.
 
Hi Paul, thanks for your message. I'm planning on using a clear Ronseal polyurethane varnish. I've tried some already and have been pleased with the results. I considered oiling it, however, I was concerned about grubby fingerprints overtime so thought a more impermeable coating would be better. It's quite good as it gives it a nice soft sheen and brings the colour up.

Thanks for the tip Nick I'll have to try that out.

Cheers
David
 
Okay time for the next update...

I have been a bit distracted this weekend with other stuff. Anyway yesterday I managed to finish sanding the panels then I routed them all. This morning I hand sanded all the routing to take any sharp edges off etc and ran over the faces again. Then came the assembly of the back section. This went well and you can see the whole thing clamped up below. I thought I had long enough clamps now for anything I would make... There is always something that comes along that is longer!Fortunatly, with the solo clamps holding the ends from twisting the ratchet clamps are doing a good job of giving a bit of pressure on the ends.

crw_19022_std.jpg


I'm hoping to glue either one side (or both) on tomorrow.

Thanks, David
 
David,

This is really taking shape, looks very good. :D
I bought some old pews from a church that has up graded its seating, still not made anything with them yet, hope it looks as good as this when I do. :)
 
DaveL - What wood are the pews you bought? In typical Victorian style these were stained very dark. The transformation after they have been planed is amazing

Thanks Paul.

Okay to keep the post up to date, here's todays progress...

Both end panels are now glued on and I'm thinking about making the table top.

crw_19045_std.jpg


Cheers
David
 
Okay a few more photo updates.

The table top has been glued up and fitted in the unit. Here it is with the first coat of Varnish on. (The table top floats on brackets and the hole is where all the gubbins will come up from underneath.

crw_19050_std.jpg


The rest has also got it's first coat on. I have started making the fittings for the mixer as well. Once the varnishing is done it will be taken to it's new home and the lid and lower cupboard added later.

crw_19056_std.jpg


(this photo looks a little strange due to the wide angle distortion)

Cheers
David
 
Nice looking work David.
I just love the look of the wood.Looks great.
I like the way you've got that lighter streak in the middle section :D
Paul.J.
 
David, this is the first time I have seen pitch pine "in the flesh" and it certainly is a nice colour with the varnish on. The grain pattern on the panelling is very pleasing. Good job :)
 
Thanks Paul.J and Shultzy - I was lucky that I only really hit one light streak for the large panels so could make it symmetrical.

Okay to keep the WIP photos going.

These were taken just after making the 19" rack mounts for the mixer and terminations. This was the dry fit just before the new parts were removed and sanded ready for the varnish.
crw_19063_std.jpg

crw_19061_std.jpg


The next move is to take it to it's home ready for an open day on Wednesday. I will complete the lid and cupboard over the next few weeks and fit them in-situ.

Cheers
David
 
Back
Top