Record 044

UKworkshop.co.uk

Help Support UKworkshop.co.uk:

This site may earn a commission from merchant affiliate links, including eBay, Amazon, and others.

ydb1md

Established Member
Joined
6 Apr 2005
Messages
634
Reaction score
0
Location
Maryland
I've only had a couple of hours to use this little plane but I gotta say, it rocks. Making grooves is fun now. Dragging out the electric router is a hassle and I never look forward to trying to think of how to capture the dust, clean up the shop etc.

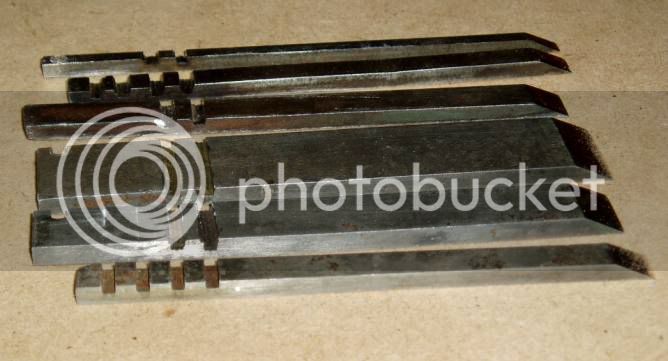
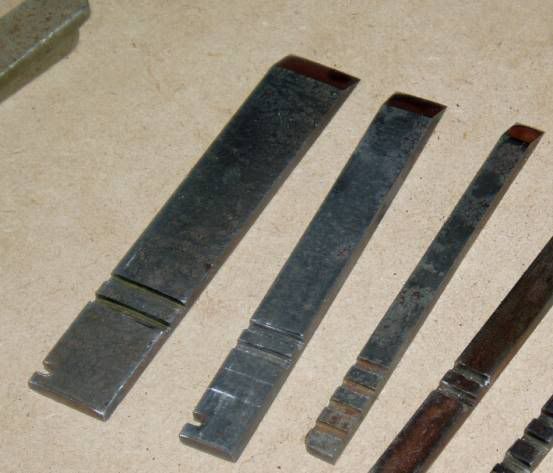
The cutters are a little rusted from being in their cardboard sleeve but they clean up pretty quickly. Sharpening them is easy because you can do it freehand. The cutters don't demand the same level of precision in sharpening that a smoother's iron does -- a nice change.

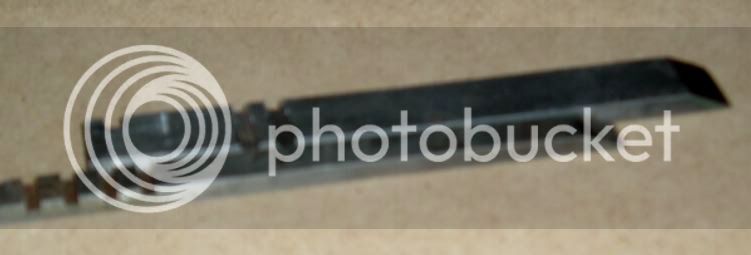
I was surprised at how fast it is to zip out some dadoes with this little sucker. I wouldn't want to do it in a production environment but for doing casework, drawers, etc it's the way to go. When you factor in the setup and cleanup time for a tailed router, this is almost as fast -- and a lot more rewarding. I can see why Derek makes his own blades. They wouldn't be hard to knock out and you could do custom widths or profiles. I was making some practice cuts in a piece of maple and before I knew it I had a 1/4" by 3/8" dado.
 
Nice one, Dave!
I have a #43, very useful for narrow grooves. Maybe I should keep my eyes open for a #44? Does it have nickers for crossgrain work?
Cheers
Philly :D
 
I've had a No,44 for 50 years ( the blades are wrapped in an oily rag (inside man old tobacco tin))

I find to get a decent plough cut I have to start at the far end and progress by bring the plane progressively back towards me at the start of each cut. Do you chaps have the same technique.
 
Hi DW,

Beginning at the far end and working back is the "proper" way. Though I have been successful beginning at the near end if the iron is set for a very light cut and I start very easy into the wood.

But it is faster and more assured beginning at the far end.

Take care, Mike
 
Philly,
Nope, no nickers. When I was doing cross grain stuff, I took a light cut and then used my layout knife and a straight edge to score the fibers. It worked well. Not as convenient as nickers but still workable.

Devon,
I began the cut at the edge nearest to me and just worked through to the end. In setting up the plane, the blade's projection is pretty shallow. I imagine that if I were taking a heavier cut, I'd have to modify my technique. I'd estimate the shaving at about 1/32" thick. And, as Mike mentioned, I took light cuts so starting the cut near me wasn't too difficult. It is nice seeing that full length curl coming off the cutter. :)

Mike,
I was reading a transcript of a web chat with Chris Schwarz, TLN and others and Chris mentioned beginning the cut at the far end. I just couldn't wrap my mind around the concept. Are you pulling the plane back towards you? Or, are you taking what you could call "plunge cuts" near the far end and then working the cuts back towards yourself?

I had to stop myself last night before I had grooves in all my wood laying around the shop. :)
 
Hi Dave,

Yes, the plane is started a few inches from the far end, fence or batten in place, and on each pass the plane is started closer to the near end.

Like I mentioned, I have done it the near-to-far end with a light setting. But if you are in kind enough wood and have it set for a rank cut, it is almost a necessity to begin at the far end and with each pass begin closer to the near end.

I do the same even with the moving fillester when it is set for a rank cut too.

Take care, Mike
 
Dave, the reason you start at the end is after the first cut you are always in effect planing down hill which makes the job easier. It may not be necessary for all woods but it will definitely will help in tough woods.
 
Thanks Dave. Up until recently I've spent most of my internet time on WoodCentral and WoodNet but since I've come across UK Workshop I find myself lurking here more and more. Another great woodworking forum with very fine people. :D
 
John Clifford":1othqf98 said:
Thanks Dave. Up until recently I've spent most of my internet time on WoodCentral and WoodNet but since I've come across UK Workshop I find myself lurking here more and more. Another great woodworking forum with very fine people. :D

Hi John,

I spend some time on the Woodcentral and Woodnet boards too. But there's something about them that I just can't get into.

The atmosphere on this board is definitely more relaxed. :)
 
I have a record 50 and use the technique of starting at the far-end and working backwards towards me, this so far has been the fastest, cleanest and effortless way to do it.

I have to say it's quite addictive using it, espeically for making mouldings :)
 
Hi John

Welcome to UKW. Glad to have you onboard.

John Clifford":2o03pwzs said:
Up until recently I've spent most of my internet time on WoodCentral and WoodNet but since I've come across UK Workshop I find myself lurking here more and more.

You'll have to take lessons in english to understand what we are saying. :lol:

Cheers
Neil
 
Thanks Neil. I've got my English to English dictionary handy and I've been watching my Jim Kingshott and David Charlesworth videos to get a feel for the lingo. :D
 
ydb1md":3e5bvxjm said:
Sharpening them is easy because you can do it freehand. The cutters don't demand the same level of precision in sharpening that a smoother's iron does -- a nice change.

If you can freehand the small blades (1/8" and 3/16") yer' a better man than I.

I find it VERY difficult holding onto the damn little things, and/or keeping the edge square across.

So I use this (top image)
http://home.earthlink.net/~kvaughn65/honing_guides2.jpg

Millers Falls #240. This has a wide enough roller to provide lateral stability.

BugBear
 
bugbear":19ourvjc said:
ydb1md":19ourvjc said:
Sharpening them is easy because you can do it freehand. The cutters don't demand the same level of precision in sharpening that a smoother's iron does -- a nice change.

If you can freehand the small blades (1/8" and 3/16") yer' a better man than I.

I find it VERY difficult holding onto the damn little things, and/or keeping the edge square across.

So I use this (top image)
http://home.earthlink.net/~kvaughn65/honing_guides2.jpg

Millers Falls #240. This has a wide enough roller to provide lateral stability.

BugBear

Paul,
You're exactly right, there's no way that I could freehand the 1/8" or the 3/16" cutters. I'd like to make a small blade holder that would allow me to semi-freehand hone the little cutters too. Clamping them into a guide is more than I want to do but I need a way to hold onto them. Maybe a wooden block with a two grooves the same width as the cutters just to give my fingers some help.
 
I recall sometime back, another #044 thread, promising to post some of the blades I made for my plane.

My #044 came with just one blade, a 3/8" (which I subsequently ground down to 1/4" because it was needed more urgently). Trying to find old #044 blades on their own was next to impossible, or too expensive. So I decided to convert old #45 blades, which are quite plentiful and cheap.

The main difference between the #044 and #45 lies in the adjustment mechanism. The #044 has 4 parallel slots in the blade, while the #45 has a single notch.

Below are the converted #45 blades. The blade closest is an original #044 blade. I began by grinding 4 slots in the first blade (with a Dremel), then realised that this was unnecessary - only two slots were indicated, and probably one could get away with just one (how many lifetimes of sharpening have you?).

044bladesmade.jpg


If you can pretend that the slots no longer are there, the next image shows the difference between the #044 slotted back (third from left) and the #45 notch (first 2 blades from the left).

044vs45blades.jpg


Lastly, the #45 blades are slightly thicker than the #044 (sorry for the poor quality).

044vs45bladethickness.jpg


Regards from Perth

Derek
 
I made the mistake of cleaning up my 044 cutters (they had some rust on them) by rubbing them on them on some fine sandpaper and then a water stone to clean up the scratches. The worst oxidation was back near the grooves. I was using the cutters freehand (I don't have an 1/8" chisel) to construct a nice wooden rack for the cutters and extra guide rods when I noticed blood on my fingers.

What I'd done (unwittingly) was to give the grooves some nice sharp edges with my work on the sandpaper and waterstone. The bandaids did let me put a little more pressure on the cutters and the workpiece. :wink:
 
Back
Top