Record 044 skate

UKworkshop.co.uk

Help Support UKworkshop.co.uk:

This site may earn a commission from merchant affiliate links, including eBay, Amazon, and others.

MarkDennehy

Established Member
Joined
29 Mar 2016
Messages
953
Reaction score
244
Location
Stepaside
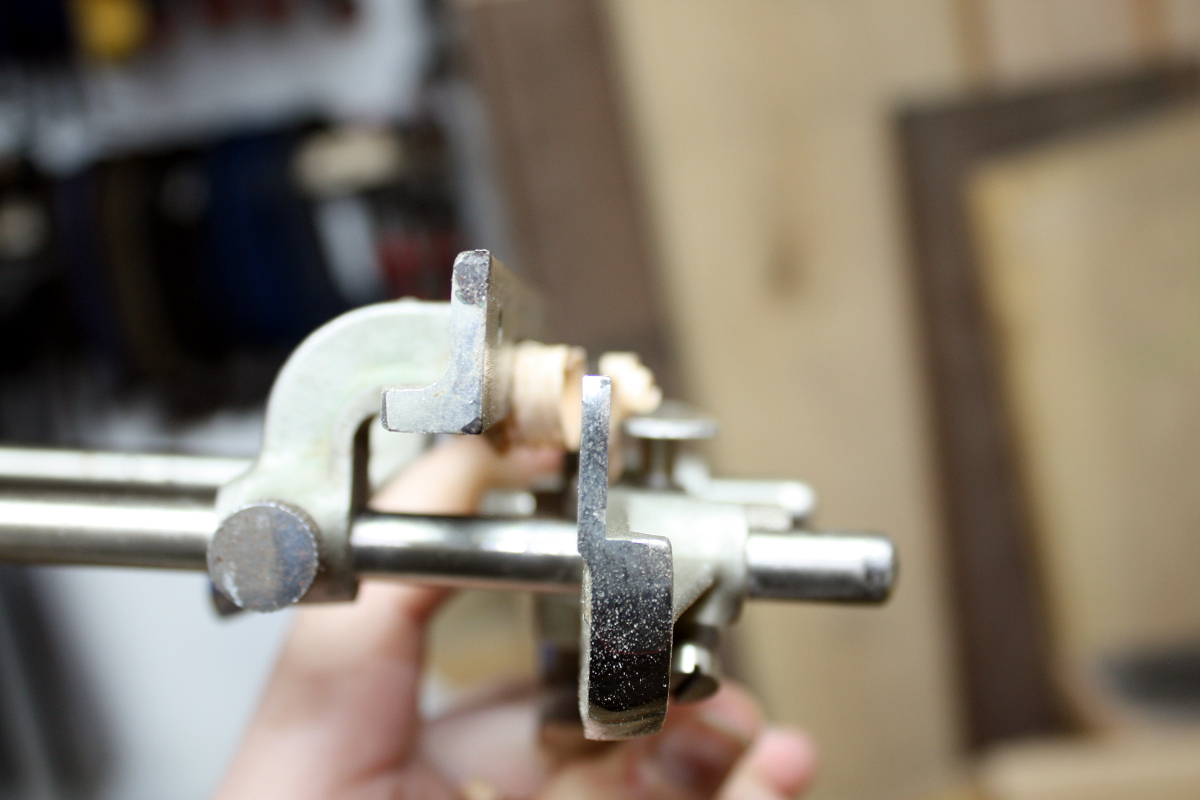
Hey guys, quick question; should the bottom of the skate in a 044 have a right-angle edge or some sort of bevel? When you're looking at it from the front of the plane, that is. Just wondering if my fun with keeping the thing upright is user error or a manufacturing defect I should grind out...
 
I'm fairly sure that the 044 was sold just as a plough and so had a skate with a flat bottom, square to the sides.
Similar planes sold as multi-planes (such as the 050) had a skate and sliding section with a bevel on one side, so they could be used with beading cutters.

Maybe yours has been modified by a previous owner - more likely than the makers accidentally milling a bevel. Photos would help.
 
MarkDennehy":dmpbigl7 said:
Hey guys, quick question; should the bottom of the skate in a 044 have a right-angle edge or some sort of bevel? When you're looking at it from the front of the plane, that is. Just wondering if my fun with keeping the thing upright is user error or a manufacturing defect I should grind out...
The skate is so narrow that a flat bottom on it will provide no significant feedback on keeping it upright.

And I would be nervous of grinding the skate, since a reduction in skate depth would alter the mouth geometry.

BugBear
 
Another thought. Simple metal ploughs like this are ok for narrow grooves, up to 1/2" max.
If you are trying to use a wider iron from another plane, maybe to cut a wide rebate, it will fit but will easily droop down to the left. You can prevent this a bit by fitting a deeper, wooden fence, using the screw holes provided, if your workpiece is big enough, or just by concentrating on using left hand to steer and right hand to push.
The extra support from the sliding section's second skate (on an 050, 405 or Stanley 45, among others) is a big help.
 
No, I'm just trying for a 1/4" groove on a rail of a frame-and-panel setup. But the grain on the oak is a bit squirrelly and reverses on me half-way along the rails (all of them). The grain pattern looks lovely but it's proving to be a pain to work with. And the 044 keeps leaving horribly ragged edges on the groove or even blowing out completely and then I plane away the attempt and retry. I've marked the top with a mortice gauge; I'm going to retry tonight with a cutting gauge instead and taking the marking knife to the line and deepening it a bit. The blade's sharp, I only just reworked it on the last attempt running up to 1200 grit on the diamond plates (and flattening the back to be sure) and then stropping; so it certainly seems sharp enough; I was just worried it was still user error rather than bad grain.

Haven't had this problem before with the 044; but I've never used it on oak before either, only on poplar and walnut which are obviously a tad different in nature :D
 
Ouch! It's easier said than done but I have heard several professionals say that success in ploughing or moulding does depend on choosing suitable wood.

Cutting gauge or repeated knife cuts make sense. You could also try sawing down both sides, using a chisel the right way of the grain ( ie with frequent reversals) or even an electric router.
 
If it's ropey grain as mentioned gauge lines should help and try not to take to much on each cut. Another tip is to work back from the end of the cut and add a decent fence.
Cheers
Andy
 
MarkDennehy":cw7fmtgn said:
No, I'm just trying for a 1/4" groove on a rail of a frame-and-panel setup. But the grain on the oak is a bit squirrelly and reverses on me half-way along the rails (all of them). The grain pattern looks lovely but it's proving to be a pain to work with. And the 044 keeps leaving horribly ragged edges on the groove or even blowing out completely and then I plane away the attempt and retry. I've marked the top with a mortice gauge; I'm going to retry tonight with a cutting gauge instead and taking the marking knife to the line and deepening it a bit. The blade's sharp, I only just reworked it on the last attempt running up to 1200 grit on the diamond plates (and flattening the back to be sure) and then stropping; so it certainly seems sharp enough; I was just worried it was still user error rather than bad grain.

Haven't had this problem before with the 044; but I've never used it on oak before either, only on poplar and walnut which are obviously a tad different in nature :D

I experienced the same thing a few days ago. I was using the 044 to cut grooves into some Ash and it was an absolute nightmare. Continually deepening the knife line did help a bit but in the end, after the grooves were deep enough I went back with a chisel and tidied the walls up. It ended up being slightly wider than I intended but it did look nicer. Live and learn!
 
toolsntat":3m8sqt78 said:
If it's ropey grain as mentioned gauge lines should help and try not to take to much on each cut. Another tip is to work back from the end of the cut and add a decent fence.
Cheers
Andy
The thing is that the rails aren't that large (it's for a miniature chest so they're barely 2" wide) so there's not enough room to use my secondary fence if I hold the rail in the face vice. What I was planning on doing was using a makeshift sticking board - really, I'd want a sticking board with an adjustable height fence but until I figure out how you'd make one of those, I'll raise my planing stop, butt the rail against it and a scrap bit of wood the same height as the rail up against the rail and the planing stop on the inside and holdfast it in place, Schwarz-style:
improvised_sticking_board_IMG_2969.jpg


With luck that'll give the anti-tipping support the rails will need when I shove the 044's fence against it.
 
If there's a major grain reversal you might try planing the two ends with the grain and then tackling the middle few inches differently - perhaps repeatedly knifing in the sides and trimming out the waste with a narrow chisel.

Slower than just ploughing it, but quicker and cheaper than starting again.
 
Running a mortice gauge along the job two or three times, then using a chisel to take out a sliver of wood to leave a vee on each side of the groove before running the plough down it can help sever the fibres. Oak tends to be coarse-grained, so the initial vee might need to be deepened a bit with some careful chisel work.

Rather a faff, but it might save the workpiece, rather than scrap it and find some milder-grained stuff.
 
AndyT":ax9q84z3 said:
Maybe yours has been modified by a previous owner - more likely than the makers accidentally milling a bevel. Photos would help.

IMG_2188a.jpg


It doesn't help that much - the bevel's small but you do notice it by eye. Turned out not to be the issue though.

matthewwh":ax9q84z3 said:
Slower than just ploughing it, but quicker and cheaper than starting again.

In the end I had to just start again. I was staring at the piece trying to figure out what the hell was going on when I finally twigged that there was twist in it. I'd prepped it before xmas and I guess with the humidity and the cold snaps it just let go and pretzelled itself. So I gave up and prepped four new long rails with less interesting but straighter grain. Oh well. Thanks for the help everyone.
 
I can't see a bevel at all - but I'm glad you got it sorted. And it's a useful learning point, that a plough won't work on twisted stock.
 
Back
Top