Project Number two - Side table 1 & 2 - NEW PICTURES

UKworkshop.co.uk

Help Support UKworkshop.co.uk:

This site may earn a commission from merchant affiliate links, including eBay, Amazon, and others.

LarryS.

Established Member
Joined
20 Nov 2007
Messages
1,072
Reaction score
24
So after the garden bench I thought I should try something a next step along in the complexity stakes.

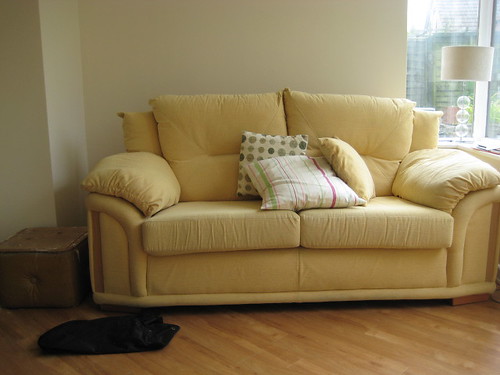
Girlfriend has been after a side-table to go by the sofa in the sun room :
2574212598_edbba9ef87.jpg


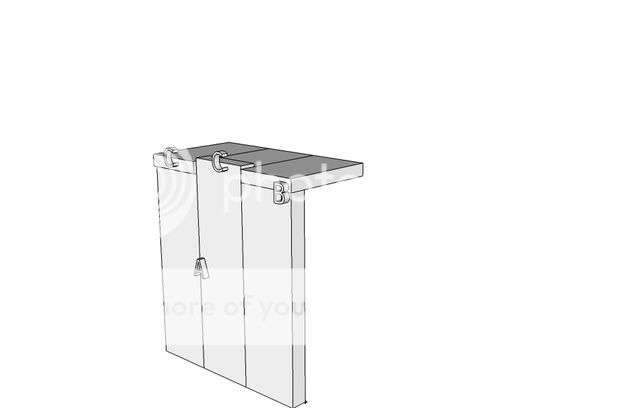
I saw this post by Pryally a few months ago and thought it would be ideal :
https://www.ukworkshop.co.uk/forums/viewtopic.php?t=22847
IMG_2877.jpg


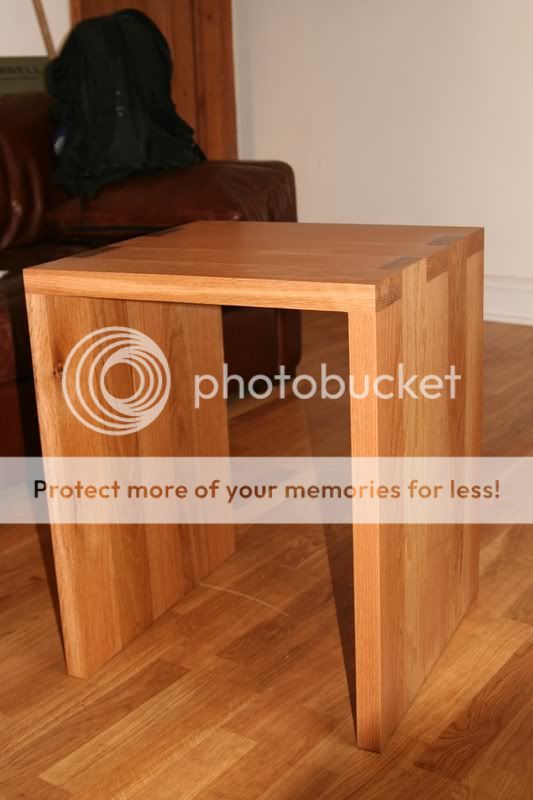
After a chat with her in charge it was decided that the unit would be 60cms tall, 30cms wide and 39cms deep (so making the unit 6 slats wide each at 6.5cms)

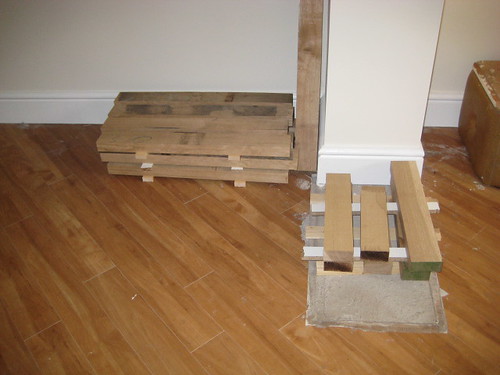
So this afternoon I headed down to Interesting Timbers to buy some 1.5inch thick planks :
2574212226_5961753cd0.jpg

2573389619_b9ce336470.jpg

2574212522_75ce0465dd.jpg


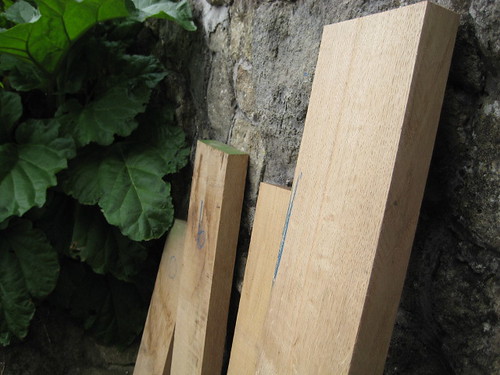
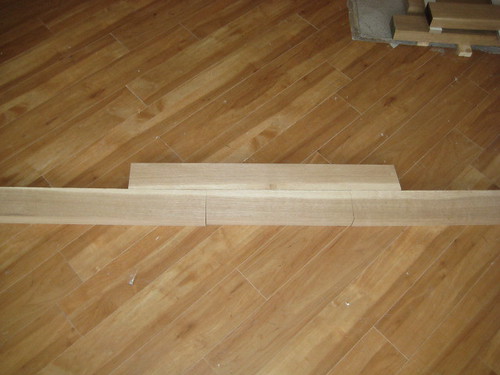
Anyone got any tips on how I can ensure all the boards end up exactly the same width ? I am guessing its all about featherboards ?
 
Cut them on the TS then finish thickness them on the P/T
 
Paul, before you think about machining it's probably a good idea to stack the timber somewhere indoors for a bit, so that most of the movement and shrinkage will take place before you've built the piece of furniture. I've never sure of precisely "how long" you should store it for really... But you'll want to stack it with sticks in between each layer, to allow the air to pass through.

Their timber's normally well air-dried, so I wouldn't have thought the timber would be too far away from the desired moisture content. It's always best to play it safe. Unless you own a Moisture Meter, I reckon that, with some good summer weather... you should only have to leave it indoors for two or three weeks...?

Once you have your accurate face and edge (from the planer), the thicknesser should ensure that all boards come out the other end in uniform width and thickness (as long as you don't touch anything!! :D 
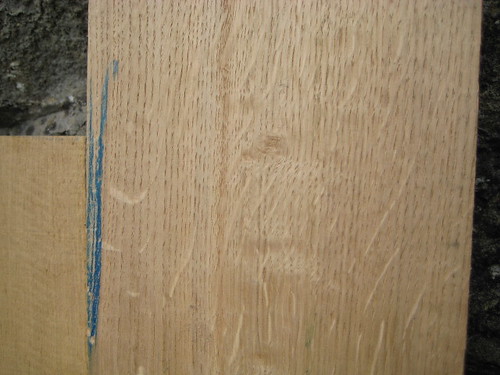
). If you're concerned about the finished piece ending up under-size then you could always finish each board 1mm oversize, glue them up and everything, then trim them with a router and straight edge - if you're not confident using hand planes, of course.
 
olly,

is it safe to put the boards through on their sides to make sure they are all the same width ? Or would they fall over ? Or do I put a few of them through together ?
 
Yes, Paul. As these boards are 2" thick, you shouldn't have to worry about them toppling over in the thicknesser. This problem only really occurs with boards of about 1" thickness and less. But, whatever size timber you're working with, it's always good practice to thickness the board to its final width before turning it 90º and working down to finished thickness.

You're better off feeding them through one at a time - or, as you mentioned in your other post, feeding a second board through just before the first one exits the machine.

In order to feed two of three lengths of timber through at the same time, you should have what's known as a "segmented roller". My machine (and I assume yours is the same) only has one solid length but, I was looking through a back issue of The Woodworker recently and in their review of this machine the photo's clearly showed a segmented roller...?! :shock:

I wouldn't have thought this matters too much for someone like yourself though, who's only doing this as a hobby part-time.
 
looked back at Pryallys original post and he just glued the pieces together, do you think this would be strong enough for the joint or should I be looking to use Dowels ?
 
Dowels can be a right PITA if you've not been down that road before! :?

A glue join with PVA or any type of modern glue should be strong enough on its own, but biscuits can make the assembly and alignment much easier still. If you don't have a biscuit jointer, you should be able to use a 4mm slot cutter in your router.

Another method would be to rout grooves in each edge and then glue "loose tongues" or "splines", which would do the same job, but you should be careful to stop short at each end, unless you want to see them in the finished piece.

Glue alone will still be strong enough but, as you apply pressure from the clamps, without biscuits or splines, the joint can slide with all the glue.
 
so I've cut the blanks on the tablesaw to some rough lengths. Then I ran them over the Planer thicknesser to get a flat face on each - reason for doing this was I wanted to see if any would be reduced too much to be of any use. Well one piece was (lost about 5mm) so used a spare piece to replace it (didn't have to take more than a mill off any of the other pieces).

Now all stacked in the sun-room where the table will eventually sit. On Ollys advice I'm going to leave them there for 2 weeks, then do the final planing and thicknessing. Then onto the scary bit of cutting !

2581630970_de7d364c03.jpg
 
Looking good Paul, that's the way to do it! :D

I like the fact that you've planed your timber slightly before hand so that you can see what you're going to have to work with later. I don't know how professional furniture makers explain this "process" to their clients without buying and storing stacks of timber months in advance...

There's no harm in stacking those odd boards on the right on top of the larger pile, you know! :wink: Looks like you've got a bit of sapwood in that one board furthest to the right... Will you be able to cut or plane it out, do you think? Or can you "hide" it inside, on the underneath? :)

I should be going down to Interesting Timbers myself tomorrow morning to return and exchange some walnut and hopefully pick up some English Cherry.
 
now thats the power of the internet, i hadn't noticed the sapwood !

not sure if I am going to be able to hide it but in the corner I have a spare piece which hopefully will cover any emergencies. Though the worrying thing is I've already had to use half of it without having planed both sides of the wood yet :(

Wish I'd bought an extra piece when I was down there (may even go down this weekend and get one just in case)
 
Nothing wrong with sapwood if you use it in the right place.
 
WiZeR's right. In some, particularly dark timbers (like walnut :x ) it can stand our far too much for many people's liking. If you find any of the other boards you've bought have a similar amount of sapwood in them you could probably keep all three on the same side of the table so it runs around continuously. Maybe keep it in the centre - almost like a racing stripe...! :D

I don't think they're open on weekends, but you may find they're happy for you to return it and swap it for another length... That's what I need to do with some walnut next week (and I bought the stuff in October! :smile:).
 
just checked through all the pieces and found this...aaaagh :
2587090835_e2935e72fe.jpg


but then looked down the sides of the pieces and it seems the sapwood peters out before breaking through to the other side :D

so a great learning experience and got away without having to buy more wood
 
So the timber should have settled by now, so plan is to plane and thickness it this weekend and do the construction. However I have a couple of questions that I am hoping some of you learned types can answer for me. As a reminder I am building a copy of this :

https://www.ukworkshop.co.uk/forums/viewtopic.php?t=22847
IMG_2877.jpg
(Pryallys original thread)

Three questions are :

A. Do I join the boards together on their sides, I am assuming so and using biscuits ?

B. The ends of the boards where they meet, do I biscuit there also even though one side of the biscuit will be into the end of a piece ?

C. Most important question - How do I put the table together and ensure that all the ends / sides all line up ? My worry is I put it together and along the top sides a couple of 'fingers' stick up a couple of mill and a couple of other are low by a couple of mill

I've done an illustration to show the areas I mean :

tableprobs-1.jpg


thanks in advance
 
A - yes
B - Pryally used big dovetails or finger joints (cannot tell from the photo) so no biscuits should be required
C - aim to make them just proud then plane off


Rod
 
thanks rod, I've very little experience of using a hand-plane so far (as this is only project number two), is there a technique or method I can use when planing off the ends to stop myself planing the piece of wood I am planing down to ?

Or should I actually be aiming to plan a small amount off the piece I am planing to (so making sure they are flush) ? I've just got this worry that I put the thing together and then put a gouge in it !
 
i thought i would reply on how i did it (impressed that someone should take inspiration from it)

i ensured my boards where the same width by cutting them on the table saw and then doing a final planing cut (less than a mm) - this was before i bought the Jet planer/thicknesser but it still worked fine.

biscuits where used between boards as suggested.

when glueing the boards up i ensured the joints where staggered correctly at the ends by using offcuts as spacers to ensure ends only projected by 1mm. i then could use my RAS to get them back to flush. i don't think my planing skills would have been up to it.

you can't really use biscuits in the ends, it would be very difficult to do and you would have to cut the slot prior to glueing the boards up as the machine won't fit in the slots! also you could only joint every other joint as you can't get the biscuits in the slots in adjacent joints. difficult to explain but you will understand when you have glued together the boards.

i just used glue and the joint is incredibly strong so i don't think biscuits are required. the table is very heavy as stated in previous thread

good luck and if you need any further advice just let me know
 
thanks pryally, didn't think you were still on the forum !

So do I take it to mean that you made the sides as complete units, then the top as a complete unit and then put the three parts together ?

Also what is a RAS ? Is it a Random orbit sander (yet another tool I haven't got....yet.....this may be my excuse)

pryally":3f6fat40 said:
i ensured my boards where the same width by cutting them on the table saw and then doing a final planing cut (less than a mm) - this was before i bought the Jet planer/thicknesser but it still worked fine.
when you say a final planing cut, did you do that on a table saw ? I have just bought a planer/thicknesser so was thinking of ensuring they were all the same thickness and width using that, what do you think ?
 
yes, still lurking.

yes, i glued the two sides and top up first and then sanded these flat and then glued together to make the table. make sure you have decent clamps to ensure you can pull the joints together.

yes, random orbital sander. they do come in really useful if you are not a master of hand planes like me.

i only used the table saw to ensure they were the same width because i didn't own a planer/thicknesser. i think the thickness would be the way to go if you own one.

any further advice let me know
 

Latest posts

Back
Top