Yes this set up would be usefule, I have a something very similar to your suggestion and it works really well.
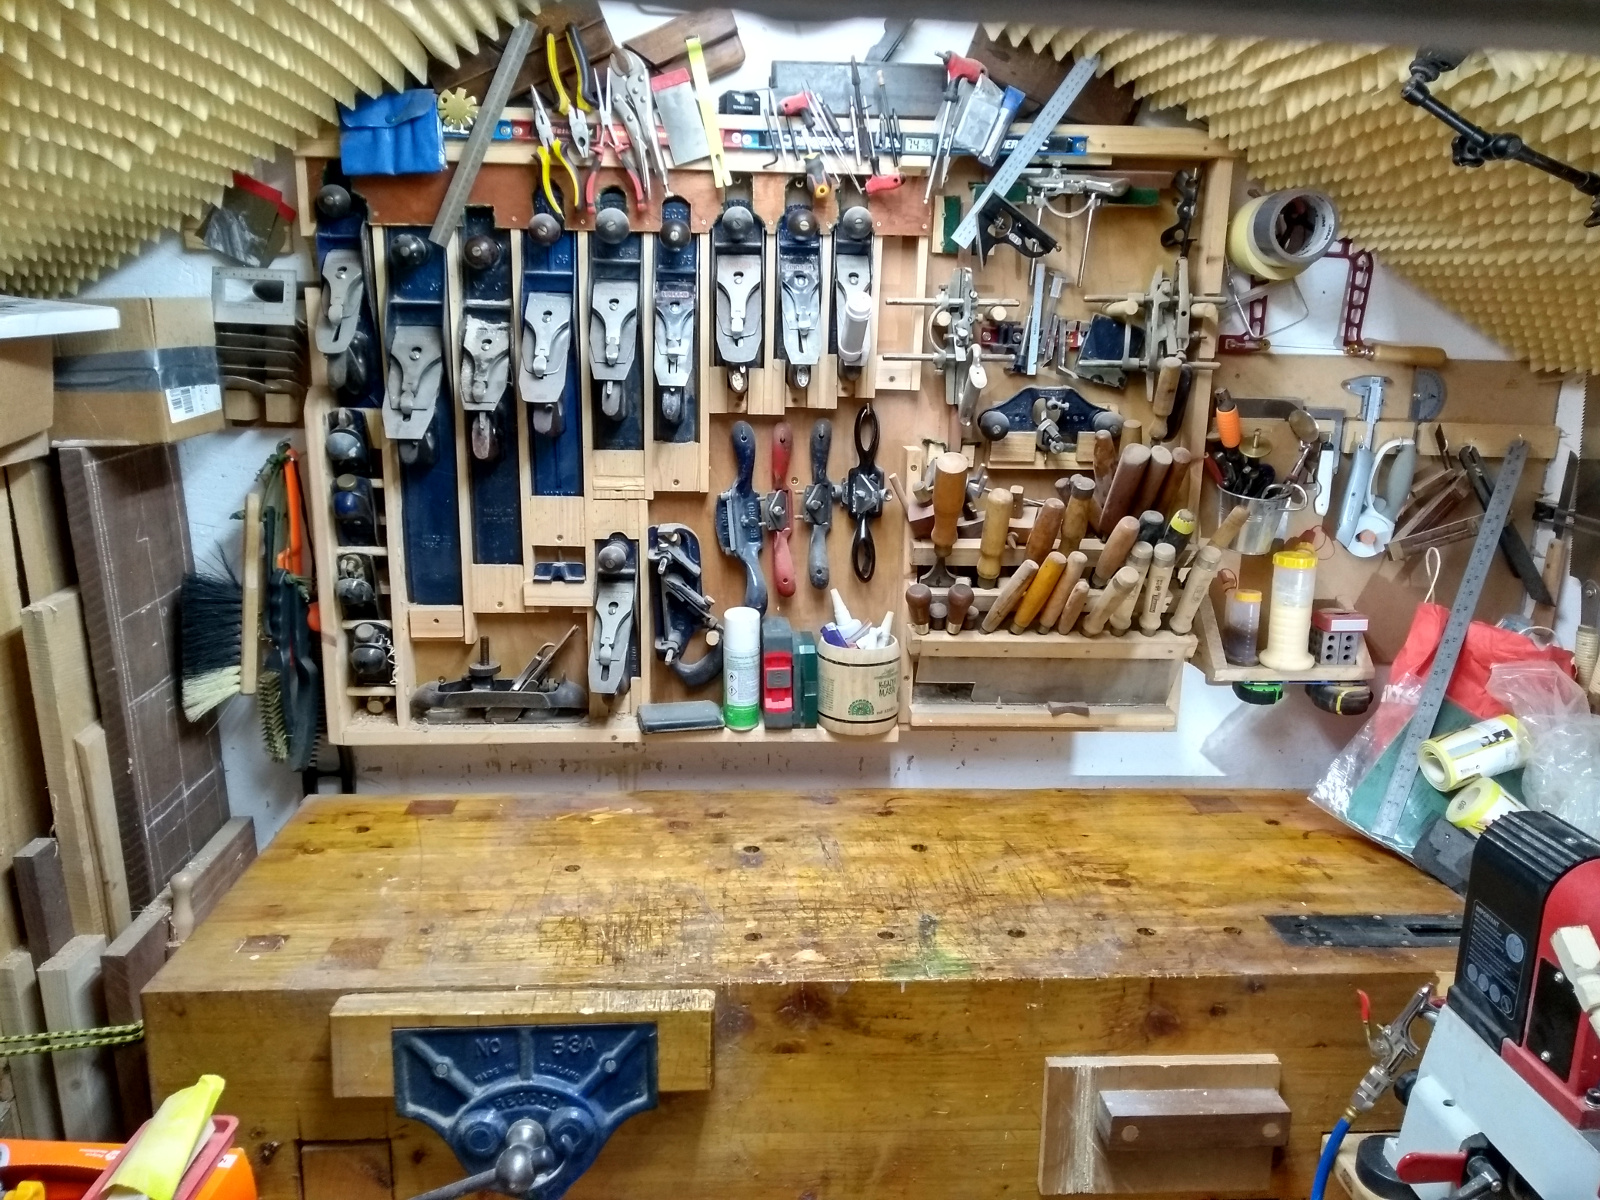
I've already shared a photo, but here is a one from a clearer angle. Well its not a cabinet on the wall, just a sheet of 18mm ply above two cabinets, but it does show how handy your concept of the tools above deep draws works well. The chests are about 4 ft wide (1.2m). I replaced an old chest of draws with the metal cabinets a couple of years ago as the drill press was beginning to bow the top draws and I had some very heavy engineering tools to stow in the bottom steel draw, but the cabinet on the left is an old chest of draws with reinforced bases using 15mm ply. The racks above have all the small tools that are used regularly and I find they get lost in draws. I keep big items such as some power tools in the deep draws and things that need to be kept clean (vernier, calipers, precision rule etc) in the thin draws. The boxes of draws to the left and right house screws and fittings, knobs handles nails fastener etc. Long things that don't fit in cupboards or shelfs have also gone on the wall, the hedge trimmer for example...
View attachment 105338
The more I read this thread, the more useful ideas merge, its seems that noting down things that work when planning storage could be collectively helpful. Thinking about it, the following seems to work. (I'm quite short of space as the garage has to hole other things.
1. Build in flexibility, the future will change - vis the new row of alan keys for a boy who fiddles with skate boards.
2. Site the tools on a wall away from major dust. Put table saw, mitre saw and lathe at the other side of the space.
3. A mix of draws, shelves and a wall display (either cabinet or ply on wall) seems to be most efficient.
4. Laying this out by size of item staring with the big items such as the saws planes and tuck the small things such as spanners in last. Long rules and spirit levels go well next to the long saws.
5. Allow tools to protrude up to 5 inches out of the wall, its still leaves about 18 inches of work space on the chest below, if ca 23 inches deep. That way saws, planes, and tools with depth can be packed close together without using up real estate. Don't put things too low so that you can access most of the work top without cutting yourself.
5. fix sockets for power tools and also for a charging station or two.
6. Have a separate shelf for safety equipment with a plastic door/cover to keep the dust of the eye protecting and mask etc as these really must be dust free.
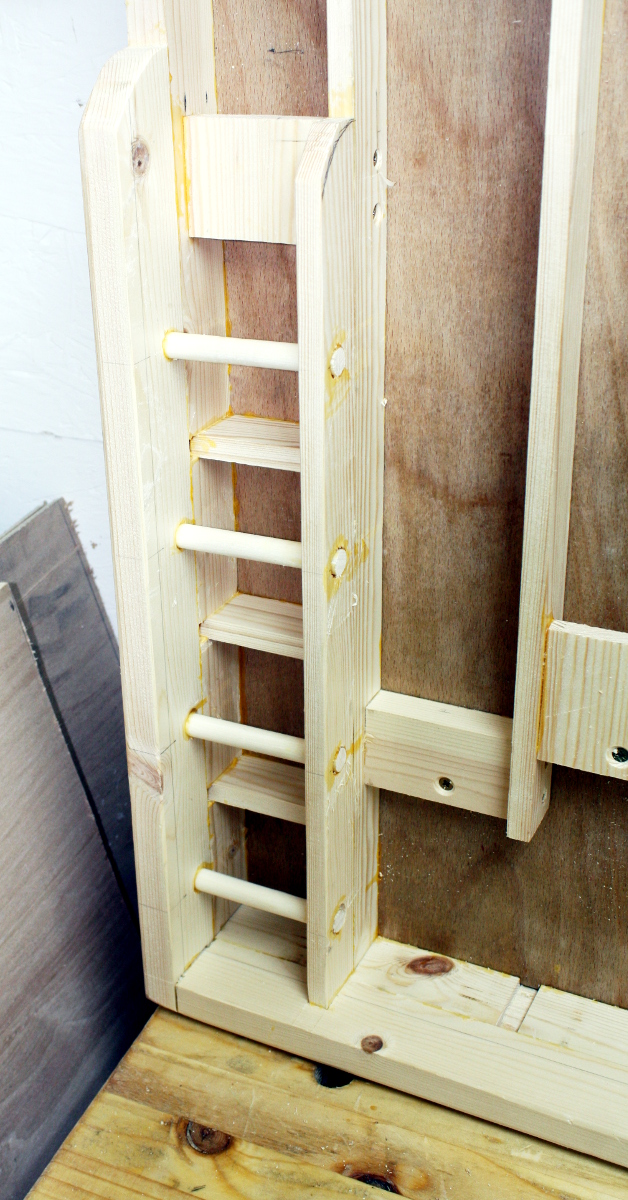
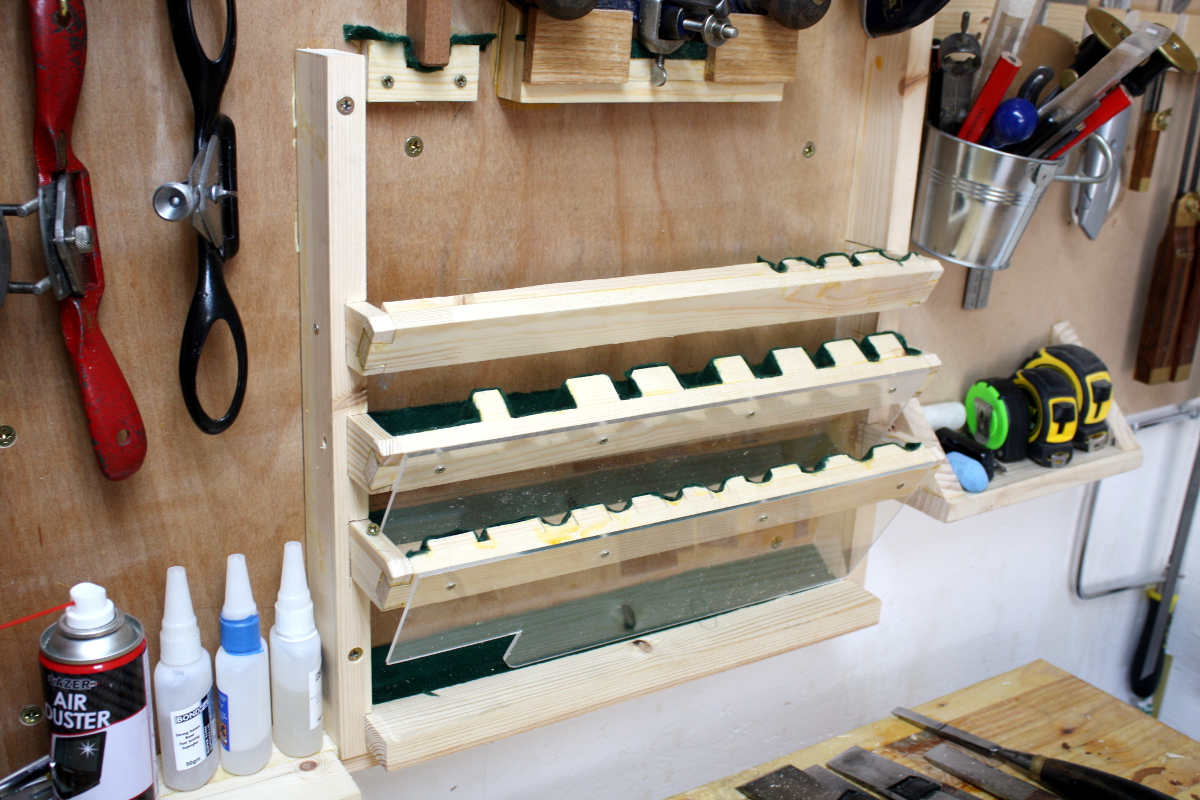
7. All long things can be stored on one double rail, ie screwdrivers, alan keys, files chisels knives, pencils, augers, brawls, punches. Drill lots of holes starting small at one end and getting bigger. Also if you have 3 or even four rows deep, small at front and long at back, slop the front ones forward, and reduce the slop towards the rear makes it easy to extract each tool. chisels and flat files are in a channel between two 2 inch boards
8. Set squares and marking gauges and (cheaper verniers - expensive one in a draw) sit neatly together.
9. Plyers, cutters, tin snips dividers, composes and wrenches also fit neatly together.
10. Hammers and mallets + the brace (amazingly) also fit together.
11. things like spanners, alan keys, can be tucked behind other tools such as the marking gauges, or hammers as they aren't used that often - I prefer to have them on the wall, so that you can see where they are stored. have a row of tape measures, can do wrong.
12. G clamps do take up space.
13. The roof joists/ rafters make excelled additional storage for long clamps etc, its possible to go a layer deep at that hight ie they can be hanging above the bench - unless you are very tall...
14. Fit bright (LED) lights, it makes a huge difference, you can find everything..
14. Don't acquire too many tools, even if you inherit some from distant relatives....
I'm sure things kind of thing has been said before elsewhere on this forum, and I'm sure others have learned a few tricks. but this is what i've found to be effective. I've move my back board and bench between a couple of houses and it has worked out well for me. So yes your suggestion has worked for me, go for it, and good luck.


")
 ) I started using the French cleat system years ago,due to not finding the tool right away. Now only the most used tools are on the wall with the exception of marking out/measuring tools.and in the recycled yoghurt pots are oddball screws/bolts and other odds and sods.