One Handed Dovetails

UKworkshop.co.uk

Help Support UKworkshop.co.uk:

This site may earn a commission from merchant affiliate links, including eBay, Amazon, and others.

custard

Established Member
Joined
20 Aug 2008
Messages
7,166
Reaction score
668
Location
Hampshire
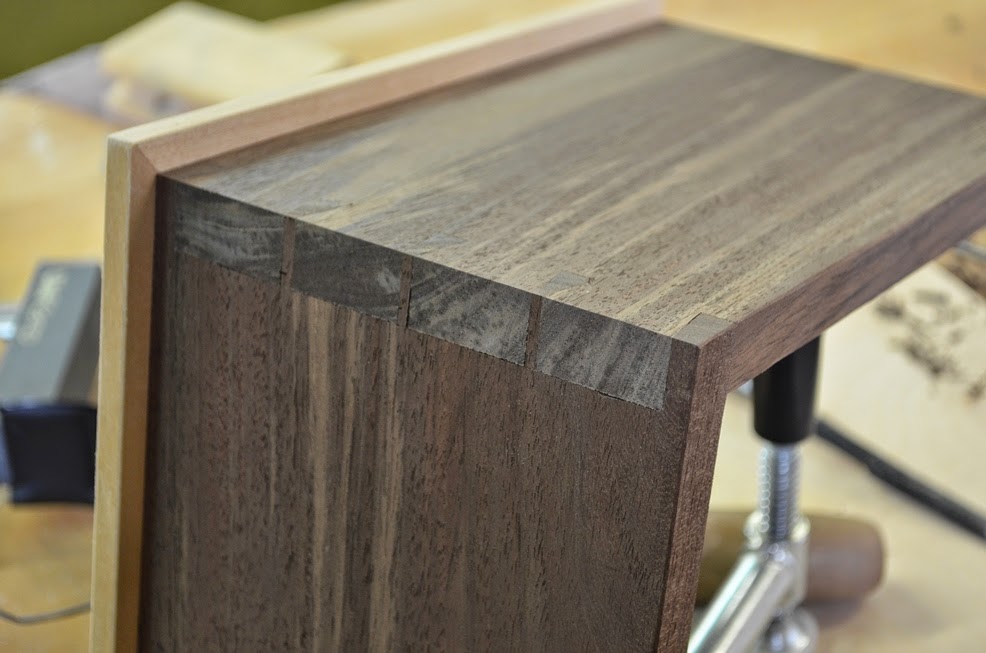
One of the forum members is trying to find a way to cut dovetails when they only have the use of one hand.

I had a go at it to see what lessons could be learned. Overall it was better than might be imagined, but I struggled when it came to transferring the tail markings to the pin board, so if anyone's got any suggestions for dealing with that procedure with just one hand then please chime in with suggestions!

First task is to set the depth of the cut on the tail boards (Bri, on your Paul Sellers box project the "tail boards" are the front and back, and the "pin boards" are the two side pieces).

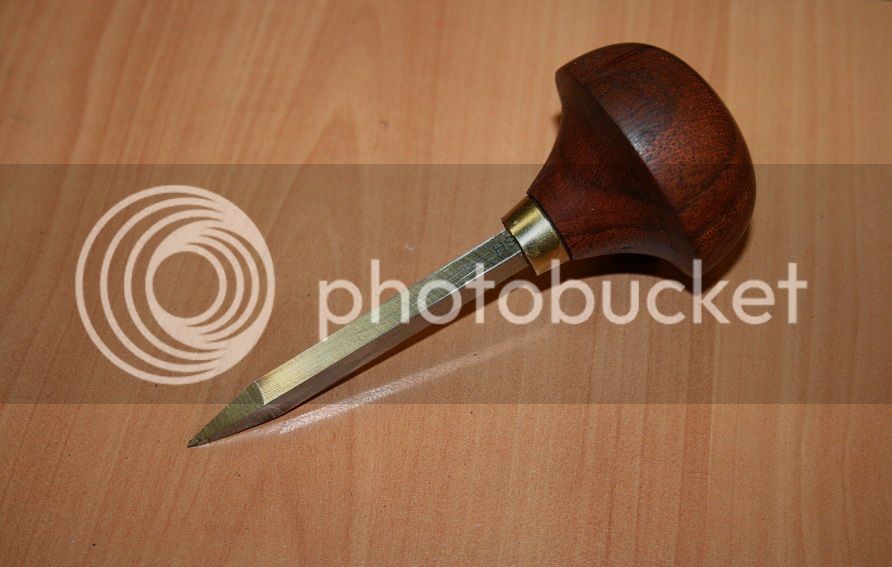
I found the best tool working with just one hand was one of these type of marking gauges,

DTail-1-Gauge-1.jpg


The depth of cut on the tail board is the thickness of the pin board, so by placing the marking gauge on top like this,

DTail-2-Gauge-2.jpg


it was easy with one hand to drop the marking wheel and lock it off like this,

DTail-3-Gauge-3.jpg


Then the tail board was locked in the vice (a bit of struggle one handed but I got there in the end), and the gauge run all the way around,

DTail-4-Gauge-4.jpg


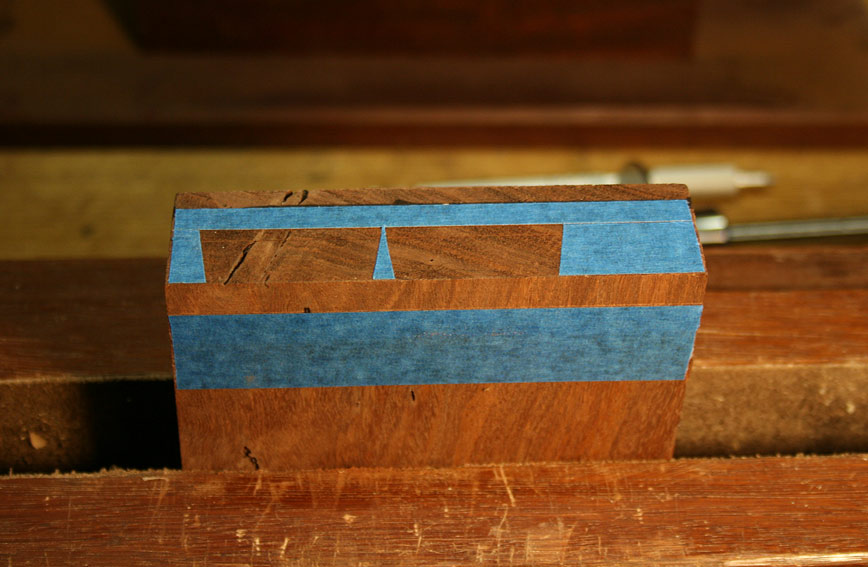
Marking out the positions for the cut had me scratching my head, but given you'll be using the 1:8 Veritas Magnetic Dovetail Jig & Saw, I borrowed this tool from a mate and came to the conclusion that you only really need a few guide marks on the end of the tail board to get the job done. I decided to have a dovetail cut 6mm in from each end and one in the middle. The easiest tool I found for marking these positions was a pair of dividers and a decent quality ruler which has scribed markings rather than painted markings. It's possible to operate the dividers single handed and using the scribe marks get an exact 6mm measurement,

DTail-5-Dividers-1.jpg


The dividers can then be used to place an indentation 6mm in from each end of the tail board,

DTail-5-Dividers-1.jpg


After that I measured to find the centre point of the tail board,

DTail-6-Dividers-2.jpg


Then I used the ruler to set the dividers to that centre position measurement and placed another indent on the tail board. After that I set the dividers to 3mm (half of 6mm) and placed two more indents 3mm out on each side from the centre point. So now there are five indents in total giving us all the dovetail location information we need,

DTail-7-Dividers-3.jpg


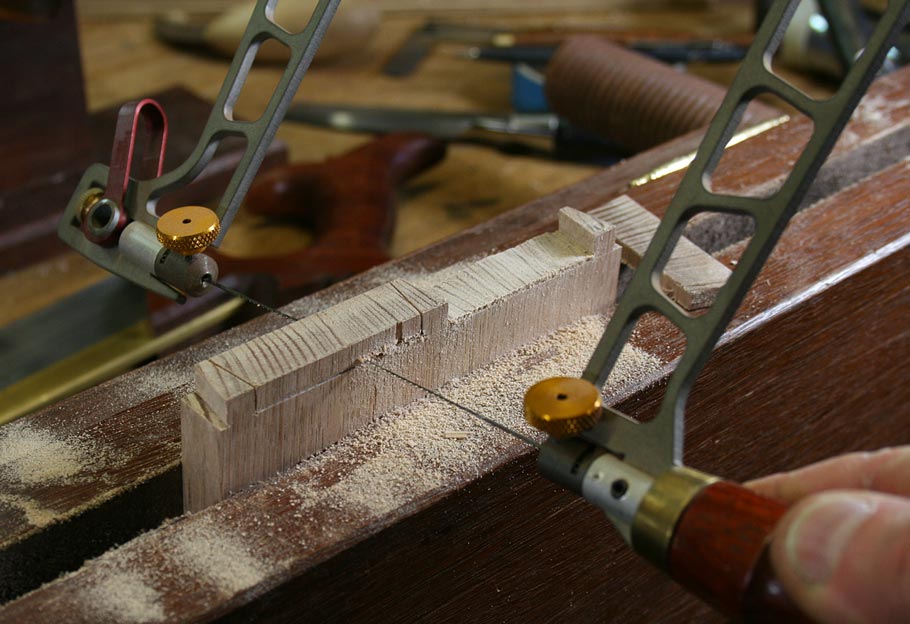
Next job was to position the Veritas jig so that the saw blade falls directly on top of the indents, I found I could do that fairly exactly with one hand

DTail-8-Saw-1.jpg


After that it's just a case of sawing down to the scribed line we previously made with the marking gauge,

DTail-9-Saw-2.jpg


After completing all the cuts you remove the Veritas Jig and use a coping saw to take out the bulk of the waste. I'm using a fancy coping saw but they're pretty much all good enough for this job,

DTail-10-Saw-3.jpg


I can only post ten photos so I'll keep going in a follow up post!
 

Attachments

  • DTail-1-Gauge-1.jpg
    DTail-1-Gauge-1.jpg
    57.2 KB · Views: 1,540
  • DTail-2-Gauge-2.jpg
    DTail-2-Gauge-2.jpg
    48 KB · Views: 1,540
  • DTail-3-Gauge-3.jpg
    DTail-3-Gauge-3.jpg
    50.8 KB · Views: 1,540
  • DTail-4-Gauge-4.jpg
    DTail-4-Gauge-4.jpg
    72.8 KB · Views: 1,540
  • DTail-5-Dividers-1.jpg
    DTail-5-Dividers-1.jpg
    55.4 KB · Views: 1,540
  • DTail-6-Dividers-2.jpg
    DTail-6-Dividers-2.jpg
    67.4 KB · Views: 1,540
  • DTail-7-Dividers-3.jpg
    DTail-7-Dividers-3.jpg
    91.1 KB · Views: 1,540
  • DTail-8-Saw-1.jpg
    DTail-8-Saw-1.jpg
    94.1 KB · Views: 1,540
  • DTail-9-Saw-2.jpg
    DTail-9-Saw-2.jpg
    75.2 KB · Views: 1,541
  • DTail-10-Saw-3.jpg
    DTail-10-Saw-3.jpg
    102.6 KB · Views: 1,540
Back again!

The waste at the ends is taken out with the saw, which works fine with one hand, better than I expected,

DTail-11-Saw-4.jpg


Then it's time to start cleaning up the cuts with a chisel. Working with one hand the chisel needs to be really sharp as it's difficult to apply much force, but there's no doubt that it's perfectly possible. I found a short bladed "butt chisel" was particularly useful with one hand, but I didn't have any small butt chisels so I used a combination of long and short chisels. It was slow going but it is do-able.

DTail-12-Saw-5.jpg


Here I am using a long chisel with one hand, holding the workpiece down with my fore arm, but it could be secured to the bench with a quick action F Cramp.

DTail-13-Saw-6.jpg


Then it's time to check the accuracy of the cuts and chisel paring with a square, one hand really is all you need for this,

DTail-14-Saw-7.jpg


I'll continue the saga in another post!
 

Attachments

  • DTail-11-Saw-4.jpg
    DTail-11-Saw-4.jpg
    65.9 KB · Views: 1,533
  • DTail-12-Saw-5.jpg
    DTail-12-Saw-5.jpg
    72.9 KB · Views: 1,533
  • DTail-13-Saw-6.jpg
    DTail-13-Saw-6.jpg
    60.1 KB · Views: 1,533
  • DTail-14-Saw-7.jpg
    DTail-14-Saw-7.jpg
    63.9 KB · Views: 1,533
Custard. If we ever happen to bump into one another in a pub, I'm buying. That's all I have to say.
 
Now it's time to transfer the markings from the tail board to the pin board.

This was difficult, I just couldn't find a way to do this with just one hand. Or rather I couldn't find a way of setting up the workpieces satisfactorily.

DTail-15-Transfer-1.jpg


If anyone with more imagination than me can see a solution then please share your thoughts! I suspect a solution is possible, maybe by semi-closing the vice and then adjusting the pin board with hammer taps? The actual transfer itself though is fairly straightforward, I usually hold down the tail board with my free hand to prevent movement, but a weight seemed to do the job perfectly well.

DTail-16-Transfer-2.jpg


To prevent mistakes it's a good idea to mark the waste clearly,

DTail-17-Pins-1.jpg


Then it's re-arrange the Veritas Jig for the pin cuts, which is a bit fiddly with one hand but I got there in the end, and clamp it on so the cut falls just in the waste section,

DTail-18-Pins-2.jpg


Once again it's back to sawing, removing most of the waste with a coping saw, and cleaning up with a chisel,

DTail-19-Pins-3.jpg


DTail-20-Pins-4.jpg


Next instalment coming up!
 

Attachments

  • DTail-15-Transfer-1.jpg
    DTail-15-Transfer-1.jpg
    111.4 KB · Views: 1,527
  • DTail-16-Transfer-2.jpg
    DTail-16-Transfer-2.jpg
    95.6 KB · Views: 1,527
  • DTail-17-Pins-1.jpg
    DTail-17-Pins-1.jpg
    81.3 KB · Views: 1,527
  • DTail-18-Pins-2.jpg
    DTail-18-Pins-2.jpg
    77.6 KB · Views: 1,527
  • DTail-19-Pins-3.jpg
    DTail-19-Pins-3.jpg
    81.2 KB · Views: 1,527
  • DTail-20-Pins-4.jpg
    DTail-20-Pins-4.jpg
    77.3 KB · Views: 1,527
Here's the nearly finished pin board, apart from a last bit of paring,

DTail-22-Pins-6.jpg


Which then joints to the tail board like this,

DTail-23-Final-1.jpg


They're maybe not the neatest dovetails I've ever cut, but one advantage of the dovetail joint is it doesn't have to be perfect to still do an excellent job. It's certainly square enough,

DTail-24-Final-2.jpg


So, apart from the transfer section I would have no hesitation in saying that it's perfectly possible to cut through dovetails (the type you need Bri for your Paul Sellers Box project) using just one hand. It's slow and sometimes a bit awkward, but you'll get there in the end and probably do a lot better job than I managed.

Apologies for the rubbish photos by the way, I was holding the camera phone in my left hand throughout while just using my right hand for the job.

Good luck!
 

Attachments

  • DTail-22-Pins-6.jpg
    DTail-22-Pins-6.jpg
    104 KB · Views: 1,523
  • DTail-23-Final-1.jpg
    DTail-23-Final-1.jpg
    56.6 KB · Views: 1,523
  • DTail-24-Final-2.jpg
    DTail-24-Final-2.jpg
    78.3 KB · Views: 1,523
M8,
this thread is awesome!
and how im feeling doing it at each stage.
like said a few days ago, the hard part with one handed is marking grain end and transferring the joints from the tails to the pin board..
im going to use your thread when I do it.....on the laptop.
ATB
Bri
 
The obvious way one handed is the trad way - just freehand single kerf pinholes. Mark positions with a divider if you want to be very tidy. Start with a vertical cut at each mark, then the 2 sides of the hole. The vertical cut makes it easier to drop in a coping saw, or just go straight to chisel.
Hold down the pin hole board (weight or a hold-down) precisely over the end of the pin board in a vice. and mark through.
 
deema":1w4usqfi said:
Hi Custard

What about using a David Barron jig, it doesn't need to be dovetailed together when made, and I think it would work for marking out the pins

https://youtu.be/5I45mEWAJv4

Hello m8,
ive talk to David and he suggested not, coz I have clamp...and will be too fiddly and not getting the marking perfect.
so the other one has its own clamp (bought now lol)
its all about one handed and getting it perfect.
ATB
Bri
 
To help line up the boards I'd make a simple L shaped piece, about 6x2 ins for the long leg, 2x2 for the short. Place the tail board in the vice and F clamp this to it so that one side is snug in the corner, and you have some protruding above the board. That would let you slide the pin board into place, and then hold it there with a weight. I think you'd probably need to remove the L piece to mark out the lines.
 
This is why I love this forum, everyone is so helpful and will to give anyone their time. One day I hope to be someone who gives on this forum rather than taking as I am doing alot of at the moment.

Hats off to you Sir, great post and good luck to Bri with his project.
 
Well done Custard!

I am cheering for you manxnorton.
I have been told that some oldtimers could make just about anything with one hand. You just need to reinvent the wheel to get going!
 
For marking out the tails and pins how about a moxon style vice bench - a bench added to the back of a moxon vice which is set at the same height as the top of the vice with holddowns of some type.

here's mine:

Moxon vice bench (3)-400.jpg


I've had a bit of a brainwave about how to mount things into a vice one handed - a sort of strapping system under the vice to provide a cradle for the item until the vice can be tightened - something like seatbelt material would be good with a long strip of the loop velcro sewn on and the hook piece put somewhere so it can be adjusted for required cradle depth and the wood just dropped in.

Doing this you would even be able to fine tune the height setting for bringing the two parts together for marking.
 

Attachments

  • Moxon vice bench (3)-400.jpg
    Moxon vice bench (3)-400.jpg
    15.3 KB · Views: 667
Good examples, Custard.

With one hand, the marking out is the area of difficulty as it is balancing two parts together and keeping them steady while the work is done.

Here are a few suggestions:

1. I'd go tails first here. It will be far easier as marking the tails from the pins - that is too fiddly.

2. Sawing tails should be done without any marking out (other than the baseline - clamp board in vise to steady it). Just approximate the angles and saw. I would also forgo the saw guide - that is also fiddly to move into position and clamp.

3. Transferring the tails to the pins is best done with two aids. This first is David Barron's dovetail board. This will align the sides of the two boards. Clamp the boards down.

Dov%2B1.jpg


The second is to use blue tape. This allows for a single knife mark to be made, and with less pressure than directly into wood. It is the paper tape that is cut, and then peeled away. Plus this gives one a second chance - remove and reapply the tape if the marks move.

HalfBlindDovetailswithBlueTape_html_m4f882f92.jpg


Here are two links:

http://www.inthewoodshop.com/Furniture/ ... eTape.html

http://www.inthewoodshop.com/Furniture/ ... ails3.html

4. First undercut for a knife wall, and then use a fretsaw to remove most of the waste ...

ThroughDovetails3_html_m46d81eff.jpg


5. Waste is removed by paring thin shavings. It pays to remove as much as possible beforehand. The fretsaw (above) is essential here. Learning how to use it is important. Once this is done, use a very sharp bench chisel with a short, squat handle to push down. A traditional paring chisel is not indicated for one hand use. A standard bench chisel may not offer enough area to maximise down force. My thoughts run to something along the lines of my awl ...

5a_zps47a1806f.jpg


5_zps2708588b.jpg


This Narex butt chisel would be great (short is more controllable than long, and a wide handle that may be pushed with the palm) ...

8110x_m.jpg


Regards from Perth

Derek
 
Great effort Custard =D>

One thing that helps with alignment is you usually have a base in a draw, box, etc so cut the groove for this first and use a snug fitting offcut pushed into the groove to align the tails to the future pins. If you have a tail vice you can clamp the tails over the pin easily. Also for paring clamping a hard endgrain offcut up to the making knife line would aid the guidance of the chisel.
 
What a lovely thing to take the time to do!

Well done sir =D>
 
custard":1jtnps9c said:
Now it's time to transfer the markings from the tail board to the pin board.

This was difficult, I just couldn't find a way to do this with just one hand. Or rather I couldn't find a way of setting up the workpieces satisfactorily.

I'm not sure it's helpful one handed, but here's an idea - it's actually the way I do it, two handed.

dt_horiz.jpg


http://www.woodworkinfo.site88.net/tour ... il_marking

BugBear
 
Back
Top