Nesting cousins

UKworkshop.co.uk

Help Support UKworkshop.co.uk:

This site may earn a commission from merchant affiliate links, including eBay, Amazon, and others.

mailee

Established Member
Joined
26 Jun 2005
Messages
5,502
Reaction score
4
Location
grimsby Humberside
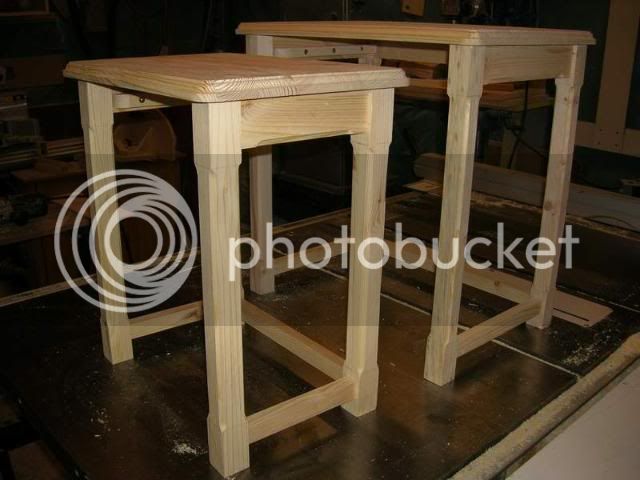
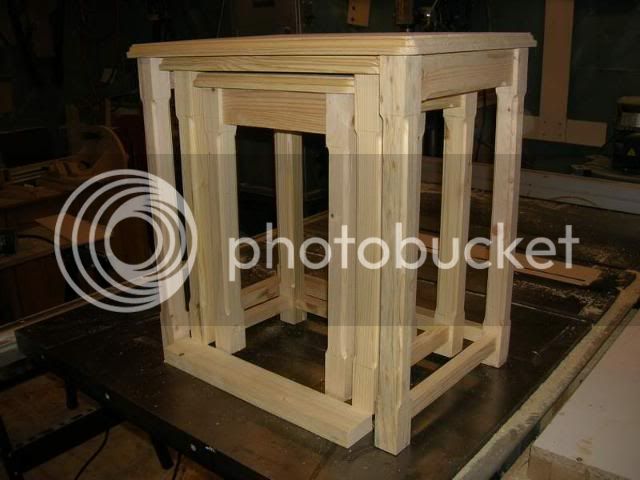
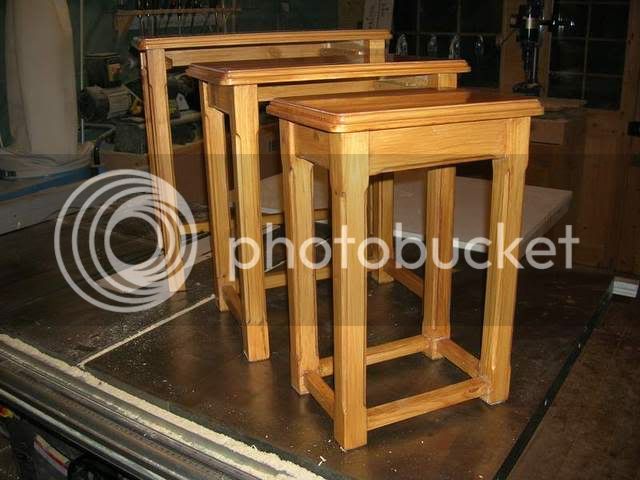
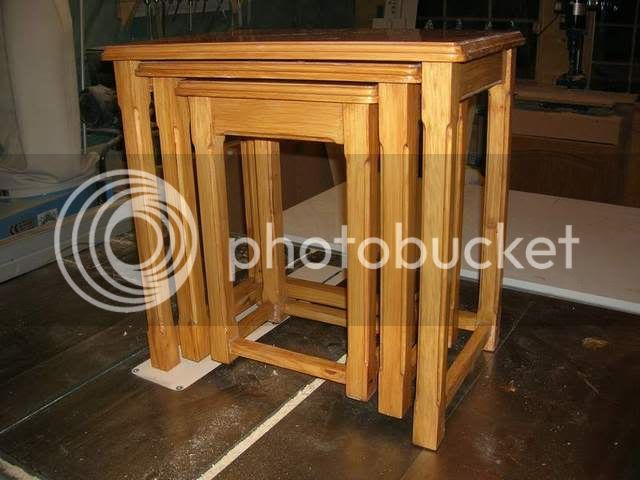
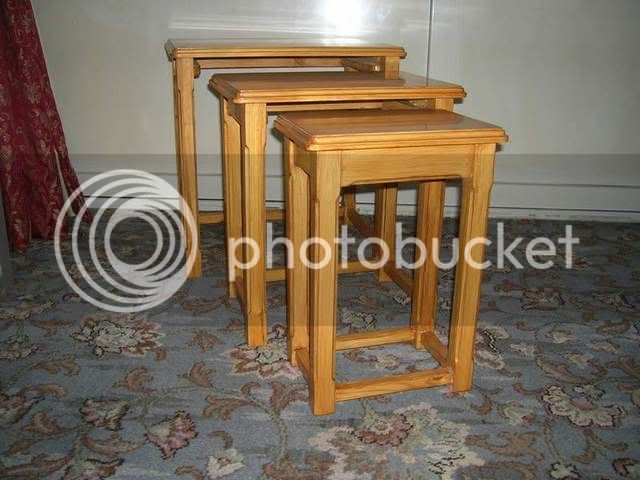
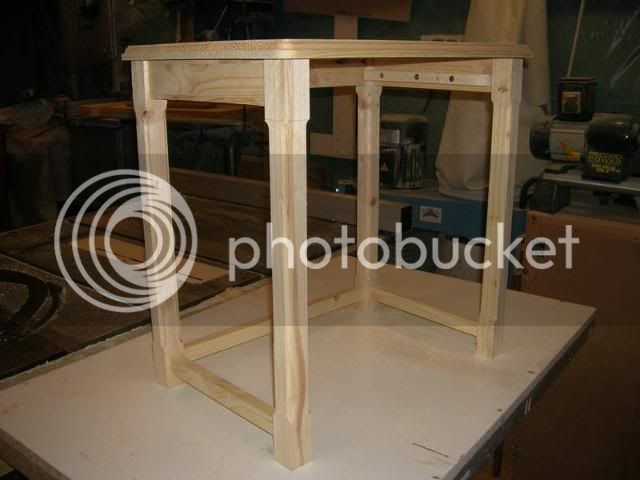
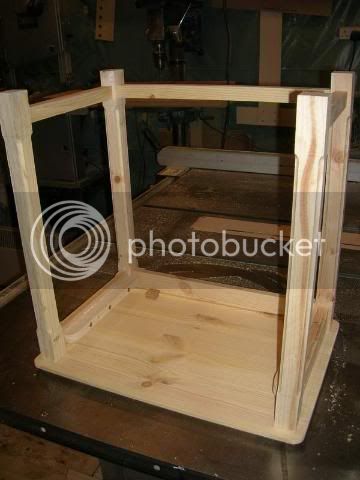
I made a start today on one of the three nest of tables which will match the Tv unit I have recently finished. I am afraid I have no WIP photos as yet but thought you might want to see the dry fit as far as I have got with it.
Dryfit1.jpg

Sidedetail.jpg

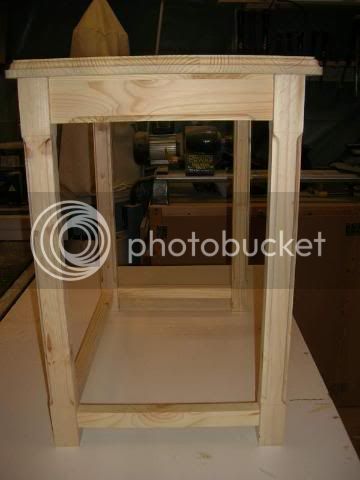
You will notice I have kept with the cove detail around the apron and legs although the legs look a little lighter than the TV unit. The top has the same detail around the edge.
tabletop.jpg

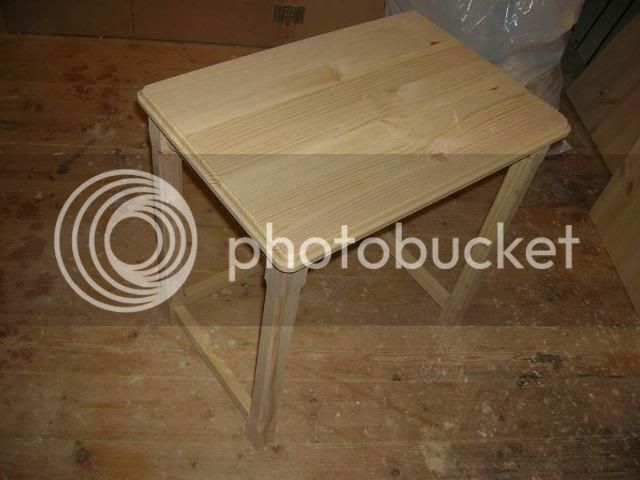
I decided to attach the top with buttons as you will see but on reflection think I may use pocket hole screws to give more depth underneath for the next table top.
Runners.jpg

Of course if anyone has any better suggestions it may help.
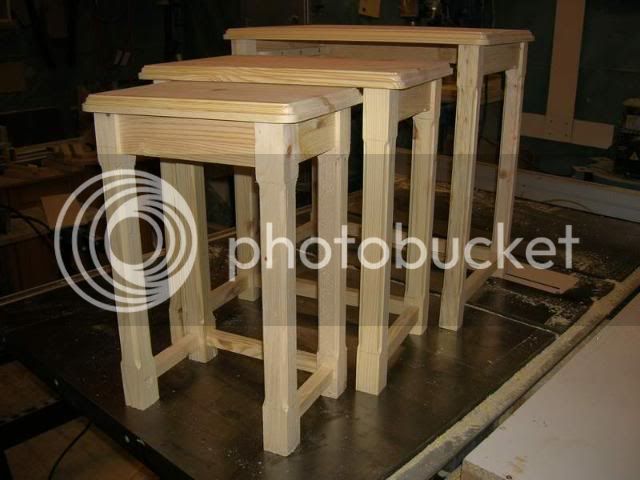
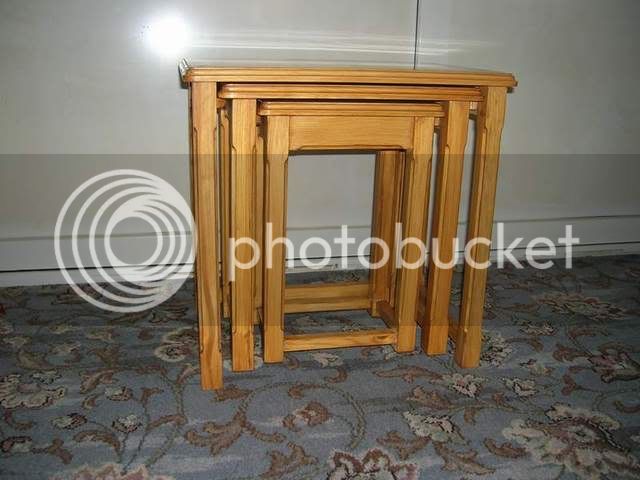
 
Waka":1dqdurrp said:
Mailee

That looks nice, good to see you're not working too fast :wink:

Blimey, you'd need a stopwatch to time mailee, myself, you would need a calendar. :lol:

Rich.
 
Looks good mailee. Your rate of productivity is putting the rest of us to shame!

Cheers, Ed
 
Well I got back in the worshop today and had a very productive day again. I started on the second table and got it finished:
twobuilt.jpg

So I thought I would carry on a little longer and got the third table almost completed.
Atrio.jpg

They nest together well too.
Nesting.jpg

Ignore the piece of timber under the feet as it was just there to hold them up for the photo. I decided to attach the top at the front edge with biscuits and use buttons for the rear and sides to allow for movement. Of course nothing is glued up yet so hence the timber under the feet. I still have the aprons on the small table to put the moulding on and a lower front rail for the small table which I forgot! Duh! Should get some more done tomorrow with any luck. :D
 
I have spent the last couple of days finishing the tables and finally have them done. I am now letting the glue set to hold the front part of the top on. then it is a quick clean up and on to the customer.
finished1.jpg


finished2.jpg


Now it is back on to the bedroom suite. :roll:
 
Impressive and speedy work. Spent an hour in my workshop yesterday and decided it was too cold :)

Not sure about the rails near ground level on these tables. Not something I've seen (or more likely not noticed) before.
 
I've seen the rails on these tables near ground level before, so I think that's fine.
The one critiscism I do have, and its only one of an opinion, is that the stopped mouldings in some places would maybe have looked better if carried on all the way.
Other than that, they look great and the customer should be happily pleased with them!
 
Thanks guys, as for the stopped mouldings Sim, they were to match the mouldings on the TV unit I built recently. I do see what you mean though. :wink:
 
Very nice Mailee , you should be well chuffed with them .
BTW , pine nests usually have a bottom rail when they are square legged , while repro mahogany ones etc dont due to the shape of the feet :wink:
 
looking good Mailee and once again very speedy can't seem to get going in my shop its just tooo cold.
How do you cut your M&T joints and did you joint up the tops or buy them in ? hope you don't mind me asking.

Jason.
 
Hi Jason and thanks. I did the M&T joints on this one with my bench morticer and a tennoning jig I made for the table saw. Longer lengths I use a router jig for the tennons. The top was jointed up using 3" planks I used the router table to joint the edges and then butt jointed them together with PVA glue. :wink: (I do have a planer jointer but couldn't be bothered to drag it out from the corner for these small boards) :roll:
 
Nice Mailee.

Another way to attach the tops without interfering with the staorage of the other tables is to screw through the rails from underneath. You do have to allow for movement, so one way is to cut a biscuit slot in the top edge of the rail (you may need to make two cuts to make it wide enough for the screw), then counterbore from the underside to within, say 6mm of the bottom of the biscuit slot. Then drill through with a clearance hole. The result is that the head of the screw stays put, but the body of the screw can waggle to and fro in the slot. It sounds far-fetched, but it works very well.

Cheers
Steve
 
Thanks Steve. I do know exactly what you mean about the screws through the side rails and a good idea it is too I didn't have any screws long enough for that at the time though. I ended up glueing biscuits into the front side rails and then used buttons for the rear rails to allow for movement, it seemed to work fine I am glad to say and the buttons were just small enough to allow the lower tables to slide all the way home. :D
 

Latest posts

Back
Top