Night Train":13fdngc4 said:
Work out the wheel size first. Most vehicle model makers who don't make their own scale wheels will get whatever wheels they can find that are suitable and then take the scale as a ratio of wheel diameter.
Anyway, That is how I do it with Lego Technic.
Sort out your steering mechanism to fit the scale of the wheels and have the axles organised for all the fixed and movable mounts. You may want to fit the axles onto a 'floor pan' so that it is all properly located with or without any suspension.
The 'floorpan' can be laminated into the body at the correct height.
You should be able to then laminate up in horizontal slices cut to be close to the inside and outside profiles.
Make up the bottom half first, with the 'floor pan' and shape the inside. Then make the top half and shape the inside then glue together before shaping the outside.
That will give you a solid structure with the steering and axle mounting all in the correct locations.
Also, for a two year old you should make the steering and axles fairly substantial to make it strong enough even if it is a long way out of scale.
That's very interesting, and not really what i was going to do:
in your approach, you go for horizontal lamination (if i read correctly), a bit like a stack of slices.
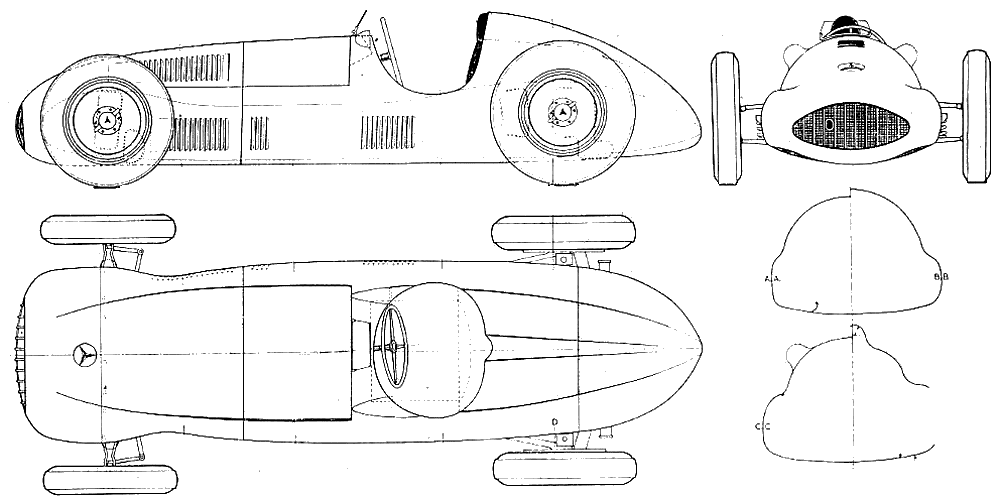
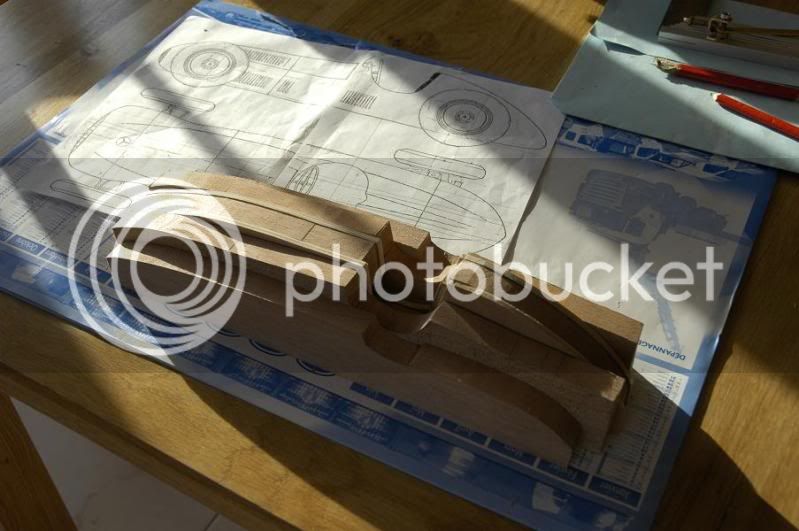
This is not suitable for me, as i plan to have light wood color for racing stripes, so i need vertical slices... something like this:
your approach is still interesting though. There are three ways to laminate the slices here. yours (bottom to top of the car), mine (left to right) and the classic boat hull one i used before (front to rear of the boat)
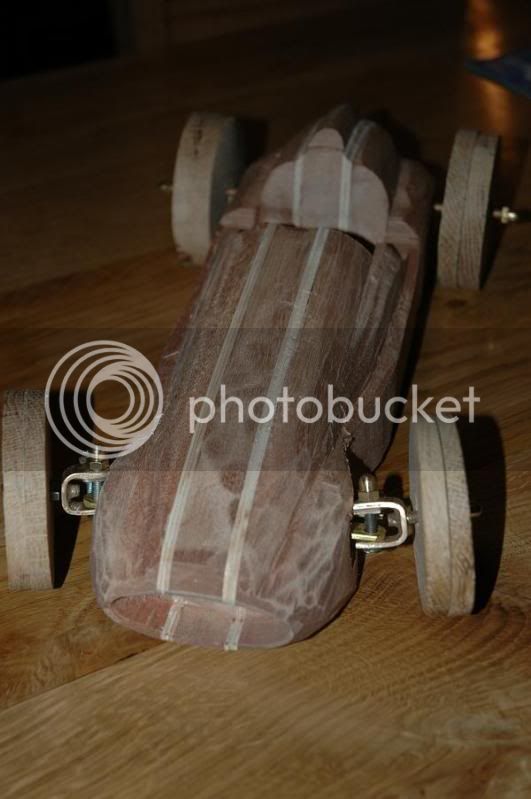
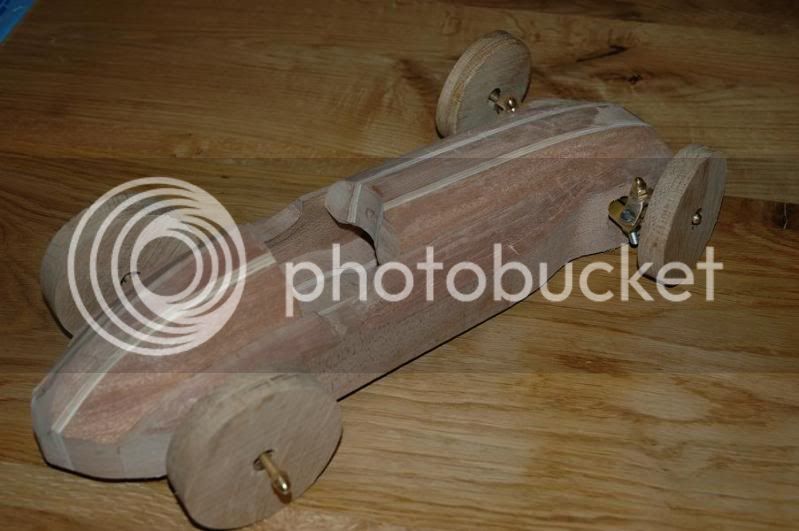
I guess following on early advice, i will go for home made wheels.. in oak. so size is not an issue.
so here is my plan as it stands today:
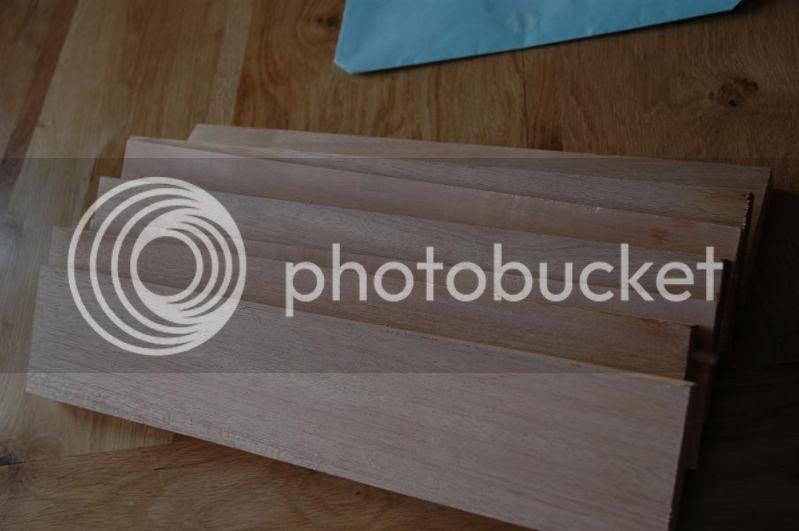
1- cut an odd number of slices to make the width of the car (say 7 slices, 15mm thick). 2 of those will be lighter tones, for the stripes.
2-mark the slices to identify in which order they will be laminated.
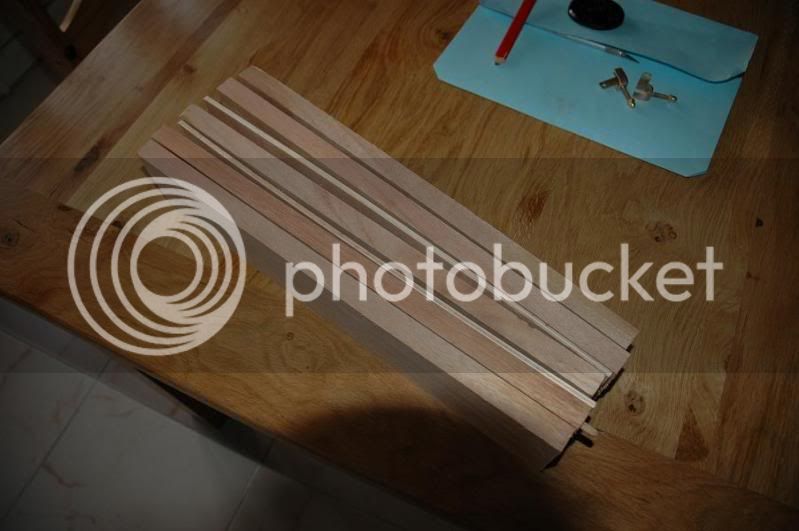
3-take each individual slice, and mark the outline of the car, as well as the outline of the cavities (cockpit, steering location, rear axle housing). . cutout the inner cavities. at this stage, each slice may be different. the inner slices will show the inside cutouts, whereas the outer slices will be solid. The inner 3 or 5 slices will show the inside floor pan , as well as the cavities through the floor, for accessing the stuff. on the two outer slices, mark out the position of the wheel axles.
on the inner slice, drill out the tunnel for the steering column
If possible, at this stage, also cut out the upper outline of paired slices..this way, you will end up with a lego type lamination, but at least, it will be symetrical. but only at the top of the car(slices). the lower edge of the slices will be used to make sure the lamination is in line. the front and rear edges should also be left untouched.
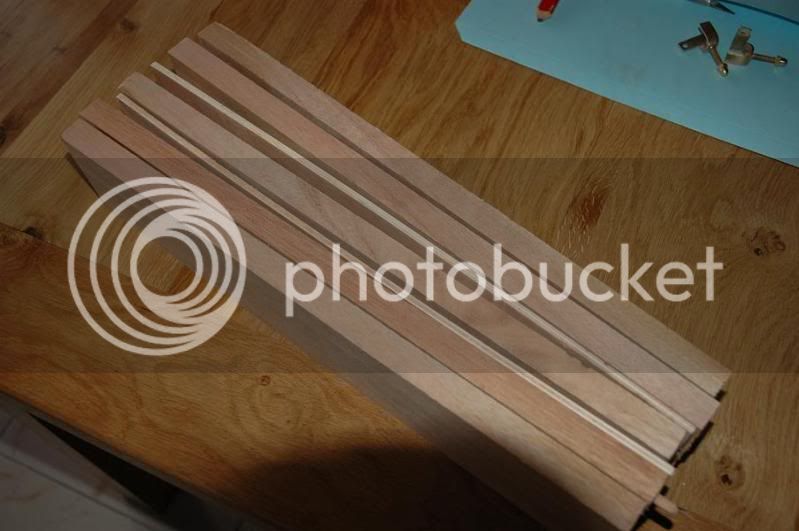
4- glue up the slices
5- since the front is still square, route the air intake at the front.
6-drill the wheel axles, making sure you are square. (drill in two halves)
7- shape the car. belt sander/rasps/files etc..and of course, using the profile gauge.
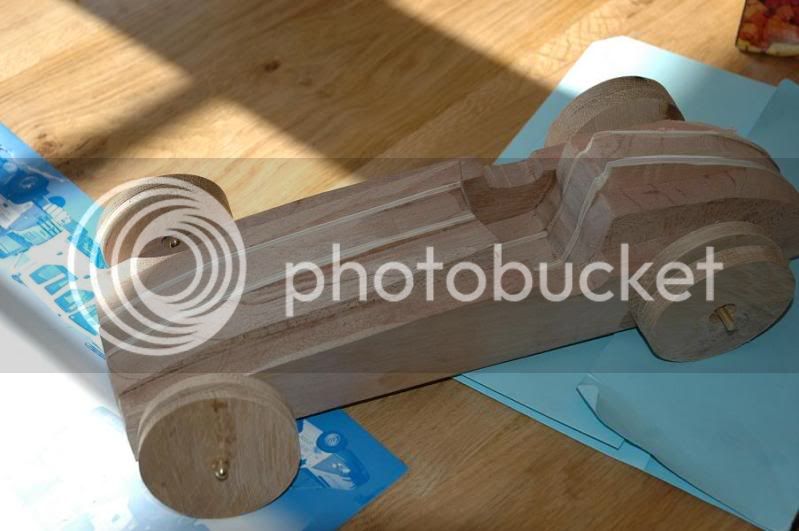
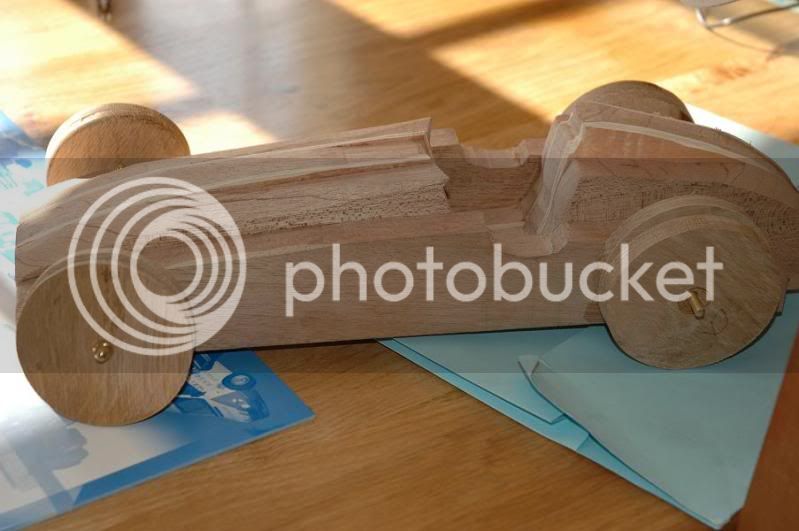
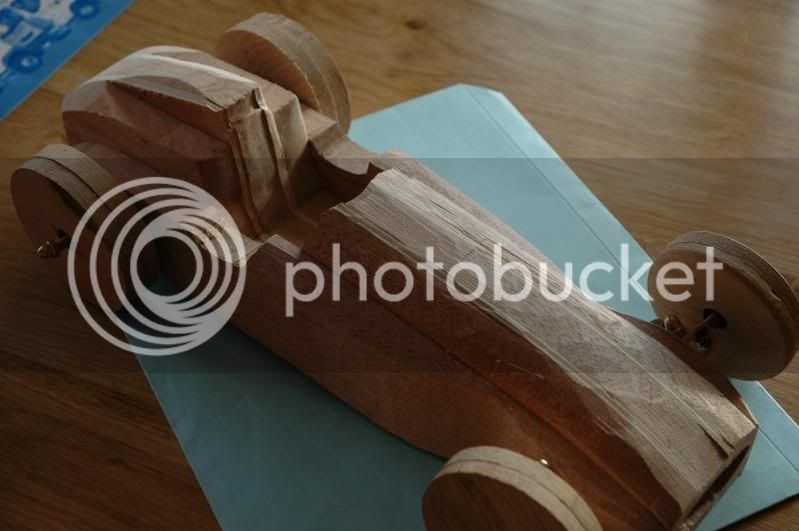
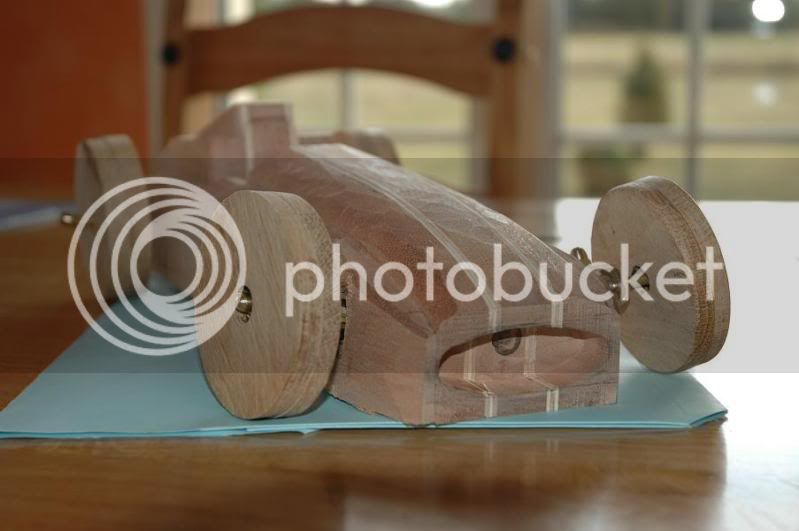
this is where i am now, as far as my plan goes.
at this point, i should have a w165 shaped hull, with inner cavities and tunnels for steering racks.
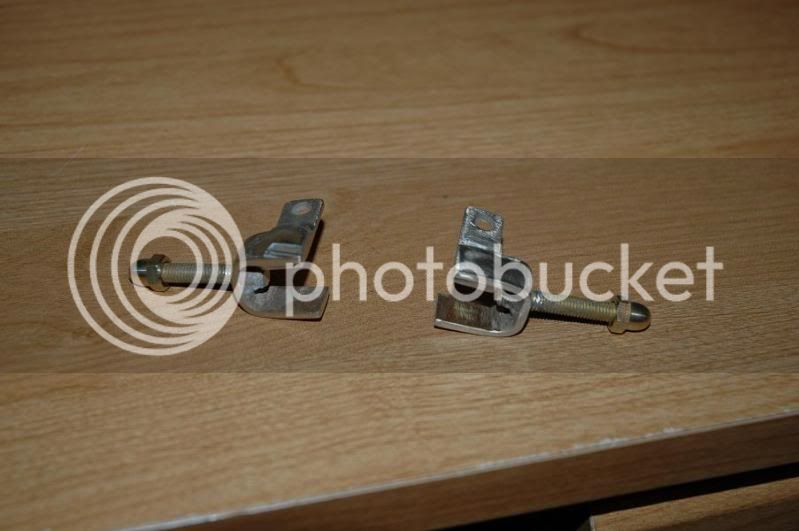
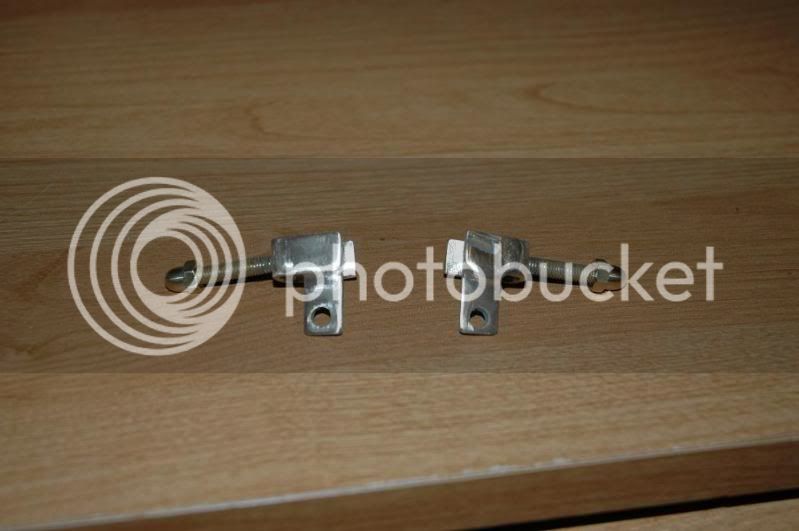
yesterday, i worked out the mecanics of the steering rack. i will need to braze a few bits of brass.
now i still need to think some more to work out if the steering rack can be fixed inside the hull, in the shape it's in.
i also need to work out the suspension, and the ball bearing wheels...how do i make sure the bb wont come out of the wheels ?


")