log advise please

UKworkshop.co.uk

Help Support UKworkshop.co.uk:

This site may earn a commission from merchant affiliate links, including eBay, Amazon, and others.

mrs. sliver

Established Member
Joined
2 Mar 2007
Messages
477
Reaction score
0
Location
west yorkshire
I have been given a good piece of sycamore log. SO before I destroy it this afternoon can anyone tell me how to go about sorting it out?
 
Hi Mrs S.

Would make a great hollow vessel, turned thin. Or a big vase if you can get down deep enough inside. Turned very thin, with a short stem and a thin base it might just get through drying without splitting. Hope you made those hollowing tools that was talked about 8) .

Or, split it down the middle and you should get a bowl from each side, but they will have to be turned thin, and they will move when drying. If you left a small spigot on the bottom you could remount when dry and finish the base off.

Good luck!
 
it would be nice try a big vessel but our lathe is no where near big enough I don't think ( plus I don't think I would feel comfortable yet doing it)
splitting down the middle sounds good to me. may try that. thanks.

As to the tools I haven't had full access to the workshop since it was mentioned. I managed to squeeze in near the lathe and turn a goblet but it is housing two big mobility scooters and a components for a scooter shed that Sliver is making while the scooter owners are on holiday..... that's my excuse anyway. 8-[
 
Mrs.S.
Depending what you want to do with it.
As Tam says split it to make bowls.This will also relieve some of the tension in it.
Cut to the round and then part turn it.But failing all this seal the ends with paint or whatever,and keep in a cool dark place till your ready.
Paul.J.
 
Mrs.S, if you want to keep it pale then rough turn asap and finish drying.
Sycamore has a habit of darkening if not dried quickly.
If you are lucky it takes on tan and fawn hues, at worst it can go dirty grey.

Have a read of this link for details the whys and wherefors, over the top for your project but you will be one up on the next person who asks you 'why you did that' :lol:
 
maybe I should have asked about HOW you suggested I split the log :oops: I think I have made a boo boo! With the tools we have I couldn't see how to do it, so asked sliver to split it for me which he did but warned me it would be rough .. which it is ... and could be a bit of hassle to sort out now :roll:
SO I took a log we were given last year and has been in the back of the workshop and managed to cut it part way through with the chop saw and the rest with a hand saw .. yes I know .. bow saw WAS easier than the one in the photo but Siliver was at work and it was tial and error!
[img=http://m1.freeshare.us/150fs431795_th.jpg]
 
I cut it into three big 'blanks' and waxed them with old candle ends
[img=http://m1.freeshare.us/150fs43207_th.jpg]

[img=http://m1.freeshare.us/150fs432117_th.jpg]

I plan on turning them later this week to rough shape, sides quite thin, bottom thinner, wrap 'em and leave them at room temp for couple of months is this right?

Having said this, I have finally coughed up for Michael O' Donnell's 'Turning green Wood' book and am more than pleased with the information in there!! maybe this will finally get the understanding of green wood into my little brain!

WE spent this afternoon attacking the remanents of my parents neibour's tree ... chopped off the bits that may be usefullgot them home and waxed the ends


I soon have 2 weeks off .... so maybe one piece may survive the shredder!
 
mrs. sliver":5ytfz4rw said:
could be a bit of hassle to sort out now :roll:

No problems with those halves:

1. Mark the biggest circle you can in the flattest area of the split face.
2. Cut off surplus wood to as near circle as you can get.
(face down on bandsaw with circle template tacked to top curved side is safest)
3. Mount flattest side to faceplate with decent screws, avoiding edges, (may need a bit of thin wood packing to stop rocking)
4. Mount on lathe and cut spigot to suit your chuck jaws in curved face and shape outside of bowl as far as possible.
5. Remove from faceplate and re-mount on chuck to hollow centre and finish outside.

PS: Flat split face can be cleaned up a bit with cheap 650 watt tailed Plane.
or sneak it across the jointer a few times when you know who is not looking.
 
okay, I will follow that advise, though will have to change it a little as we have not got a bandsaw that will take that depth or a jointer but you know what they say about necessity! :D
 
Mrs S,

I tend to attack the face of a split log with an electric planer just to flatten it a bit, it's a bit brutal but it seems to work OK.

Cheers,

Dod
 
right, so I haven't killed it yet? it will be Tuesday before I should have time to go back in there, will it be okay till then? or should i do something with it?
 
mrs. sliver":2ocdkyfk said:
will it be okay till then? or should i do something with it?

As long as the ends are sealed, should be OK.
If in doubt wrap it in a Tesco bag to keep moist atmosphere around it, although if it looks a better class piece maybe a Sainsburys or even a Waitrose bag might be in order. :lol:

I have wrapped smaller pieces cut neater on the bandsaw in cling film for a while until I could get them on the lathe, sometimes if I have a dozen or so prepared I put them all in a dustbin sized plastic bag for a few days whilst rough turning, the bag is usually soaking wet inside due to moisture loss after a few hours. In hotter climes it is not unknown for people to put them in the water butt until ready to rough turn, sometimes for months.
 
Mrs.S.
You need to measure the dia of the log and add a few inches on when you cut the logs to length for doing bowls.
Say it's a 10" dia log cut the length 12".
Then split it,then mark and cut it round.
If you haven't got a bandsaw or chainsaw this is a lot of hard work for logs that might still split on you.
Best of luck.
Paul.J.
 
mrs. sliver":1fqtqnt2 said:
I cut it into three big 'blanks' and waxed them with old candle ends

Mrs.S I noted you cut this log into 'fat' slices, this means you will be turning endgrain wood when it comes to hollowing, you may find it a little more difficult dependant on the wood type. End grain is usually more difficult to hollow out.
 
As Chas said, the end grain can be a bit of a pig depending on the wood. I often end up having to tarn it this way as I work mainly with offcuts. The plus is that you can get some really nice effects. I did a bowl in cedar and all the growth rings ran around the bowl from the centre outward. Serendipity I am afraid, not design :eek:

Pete
 
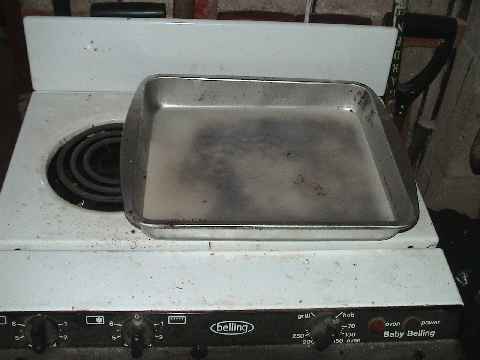
Mrs. S, I also noted that you were using a Saucepan to apply the wax.

You may find it easier to use an old meat dish, or a cheapy from the £ shop.
DSC02189.JPG


It has the advantage that when you dip the wet wood it steams off some of the surface moisture (you can see bubbles like frying) and results in a better wax bond and thinner coating.
Watch out for wax drips when lifting clear, a few seconds pause usually sees the surplus stop dripping.

Posher households have been known to use an electric Frying pan which gives better temperature control.
 
sorry, I hadn't seen the last few posts until today :oops:
Thanks, all good advice! And I STILL haven't got round to doing it!! :roll:

I got 2 weeks off work but was asked for some fruit bowls and finial pots so I have got them out of the way I WILL try the green turney thing tomorrow!!

This was my weeks work from last Wednesday

 
Well done Mrs.S. :D
Some nice looking pieces there.
Glad you've had a productive time.
As that big bowl got some inlaid work in it :?:
Paul.J.
 

Latest posts

Back
Top