Laminating with a form

UKworkshop.co.uk

Help Support UKworkshop.co.uk:

This site may earn a commission from merchant affiliate links, including eBay, Amazon, and others.

mseries

Established Member
Joined
7 Oct 2012
Messages
1,100
Reaction score
1
Location
West Yorkshire
I am going to be embarking on my first attempt at a curved piece soon. I have cut the wood, 1.2mm thick pine, 18mm wide, approx 400mm long, 20 pieces. I'll need 10 for the thickness I need, to be bent round 100mm inside radius curves. I *think* they'll cold bend if I am careful so I'll make a matching male and female former and press the laminations together with glue in between. Now some questions. Do I need to use any special adhesive, I normally use PVA ? What precautions do i need to take to stop the ooze out from sticking the workpiece to the former ? cling film ? candle wax ? melamine base ? Is the formed piece likely to spring back ? - will my choice of adhesive minimise this ?
 
I have just completed some more lamination work and I did a few curved legs last year.
For adhesive I was advised to use cascamite, also known as polymite, extramite, resinite. It's a urea-formaldehyde glue.
It has very little or no "creep" when set, making it ideal for bent laminations.
PVA suffers with "creep" as it doesn't set glass hard.
It's really quite easy to use, follow the instructions, and it mixes up with water.
My formers have been painted first, it makes clean up very easy and then I covered them with parcel tape to make sure nothing sticks. Some people seem to use wax but I've found the tape idea works well enough.

Richard Jones (Sgian Dubh) on here did a beautiful table recently made with laminations. He used an epoxy resin adhesive IIRC, he said it gave him a big open time as his lamination work was quite involved. He has done a great write up of the process and is really worth a read.

I found having everything, and I really mean everything (materials, glue, clamps, cleanup rags, former prepped, everything) ready a big boost to getting it right. Being a beginner at it I made sure it was the only thing that day I had to do so there were no time constraints.
Good luck.


Edit to add,
Here's the legs from last year. Not as tight a radius as you want to do, from following the advice from the guys here they came out great.
http://s389.photobucket.com/user/nolegs ... 9.jpg.html
 
Peter Sefton":lp6hwu7n said:
You could polish the jig with some old varnish or similar, for speed I would cover it with parcel tape.

You could use a good quality D3 PVA but a UF (Cascamite) would be better or and epoxy resin like the West System.

It may well spring back is more likely with the PVA.

Cheers Peter

There's a weird thing happens with bent laminations, at smaller radii (and 100mm is pretty small) instead of springing back they can actually get tighter when removed from the former, in fact when they wrap around a former it's sometimes difficult to prize them off.

I'd be very nervous about PVA with a 10 leaf lamination, you just won't get the open time you need. Cascamite would be a far better option because it's widely available in small quantities, can be cleaned up with water (and you'll have more squeeze out than you can possibly imagine!), it sets glass hard with no creep, and it's not too expensive.

Let us know how you get on. Good luck!
 
One other thing, you know that you have make the male and female formers with a fairly accurate gap representing the workpiece between them? In other words the two parts of the former shouldn't precisely nest one into the other. So for example the male former may have a 100mm radius, add in 10 x 1.2mm lamina and a bit of glue and the female former may then have a 113mm radius.

If you're familiar with all this then I'll shut up, but if not it's something you need to be aware off. In fact making the formers can be the trickiest part of lamination work.
 
Thanks all. We used to use Cascamite for model boat building so I have loads of experience with it. We tended to use 1/32" ply for laminating back then, always used Cascamite for it's waterproofness. I don't think we did much as thick or as tight as I am doing now and I don't remember the outside former, just clamps and blocks and straps
 
Finally I managed to get some time to start this at the weekend.

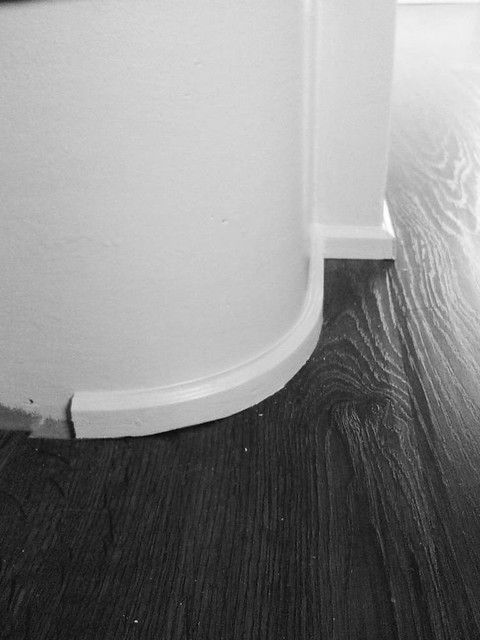
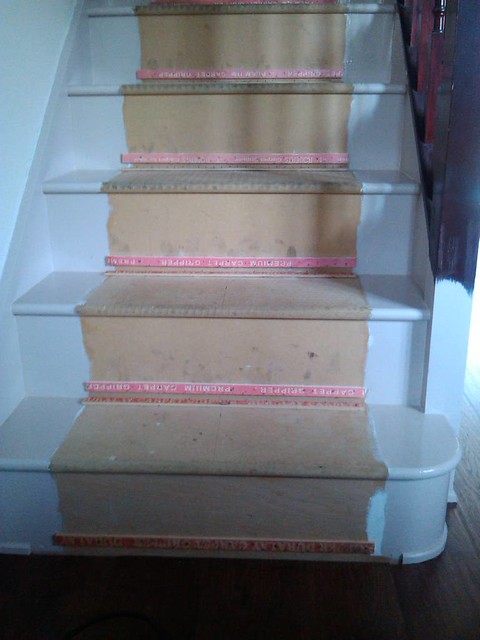
I need to make a strip of curved beading to go around the bottom stair to cover the gap at the edge of the lamianted flooring. The strip is 1/4" thick and 3/4" high. I'll route a profile on it. [The flooring has been down for two years, is settled and < 1/4" is fine. The stair will be fitted with a runner so I only need the beading for the sides not covered by the carpet]

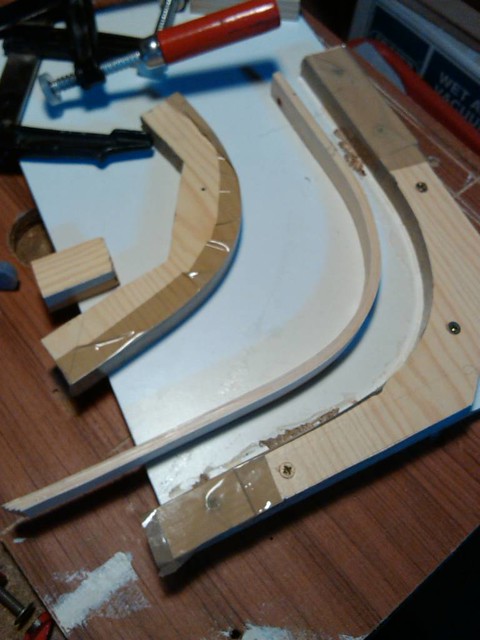
I used a flexi curve around the stair to get the shape, I transfered this to 6mm MDF and cut the inside template using a jig saw and hand tools. This will be used with a profile trimmer to create the inside part of the form. The same template was used to create the matching outside template. Using a 3/8" cutter and 5/8" guide bush I routed the template which at this point is 1/2" larger than the inside one and 1/4" larger than the desired form. Thus with a 1/2" cutter and 1" bush routing around this second template gives my second form part the desired 1/4" larger than the inside/first piece.


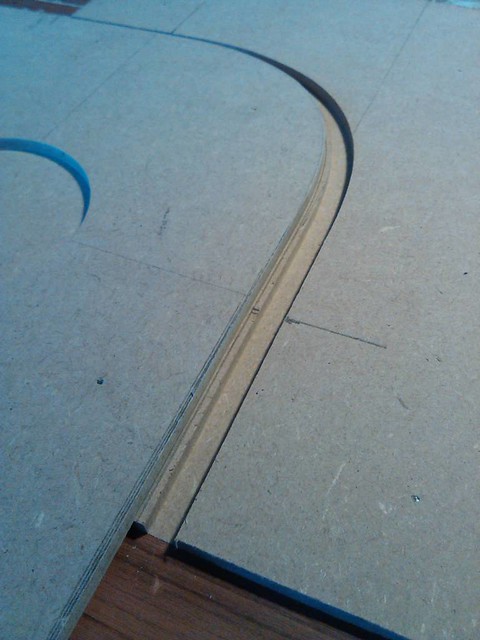
here are the finished templates [the hole was actually a template used to route the grommet holes in my wife's new desk and serves no purpose now]


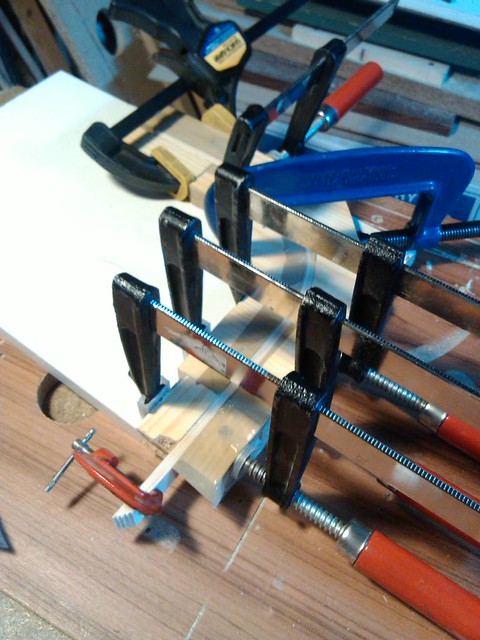
I made the form pieces from some very old conti type stuff that itself has had two lives. [My brother gave me some shelving about 20 years ago, then maybe 15 years ago I used it as the bottom of a sliding keyboard shelf on a work table for my wife. Recently that table was scrapped as I refurbed her office]

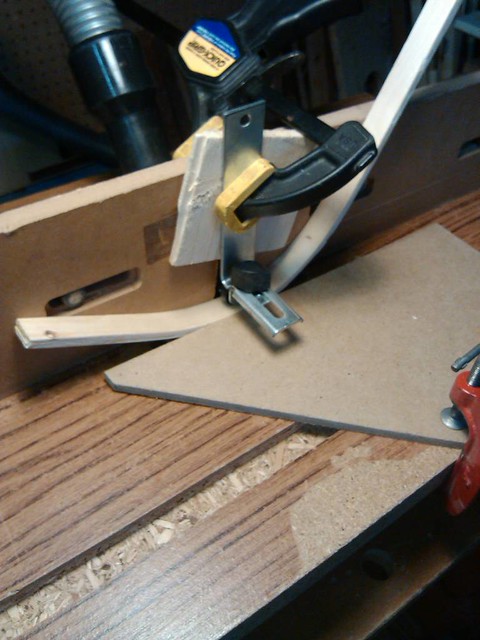
I didn't take any pictures of the form once assembled before I used it I was getting too excited to see if it would all work as I have never done this before. I screwed the outside, fixed, form pieces to a conti board base, covered the bare wood with parcel tape in an attempt to prevent the glue sticking.

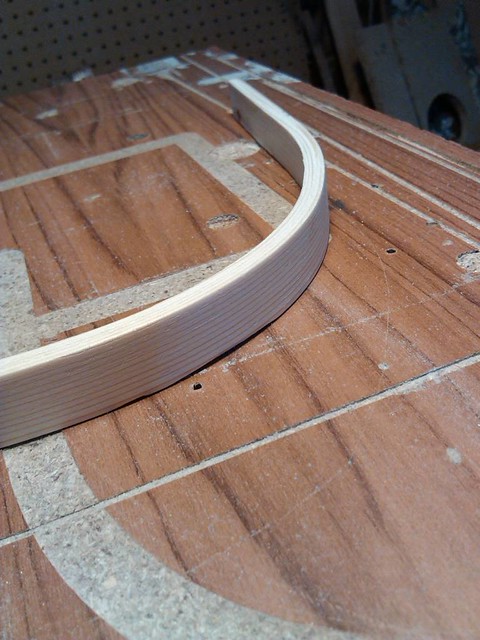
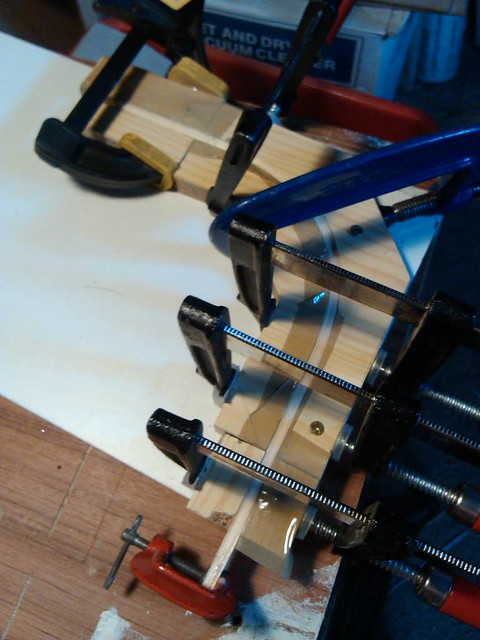
Weeks ago I cut some strips, 1.2mm thick, 3/4" wide (forgive the mixed units), five of these would give me the correct thickness, not ten like I said in my original post, I have decided 1/4" is thick enough. I have at least 10 spares anyway so I can make another if I need to.

then glued, using Cascamite as recommended [mixing it and the smell invoked some happy memories of model boat building with my Dad about 35-40 years ago], and clamped up


same thing


and left it overnight.

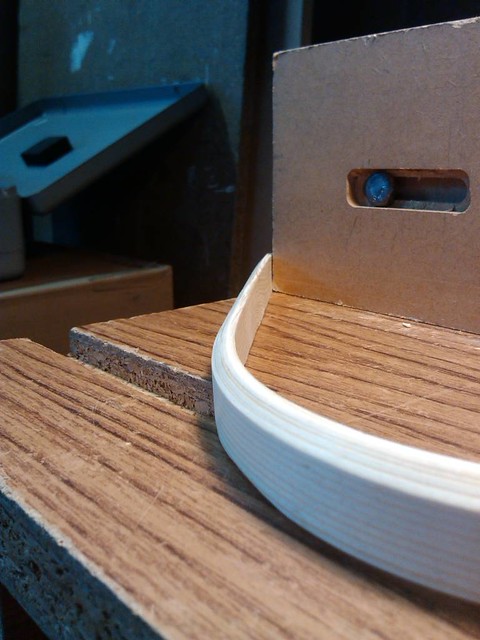
This morning as I was scooping the cat litter I undid the clamps, pulled off the moveable parts of the form and the workpiece didn't spring off. It was glued to the form but some careful prising with a thin knife eased it away with no damage. Some of the conti facing was stuck to the bottom but it will clean up properly - should have taped it too.

I am pleased with this, my first attempt at curved laminating without a permanent former. No spring back. I'll attempt some more pictures in due course.
 
Well done, it looks superb!

If you can leave it in the former for longer then do, spring back can happen slowly over a few days due to the moisture that was added during the lamination slowly evaporating away. If that can happen while the workpiece is held captive in the former then that's to the good.

Hope you'll press on and try more laminations, it's a technique that opens an awful lot of doors!
 
custard":e4tt6ngx said:
Hope you'll press on and try more laminations, it's a technique that opens an awful lot of doors!


That made me laugh, I'm about to do some laminating so I can achieve the exact opposite, so I & guests can sit down in my 38" by 40" loo. Need a bowed door to accommadate anyone with size 7 or bigger feet. :oops:
 
custard":1ba1q3jp said:
If you can leave it in the former for longer then do, spring back can happen slowly over a few days due to the moisture that was added during the lamination slowly evaporating away. If that can happen while the workpiece is held captive in the former then that's to the good.

Hope you'll press on and try more laminations, it's a technique that opens an awful lot of doors!
That;s a fair point, I left it unclamped this morning, if it's OK when i get home, I'll clamp it back into the form and take it indoors for a few days so it can aclimatise to the environment in which it will be fitted.

I intend to have a play with laminating some more, it does appeal to me and I like making the jigs and templates.

A couple of years ago I would have considered something like this beyond me. I didn't have the experience, confidence or tools to do this. This forum has helped a lot, not just asking direct questions about this but reading other people threads about their projects and the answers they receive from the 'old masters' when asking for advice.
 
So i clamped my workpiece back into the form and left it indoors for a few days. Today I unclamped it again


Looks OK doesn't it ? So I set about sanding it

ready to and apply the desired profile a simple chamfer,


The metal gadget thing is the edge guide from my B&D router, just a plastic bearing on the end of the strip of metal, works well to hold the workpiece down on the table

Here it is
 
Well done that man. Methodical, careful, patient, persistent...you've got what it takes to be a seriously good woodworker. I hope you'll incorporate laminating into some furniture projects, keep us posted!

=D>
 
Thats turned out very nicely indeed mseries. i think you must be well chuffed
 

Latest posts

Back
Top