You are using an out of date browser. It may not display this or other websites correctly.
You should upgrade or use an alternative browser.
You should upgrade or use an alternative browser.
Knuckle joint
- Thread starter Digit
- Start date


Help Support UKworkshop.co.uk:
This site may earn a commission from merchant affiliate
links, including eBay, Amazon, and others.
motownmartin
Established Member
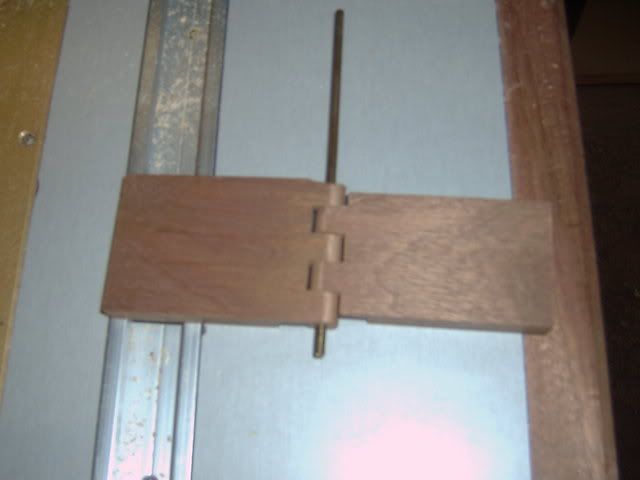
Roy, I made some hinges which were how you describe Knuckle joints (I hope) I used A router cutter on the router table, it was a half round or semi circle shape, I suppose it would depend on how big you want to do it another cutter you could use is a Torus Bead cutter, here is a pic of the hinge, albeit a little blurred.
frugal
Established Member
motownmartin":21sqgnfy said:Roy, I made some hinges which were how you describe Knuckle joints (I hope) I used A router cutter on the router table, it was a half round or semi circle shape, I suppose it would depend on how big you want to do it another cutter you could use is a Torus Bead cutter, here is a pic of the hinge, albeit a little blurred.
I like the David Llyod way of making these. He has a jig that clamps to the table of his disc sander. The jig consists of a piece of rod the diameter of the hinge pin supported the correct distance away from the sander. To operate, just rotate the hing up and down in the jog and it rounds off the corners. You can even stop at a certain point in the arc to leave a ridge so that the lid will open only to this stop.
Thanks fellas, but the classical type that I had in mind requires that the female parts have a concavity in them so that you don't actually see the radiused ends of the male parts, and the only way I can see to do that, I'm awkward, is to chisel the rads.
Roy.
Roy.
I can't claim to have made any, but David Charlesworth has eight detailed pages on these in his Furniture Making Techniques vol 2. You can get it for under a tenner, delivered.
His description looks like a thought-through approach, not skipping over the difficult bits. You need a shoulder plane, some sharp chisels and a gouge.
Andy
His description looks like a thought-through approach, not skipping over the difficult bits. You need a shoulder plane, some sharp chisels and a gouge.
Andy
OPJ
Established Member
Hello Roy. While I'm reluctant to reveal too much at this time (this is destined to appear as part of a larger article in a certain magazine... :wink") , hopefully these photo's will be of help.
, hopefully these photo's will be of help.
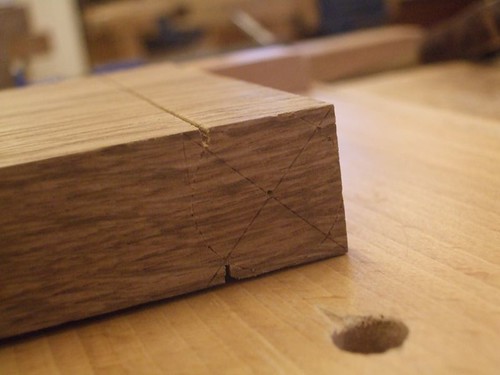
Once you've got your basic marking out done (it must be accurate!), saw down the centre of V-grooves with a tenon saw. Then, you should be able to fit a shoulder plane in there are work carefully from each side. The outer radius can, of course, be done with a smoothing or block plane.
Actually, you can't buy router cutters that will do all this in one hit!! :shock: 26mm is a good thickness for this sort of joint.
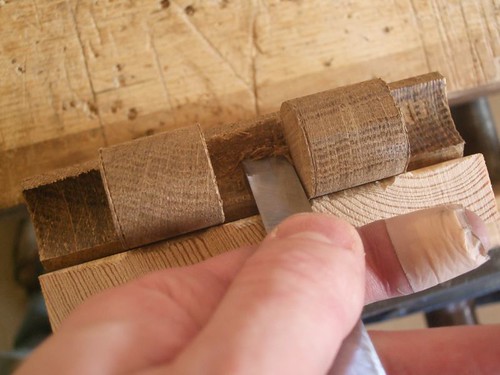
You can scoop out the waste between the 'pins' as shown here; all I'm doing is resting a chisel (bevel down) on the edge of a scrap of wood raised slightly higher than the shoulder line of the joint... Hope that makes sense. Don't damage the edges!
If you've got a big old mortiser with plenty of capacity though, you can cheat here and chop these out square, as they won't be seen! :shock: :wink: Just make sure you don't damage the edges! Of course, you'll still have to used a gouge or similar on the ends... Unless you can find a forstner bit to suit!
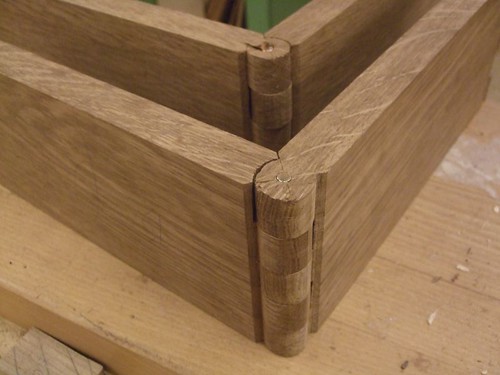
Eventually, you should end up with something like this. The pin is a length of ¼" brass rod. Remember: you only really need the joint to open and close properly one way. Hope this helps.
, hopefully these photo's will be of help.Once you've got your basic marking out done (it must be accurate!), saw down the centre of V-grooves with a tenon saw. Then, you should be able to fit a shoulder plane in there are work carefully from each side. The outer radius can, of course, be done with a smoothing or block plane.
Actually, you can't buy router cutters that will do all this in one hit!! :shock: 26mm is a good thickness for this sort of joint.
You can scoop out the waste between the 'pins' as shown here; all I'm doing is resting a chisel (bevel down) on the edge of a scrap of wood raised slightly higher than the shoulder line of the joint... Hope that makes sense. Don't damage the edges!
If you've got a big old mortiser with plenty of capacity though, you can cheat here and chop these out square, as they won't be seen! :shock: :wink: Just make sure you don't damage the edges! Of course, you'll still have to used a gouge or similar on the ends... Unless you can find a forstner bit to suit!
Eventually, you should end up with something like this. The pin is a length of ¼" brass rod. Remember: you only really need the joint to open and close properly one way. Hope this helps.
Night Train
Established Member
If it is a simple piece and not easily seen then you could make the hinge in bits. The rounded end is easy to cut as shown in the excellent images above. The concave bit could be drilled with a forstner bit.
The trick is to select the timber you want to use and then rip the timber into sticks each finished at the width of each knuckle.
Then, keeping the pices in the correct order, you can mark out the parts of the knuckle.
Rearrange the parts so that you can make up a jig to cut all the knuckles together and drill out the hollows together easily.
Gluing the bits back together in the correct order and this will give you a complete knuckle joint that fits perfectly.
Thanks for all the help fellas but I'm gonna have a crack at doing it Olly's way. Granted nobody it will see it, (which could be an advantage! :lol: ) but it gives me the chance to improve my skills.
Roy.
Roy.
OPJ
Established Member
One more thing to add, Roy... If you're getting a dull 'thud' and the pin isn't moving as you try to hammer it in, don't keep hitting it or you'll probably blow the joint apart! :shock: Thankfully, I haven't yet done this!
One of mine was perfect, no trouble at all. With the other, the pin got stuck about halfway through; that's the problem with having to drill from both sides and why your marking out must be so accurate. If you sight through the hole, you should be able to see any 'high points', which can be reamed out (carefully!) with a long drill bit.
Cramp your joint up properly before you drill it as well. One (or two?) long sash cramp to pull it together, with a couple of G-cramps and some lengths of scrap on either side to keep it straight.
motownmartin
Established Member
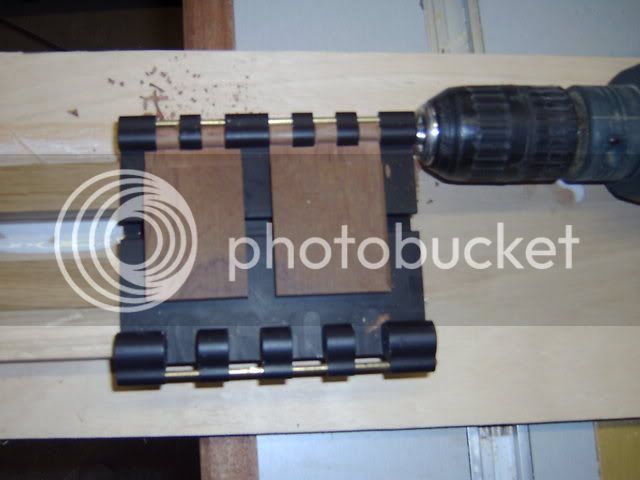
I had the same problem Roy so I made a jig that slides onto the drill like soDigit":2zm79qod said:Drilling is the bit that worries me Olly, I've got drills that will pass through from one side, but then keeping it on line could be fun. I'm thinking of some practise runs first.
Roy.

The sliding bit is a bought item from the States but I can't remember who makes it, I think they are canadian, anyway a man of your caliber and engineering expertise should be able to knock something up to do the job, here is a closer view of the jig
Our friends across the pond always seem to have access to things we can't get our hands on don't they?
I've got a jig for other jobs that I think will handle it OK, next step is to check my pillar drill for square.
Roy.
I've got a jig for other jobs that I think will handle it OK, next step is to check my pillar drill for square.
Roy.
MikeG.
Established Member
Whenever I make wooden hinges (cue gratuitous posting of old photo!)...

.........it is always the hole drilling that is the main problem. In my view, it is critical to drill the two halves together at the same time, and to advance the drill only millimetres at a time before withdrawing it.
I am not sure about your project, Roy, but if this joint is for the flap on the table top, I am not sure at all how you will manage it. It is obviously impossible to drill a hole 2 or 3 feet long! You could take a risk and only have a pin going through the outermost 3 or 4 knuckles........or a bigger risk of making up the hinge in sections before you glue the table-top boards together........but either way is fraught with problems.
Mike
I'll see if I can find that Rich. No Mike, it's for the gate leg. OK I could probably get away with a decent hinge, but like I said earlier, I'm awkward. I wan't to have a shot at it, if I cock it up I'll fall back on a hinge, or try again.
Roy.
Roy.
Similar threads
- Replies
- 5
- Views
- 789